Are you looking to add a stylish and functional piece to your home? Making a console table with a mirror is a perfect way to do that.
Imagine having a beautiful table that not only holds your essentials but also brightens up your space with a reflective touch. You don’t need to be a woodworking expert or spend a fortune to create this. In this guide, you’ll discover simple steps and tips to build your own console table with a mirror.
By the end, you’ll have a unique piece that matches your style and makes your room feel more inviting. Ready to get started? Let’s dive in!
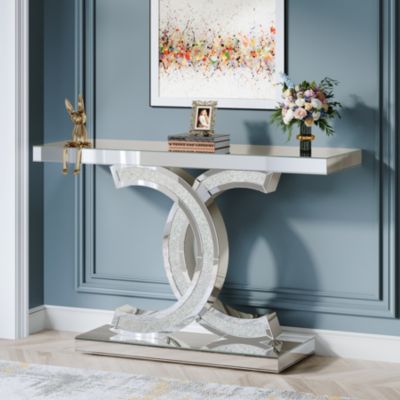
Credit: www.macys.com
Choosing Materials
Choosing the right materials is the first step to making a beautiful console table with a mirror. The materials affect the table’s strength, style, and durability. Picking quality supplies makes your project easier and the final piece more attractive. Focus on wood type, mirror style, and essential tools.
Selecting Wood Types
Wood is the main material for your console table. Choose wood that matches your room’s look and your skill level. Pine is soft and easy to work with. Oak is strong and has a classic look. Walnut offers a rich color and smooth finish. Consider how the wood will hold paint or stain. Always pick dry wood to avoid warping later.
Picking The Right Mirror
The mirror adds style and function. Choose a mirror size that fits the table’s width. Frameless mirrors give a modern feel. Framed mirrors add character and can match the wood. Use safety glass or acrylic mirrors to prevent accidents. Check the mirror’s thickness for durability.
Essential Tools And Supplies
Gathering the right tools makes the build smooth and safe. Basic tools include a saw, drill, screwdriver, and measuring tape. Sandpaper or a sander helps smooth rough edges. Use wood glue and screws for strong joints. Have clamps ready to hold pieces while drying. Safety gear like goggles and gloves protects you during work.

Credit: www.amazon.com
Design Planning
Design planning is the first step to create a beautiful console table with a mirror. It helps organize your ideas and ensures the final product fits your space perfectly. Careful planning saves time and materials.
Consider the room where you will place the table. Think about how the table and mirror will match your decor. This planning stage sets a clear path for your project.
Measuring And Sketching
Start by measuring the wall space where the table will stand. Note the width, height, and depth allowed. Use a tape measure for accuracy.
Sketch the table and mirror on paper. Draw basic shapes to represent each part. This visual guide helps avoid mistakes later.
Deciding On Dimensions
Choose dimensions that suit your space and needs. A narrow table works well in tight areas. A wider table offers more surface for decoration.
Keep the mirror size proportional to the table. A large mirror can make the room look bigger. A small mirror adds a subtle touch.
Incorporating Style Elements
Pick style features that match your home’s theme. Rustic wood adds warmth. Modern metal gives a sleek look.
Think about the mirror frame style. Simple frames suit minimalist designs. Ornate frames fit classic decor.
Cutting And Preparing Wood
Cutting and preparing wood is a key step in making a console table with a mirror. This step shapes your wood pieces and sets the base for a strong, beautiful table. Careful measurement and smooth finishes ensure your project fits well and looks great.
Taking time here saves you from mistakes later. Wood needs to be cut clean and smooth to fit perfectly. You will mark, cut, and sand the wood to get it ready for assembly.
Marking Cut Lines
Start by measuring the wood pieces carefully. Use a pencil and ruler to draw clear cut lines. Mark the lines where you want to cut. Double-check each measurement before marking. This helps avoid cutting mistakes. Clear marks guide your saw for straight cuts.
Safe Cutting Techniques
Wear safety glasses and gloves before cutting. Use a saw that fits your wood size. Keep your hands away from the blade. Cut slowly and steady along the marked lines. Secure the wood on a stable surface. Proper safety keeps you injury-free during cutting.
Sanding For Smooth Finish
After cutting, sand each wood edge well. Use medium-grit sandpaper to remove rough spots. Then switch to fine-grit for a smooth finish. Sand in the direction of the wood grain. Smooth edges help your table look polished. Sanding also prepares wood for paint or stain.
Assembling The Console Table
Assembling the console table is a simple process that brings all parts together. This step gives the table its shape and strength. Follow each part carefully to create a sturdy and beautiful piece.
Joining Legs And Frame
Start by attaching the legs to the frame. Align the legs with the corners of the frame. Use screws or bolts to fix them tightly. Make sure legs stand straight and do not wobble. Check the angle before tightening all screws.
Attaching The Tabletop
Place the tabletop on the frame. Center it well so all edges are even. Use screws under the frame to secure the tabletop. Avoid screwing too deep to prevent damage. The tabletop should feel firm and stable.
Securing Joints
Reinforce all joints for extra strength. Apply wood glue at each connection point. Use clamps to hold parts until glue dries. Tighten any loose screws once glue sets. Strong joints keep the table durable and safe.
Installing The Mirror
Installing the mirror is a key step in making a console table with a mirror. It gives the table a stylish look and makes the space feel larger. Careful installation helps the mirror stay safe and steady over time. Follow these steps to install the mirror properly and enjoy your new console table.
Preparing The Mirror Frame
Start by checking the mirror frame for any damage. Sand the edges lightly to smooth rough spots. Clean the frame with a damp cloth to remove dust. Paint or stain the frame if you want a fresh look. Let the frame dry completely before moving on.
Mounting Techniques
Decide where the mirror will sit on the console table. Use a level to mark even spots for mounting. Choose strong mounting hardware like brackets or heavy-duty adhesive strips. Attach the hardware securely to the back of the mirror frame. Align the mirror carefully, then fasten it to the table or wall.
Ensuring Stability
Test the mirror by gently pushing it to check for movement. Add extra supports if it feels loose. Use wall anchors for extra strength when attaching to drywall. Check all screws and mounts after installation. This keeps the mirror steady and prevents accidents.
Finishing Touches
Finishing touches make your console table with mirror look complete and polished. They protect the wood and add style. Small details can change the whole look. Follow these steps to finish your project perfectly.
Painting Or Staining
Choose paint or stain based on your room’s style. Paint covers the wood and adds color. Stain shows the natural wood grain. Apply thin, even coats for the best result. Let each coat dry fully before adding another. This step brightens your table and matches your decor.
Applying Protective Coating
A protective coating keeps your table safe from scratches and spills. Use clear polyurethane or varnish for strong protection. Apply with a clean brush in smooth strokes. Let it dry in a dust-free place. This layer makes your table last longer and look shiny.
Adding Decorative Hardware
Decorative hardware adds charm and character to your table. Choose knobs or handles that fit your style. Attach them carefully in the right spots. Hardware can create a vintage or modern feel. It’s a small step that makes a big difference.
Maintenance Tips
Keeping your console table with mirror in great shape needs regular care. Good maintenance helps the table look fresh and lasts longer. Simple steps make a big difference in preserving both the wood and glass parts.
Follow these tips to keep your piece clean and safe from damage. Regular checks help catch small issues early before they grow. This way, your console table stays a beautiful part of your home.
Cleaning The Mirror And Table
Use a soft cloth to dust the mirror and table surface. Avoid rough materials that can scratch the glass or wood. Spray a gentle glass cleaner on the cloth, not directly on the mirror. Wipe the wood with a damp cloth and dry it quickly. Avoid soaking the wood to prevent warping or damage.
Preventing Damage
Place the table away from direct sunlight to stop fading. Use coasters or mats under items to protect the wood. Avoid placing hot or wet items directly on the surface. Handle the mirror gently to prevent cracks or chips. Keep pets and children from climbing or pushing the table.
Periodic Inspections
Check the table and mirror regularly for loose parts or cracks. Tighten screws and joints to keep the table stable. Look for signs of water damage or stains on the wood. Inspect the mirror for spots or fading edges. Early repairs stop small problems from becoming big ones.

Credit: us.amazon.com
Frequently Asked Questions
How Do I Start Making A Console Table With A Mirror?
Begin by selecting quality wood and a mirror size. Measure and cut wood pieces carefully. Assemble the frame and attach the mirror securely. Sand and finish the table for a smooth look.
What Tools Are Needed For Building A Console Table?
Essential tools include a saw, drill, measuring tape, clamps, and screwdriver. Sandpaper and wood glue are also important. Safety gear like gloves and goggles is recommended during construction.
How Do I Securely Attach The Mirror To The Table?
Use strong adhesive or mirror clips designed for furniture. Ensure the mirror is clean and dry before attaching. Double-check stability to prevent shifting or damage over time.
What Wood Types Work Best For Console Tables With Mirrors?
Hardwoods like oak, maple, and walnut offer durability and elegance. Pine is budget-friendly but less durable. Choose wood that complements your room’s style and finish well.
Conclusion
Building a console table with a mirror adds style and function to any room. You can create a unique piece that fits your space and taste. The steps are simple and do not need special skills. Use basic tools and materials to keep costs low.
This project brings a personal touch to your home decor. Enjoy the satisfaction of making something useful and beautiful yourself. Try it and see how much you can create with your own hands.

