Are you looking to save space and add a fun touch to your room? Making a frame bunk bed could be exactly what you need.
Imagine having a sturdy, stylish bunk bed built by your own hands—customized just the way you want it. This guide will walk you through simple steps that anyone can follow, even if you’re new to woodworking. By the end, you’ll have the confidence and know-how to create a bunk bed that’s safe, durable, and perfect for your space.
Ready to transform your room and impress your family? Let’s get started!
Materials And Tools Needed
Building a frame bunk bed requires the right materials and tools. Gathering these items before starting will make the project smoother. It helps ensure safety and quality in your work. Below is a guide to the essential materials and tools.
Choosing The Right Wood
Pick wood that is strong and durable. Pine and oak are popular choices for bunk beds. Pine is affordable and easy to work with. Oak is harder and lasts longer. Avoid soft woods that may break easily. Make sure the wood is smooth and free of cracks.
Essential Tools List
Use a saw to cut the wood pieces. A drill will help with screws and holes. Sandpaper or a sander smooths the wood edges. A measuring tape is key for accurate cuts. A screwdriver is needed for assembling parts. Clamps hold wood steady during work.
Safety Equipment
Protect your eyes with safety goggles. Wear gloves to avoid splinters and cuts. Use a dust mask to prevent inhaling sawdust. Ear protection reduces noise from power tools. Always work in a well-lit and ventilated area.
Designing The Frame
Designing the frame is the first step in building a sturdy bunk bed. A good design ensures safety and comfort. It also makes the building process smoother. Careful planning saves time and materials.
Start by understanding the space and mattress size. Then, sketch the layout. Finally, choose the right dimensions for the frame. Each step is important for a successful build.
Measuring Space And Mattress Size
Measure the room space where the bunk bed will go. Note the height, width, and length carefully. Also, check the ceiling height to avoid fitting problems. Next, measure the mattress size you want to use. Standard mattress sizes include twin, full, and queen. Use these measurements to guide your frame design.
Sketching The Frame Layout
Draw a simple sketch of your bunk bed frame. Mark where the mattress will sit. Add space for ladders and guardrails. This helps visualize the bed and avoid mistakes. Use graph paper or a drawing app for accuracy. Label parts like legs, slats, and supports clearly.
Selecting Frame Dimensions
Choose frame dimensions based on mattress size and space. Add extra space for comfort and safety. For example, add 2-3 inches to mattress width and length. Make sure the frame height fits the room well. Consider the space between top and bottom beds for sitting up. Strong, thick wood works best for frame parts.
Cutting The Wood
Cutting the wood is a key step in building a frame bunk bed. It shapes all parts to the right size. This step needs care and accuracy. Good cuts make assembly smooth and strong. Take your time and prepare well before starting.
Marking Cut Lines
Start by measuring each board carefully. Use a pencil to draw clear cut lines. Double-check measurements to avoid mistakes. Straight, visible lines help guide your saw. Mark both sides of the wood for better accuracy.
Using Saws Safely
Choose the right saw for your cuts. A handsaw works well for small pieces. A circular saw cuts faster for large boards. Always wear safety goggles and gloves. Keep your hands away from the blade. Cut slowly and steadily to keep control.
Preparing Pieces For Assembly
After cutting, smooth the edges with sandpaper. Check each piece against your plan. Remove any splinters or rough spots. Organize the pieces by size and purpose. This makes the next steps easier and faster.
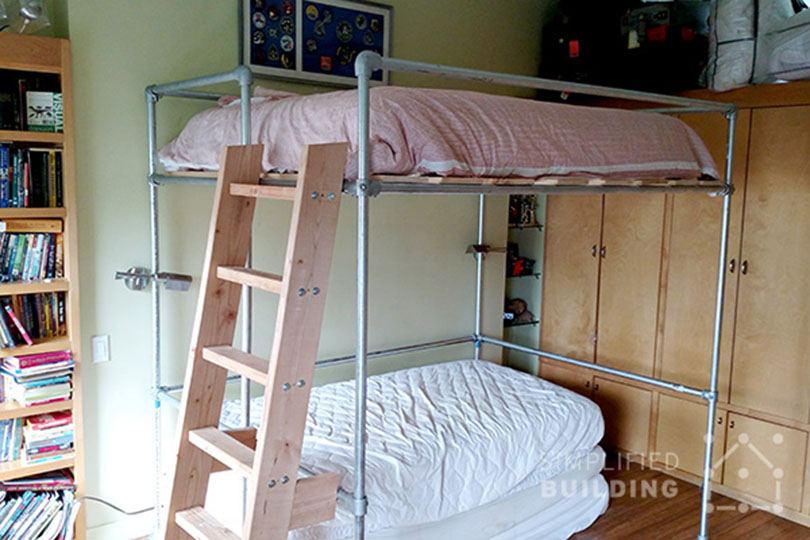
Credit: www.simplifiedbuilding.com
Assembling The Base
Assembling the base is the first step in making a frame bunk bed. It creates a strong foundation that supports the entire bed. A solid base ensures safety and durability. Focus on precise measurements and careful assembly. Follow the steps below to build a reliable and sturdy base.
Building The Bed Supports
Start by cutting the wooden beams to the right length. These beams act as the main supports for the bed. Attach the beams to the frame using screws. Make sure each support is level and straight. Use a carpenter’s square to check corners for accuracy. Properly aligned supports prevent wobbling later on.
Securing The Slats
Lay wooden slats across the bed supports. Space them evenly to provide good mattress support. Screw each slat firmly into the supports. Avoid gaps that are too wide to stop mattress sagging. Ensure all screws are tight and flush with the wood. This step adds strength and comfort to the bed.
Checking Stability
Press down on different parts of the base to test firmness. The frame should not move or creak under pressure. Tighten any loose screws immediately. Use a level to confirm the base is flat and even. A stable base increases safety and extends bed life. Take time to check stability before moving to the next step.
Constructing The Upper Bunk
Constructing the upper bunk is a key step in making a frame bunk bed. It needs strong support and safety features. This part holds the mattress and protects the sleeper. Focus on building a solid frame, adding guard rails, and attaching a safe ladder. Each step ensures the upper bunk is secure and easy to use.
Building The Frame
Start by cutting wood pieces to size for the frame. Use durable wood like pine or oak for strength. Join the side rails with the end pieces using screws. Check the corners are square for a neat fit. Add slats across the frame to hold the mattress. Space the slats evenly for good support. Sand the edges to avoid splinters and rough spots.
Adding Guard Rails
Guard rails keep the sleeper safe from falling out. Attach long wooden boards along the sides of the upper bunk. Make sure the rails are high enough to prevent falls. Secure the rails tightly with screws or bolts. Leave space between the rails and mattress for air flow. Double-check the rails do not wobble or move easily.
Attaching The Ladder
The ladder provides safe access to the top bunk. Measure the height from floor to upper bunk frame. Cut ladder side rails and evenly space ladder steps. Fix the steps firmly to the rails with screws. Position the ladder at a comfortable angle for climbing. Attach the ladder securely to the bed frame. Test the ladder by climbing to ensure stability.
Finishing Touches
Finishing touches give your frame bunk bed a polished look. They also make it safe and durable. Spend time on these final steps to ensure your bed looks great and lasts long.
Sanding And Smoothing
Start by sanding the entire frame. Use fine-grit sandpaper for a smooth finish. Sand all edges and corners carefully. This removes splinters and rough spots. A smooth surface feels nice and prevents injuries.
Applying Paint Or Stain
Choose paint or stain that suits your room. Use a brush or roller to apply evenly. Let the first coat dry completely. Apply a second coat for better coverage. Paint adds color; stain shows the wood grain. Both protect the wood from damage.
Final Safety Checks
Inspect all screws and bolts. Tighten any loose parts. Check for sharp edges or nails sticking out. Make sure the ladder is secure and stable. Test the bed by gently shaking it. Safety first ensures the bed is ready to use.
Maintenance Tips
Maintaining your frame bunk bed is important for safety and durability. Small steps can keep the bed strong and looking good. Regular care prevents big problems later.
Regular Tightening Of Screws
Screws and bolts can loosen over time. Check them every few weeks to keep the bed stable. Use the right tools to tighten all fasteners. Loose screws can cause wobbly frames and unsafe conditions.
Cleaning And Upkeep
Dust and dirt can build up on the frame. Wipe the bed with a soft cloth regularly. Use mild soap and water for tougher spots. Avoid harsh chemicals that damage the finish. Clean beds last longer and look nicer.
Inspecting For Wear And Tear
Look closely for cracks, rust, or bent parts. Pay special attention to joints and support beams. Replace any damaged pieces quickly to avoid accidents. Regular checks catch problems early and keep the bed safe.
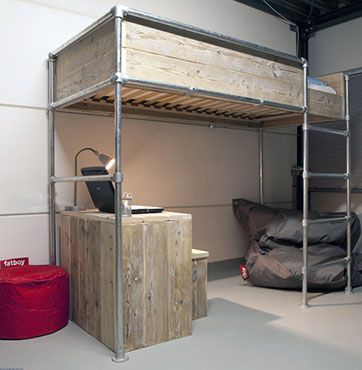
Credit: www.simplifiedbuilding.com
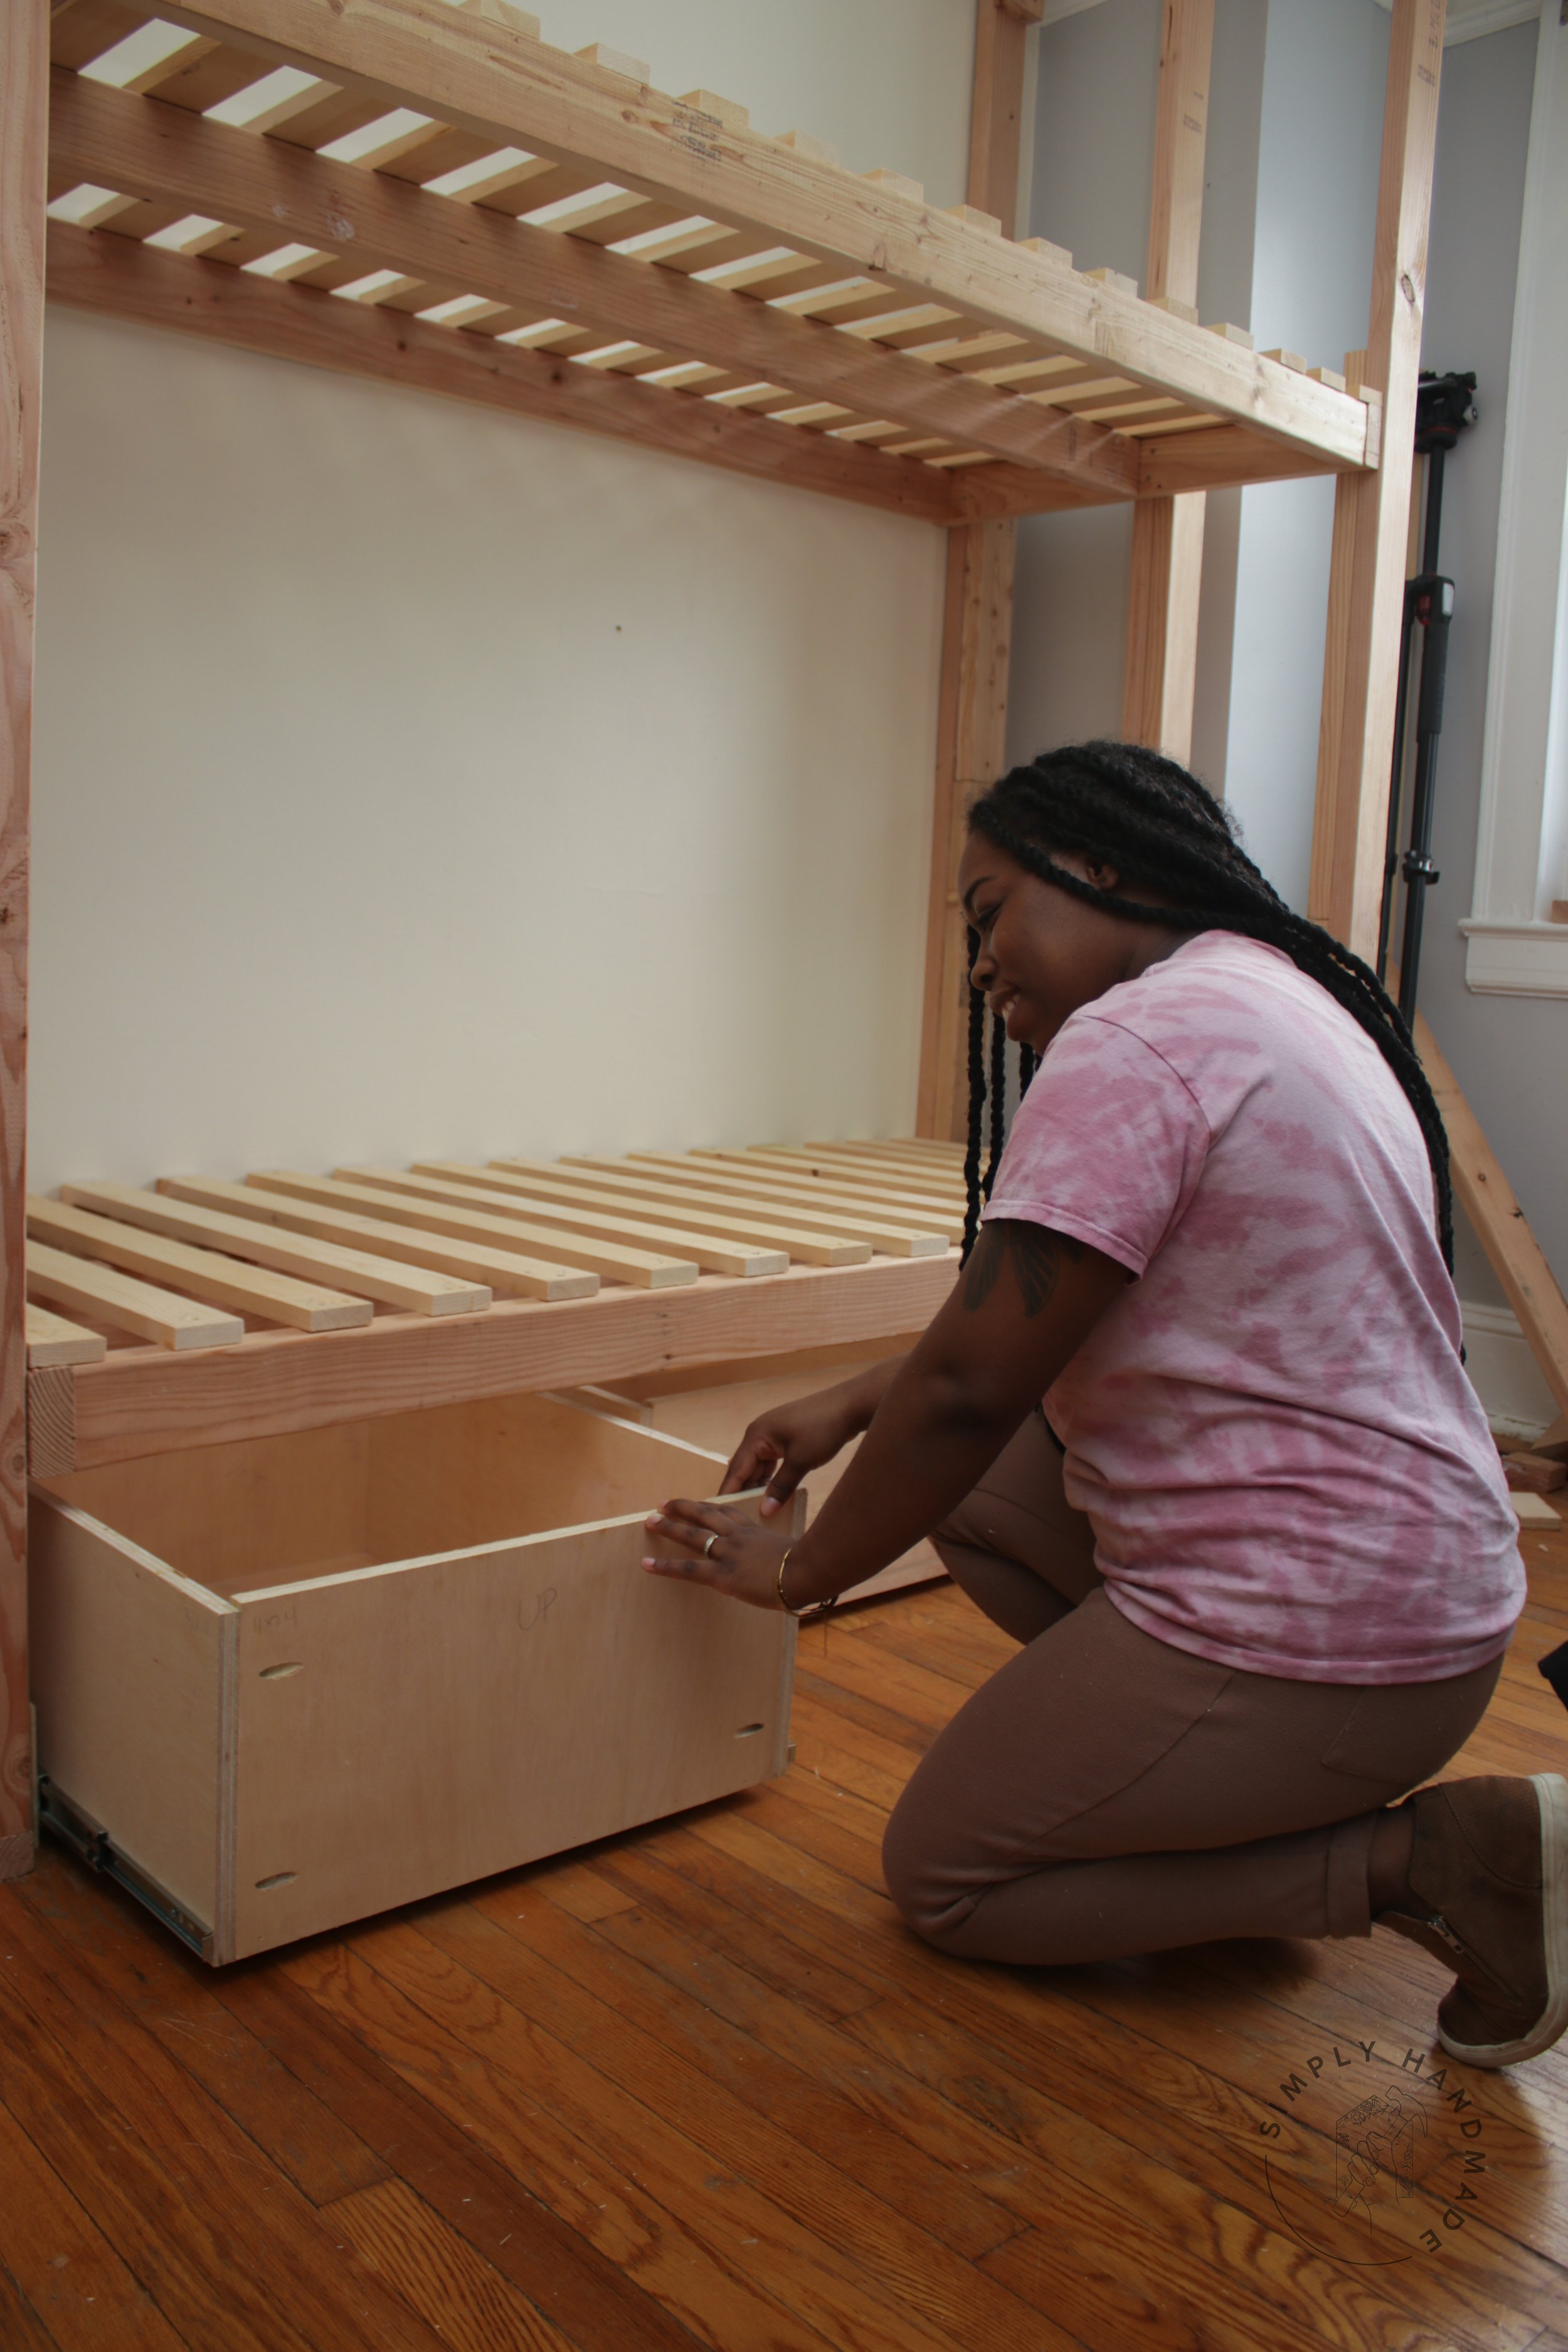
Credit: www.simplyhandmadestudios.com
Frequently Asked Questions
What Materials Are Needed To Make A Frame Bunk Bed?
You need wood planks, screws, a drill, sandpaper, wood glue, and a measuring tape. Choose sturdy wood like pine or oak for durability and safety.
How Long Does It Take To Build A Frame Bunk Bed?
Building a frame bunk bed typically takes 6 to 8 hours. This depends on your skill level and tools available. Planning and precise measurements help speed up the process.
What Safety Features Should A Frame Bunk Bed Have?
Include guardrails on the top bunk and secure ladders. Ensure all joints are tight and surfaces are smooth. Use non-toxic finishes to keep the bed safe for children.
Can I Customize The Size Of A Frame Bunk Bed?
Yes, you can customize the size to fit your room and mattress. Adjust dimensions during the planning phase for a perfect fit. Custom sizes improve comfort and space utilization.
Conclusion
Building a frame bunk bed can be a fun and rewarding project. Follow the steps carefully to ensure safety and stability. Use the right tools and materials for the best results. Take your time and check each part as you go.
A sturdy bunk bed saves space and adds style to any room. Enjoy the process and the finished product. Now, you have a practical bed made with your own hands. Simple and satisfying.