Are you looking to save space and add a fun, practical touch to your home? Making a homemade bunk bed could be the perfect solution for your needs.
Imagine having a sturdy, custom-built bed that fits your room perfectly and gives your kids a cozy place to sleep and play. In this guide, you’ll discover simple steps to build your own bunk bed without spending a fortune or needing expert skills.
Keep reading, and by the end, you’ll feel confident to create a bunk bed that’s safe, stylish, and just right for your family.
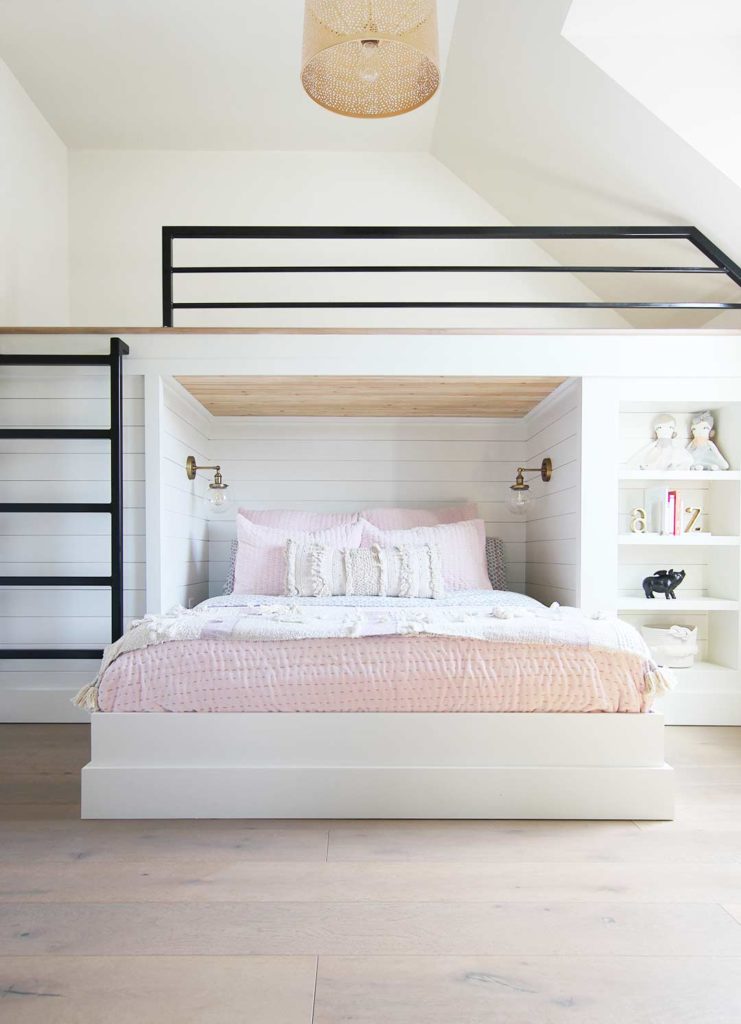
Credit: plankandpillow.com
Choosing The Right Materials
Choosing the right materials is key to building a sturdy and safe homemade bunk bed. Good materials make the bed last long and stay strong. Poor choices can cause problems later, like wobbling or breaking. This section helps you pick the best wood and tools for your project.
Selecting Wood Types
Wood is the main material for a bunk bed. Choose wood that is strong and durable. Pine is a common choice because it is easy to work with and affordable. Oak and maple are harder woods. They last longer but cost more and need special tools. Avoid soft woods like cedar or spruce. They can dent or break easily. Check for wood that is smooth and free of cracks or knots. These flaws can weaken the bed.
Gathering Tools And Supplies
Good tools make building easier and safer. Basic tools include a saw, drill, screwdriver, measuring tape, and level. A power drill speeds up work and helps make strong joints. Sandpaper smooths rough edges to avoid splinters. You will also need screws, wood glue, and brackets for extra support. Wear safety glasses and gloves to protect yourself. Prepare all materials before starting to save time.
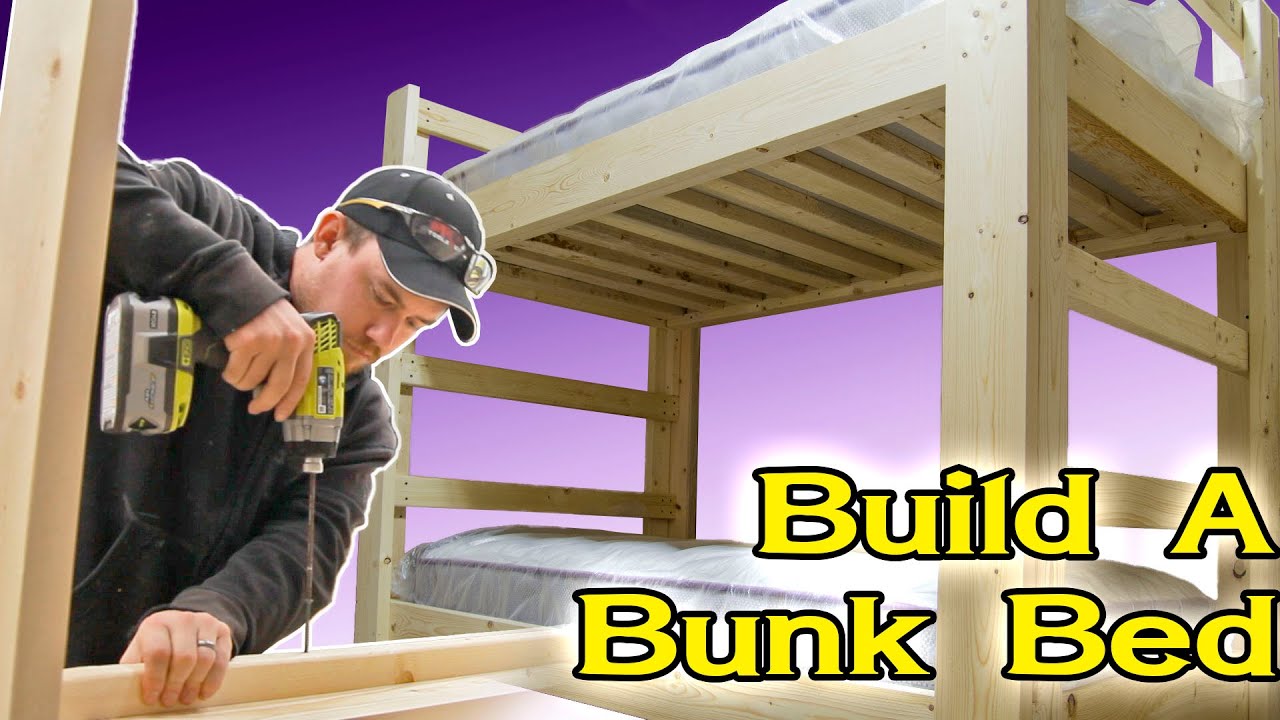
Credit: www.youtube.com
Designing Your Bunk Bed
Designing your bunk bed is the first step in building a safe and sturdy piece. A good design helps you use space well and keeps the bed strong. Planning carefully saves time and materials later.
Think about who will use the bed and how much room you have. The design should fit the space and meet your needs. Start with simple sketches and clear measurements.
Measuring Space And Dimensions
Measure the room where the bunk bed will go. Note the height, width, and length carefully. Check for any obstacles like doors or windows nearby. Leave enough space around the bed for easy movement.
Decide the size of the mattresses you want to use. Standard sizes help choose the right frame size. Remember to add extra space for safety rails and ladder steps. Accurate measurements make the building process smoother.
Sketching The Frame Layout
Draw a simple plan of the bunk bed frame on paper. Include all parts like the headboard, footboard, and side rails. Mark where the ladder and safety rails will go. Use a ruler to keep lines straight and clear.
Label each part with its size and shape. This helps during cutting and assembly. Think about the bed’s height and how strong the frame should be. A clear layout guides you through building step-by-step.
Preparing The Wood
Preparing the wood is the first important step in making a homemade bunk bed. It ensures the wood pieces fit well and look smooth. Proper preparation makes the bunk bed safe and strong. Taking time to prepare the wood helps avoid problems during assembly. Follow these steps carefully for the best results.
Cutting To Size
Measure each piece of wood carefully before cutting. Use a tape measure and mark the wood with a pencil. Cut the wood with a saw, following the marks exactly. Make straight cuts to ensure all pieces fit together well. Check each piece after cutting to confirm the size is correct. Accurate cuts save time and improve the bunk bed’s stability.
Sanding And Finishing
Sand all wood surfaces to remove rough edges and splinters. Use medium-grit sandpaper first, then fine-grit for a smooth finish. Sand corners and edges to prevent injuries. After sanding, wipe the wood with a clean cloth to remove dust. Apply a wood finish or paint for protection and a nice look. Let the finish dry completely before building the bed.
Building The Frame
Building the frame is the first step in making a homemade bunk bed. The frame is the base that holds everything together. It needs to be strong and stable to keep the bed safe. Use good quality wood and measure carefully. Take your time to cut and prepare each piece before assembly.
Assembling Side Rails
Start by cutting the side rails to the right length. These rails connect the headboard and footboard. Use screws to join the rails with the boards. Make sure the rails are straight and level. Check the corners to ensure they form right angles. Tighten all screws but do not overdo it. The side rails must hold the mattress and support weight safely.
Constructing Headboards And Footboards
Next, build the headboards and footboards. Cut the wood pieces to the desired height and width. Arrange the vertical and horizontal pieces in a simple pattern. Use wood glue and screws to fix them together. Sand the edges to avoid splinters. Attach strong support beams at the back for extra strength. These parts give the bunk bed its shape and hold the side rails firmly.
Adding Support And Safety Features
Adding support and safety features is very important for a homemade bunk bed. These features keep the bed strong and protect children from falls. Proper support makes the bed last longer and stay stable. Safety features help parents feel confident that their kids are safe while sleeping or playing.
Installing Guardrails
Guardrails stop children from rolling off the top bunk. Use sturdy wood pieces that are smooth and strong. Attach guardrails on both sides of the top bunk. Make sure the rails are high enough to keep kids safe. Secure them tightly with screws so they do not move. Check for any sharp edges and sand them down. Good guardrails are a must for every bunk bed.
Attaching Ladder And Steps
The ladder or steps help children climb up and down safely. Choose wide steps to give enough space for feet. Attach the ladder firmly to the bed frame. Test the ladder by putting weight on it before use. Place the ladder at a comfortable angle for easy climbing. Use screws and brackets to keep it stable. Safe ladders prevent accidents and make the bed easy to use.
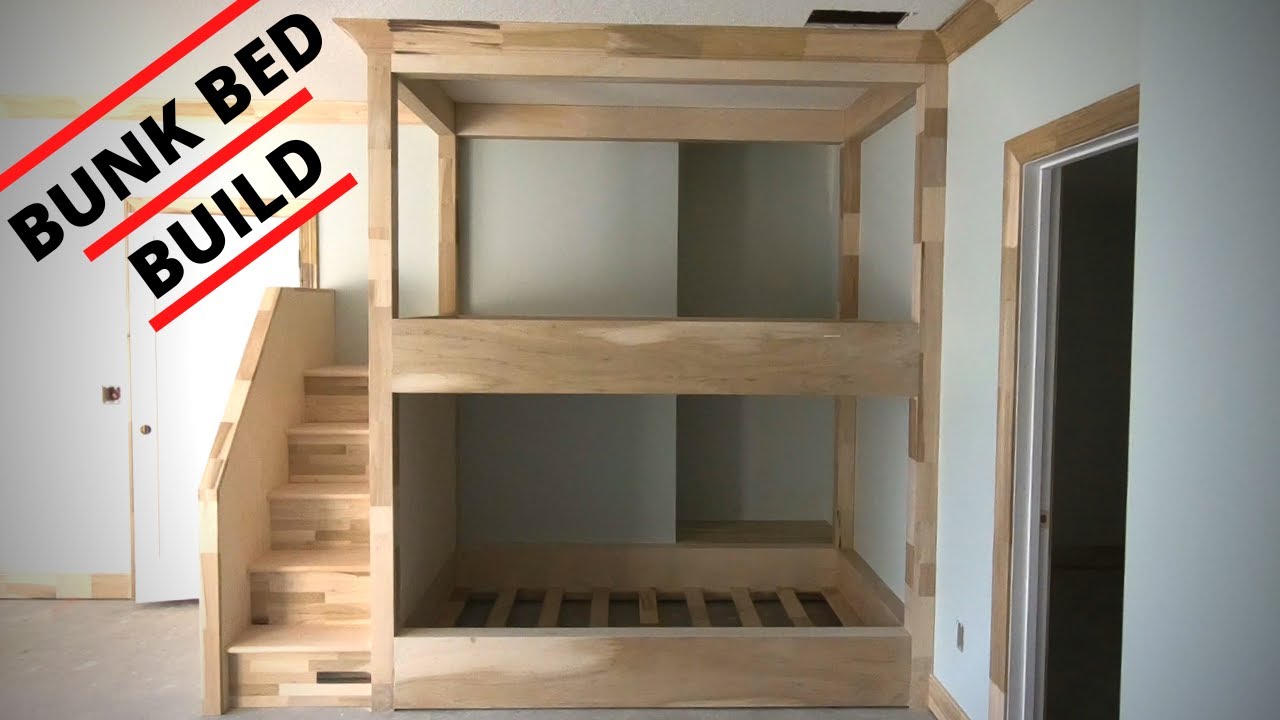
Credit: www.youtube.com
Finishing Touches
Finishing touches make your homemade bunk bed safe and attractive. These final steps protect the wood and keep the mattress in place. They also give your bunk bed a clean, polished look. Let’s explore two key finishing touches to complete your project.
Painting Or Staining
Choose paint or stain to protect the wood from wear and spills. Paint offers color and hides imperfections well. Stain shows the wood’s natural grain and gives a classic look.
Apply a primer before painting for better coverage. Use a brush or roller for even coats. Let each coat dry completely before adding another layer.
If staining, wipe off excess with a clean cloth. Add a clear sealant for extra protection. This step helps prevent scratches and water damage.
Securing The Mattress
Keep the mattress from sliding with safety straps or rails. Attach straps to the bed frame using screws or hooks. This stops movement while sleeping or climbing.
Adding a non-slip mat under the mattress works well too. Check that the mattress fits snugly in the frame. A secure mattress means safer, more comfortable sleep.
Tips For Maintenance And Longevity
Maintaining your homemade bunk bed helps it last longer and stay safe. Small efforts keep the bed strong and comfortable for years. Regular care prevents damage and costly repairs.
Regular Inspections
Check the bunk bed often for any signs of wear or damage. Look for cracks in the wood or loose screws. Inspect the joints and slats for stability. Catching problems early stops bigger issues later.
Tightening And Repairs
Tighten all screws and bolts every few months. Loose parts can cause the bed to wobble or break. Replace any broken or worn pieces right away. Use the right tools to avoid damaging the wood. Proper repairs keep the bed safe for children.
Frequently Asked Questions
What Materials Are Needed To Make A Homemade Bunk Bed?
You need sturdy wood, screws, nails, wood glue, a saw, drill, measuring tape, and sandpaper. Safety gear like goggles is also essential. Choose high-quality materials for durability and stability.
How Long Does It Take To Build A Bunk Bed At Home?
Building a homemade bunk bed usually takes 1 to 3 days. Time depends on your skill level and the complexity of the design. Proper planning and preparation speed up the process.
Is It Safe To Build A Bunk Bed By Yourself?
Yes, it’s safe if you follow instructions carefully and use quality materials. Ensure all joints are secure, and guardrails are installed. Double-check measurements and weight limits for safety.
What Tools Are Required For Diy Bunk Bed Construction?
Essential tools include a saw, drill, screwdriver, measuring tape, level, and sander. These help with cutting, assembling, and smoothing the wood for a sturdy build.
Conclusion
Building a homemade bunk bed can save space and add style. Follow each step carefully to ensure safety and strength. Use quality materials and check all joints tightly. Customize the design to fit your room and needs. Enjoy the process and the final result.
A sturdy bunk bed makes any room fun and practical. Keep safety your top priority throughout the build. Now, your DIY bunk bed is ready for use!