Do you want a unique way to show off your favorite books? Imagine a bookshelf that highlights the spines of your books, making your collection look organized and stylish at the same time.
A spine bookshelf does just that—it turns your books into a beautiful display. In this guide, you’ll learn simple steps to build your own spine bookshelf. By the end, you’ll have a custom piece that fits your space and showcases your personality.
Ready to transform your reading nook? Let’s get started!
Choosing Materials
Choosing the right materials is the first step to build a strong spine bookshelf. The materials affect the shelf’s look, strength, and lifespan. Picking quality materials ensures your bookshelf stays sturdy and beautiful for years. Focus on wood types, tools, and extra supplies to get started.
Wood Types
Select wood that fits your budget and style. Pine is soft and easy to cut. Oak is strong and lasts long. Birch has a smooth finish and is good for painting. Avoid wood with cracks or knots for better durability. Choose wood sheets or planks that match your shelf size.
Tools Needed
Gather basic tools to make cutting and assembling easier. A saw cuts wood to size. A drill helps fix screws. Sandpaper smooths rough edges. A measuring tape ensures exact cuts. A screwdriver tightens screws firmly. Have safety glasses to protect your eyes.
Additional Supplies
Extra items help your bookshelf look neat and hold well. Wood glue adds strength to joints. Screws keep parts tightly fixed. Wood filler hides holes or cracks. Paint or varnish gives a nice finish and protects wood. Use clamps to hold pieces while glue dries.
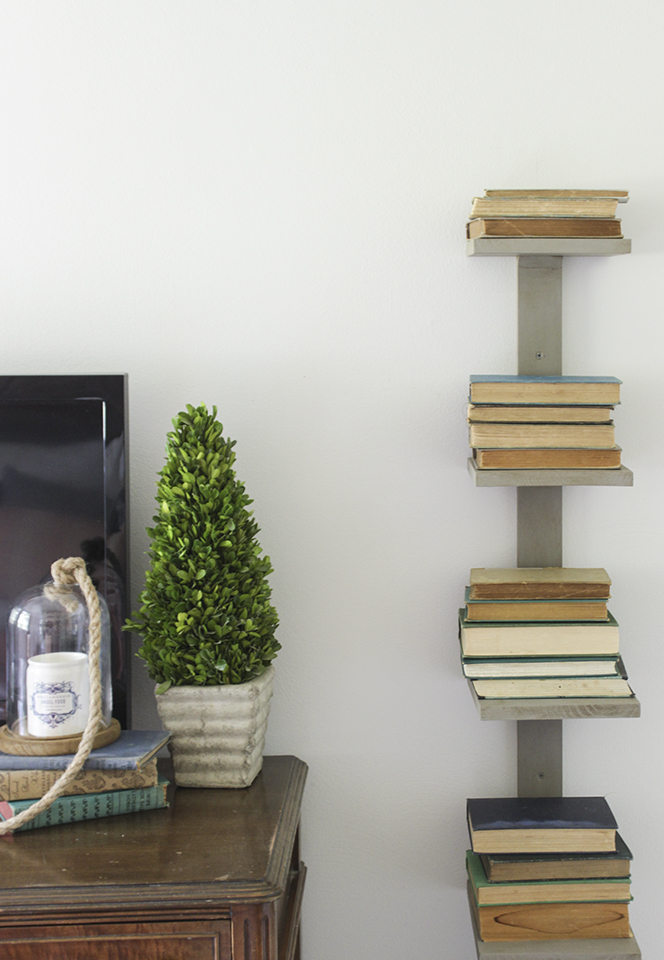
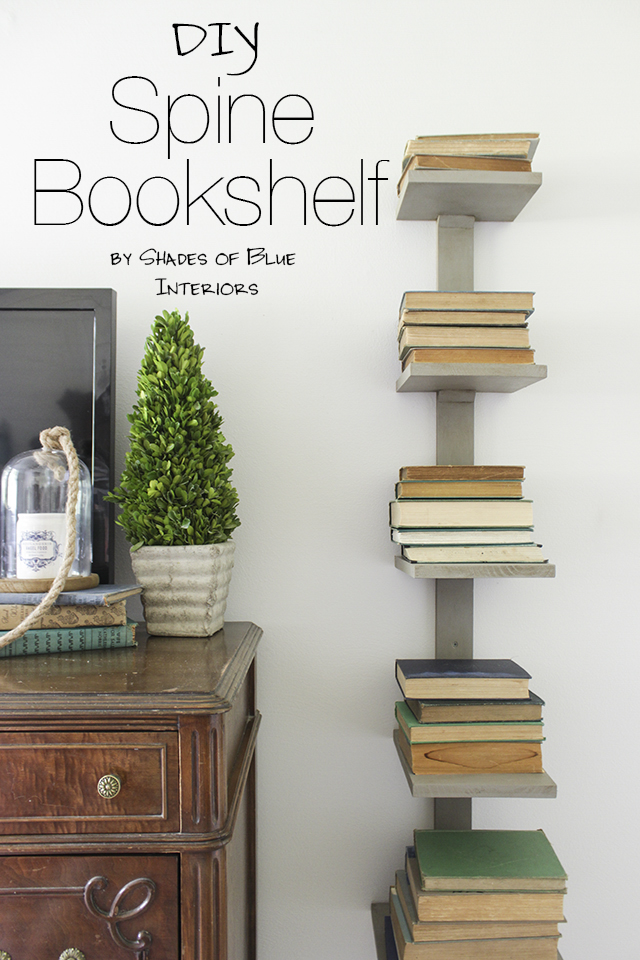
Credit: www.shadesofblueinteriors.com
Designing Your Bookshelf
Designing your spine bookshelf is the first step to create a functional and stylish piece. The design sets the foundation for the build. Take your time to think about the size, shape, and style you want. A well-planned design helps avoid mistakes and wasted materials.
Start by understanding the space where the bookshelf will go. Consider the height, width, and depth carefully. Good design matches the room and fits your books perfectly.
Measuring Space
Measure the wall or area where the bookshelf will stand. Use a tape measure for accuracy. Note the height from floor to ceiling. Check the width and available depth too. Write down all measurements clearly. Double-check each number to avoid errors. Remember, a bookshelf that fits well looks better and works better.
Sketching The Frame
Draw a simple outline of your bookshelf on paper. Mark the height and width based on your measurements. Add lines to show the vertical sides and shelves. Keep the design clean and balanced. Use a ruler to make straight lines. This sketch guides your build and helps visualize the final product. You can make changes easily on paper before cutting wood.
Planning Shelf Spacing
Decide how many shelves you need. Think about the size of your books. Space shelves to hold tall and short books comfortably. Leave extra room for future additions. Standard spacing is 10 to 12 inches between shelves. Adjust spacing to fit your collection. Proper shelf spacing keeps books neat and easy to reach.
Cutting And Preparing Wood
Cutting and preparing wood is an important step in making a spine bookshelf. It shapes the wood pieces to the right size. Proper preparation makes assembly easier and the final shelf strong and neat.
Careful work here saves time later. The wood must be measured, cut, and smoothed correctly. Each step needs attention to detail and safety.
Marking Measurements
Start by measuring the wood with a tape measure. Mark the points with a pencil. Use a square tool to draw straight lines across the wood.
Double-check every measurement before cutting. Accurate marks prevent mistakes and wasted wood. Take your time to ensure precision.
Safe Cutting Techniques
Wear safety goggles and gloves before cutting. Use a saw that fits the wood size and type. Keep your hands clear of the blade.
Cut slowly and follow the marked lines closely. Use clamps to hold the wood steady. Clean cuts make the shelf fit better.
Sanding Edges
After cutting, sand the edges to smooth rough spots. Use medium-grit sandpaper first, then fine-grit for a soft finish.
Sand along the wood grain to avoid scratches. Smooth edges make the shelf safer and more attractive. Take your time for the best results.
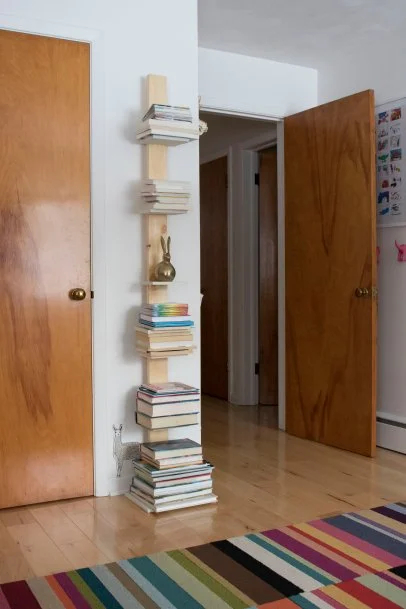
Credit: www.shadesofblueinteriors.com
Assembling The Frame
Assembling the frame is the first big step in building your spine bookshelf. This part shapes the main structure that holds your books. Follow each step carefully to ensure a strong and stable frame.
Joining Pieces
Start by aligning the wooden pieces on a flat surface. Match the ends that fit together perfectly. Use wood glue on the edges for extra hold. Press the pieces firmly to bond them well. Let the glue set before moving to the next step.
Securing With Screws
Next, drill pilot holes into the wood to avoid splitting. Insert screws into the holes using a screwdriver or drill. Tighten screws until the pieces are snug but not cracked. This keeps the frame strong and durable. Double-check all corners are fastened securely.
Checking For Stability
Place the frame on a level floor. Gently shake it to test for wobbling or loose joints. Tighten any loose screws you find. Make sure the frame stands firm without leaning. A stable frame ensures your bookshelf lasts long and holds books safely.
Adding Shelves
Adding shelves to your spine bookshelf brings the design to life. This step creates space for your books and decorative items. Careful placement and secure attachment are key. Shelves must hold weight and stay level for safety and style.
Positioning Shelves
Decide the height of each shelf based on your books’ size. Mark spots on the spine for shelf placement. Keep even spacing for a neat look. Allow extra space for taller books. Use a pencil for light, adjustable marks.
Attaching Supports
Choose strong supports to hold your shelves firmly. Metal brackets or wooden cleats work well. Fix supports to the spine using screws. Pre-drill holes to avoid splitting the wood. Attach supports at marked points for stability.
Ensuring Level Surfaces
Place each shelf on the supports carefully. Use a spirit level to check horizontal alignment. Adjust until the shelf sits perfectly flat. A level shelf prevents books from sliding off. Secure shelves with screws or nails for safety.
Finishing Touches
Finishing touches bring your spine bookshelf to life. They protect the wood and enhance its look. These final steps make your project strong and beautiful. Focus on painting or staining, sealing, and adding decorative elements. Each step adds value and style.
Painting Or Staining
Choose paint or stain based on your room’s style. Paint gives bright, bold colors. Stain shows the wood’s natural grain and texture. Use smooth, even strokes for a clean finish. Let each coat dry completely before adding the next. Light sanding between coats helps the surface stay smooth.
Applying Sealant
Sealant protects your bookshelf from scratches and moisture. Use a clear sealant like polyurethane or varnish. Apply thin, even layers with a brush or cloth. Allow the sealant to dry fully before touching. This step keeps your bookshelf looking new for years.
Decorative Elements
Add small details to make your bookshelf unique. Use stencils or decals for patterns and designs. Attach small knobs or metal corners for an elegant touch. Consider adding LED strip lights for a modern look. These elements give your bookshelf personality and charm.
Maintaining Your Bookshelf
Maintaining your spine bookshelf helps it last longer and look great. Regular care keeps books safe and the wood strong. Small efforts can stop big problems later.
Cleaning Tips
Dust your bookshelf often to avoid dirt buildup. Use a soft cloth or duster for gentle cleaning. Avoid harsh chemicals that can damage the finish. A damp cloth works well for sticky spots. Dry the surface quickly to prevent water marks.
Repairing Damage
Fix scratches with wood filler or touch-up markers. Tighten loose screws or brackets to keep the shelf stable. Replace broken parts with similar wood or materials. Small cracks can be glued and clamped until dry. Check for damage regularly to fix issues early.
Preventing Wear
Place the bookshelf away from direct sunlight to avoid fading. Use coasters or mats under items to stop scratches. Avoid overloading shelves to prevent bending or breaking. Keep the bookshelf in a dry area to stop warping. Rotate heavy books to spread weight evenly.
Credit: www.hgtv.com
Frequently Asked Questions
What Materials Are Needed To Make A Spine Bookshelf?
You need wood planks, screws, a drill, wood glue, sandpaper, and paint or stain. Choose sturdy wood for durability and smooth finishes for aesthetics.
How Long Does It Take To Build A Spine Bookshelf?
Building a spine bookshelf typically takes 4 to 6 hours. This includes measuring, cutting, assembling, sanding, and finishing.
Can I Customize The Size Of My Spine Bookshelf?
Yes, you can customize the size to fit your space. Adjust the height, width, and depth according to your needs.
What Tools Are Essential For Building A Spine Bookshelf?
Essential tools include a saw, drill, screwdriver, measuring tape, level, and clamps. These ensure accurate cuts and secure assembly.
Conclusion
Building a spine bookshelf is easier than it seems. With basic tools and clear steps, anyone can create one. This project adds style and function to your room. You save money by making it yourself. Plus, it gives a sense of pride and joy.
Try it out and enjoy your new bookshelf. Keep your books neat and your space tidy. Making things with your hands feels good. Start small, follow the guide, and see the results.