Are you looking for a fun and creative project that will bring joy to your child’s playtime? Making a toy bunk bed is easier than you think, and it’s a great way to add a special touch to your child’s doll or action figure collection.
Imagine watching your little one’s face light up as they see their favorite toys resting comfortably in a handmade bunk bed you created just for them. In this guide, you’ll discover simple steps and tips to build a sturdy, charming toy bunk bed that fits perfectly in your home.
Ready to turn your ideas into a delightful reality? Let’s get started!
Materials Needed
To build a toy bunk bed, you need the right materials. Preparing everything before you start saves time and makes the project easier. Gather all items in one place. This helps avoid interruptions while working.
Wood And Tools
Choose sturdy wood like pine or plywood. These woods are easy to cut and strong enough for toys. Cut wood pieces to size before assembly. Use a saw for cutting and a drill for screws. Sandpaper smooths rough edges. You also need measuring tape, screws, and wood glue. These tools help create a solid frame.
Paints And Decorations
Pick non-toxic paints safe for children. Use bright colors to make the bed fun. Paint brushes come in various sizes for details and broad strokes. You can add stickers or small decorations. These make the bunk bed look unique and attractive. Let paint dry completely before use.
Safety Equipment
Wear safety glasses to protect your eyes. Gloves protect hands from splinters and sharp tools. A dust mask helps when sanding wood. Work in a well-ventilated area to avoid fumes. Safety is important for a smooth, injury-free project.
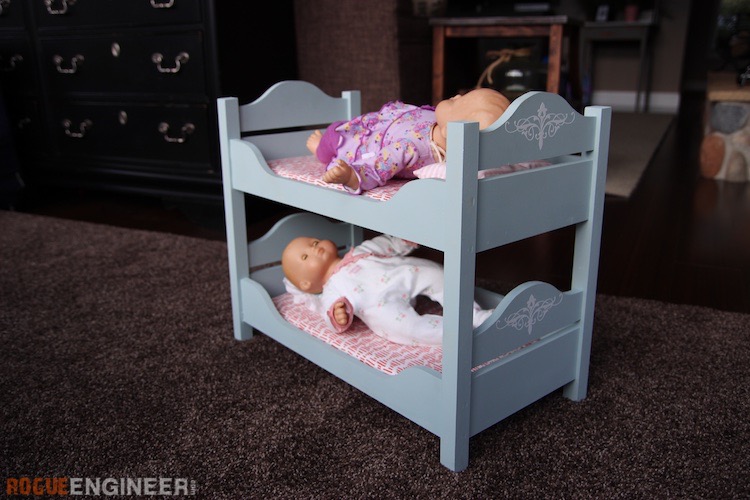
Credit: rogueengineer.com
Planning The Design
Planning the design is the first step in making a toy bunk bed. It helps organize ideas and makes the building process easier. Careful planning ensures the bed fits well and looks great. It also saves time and materials by avoiding mistakes.
Measuring Dimensions
Start by measuring the space where the toy bunk bed will go. Check the height, width, and depth needed. Measure the toys or dolls that will use the bed. Use these numbers to decide the bed size. Accurate measurements keep the bed safe and functional.
Sketching The Layout
Draw a simple sketch of the bunk bed on paper. Include the top and bottom beds in your drawing. Mark where the ladder and guardrails will be placed. This visual plan helps see the bed’s shape and parts. Make changes to the sketch before building.
Choosing The Style
Decide on the look of the toy bunk bed. Choose a style that matches the room or toys. Options include modern, classic, or themed designs. Pick colors and materials that are safe and easy to clean. A good style makes the toy bed more fun and inviting.
Cutting The Wood
Assembling the frame is an important step in making a toy bunk bed. It creates the main structure that holds the bed together. Follow these steps carefully for a strong, safe frame that looks great.
Building The Base
Start by making the base. Use sturdy wooden pieces or strong cardboard. Cut four pieces for the sides and connect them in a rectangle. Use glue or small nails to join the corners tightly. Make sure the base is flat and even. This will support the bottom bunk and keep the bed steady.
Adding The Ladder
The ladder lets toys climb to the top bunk. Cut two long, thin pieces for the sides. Then cut smaller pieces for the steps. Space the steps evenly and fix them between the sides with glue or nails. Attach the ladder to one side of the base securely. Check it stays firm and straight.
Securing The Top Bunk
Next, add the top bunk frame. Use the same method as the base to build a smaller rectangle. Place it above the base, leaving enough space for toys to sit below. Attach strong supports at each corner to hold the top bunk. Use screws or nails to fix the supports to the base. Test the frame for stability before finishing.

Credit: www.youtube.com
Assembling The Frame
Painting and decorating your toy bunk bed makes it special and fun. It brings your project to life with color and style. This step lets you add personality and charm. Take your time and enjoy the process. A well-painted toy bunk bed looks great and lasts longer.
Applying Primer
Start by applying a primer coat. Primer helps paint stick better to the wood. It also stops the paint from soaking in unevenly. Use a small brush or roller for smooth coverage. Let the primer dry fully before painting. This step creates a clean base for bright colors.
Choosing Colors
Pick colors that match your child’s taste or room theme. Bright colors like red, blue, or yellow stand out. Soft colors like pastels give a calm look. Use non-toxic, child-safe paint for safety. Test a small area first to see the color dry. Choose colors that make the toy bed inviting and fun.
Adding Fun Details
Add details to make the toy bunk bed unique. Paint patterns like stripes, polka dots, or stars. Use stencils for shapes or letters. Add small stickers or decals for extra charm. You can also paint little drawings or designs. These details make the bed feel personal and playful.

Credit: www.bybrittanygoldwyn.com
Frequently Asked Questions
What Materials Are Needed To Make A Toy Bunk Bed?
You need wood, screws, glue, paint, sandpaper, and fabric for bedding. These materials ensure a sturdy and attractive toy bunk bed.
How Long Does It Take To Build A Toy Bunk Bed?
Building a toy bunk bed typically takes 2 to 4 hours. Time varies based on skill level and complexity of the design.
Can I Customize The Toy Bunk Bed Design?
Yes, you can customize size, colors, and decorations. Personalizing the toy bunk bed makes it unique and fun for children.
Is It Safe To Use Power Tools For This Project?
Power tools are safe if used correctly with protective gear. Always follow instructions and supervise children during the building process.
Conclusion
Making a toy bunk bed is a fun and simple project. You can use basic tools and easy steps. This craft helps improve your skills and creativity. Kids will love playing with a handmade bunk bed. Try different designs to fit your toys perfectly.
Remember to work carefully and enjoy the process. This project brings joy and adds a special touch to playtime. Give it a try and see the smiles it creates.