Are you looking for a simple, stylish way to organize your books and add charm to your space? Making a wooden crate bookshelf might be the perfect project for you.
It’s easy, affordable, and lets you create something unique with your own hands. Imagine having a bookshelf that fits your style and holds your favorite reads just the way you want. Keep reading, and you’ll discover step-by-step how to build this practical and eye-catching piece, even if you’re new to woodworking.
Your perfect bookshelf is closer than you think!
Materials And Tools Needed
Creating a wooden crate bookshelf starts with gathering the right materials and tools. Choosing quality wood and having the proper equipment makes the project easier and the final product strong. This section covers the types of wood, essential tools, and extra supplies you need for building your bookshelf.
Types Of Wood Suitable For Crates
Wood choice affects durability and look. Pine is a common choice. It is light, easy to cut, and affordable. Oak is stronger but costs more. Cedar offers natural resistance to moisture and pests. Plywood can also work well for a smooth finish. Pick wood that fits your budget and style.
Essential Tools For Assembly
A drill is necessary for making holes and screwing parts together. A saw helps cut wood to size. Sandpaper smooths rough edges. A measuring tape ensures accurate dimensions. A screwdriver is helpful for tightening screws. Clamps hold pieces steady during assembly. These tools make the building process smoother and safer.
Additional Supplies And Hardware
Screws and nails join wood pieces securely. Wood glue adds extra strength to joints. Wood filler hides holes or cracks. Paint or wood stain finishes the shelf and protects it. Brushes or rags apply the finish evenly. Safety gear like gloves and goggles protect your hands and eyes. Having these supplies ready speeds up your work.
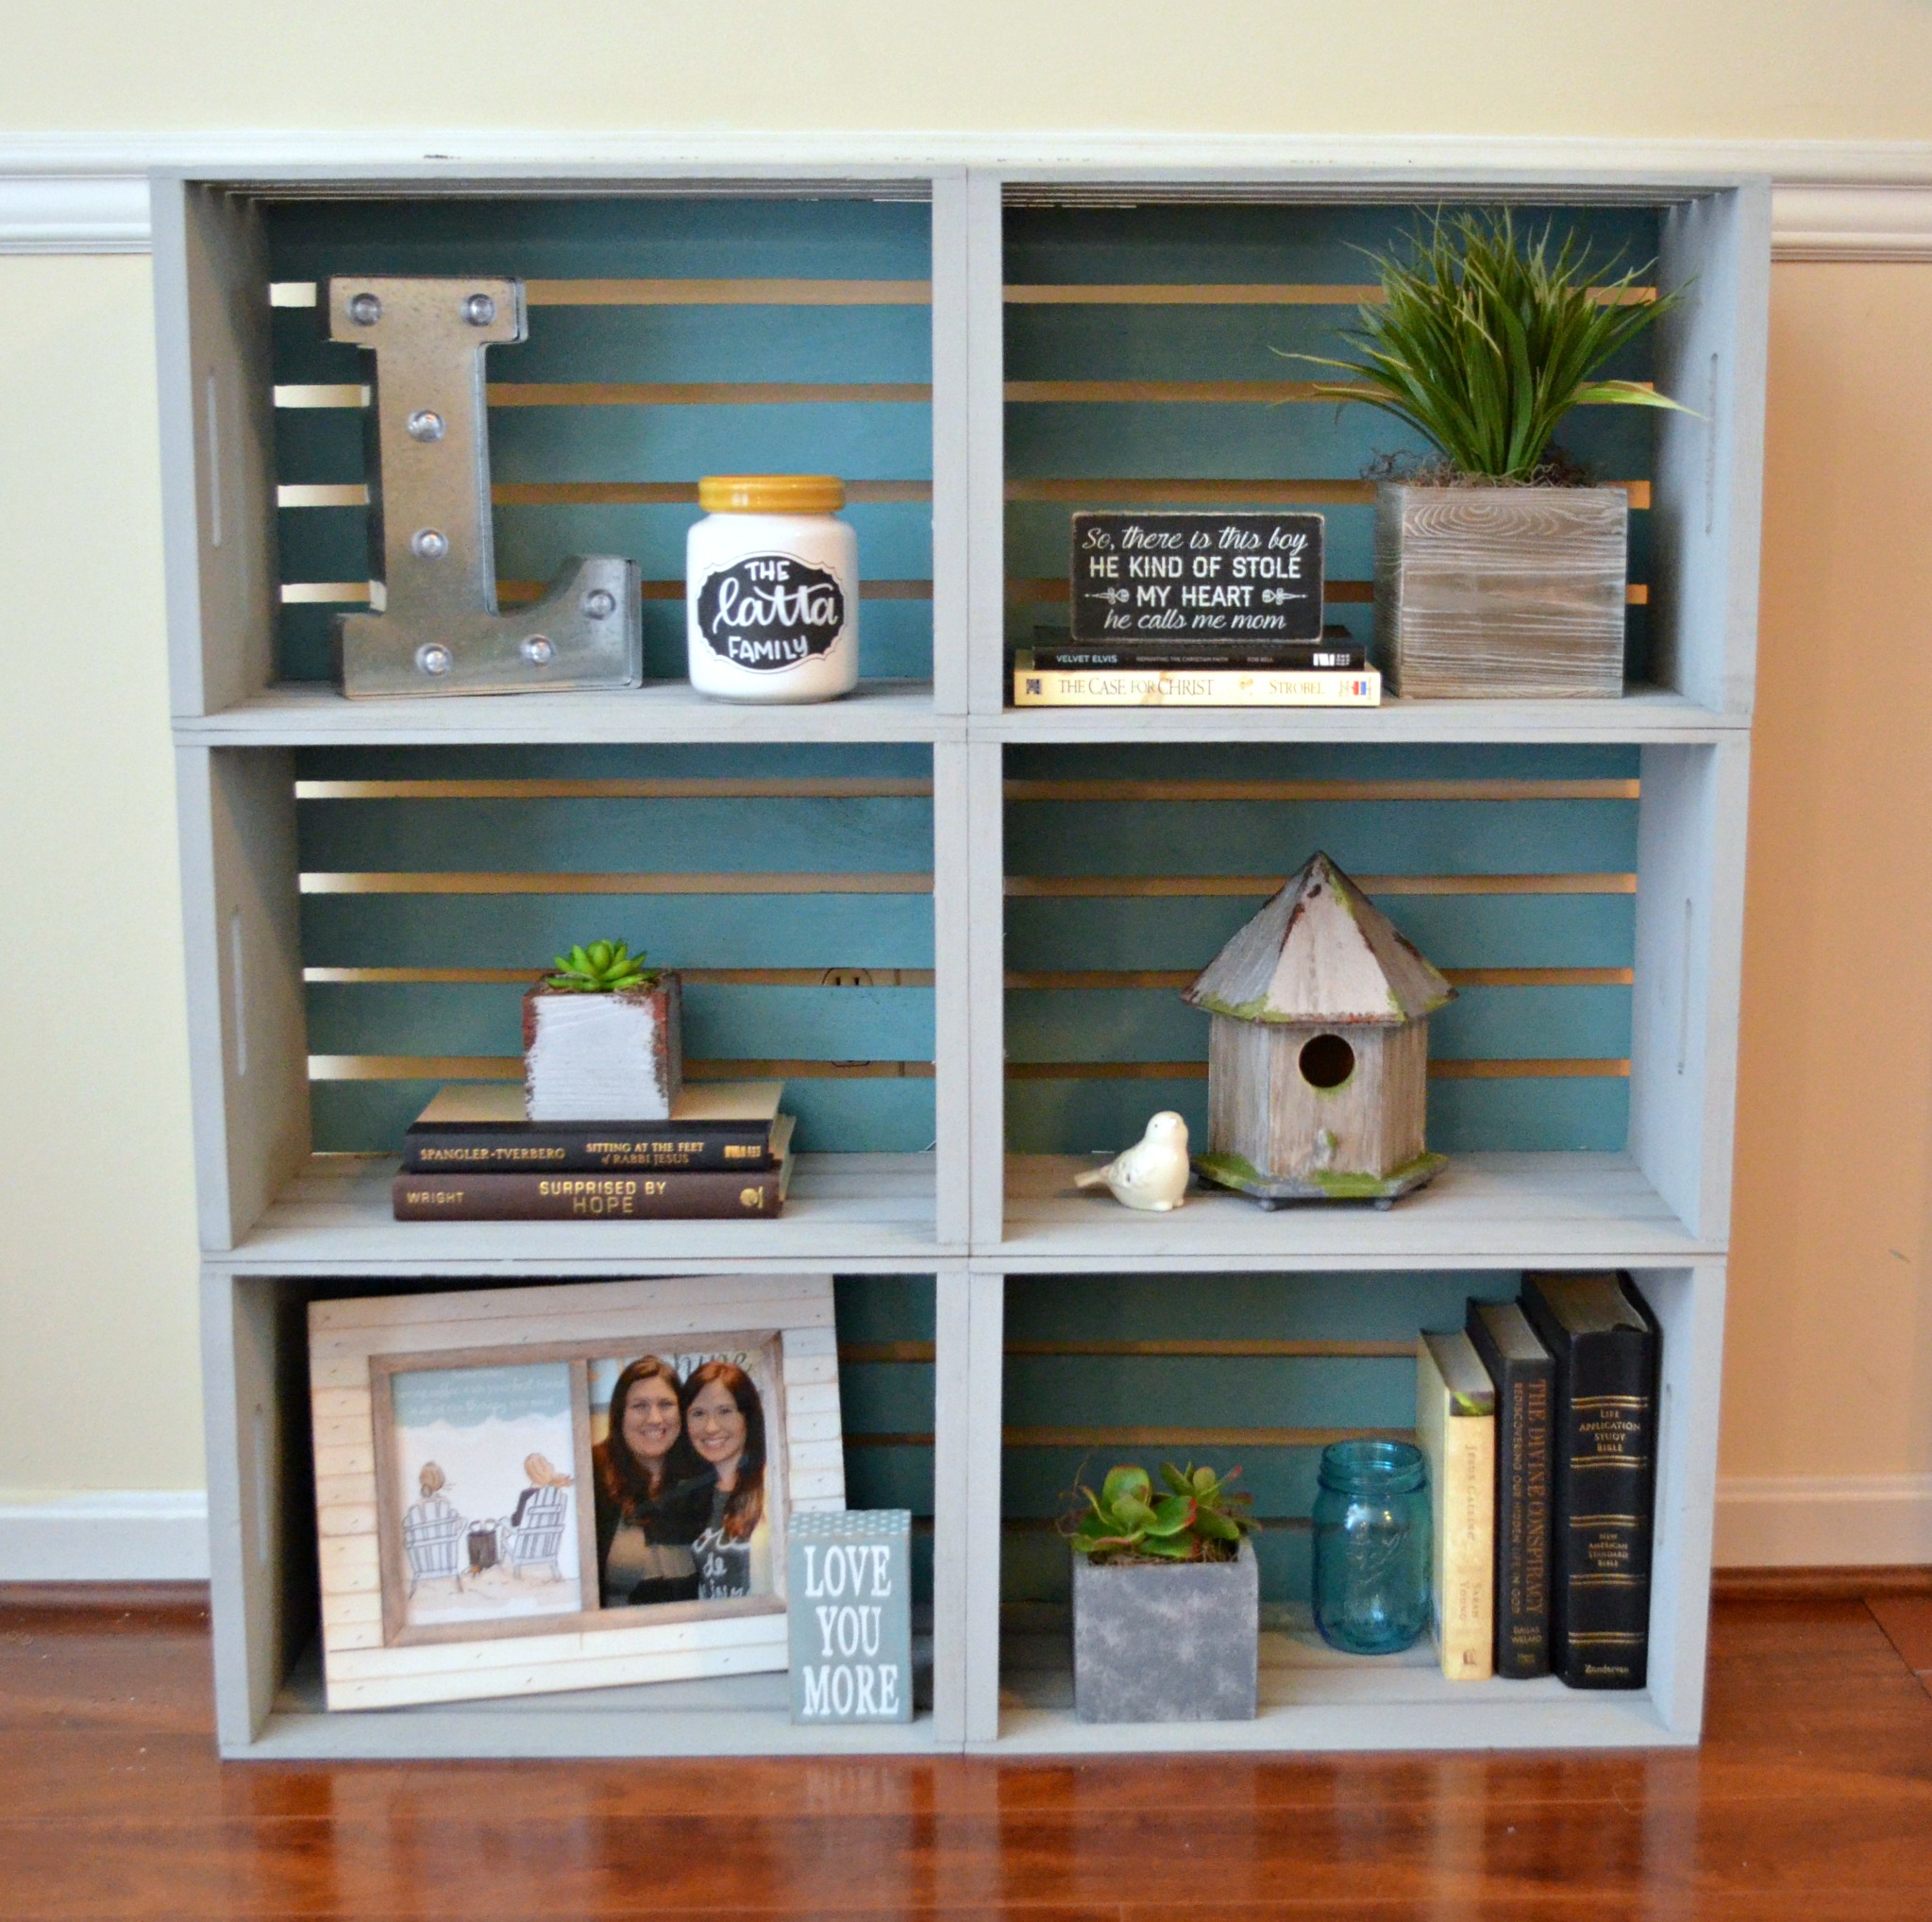
Credit: www.amylattacreations.com
Choosing The Right Crates
Choosing the right wooden crates is important for making a sturdy bookshelf. The crates must fit well in your space and hold your books safely. Picking the correct size and shape helps the shelf look balanced and neat. Quality crates last longer and support heavy books without breaking.
Size And Shape Considerations
Select crates that match the space where you want the bookshelf. Measure the area carefully before buying. Square or rectangular crates work best for stacking. Taller crates allow for bigger books or decorative items. Keep the width wide enough to hold standard book sizes. The shape affects the overall style of your shelf.
Where To Source Wooden Crates
Wooden crates come from many places. Check local craft stores or home improvement shops. Online marketplaces offer a wide range of options. Farmers’ markets or fruit stands sometimes sell used crates. Reclaimed wood stores provide unique and eco-friendly choices. Choose crates that fit your budget and style.
Inspecting Crates For Quality
Look closely at the wood before buying. Avoid crates with cracks, splinters, or loose nails. The wood should feel solid and smooth. Check for signs of rot or mold. Strong joints help the crate hold weight. Quality crates make your bookshelf safer and more durable.
Preparing The Crates
Preparing the crates is the first step to create a sturdy bookshelf. It helps the wood look nice and last longer. Taking time to clean, sand, and finish the wood makes a big difference. This process also protects the wood from damage and wear.
Cleaning And Sanding
Start by removing dust and dirt from the crates. Use a brush or cloth to clean all surfaces. Next, sand the wood with medium-grit sandpaper. Sanding smooths rough spots and removes old paint or stains. Finish with fine-grit sandpaper for a smooth touch. Clean away dust after sanding with a dry cloth.
Staining Or Painting Options
Choose a stain or paint to match your style. Stains keep the wood’s natural look while adding color. Paint offers many color choices and a bold finish. Apply thin, even coats using a brush or sponge. Let each coat dry fully before adding another. This ensures a smooth, even color.
Sealing For Durability
Seal the crates to protect them from moisture and scratches. Use a clear wood sealer or varnish for the best result. Apply a thin layer with a brush and let it dry. Add a second coat for extra protection. Sealing keeps your bookshelf looking good for years.

Credit: smokymountainfarmhouse.com
Designing Your Bookshelf Layout
Designing your bookshelf layout is the first step in building a wooden crate bookshelf. It helps you plan how the crates will fit together. A good design makes the bookshelf strong and useful. You can decide the shape, size, and style before building.
Take time to think about what you want. The layout guides the whole project. It keeps your work organized and clear.
Arranging Crates For Stability
Place crates so the weight spreads evenly. Stack crates directly on top of each other. Avoid overhanging crates as they can tip over. Use a flat surface to keep the shelf steady. Add screws or brackets to join crates tightly.
Planning Shelf Dimensions
Measure the space where the bookshelf will stand. Decide the height, width, and depth of your shelf. Make sure shelves fit your books and items. Leave extra room for larger books or decorations. Use a tape measure and draw your plan on paper.
Customizing For Space And Style
Think about the room’s size and shape. Choose crate colors and finishes that match your decor. Mix vertical and horizontal crates for a unique look. Add doors or backs to crates for a polished style. Personal touches make your bookshelf one of a kind.
Assembly Process
The assembly process is a key step to build a strong wooden crate bookshelf. It shapes the final look and stability of your project. Taking time to connect and secure each crate ensures safety and durability. Follow clear steps for a smooth build.
Connecting Crates Securely
Place crates side by side or stack them as planned. Use screws or bolts to join crates through the sides. Drill pilot holes first to avoid wood splitting. Tighten screws evenly to hold crates firmly together. Check alignment often to keep shelves straight.
Reinforcing Joints
Strengthen the bookshelf by adding corner brackets or metal plates. Attach brackets on the inside corners of joined crates. Use wood glue along joints for extra bonding. Let glue dry fully before moving the shelf. Reinforced joints prevent wobbling and increase weight support.
Adding Backing Or Support Boards
Cut plywood or thin boards to fit the back of your shelf. Attach backing boards using nails or screws to add stability. Backing also helps keep crates square and prevents items from falling out. Choose a smooth board for a clean look. Secure the boards tightly for better shelf strength.
Finishing Touches
Finishing touches give your wooden crate bookshelf a polished look. These final steps improve both style and function. Small details make a big difference in your project’s success.
Adding Feet Or Casters
Attach feet or casters to raise your bookshelf from the floor. Feet add stability and protect wood from moisture. Casters make moving the shelf easy. Choose rubber casters to avoid floor scratches. Secure them tightly with screws. Test the shelf’s balance after installation.
Decorative Enhancements
Decorate your bookshelf for a unique look. Paint or stain crates to match your room. Use stencils or decals for patterns. Add handles or metal corners for style and strength. Sand edges smooth for safety and beauty. Let paint or stain dry completely before use.
Final Inspection And Safety Checks
Check all screws and nails are firmly in place. Look for rough edges or splinters. Sand any sharp spots carefully. Make sure the shelf stands steady and level. Test the weight capacity by adding books slowly. Fix any loose parts before use. Safety ensures your bookshelf lasts long and stays safe.
Maintenance Tips
Proper care keeps your wooden crate bookshelf looking great for years. Regular maintenance prevents damage and preserves its natural beauty. Small actions can make a big difference in your shelf’s life.
Cleaning And Dusting
Use a soft cloth to remove dust gently. Avoid wet cloths that can harm the wood. Dust at least once a week to keep dirt from building up. A microfiber cloth works best to trap dust without scratching.
Repairing Minor Damages
Fix small scratches with wood filler or a matching wood marker. Sand rough spots lightly to smooth the surface. Tighten loose screws or nails to keep the crate stable. Quick repairs stop damage from growing worse.
Prolonging Wood Life
Apply wood oil or wax every few months to protect the wood. Keep the shelf away from direct sunlight and moisture. Use coasters or mats under items to avoid stains. Proper care helps the wood stay strong and fresh longer.

Credit: taramichellehome.com
Frequently Asked Questions
What Materials Do I Need For A Wooden Crate Bookshelf?
You need wooden crates, sandpaper, wood screws, a drill, wood glue, paint or stain, and a sealant. These materials ensure durability and a polished look for your bookshelf.
How Do I Assemble A Wooden Crate Bookshelf?
Start by sanding the crates to smooth edges. Arrange crates in your desired shape. Secure them with screws and wood glue for stability.
Can I Customize The Size Of The Bookshelf?
Yes, you can customize by using different crate sizes or stacking more crates. This flexibility suits your space and storage needs.
How Do I Finish And Protect The Wooden Crates?
Apply paint or wood stain for color and aesthetics. Seal with a clear coat to protect against moisture and wear.
Conclusion
Building a wooden crate bookshelf is a simple, fun project. It saves money and adds charm to any room. You only need basic tools and some patience. Each step brings you closer to a unique piece. Customize it with paint or stain for a personal touch.
Enjoy the feeling of making something useful with your hands. This bookshelf holds books, plants, or decorations. It fits well in small or big spaces. Try this project to brighten your home and learn new skills.