Are you looking for a unique way to organize your books and add charm to your space? Making an apple crate bookshelf is easier than you think, and it gives your room a cozy, rustic touch.
Imagine turning simple wooden crates into a stylish, practical shelf that holds your favorite reads and decor. In this guide, you’ll learn step-by-step how to build your own apple crate bookshelf, even if you have little experience with DIY projects.
By the end, you’ll have a beautiful piece that’s both functional and full of character. Ready to create something special for your home? Let’s get started!
Credit: www.etsy.com
Materials Needed
Building an apple crate bookshelf is a fun and simple project. Having the right materials makes the process smooth and enjoyable. Prepare all items before starting to save time and avoid frustration.
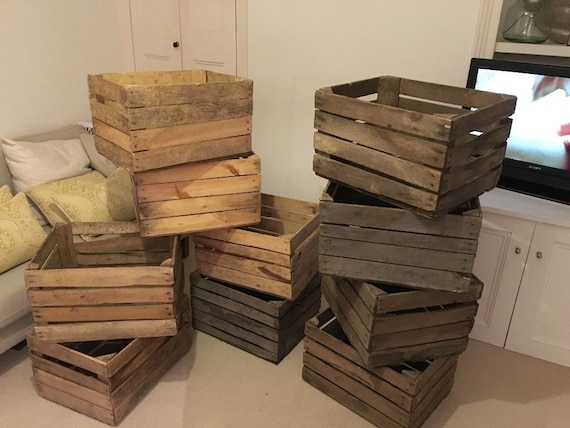
Choosing The Right Apple Crates
Select sturdy apple crates with solid wood. Avoid crates that are cracked or weak. Medium-sized crates work best for bookshelves. Look for crates that have a clean surface for easy painting or staining. Ensure crates have enough space to hold your books comfortably.
Tools Required
Gather basic tools for assembling the bookshelf. A drill helps with screws and makes the work faster. A screwdriver is needed to secure the crates together. Sandpaper smooths rough edges for safety and better finish. A measuring tape ensures correct spacing between crates. A pencil is useful for marking drill points.
Additional Supplies
Use wood screws to join the crates securely. Wood glue adds extra strength to joints. Paint or wood stain can improve the bookshelf’s look. Brushes or rags help apply paint or stain evenly. Felt pads protect floors from scratches when the shelf is placed. Clamps hold crates in place while glue dries.
Credit: www.etsy.com
Preparing The Crates
Preparing the crates is the first step to make your apple crate bookshelf strong and beautiful.
This step helps the crates look better and last longer in your home.
Cleaning And Sanding
Start by removing dirt and dust from the crates using a brush or cloth.
Next, sand all surfaces with medium-grit sandpaper for smoothness.
Focus on rough edges and splinters to avoid injuries.
Sanding also helps paint or stain stick better to the wood.
Painting And Staining Options
Choose paint or stain based on your room’s style and color.
Paint covers the wood completely and gives a bright finish.
Stain shows the wood’s natural grain while adding color.
Apply with a brush or cloth in thin, even layers for best results.
Sealing For Durability
Seal the crates with clear varnish or polyurethane after painting or staining.
This protects the wood from water, dust, and scratches.
Use a clean brush and apply two or three thin coats.
Let each coat dry fully before adding the next one.
Designing Your Bookshelf
Designing your apple crate bookshelf is an exciting part of the project. It sets the foundation for how your shelf will look and function. Thoughtful design helps you use space well and keep the shelf strong. Planning carefully saves time and effort during building.
Consider your needs and the room where the shelf will go. This helps create a design that fits perfectly and serves its purpose. Focus on simple, clear ideas to make your project easier.
Layout Ideas
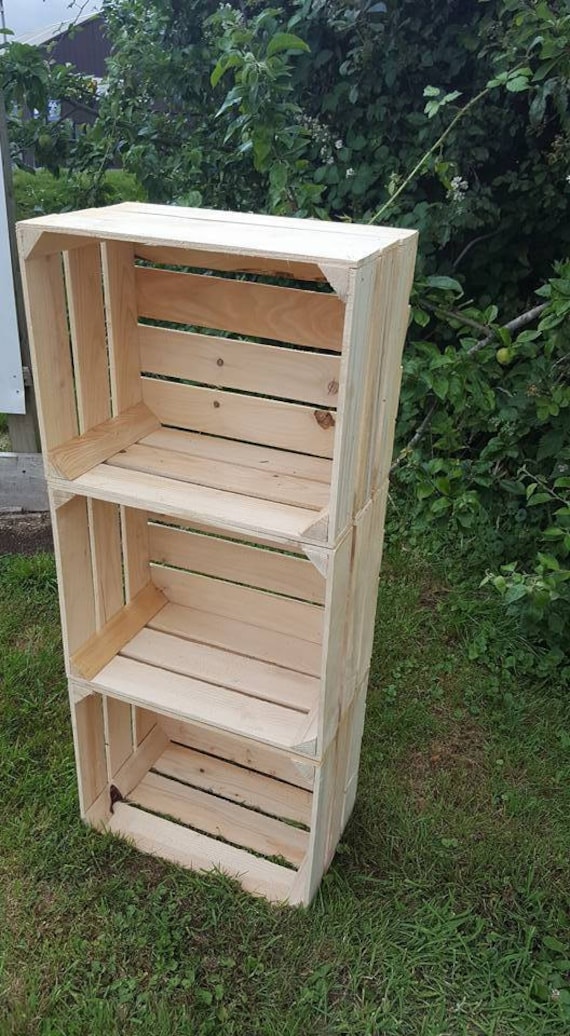
Start by deciding the shape of your bookshelf. You can stack crates vertically for a tall shelf. Or place them side by side for a wide shelf. Mixing both ways creates unique designs.
Think about how many crates you want to use. More crates give more storage but need more space. Try drawing your layout on paper first. This helps see how the shelf will look.
Measuring And Marking
Accurate measuring is key. Measure the crates carefully before building. Use a tape measure and write down all numbers.
Mark where each crate will go on the floor or wall. Mark drill points and places to join crates. Clear marks make assembly easier and faster.
Planning For Stability
Stability keeps your bookshelf safe and strong. Plan to attach crates firmly to each other. Use screws or brackets to hold crates in place.
Think about the shelf’s base. It should be flat and solid to support weight. Add wall anchors if the shelf is tall. This stops it from tipping over.
Assembling The Crates
Assembling the crates is the key step to building your apple crate bookshelf. This process turns separate crates into a sturdy and functional shelf. Proper assembly ensures your bookshelf holds books safely and looks great. Take your time to align and join crates carefully. Follow simple methods for a strong connection.
Joining Techniques
Start by deciding how to join the crates. You can stack them or place them side by side. Use wood glue to add extra hold between contact surfaces. Clamps help keep crates tight while glue dries. For a stronger bond, try using dowels or biscuits inside the crate edges. These small pieces fit into drilled holes to lock crates together. Choose a joining method that fits your tools and skill level.
Using Screws And Brackets
Screws add solid support to your bookshelf. Drill pilot holes to avoid splitting the wood. Attach crates with screws through the sides or backs. Metal brackets boost stability, especially for larger shelves. Fix brackets inside corners to hold crates firmly. Use screws that match bracket holes for tight fitting. Screws and brackets keep your bookshelf safe and steady.
Ensuring Level And Balance
Check the level of your shelf often during assembly. Use a bubble level on top of each crate layer. Adjust crates by adding small shims under corners if needed. Balance prevents wobbling and uneven weight on shelves. Make sure the bookshelf stands flat on the floor. A balanced shelf lasts longer and looks professional.
Finishing Touches
Finishing touches give your apple crate bookshelf a polished look. They improve stability and style. These final steps make your project ready for daily use. Let’s explore key finishing details to complete your bookshelf.
Adding Back Panels
Back panels add strength to your bookshelf. They stop books from falling behind. Use plywood or thin wood sheets cut to size. Attach panels with nails or screws. Make sure the panels fit snugly to the frame. This step also helps keep your shelf square.
Incorporating Decorative Elements
Decorative touches make your bookshelf unique. Paint the crates in colors that match your room. Add stencils or simple patterns for style. You can also attach small trim pieces for a finished look. These details make your shelf a focal point.
Protective Coating
A protective coating keeps wood safe from damage. Use clear varnish or wood sealant. Apply with a brush in thin, even layers. Let each coat dry before adding another. This finish makes your bookshelf last longer and look better.
Placement And Styling
Placement and styling play a big role in how your apple crate bookshelf looks and fits in your space. Choosing the right spot and organizing the shelf well will make it both useful and attractive. Styling helps show off your personality and keeps your items easy to find.
Best Locations For Your Bookshelf
Pick a spot with enough light to read the book titles easily. A living room corner or near a window works well. Avoid damp or very sunny places to keep the wood safe. Make sure the shelf does not block walkways or doors. Think about where you spend most time reading or relaxing.
Arranging Books And Decor
Place books upright and group them by size or color for neatness. Mix in small plants or photo frames to add life to the shelf. Use baskets or boxes in some crates to hold small items. Leave some space empty to avoid a crowded look. Balance heavy and light items for a stable, pleasing style.
Maintaining Your Shelf
Dust the shelf regularly to keep it clean and fresh. Check the wood for cracks or loose nails often. Wipe spills quickly to avoid stains or damage. Tighten screws if the shelf feels shaky. Treat the wood with oil or wax once a year to keep it strong and looking good.
Troubleshooting Tips
Building an apple crate bookshelf is fun and rewarding. Sometimes, small problems appear during or after the build. Troubleshooting these issues helps keep your bookshelf strong and good-looking. Here are simple tips to fix common problems.
Fixing Wobbly Shelves
Wobbly shelves can make your bookshelf unsafe. Tighten all screws and nails firmly. Use a level tool to check if shelves are even. Add wood glue to joints for extra strength. Place small wooden shims under loose corners. This stops movement and makes shelves stable.
Repairing Scratches And Dents
Scratches and dents spoil the look of your bookshelf. Lightly sand the damaged area with fine sandpaper. Fill deeper dents with wood filler and let it dry. Sand again for a smooth finish. Apply matching stain or paint to hide repairs. This keeps your bookshelf looking neat.
Extending Shelf Lifespan
Proper care makes your bookshelf last longer. Avoid placing heavy items on one shelf. Keep the bookshelf away from moisture and direct sunlight. Use a clear sealant to protect the wood surface. Clean dust gently with a soft cloth. These steps maintain strength and beauty over time.

Credit: www.ebay.com
Frequently Asked Questions
What Materials Are Needed For An Apple Crate Bookshelf?
You need wooden apple crates, screws, a drill, sandpaper, wood stain or paint, and a screwdriver. Optional items include wood glue and brackets for extra stability.
How Do You Assemble An Apple Crate Bookshelf?
Stack crates in your desired layout, then secure them using screws or brackets. Sand and finish the wood for a polished look.
Can Apple Crates Hold Heavy Books Safely?
Yes, apple crates can support moderate weight. Ensure proper fastening and consider reinforcing with brackets for heavy books.
How To Customize The Apple Crate Bookshelf Design?
You can paint or stain crates, add decorative knobs, or arrange crates asymmetrically for a unique style.
Conclusion
Building an apple crate bookshelf is a simple and fun project. You only need a few tools and materials to start. This bookshelf adds charm and storage to any room. It fits well in small spaces and holds books or decorations.
You can paint or stain it to match your style. Making it yourself saves money and gives pride in your work. Try this project to enjoy a creative and useful piece at home. You will love how easy and rewarding it feels.