Are you tired of your old bathroom vanity cabinet that doesn’t fit your style or needs? Imagine having a custom piece that perfectly matches your space and saves you money.
Making your own bathroom vanity cabinet might sound tricky, but it’s easier than you think. In this guide, you’ll discover simple steps and practical tips to build a beautiful, sturdy cabinet that transforms your bathroom. Ready to take control of your bathroom makeover?
Let’s get started!
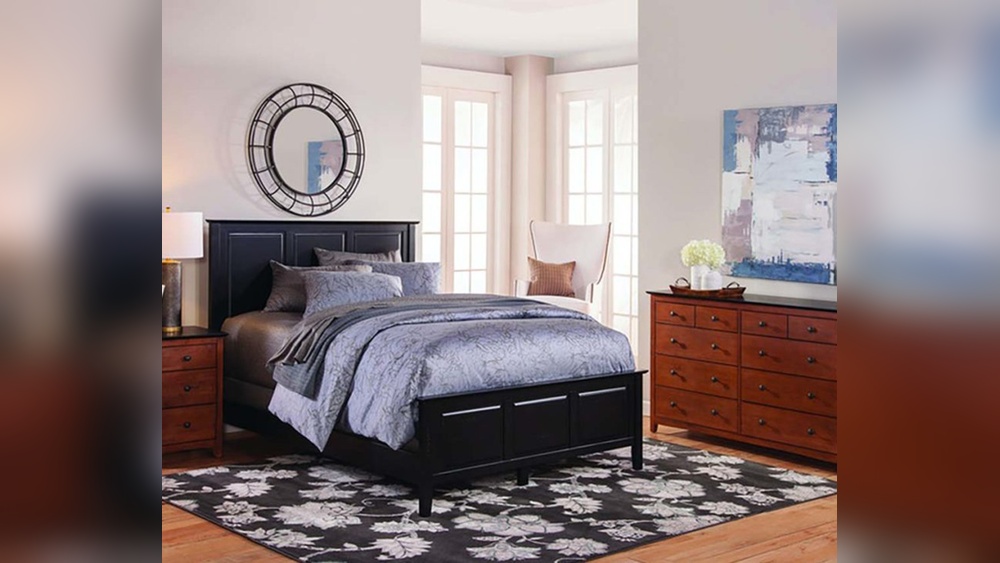
Credit: castacabinetry.com
Choosing Materials
Choosing the right materials for your bathroom vanity cabinet is key to a lasting and beautiful result. The materials affect the cabinet’s look, strength, and resistance to moisture. Careful selection ensures your vanity stands up to daily use and stays attractive over time.
Selecting Wood Types
Wood is the most common choice for bathroom vanities. Solid hardwood like oak, maple, or cherry offers durability and a classic look. These woods resist dents and scratches well.
Plywood is a budget-friendly option. It is stable and less likely to warp in humid bathrooms. Look for plywood with a smooth veneer for a nice finish.
MDF (medium-density fiberboard) is affordable and easy to paint. It does not handle water well, so seal it properly to prevent damage.
Picking Hardware And Finishes
Hardware includes handles, knobs, and hinges. Choose corrosion-resistant metals like stainless steel or brass. These last longer in moist environments.
For finishes, use water-resistant paints or stains. A good finish protects the wood and keeps the cabinet looking fresh. Glossy finishes are easier to clean but show fingerprints.
Matte finishes hide smudges but might need more care. Seal all surfaces well to prevent water damage and swelling.
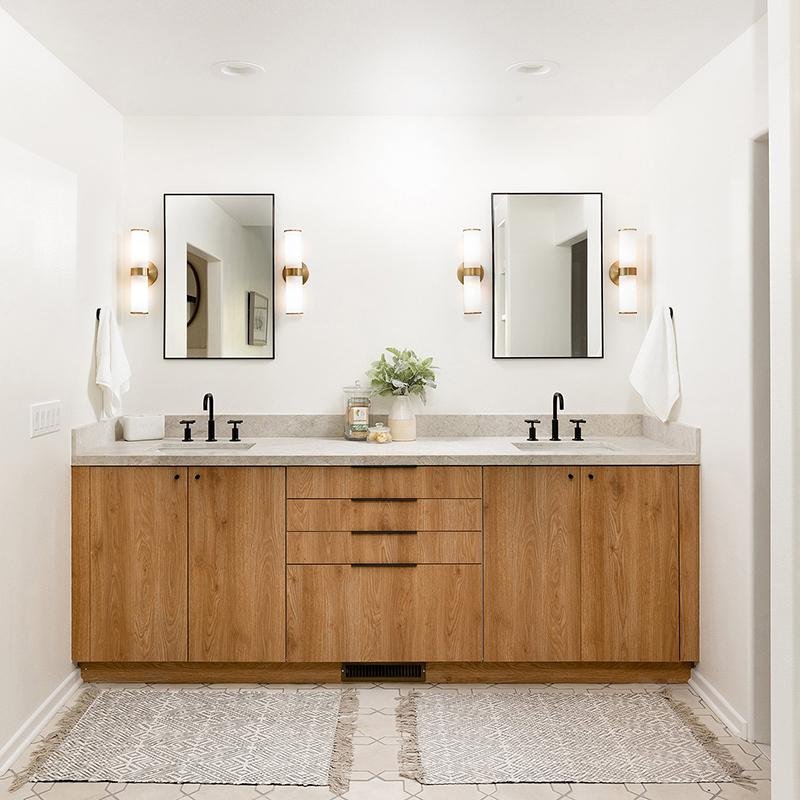
:strip_icc()/modern-graphic-bathroom-natural-vanity-af5a8dee-ee59fe31171d4a52a3452c28851bee09.jpg)
Credit: www.bhg.com
Planning Your Design
Planning your bathroom vanity cabinet design is the first step to a successful project. It sets the foundation and guides every decision. Careful planning saves time, money, and effort later.
Start by understanding the space you have. Think about how you use your bathroom and what storage you need. This helps create a practical and attractive vanity design.
Measuring Bathroom Space
Measure the width, depth, and height of your bathroom area. Use a tape measure for accuracy. Write down all numbers clearly.
Measure the distance between walls and any obstacles like pipes or doors. These affect the size and shape of your vanity.
Check for electrical outlets and light fixtures. These can limit where you place the vanity or the sink.
Sketching The Vanity Layout
Draw a simple sketch of your bathroom wall. Mark the measurements you took earlier.
Sketch the vanity shape and size on the drawing. Use scale, like 1 inch equals 1 foot, for accuracy.
Plan where the sink, faucet, and storage will go. Think about how easy it will be to use each part.
Try different layouts on paper before starting. This helps avoid mistakes and improves the design.
Gathering Tools
Gathering the right tools is the first step in making a bathroom vanity cabinet. Good tools make the project easier and help you get better results. Preparing your workspace with all necessary items saves time and reduces mistakes. Focus on both woodworking tools and safety equipment. Both are equally important for a smooth build.
Essential Woodworking Tools
Start with a tape measure to mark accurate cuts. A saw is needed to cut wood pieces to size. A drill helps to make holes and drive screws quickly. Sandpaper or an electric sander smooths rough edges for a clean finish. A carpenter’s square ensures corners are straight and perfect. Clamps hold wood pieces firmly while you work. Wood glue strengthens joints and adds stability. Having these tools ready speeds up the building process.
Safety Equipment
Protect your eyes with safety goggles to avoid debris. Wear ear protection to guard against loud tool noises. Use a dust mask to prevent breathing in sawdust. Gloves protect your hands from splinters and sharp edges. Proper footwear keeps your feet safe from falling objects. Safety is important for a risk-free work environment. Never skip using safety gear during the project.
Cutting And Preparing Wood
Cutting and preparing wood is a key step in making a bathroom vanity cabinet. It sets the foundation for a strong, beautiful piece. Careful preparation helps the cabinet fit well and last longer. Accurate cutting saves time and avoids waste. Follow clear steps to measure, mark, and cut wood precisely.
Measuring And Marking
Start by measuring the wood carefully. Use a tape measure for accuracy. Mark the cut lines with a pencil. Double-check each measurement before marking. Mark both sides of the wood. This helps guide your cuts and keeps lines straight. Clear markings reduce mistakes and improve results.
Making Precise Cuts
Use the right saw for clean cuts. A circular saw works well for straight lines. Cut slowly along the marked lines. Keep your hand steady to avoid slipping. Check the cut edges for smoothness. Sand any rough spots to prevent splinters. Precise cuts make assembly easier and improve the cabinet’s look.
Assembling The Cabinet Frame
Assembling the cabinet frame is a key step in making a bathroom vanity cabinet. This frame forms the main structure. It needs to be strong and square. Take your time to fit each part precisely. A solid frame ensures the cabinet lasts long and holds weight well.
Joining Panels
Start by aligning the side panels with the bottom and top panels. Use clamps to hold them in place. Check that all edges match perfectly. This keeps the frame square and steady. Use a carpenter’s square to confirm corners are right angles. Proper alignment prevents problems later in the build.
Securing With Screws And Glue
Apply wood glue on the edges before joining panels. Glue adds strength and keeps joints tight. Next, drill pilot holes to avoid splitting the wood. Insert screws to lock the panels firmly. Space screws evenly for balanced support. Wipe off excess glue before it dries for a clean finish.
Adding Doors And Drawers
Adding doors and drawers to your bathroom vanity cabinet gives it a finished look. These parts help keep your items organized and out of sight. Proper installation ensures smooth use and long-lasting function. Focus on careful measuring and fitting for best results.
Installing Hinges
Start by choosing the right hinges for your doors. Concealed hinges work well for a clean look. Mark where the hinges will go on the door and cabinet frame. Drill pilot holes carefully to avoid splitting the wood. Attach the hinges to the door first, then to the cabinet. Check the door alignment and adjust the screws as needed. The door should open smoothly and close tightly without gaps.
Fitting Drawer Slides
Select drawer slides that support the drawer size and weight. Measure the drawer and cabinet sides for accurate placement. Attach the slides inside the cabinet first, making sure they are level. Secure the matching part of the slide to the drawer sides. Slide the drawer into the cabinet and test its movement. Adjust the slides if the drawer sticks or does not close fully. Well-fitted slides allow easy opening and closing every time.
Sanding And Finishing
Sanding and finishing are key steps in making a bathroom vanity cabinet. They give your cabinet a smooth look and protect the wood. Good sanding removes rough spots and helps paint or stain stick better. Finishing adds color and seals the surface from water and wear.
Smoothing Surfaces
Start with coarse sandpaper to remove large bumps and scratches. Use even strokes along the wood grain. Change to finer sandpaper to smooth the surface further. Wipe off dust with a clean cloth after sanding. Check for rough patches and sand again if needed. Smooth surfaces help paint or stain cover evenly.
Applying Paint Or Stain
Choose paint or stain that suits your bathroom style. Use a brush or sponge to apply thin, even coats. Let the first coat dry fully before adding more. This prevents drips and uneven color. For a natural look, stain enhances the wood grain. For bright colors, paint covers the wood completely. Finish with a clear sealant to protect your work.
Installing The Vanity
Installing the bathroom vanity cabinet is a key step in your project. It sets the foundation for your bathroom’s look and function. Taking care to position it right and secure it well ensures lasting stability. This section guides you through proper placement and fastening.
Positioning In The Bathroom
Place the vanity near plumbing connections for sinks. Check the space around it for easy movement. Align it with other bathroom fixtures for a balanced look. Use a level to confirm it sits flat on the floor. Adjust with shims if the floor is uneven. Mark the wall edges lightly to guide installation.
Securing To Walls And Floor
Secure the vanity to the wall studs for strong support. Use a stud finder to locate the studs behind drywall. Drill pilot holes through the vanity back panel at stud points. Fasten with long screws that reach the studs firmly. Avoid screwing into plumbing pipes or electrical wires. Add corner braces if extra strength is needed. For tile floors, use anchors designed for masonry if screwing into the floor.
Maintaining Your Vanity
Maintaining your bathroom vanity cabinet keeps it looking fresh and lasting longer. Regular care prevents damage and costly repairs. Simple steps help keep the wood and finish in great shape. Clean surfaces and fix small issues quickly for a neat vanity. Follow easy tips to protect your cabinet from moisture and wear.
Cleaning Tips
Use a soft cloth for daily dusting. Avoid harsh cleaners that can damage the finish. Mild soap and water work well for stains. Wipe spills immediately to stop water damage. Dry the cabinet after cleaning to prevent moisture buildup. Clean handles and hinges often to keep them shiny.
Handling Repairs
Fix small scratches with wood filler or touch-up markers. Tighten loose screws on doors and drawers. Replace damaged hardware to improve function. Check for water leaks under the sink regularly. Sand and refinish worn areas to restore the surface. Act fast to stop small problems from growing.
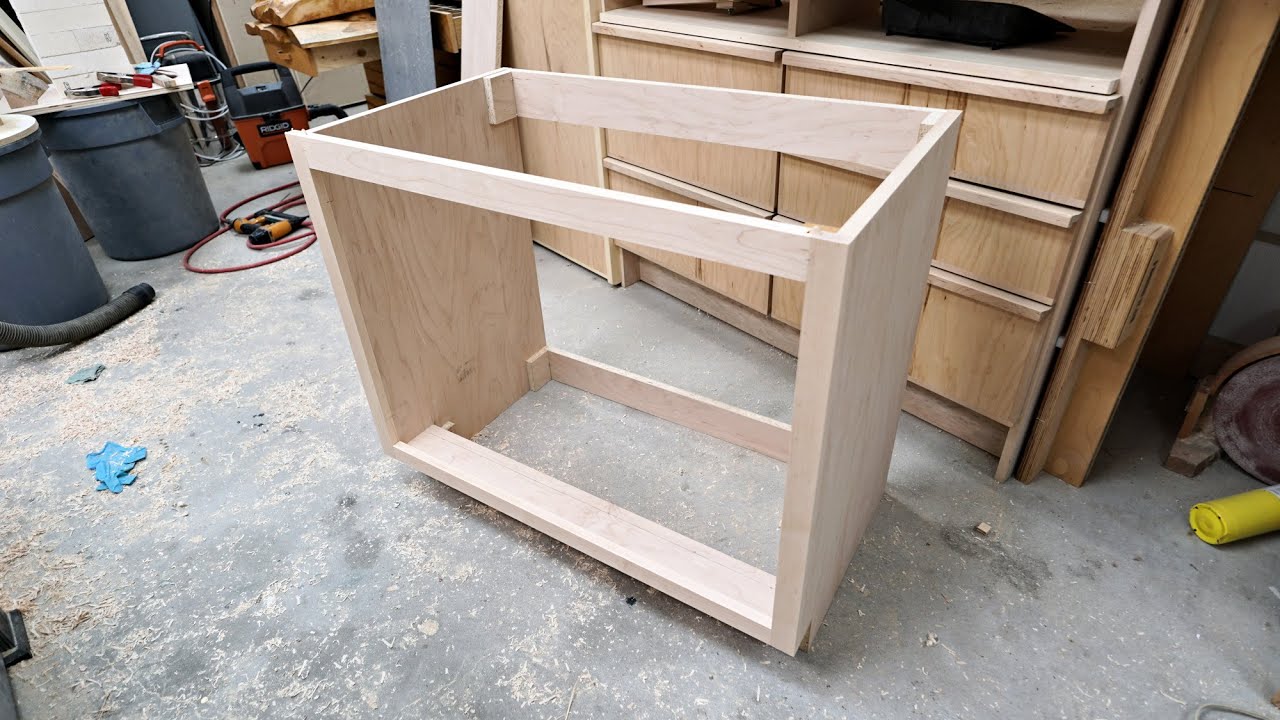
Credit: www.youtube.com
Frequently Asked Questions
What Materials Are Best For Bathroom Vanity Cabinets?
Wood is the most popular material for bathroom vanities. Plywood and MDF offer durability and moisture resistance. Solid wood like oak or maple provides a long-lasting and stylish finish. Choose water-resistant finishes to protect against bathroom humidity and extend cabinet life.
How Do I Measure For A Bathroom Vanity Cabinet?
Measure the available wall space width and depth accurately. Consider plumbing and door clearance when selecting cabinet size. Also, measure the height to ensure comfortable use. Always double-check measurements before purchasing or building your vanity cabinet.
What Tools Are Needed To Build A Vanity Cabinet?
Essential tools include a saw, drill, screwdriver, tape measure, and level. Clamps and sanding equipment help with assembly and finishing. Safety gear like gloves and goggles is important during construction. Having these tools ensures a smooth and efficient building process.
How Can I Waterproof My Bathroom Vanity Cabinet?
Use waterproof paint or sealant on all cabinet surfaces. Apply a water-resistant varnish to protect wood from moisture. Ensure edges and joints are sealed properly. Regular maintenance helps prevent water damage and keeps your vanity looking new.
Conclusion
Making your own bathroom vanity cabinet can save money and add charm. Step-by-step, the process becomes simple and clear. Choose the right materials and tools for best results. Take your time and measure twice before cutting. Personal touches make the cabinet truly yours.
Enjoy the pride of creating something useful and beautiful. This project suits beginners and those with some skills. Try it and see how rewarding DIY work can be. Your bathroom will look fresh and neat with a handmade cabinet.