
Are you dreaming of a stylish, space-saving way to organize your books and display your favorite items? Building your own built-in bookshelf is easier than you think—and it can completely transform your room.
Imagine having a custom piece that fits perfectly into your space, adding both charm and function. In this guide, you’ll discover simple steps and expert tips to create a beautiful built-in bookshelf tailored just for you. Ready to turn your walls into a stunning storage solution?
Let’s get started!

Credit: www.younghouselove.com
Planning Your Bookshelf
Planning your built-in bookshelf sets the stage for a successful project. Careful thought helps you build a shelf that fits perfectly and looks great. This phase saves time and avoids costly mistakes. Let’s break down key steps to plan well.
Choosing The Right Location
Pick a spot that matches your needs and room style. Consider walls with enough space and no obstructions. Check for electrical outlets or vents that may interfere. Choose a place where the shelf will be easy to reach and use daily.
Measuring Space Accurately
Measure the wall space carefully using a tape measure. Note the height, width, and depth available. Measure twice to avoid errors. Think about the size of books and items you want to store. Allow extra space for shelf thickness and molding.
Selecting Materials And Tools
Choose wood that fits your budget and room design. Pine and plywood are common and easy to work with. Pick screws, nails, and brackets that hold weight well. Gather tools like a saw, drill, level, and screwdriver before starting. Good materials and tools make building easier and safer.
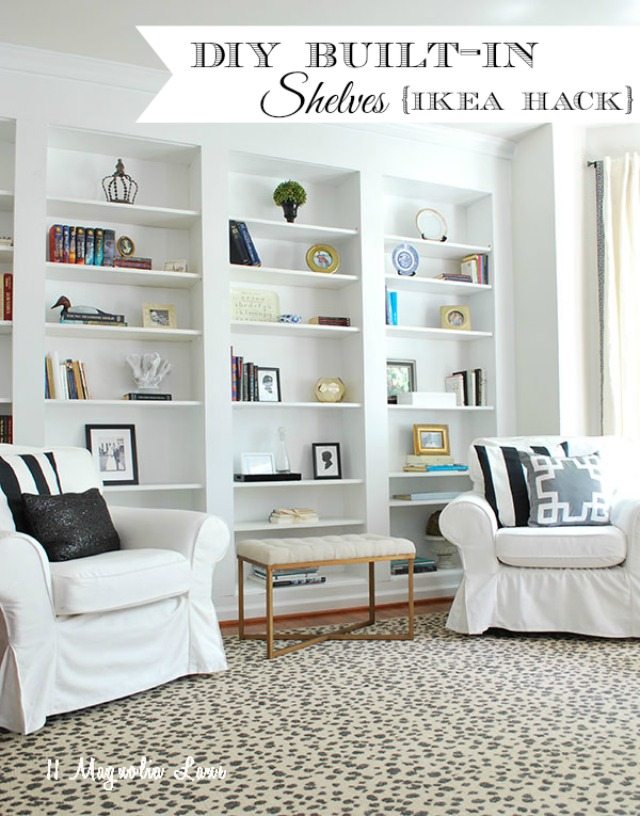
Credit: www.11magnolialane.com
Designing The Bookshelf
Designing a built-in bookshelf is an exciting first step. A well-planned design makes building easier and results in a beautiful piece. Thoughtful design helps the bookshelf fit your space and needs perfectly.
Consider your room’s style and how much storage you want. Planning shelf sizes and layout improves both form and function. Careful design creates a shelf that looks great and holds everything you need.
Deciding On Style And Size
Choose a style that matches your room’s decor. Classic, modern, or rustic styles work well. Size depends on wall space and what you want to store. Measure your wall carefully before deciding the bookshelf width and height. A bookshelf too big or small may look odd or not fit well.
Sketching Your Layout
Draw your bookshelf design on paper or use software. Sketch shelves, sides, and any trim details. Mark where each shelf will go and their lengths. A clear layout helps avoid mistakes during building. It also shows how the bookshelf fits in your room.
Considering Shelf Spacing
Space shelves for the items you plan to store. Books need about 10 to 12 inches of height per shelf. Taller items like vases need more space. Leave some extra room to avoid crowding. Adjustable shelves offer flexibility for different items.
Preparing The Area
Preparing the area is the first step in making a built-in bookshelf. This stage sets the foundation for your entire project. A clean, safe workspace helps you work faster and avoid mistakes. It also protects your home from damage during construction.
Clearing The Workspace
Start by removing all furniture and items near the wall where the bookshelf will go. Clear the floor and any shelves around the area. This gives you plenty of room to work. It also prevents dust and tools from damaging your belongings.
Protecting Surrounding Surfaces
Cover floors and nearby walls with drop cloths or plastic sheets. Use painter’s tape to secure covers and avoid slipping. Protect windows and trim from dust and paint. This keeps your home clean and saves time on cleanup later.
Gathering Safety Equipment
Safety is important during any building project. Get gloves to protect your hands from splinters and nails. Wear safety glasses to shield your eyes from dust and flying debris. Use a dust mask to avoid breathing sawdust. Having safety gear ready helps you work with confidence.
Credit: gagemadehome.com
Building The Frame
Building the frame is the first big step in making a built-in bookshelf. This frame gives the shelf its shape and strength. It must be sturdy and fit perfectly in your space. A well-built frame supports the shelves and holds all your books safely. Follow clear steps to cut, assemble, and attach the frame securely.
Cutting Wood To Size
Start by measuring the space for your bookshelf carefully. Mark the wood pieces according to these measurements. Use a saw to cut the wood straight and clean. Take your time to make sure the cuts are exact. This helps the frame fit well and look neat.
Assembling The Frame
Lay out the cut wood pieces on a flat surface. Join the pieces with wood screws or nails at the corners. Use a square tool to keep the corners at right angles. Check that the frame is level and even. Tighten all screws to make the frame strong and stable.
Securing The Frame To The Wall
Find the wall studs using a stud finder for a strong hold. Position the frame against the wall where you want the bookshelf. Drill pilot holes through the frame into the studs. Use long screws to fasten the frame tightly to the wall. Double-check that the frame is straight and solid before moving on.
Adding Shelves And Backing
Adding shelves and backing is a key step in building a sturdy built-in bookshelf. Shelves hold your books and decorations. The backing gives the bookshelf a finished look and adds strength. This part of the project needs careful attention to detail. Proper installation helps the bookshelf last longer and look great.
Installing Shelf Supports
Start by marking where each shelf will go on the sides. Use a level to keep marks straight. Install shelf supports on these marks. You can use metal brackets or wooden cleats. Make sure they are firmly attached to the wall or frame. This prevents shelves from sagging or falling under weight.
Attaching Shelves
Cut shelves to fit the space perfectly. Sand edges for a smooth finish. Place each shelf on the supports. Secure them with screws from underneath or inside the shelf. Check that shelves are level before tightening screws. Well-attached shelves stay stable and look professional.
Mounting The Back Panel
The back panel adds strength and hides wall imperfections. Use thin plywood or hardboard cut to size. Align the panel carefully with the bookshelf frame. Attach it with nails or screws, spacing them evenly. Make sure the panel is flat and tight against the frame. This step helps the bookshelf stay rigid and neat.
Finishing Touches
Finishing touches give your built-in bookshelf a polished, professional look. These final steps protect the wood and enhance its beauty. Take time with each part to ensure the best results. The right finish can make your bookshelf last for years.
Sanding And Smoothing
Start by sanding the entire bookshelf with fine-grit sandpaper. This removes rough spots and splinters. Sand along the wood grain to avoid scratches. Wipe the dust off with a damp cloth. Smooth surfaces help paint or stain stick better.
Applying Paint Or Stain
Choose paint or stain based on your room’s style. Use a brush or roller for even coats. Apply thin layers and let each dry fully before the next. Stain brings out the wood’s natural color. Paint offers many color options for a fresh look.
Adding Trim And Molding
Trim and molding add charm and detail to your bookshelf. Cut pieces to fit edges and corners precisely. Nail them in place carefully to avoid damage. Fill holes with wood filler for a seamless finish. This step gives your bookshelf a custom, built-in feel.
Maintaining Your Bookshelf
Maintaining your built-in bookshelf is key to keeping it useful and attractive. Regular care helps the wood last longer and keeps your space neat. Small efforts can prevent big repairs later.
Follow simple steps to clean, check stability, and refresh the shelf layout. These tasks help your bookshelf stay safe and functional for years.
Cleaning Tips
Dust your bookshelf often with a soft cloth or duster. Avoid harsh cleaners that can damage the wood. Use a damp cloth for sticky spots, then dry immediately. Clean shelves before adding new books or decor.
Checking For Stability
Look for loose screws or nails regularly. Tighten them to keep the shelf strong. Check for any cracks or warping in the wood. Fix small problems early to avoid bigger damage. Make sure the bookshelf is firmly attached to the wall.
Updating Shelf Layout
Change your shelf layout to fit new books or decorations. Move heavy items to lower shelves for safety. Leave some space for air and light. Rearrange items to keep the shelf looking fresh and organized. This also helps prevent wear on one spot.
Frequently Asked Questions
What Tools Do I Need To Build A Built-in Bookshelf?
You need a saw, drill, level, measuring tape, screws, wood glue, and clamps. These basic tools ensure accurate cuts and secure assembly for your bookshelf.
How Do I Measure Space For A Built-in Bookshelf?
Measure the width, height, and depth of the wall space. Account for trim and baseboards to ensure a perfect fit for your bookshelf.
What Type Of Wood Is Best For Built-in Bookshelves?
Pine, oak, and maple are popular choices. They are strong, durable, and easy to finish, making them ideal for built-in bookshelves.
How Long Does It Take To Build A Built-in Bookshelf?
Typically, it takes 1-3 days depending on size and complexity. Proper planning and tools can speed up the process.
Conclusion
Building a built-in bookshelf adds style and storage to any room. It takes some planning and basic tools. Measure your space well and choose strong materials. Cut and assemble pieces carefully for a neat look. Paint or stain to match your decor.
A built-in shelf can hold books, decor, and more. It saves space and makes your room cozier. Try this project to enjoy a personalized storage solution. Simple steps lead to great results. Start today and create your own bookshelf!