Are you ready to transform your outdoor space with furniture that lasts and looks amazing? Making your own cedar outdoor furniture is easier than you think.
Cedar is naturally strong, weather-resistant, and smells great, making it perfect for your patio or garden. In this guide, you’ll discover simple steps to create beautiful, durable pieces that fit your style and needs. Imagine relaxing on furniture you built yourself, knowing it’s made to stand up to the elements.
Keep reading, and you’ll learn everything you need to bring your outdoor furniture ideas to life.
Choosing The Right Cedar Wood
Choosing the right cedar wood is key to making durable outdoor furniture. Cedar wood offers natural beauty and strength. Picking the right type can improve your furniture’s life. Quality cedar also resists weather and insects well. This guide helps you find the best cedar for your project.
Types Of Cedar For Outdoor Use
Western Red Cedar is popular for outdoor furniture. It has a rich color and pleasant smell. The wood resists rot and insects naturally. Alaskan Yellow Cedar is another good choice. It is strong and has a light color. Eastern White Cedar is lighter and less expensive. It still offers good weather resistance. Each type suits different styles and budgets.
Benefits Of Cedar Wood
Cedar wood is lightweight and easy to work with. It resists decay without extra chemicals. The wood’s natural oils protect it from bugs. Cedar also handles moisture well. It does not warp or crack easily. Over time, cedar ages to a beautiful silver-gray color. This wood stays comfortable in hot or cold weather.
Selecting Quality Lumber
Choose cedar with straight, tight grain for strength. Avoid wood with many knots or cracks. Look for boards that feel smooth and solid. Fresh, bright color shows good quality. Check for any signs of mold or damage. Buy from trusted suppliers for the best wood. Proper lumber selection makes your furniture last longer.
Essential Tools And Materials
Making cedar outdoor furniture needs the right tools and materials. Choosing good tools helps you work faster and safer. Quality materials make sure your furniture lasts long outside. This section lists the essentials you need to start your project with confidence.
Basic Carpentry Tools Needed
You need a few basic tools for cutting and shaping cedar wood. A handsaw or circular saw is perfect for cutting boards to size. Use a drill with drill bits to make holes for screws. Sandpaper or a power sander smooths rough edges and surfaces. A tape measure and square help you measure and mark wood correctly. Clamps hold pieces tight while you work on them. A screwdriver or impact driver tightens screws securely. These tools are the foundation of any woodworking project.
Recommended Finishes And Sealants
Cedar wood needs protection from rain, sun, and insects. Use outdoor wood stain to bring out natural color. Clear sealants add a waterproof layer to prevent damage. Oils like teak or linseed oil nourish wood and keep it fresh. Apply finishes in thin coats with a brush or cloth. Let each coat dry fully before adding the next. Proper finishing extends the life of your furniture greatly.
Safety Equipment
Safety must come first in every woodworking task. Wear safety glasses to protect eyes from dust and splinters. Use ear protection if you work with noisy power tools. Gloves protect your hands from sharp edges and rough wood. A dust mask helps you avoid breathing sawdust. Work in a well-ventilated area to keep air clean. Following safety steps prevents accidents and keeps you healthy.
Designing Your Furniture
Designing your cedar outdoor furniture is the first step in creating a beautiful and durable piece. A good design helps you build furniture that fits your space and style. It also makes the building process easier and more enjoyable.
Simple Plans For Beginners
Start with easy designs that use basic shapes and few parts. Simple plans save time and reduce mistakes. Choose projects like benches, small tables, or chairs. These use less wood and need fewer tools. Clear plans help beginners feel confident and finish their work faster.
Customizing Size And Style
Change the size to fit your outdoor area perfectly. Measure your space before deciding the dimensions. Adjust the style to match your taste. Add curves, straight lines, or decorative touches. Custom furniture makes your outdoor space unique and personal.
Sketching And Measurements
Draw your furniture plan on paper before cutting wood. Sketching helps you see the final shape and details. Mark exact measurements for every part. Accurate measurements prevent wasting wood and time. Use a ruler and pencil to keep lines clear and straight.

Credit: reneerenovates.com
Preparing The Wood
Preparing the wood is the first step to build strong cedar outdoor furniture. This step helps the wood last longer and look great. Proper preparation makes the building process easier and the final piece more sturdy.
Cutting Cedar To Size
Start by measuring the cedar boards carefully. Use a saw to cut the wood into the right pieces. Cutting straight and precise shapes helps the furniture fit together well. Always wear safety gear while cutting the wood.
Sanding For Smooth Surfaces
After cutting, sand the wood to remove rough edges. Smooth surfaces prevent splinters and make the wood look neat. Use medium-grit sandpaper first, then fine-grit for a soft finish. Sand along the grain to protect the wood fibers.
Pre-drilling And Assembly Prep
Pre-drill holes before screwing pieces together. This step stops the wood from splitting. Mark the spots for screws clearly. Keep the drill steady for clean holes. Pre-drilling saves time and ensures strong joints during assembly.
Assembling The Furniture
Assembling cedar outdoor furniture requires careful attention and a clear plan. This step turns your cut wood pieces into a sturdy, beautiful piece. Follow these simple methods to join parts properly, use the right tools, and ensure the furniture stays stable over time.
Joining Techniques
Choose strong joining methods for lasting furniture. Common options include dowel joints, mortise and tenon, and pocket screws. These techniques help align parts and add strength. Use clamps to hold pieces firmly while the glue dries. Take time to check each joint fits well before securing.
Using Screws And Nails
Use screws for stronger, longer-lasting holds. Pre-drill holes to avoid splitting the cedar wood. Choose stainless steel or coated screws to resist rust. Nails work for quick fixes but are less durable. Drive them in carefully with a hammer to prevent damage. Always countersink screws and fill holes for a smooth finish.
Ensuring Stability
Check the furniture’s balance and firmness after assembly. Tighten all screws and joints thoroughly. Add corner braces or brackets for extra support if needed. Test by pressing and rocking gently. Fix any wobbles immediately to keep the furniture safe and comfortable. Proper stability extends the life of your cedar furniture outdoors.
Finishing Touches
Finishing touches are key to making cedar outdoor furniture look great and last longer. These steps protect the wood and add comfort. They also keep your furniture looking fresh through all seasons. Let’s explore how to apply sealants, choose cushions, and maintain your pieces.
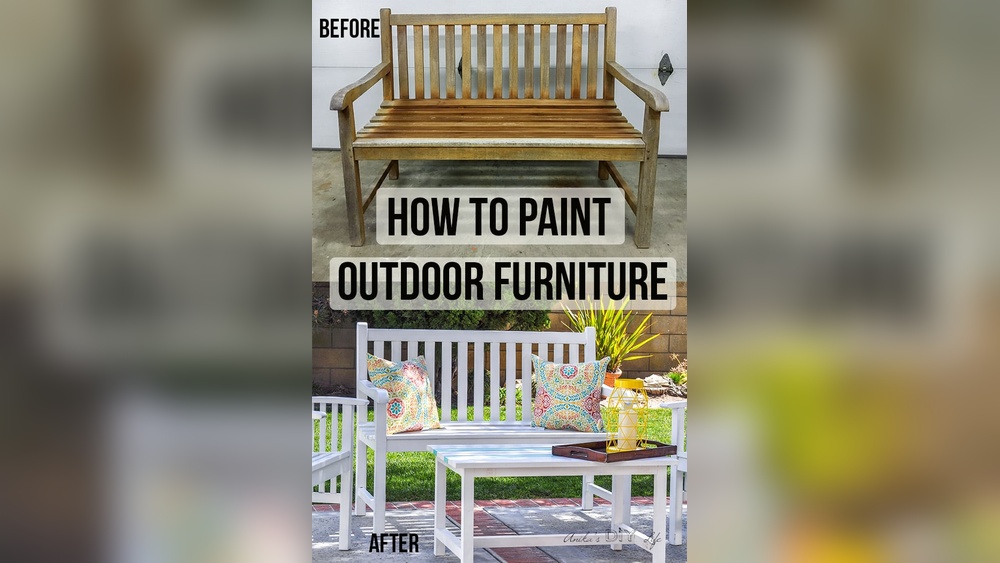
Applying Sealants And Stains
Start by cleaning the wood to remove dust and dirt. Choose a sealant or stain that suits cedar wood. Use a brush or cloth to apply it evenly. Let the first coat dry fully before adding another. This protects the wood from water and sun damage. Sealants keep the cedar from cracking and fading.
Adding Cushions And Accessories
Pick cushions that fit your furniture size and style. Use outdoor fabrics that resist water and fading. Add pillows for extra comfort and color. Consider accessories like umbrellas or covers for shade and protection. These extras make your space cozy and inviting.
Maintenance Tips For Longevity
Clean your furniture regularly with mild soap and water. Avoid harsh chemicals that can damage the wood. Check sealants once a year and reapply if needed. Store cushions in a dry place during bad weather. Cover furniture to protect it from rain and dirt. These habits keep your cedar furniture strong and beautiful.
Troubleshooting Common Issues
Making cedar outdoor furniture is rewarding, but problems may arise. Wood can warp, crack, or suffer from weather damage. Joints may become loose over time. These issues affect your furniture’s look and strength. Fixing them keeps your pieces sturdy and beautiful.
Fixing Warping And Cracks
Warping happens when wood dries unevenly. To fix warping, gently clamp the wood back into shape. Use moisture to help the wood bend. For cracks, fill gaps with wood filler or epoxy. Sand the area smooth once dry. Seal the wood to prevent future cracks.
Dealing With Weather Damage
Sun and rain can damage cedar furniture. Start by cleaning the surface with mild soap and water. Let the wood dry completely. Use a wood brightener to restore the natural color. Apply a protective finish or oil to shield from moisture and sun. Regular care slows weather damage.
Repairing Loose Joints
Loose joints weaken the furniture’s structure. Tighten screws or bolts holding the joints. If nails are loose, replace them with screws. For glued joints, remove old glue and reapply wood glue. Clamp the pieces until dry. Check joints often to keep furniture strong.
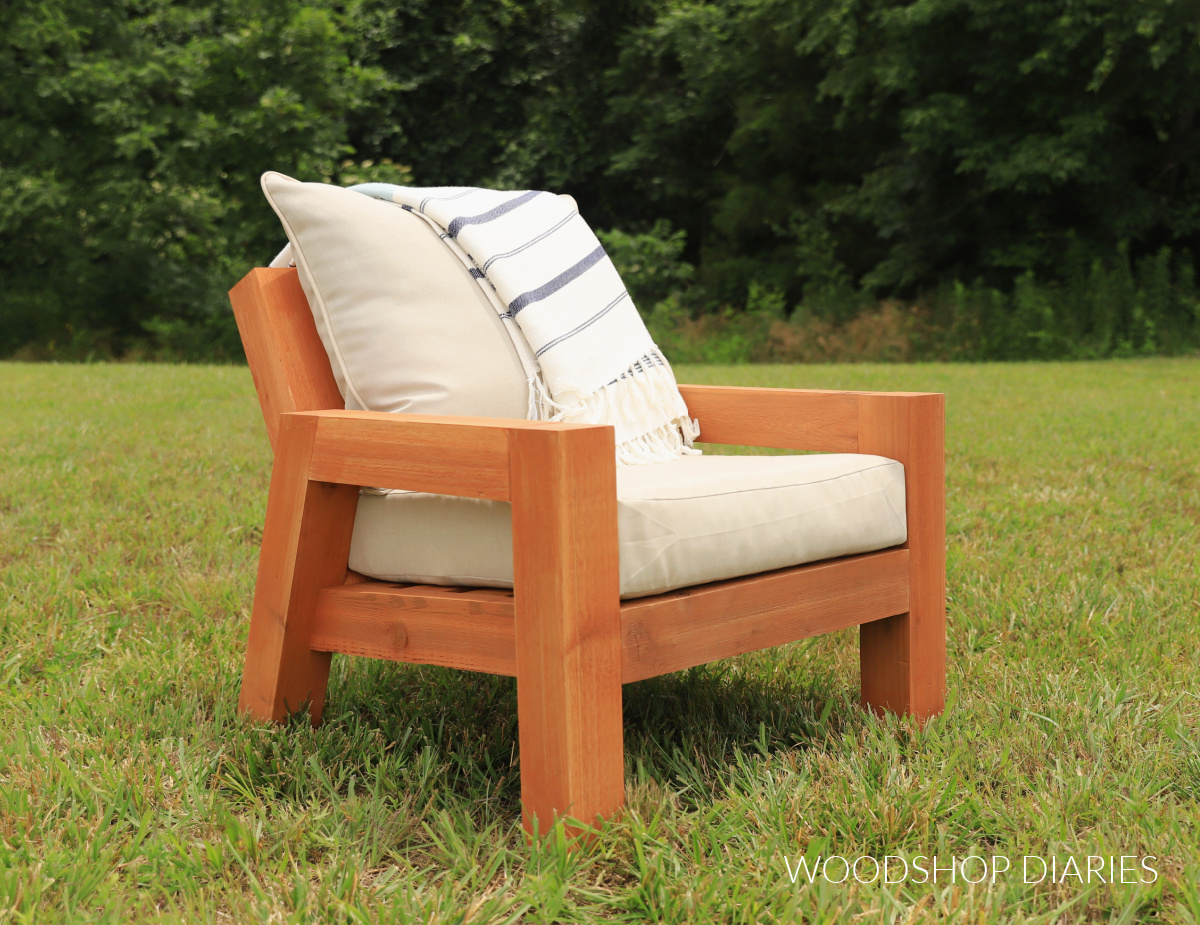
Credit: www.woodshopdiaries.com

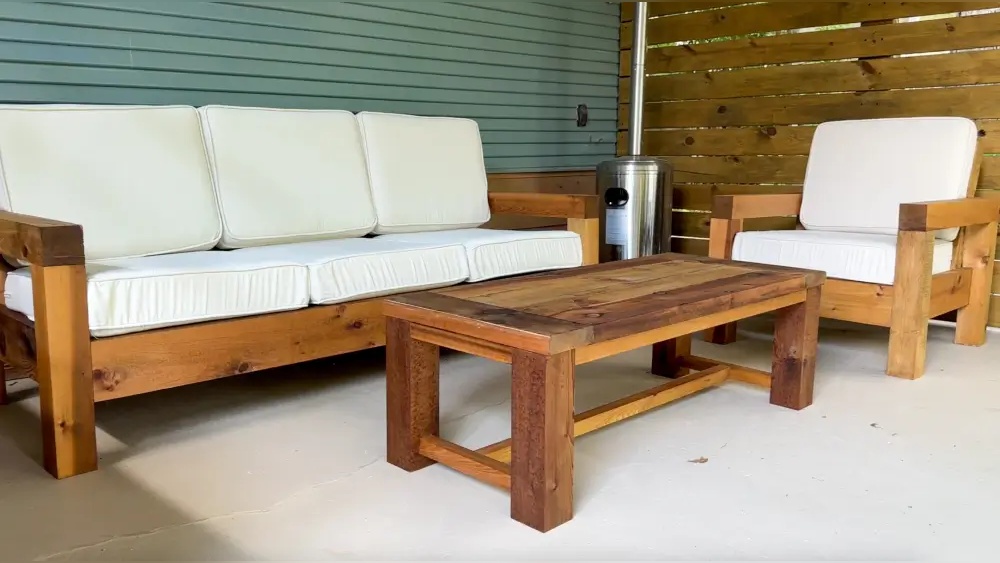
Credit: reneerenovates.com
Frequently Asked Questions
What Tools Do I Need For Making Cedar Outdoor Furniture?
You need basic woodworking tools like saws, drills, sanders, clamps, and measuring tape. Quality tools ensure precise cuts and sturdy assembly. Safety gear like gloves and goggles is essential. Proper tools make the building process smoother and the final product durable.
How Do I Protect Cedar Furniture From Weather Damage?
Apply a clear wood sealer or outdoor wood oil to protect cedar. Reapply it yearly to maintain resistance against moisture and UV rays. Proper finishing prevents cracking, warping, and fading, extending the furniture’s life outdoors.
Can Cedar Furniture Be Left Untreated Outdoors?
Untreated cedar resists decay naturally but ages to a gray color. Untreated wood is more prone to surface damage and weathering. Applying finish enhances durability, color, and protection, making it ideal for outdoor use.
How Long Does Cedar Outdoor Furniture Last?
With proper care, cedar furniture can last 15 to 20 years outdoors. Regular maintenance like cleaning and sealing extends its lifespan. Cedar’s natural oils help resist rot and insects, contributing to its longevity.
Conclusion
Creating cedar outdoor furniture brings warmth and charm to any space. Cedar wood lasts long and resists weather well. With basic tools and steps, you can build strong, beautiful pieces. Regular care keeps your furniture looking fresh for years. Enjoy crafting something useful and personal for your outdoors.
This project suits beginners and experts alike. Start small, learn, and watch your skills grow. Your outdoor area will thank you for the natural touch.