Are you looking for a unique way to organize your books and add a touch of nature to your space? Making your own tree bookshelf is easier than you think—and it can completely transform your room.
Imagine a bookshelf that not only holds your favorite reads but also becomes a stunning piece of art. In this guide, you’ll discover simple steps and tips to create a beautiful tree-shaped bookshelf that fits perfectly with your style. Ready to bring your bookshelf to life?
Keep reading to unlock the secrets of this fun and rewarding project.
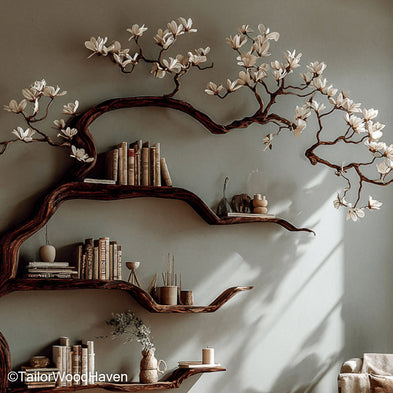
Credit: tailorwoodhaven.com
Materials Needed
Building a tree bookshelf starts with gathering the right materials. Each item plays a key role in the project’s success. Choosing quality materials makes the process smoother and the final product stronger.
Prepare all supplies before starting. This helps keep your work organized and efficient. Below are the main materials needed for your tree bookshelf.
Wood Selection
Select wood that is sturdy and easy to work with. Pine and oak are popular choices. Pine is soft and affordable. Oak is harder and lasts longer. Consider plywood for the shelves. It is strong and cost-effective. Make sure the wood is smooth or sand it before use.
Tools Required
Gather essential tools for cutting and assembling. A saw is needed for shaping the wood. A drill helps with making holes and inserting screws. Use a screwdriver to tighten screws securely. Sandpaper smooths rough edges. A measuring tape ensures precise cuts. A pencil helps mark your measurements clearly.
Additional Supplies
Besides wood and tools, some extra items are necessary. Wood glue strengthens joints and holds parts together. Screws and nails secure the shelves to the frame. Paint or varnish protects the wood and adds style. Brushes or rollers apply the finish evenly. Safety gear like gloves and goggles keeps you safe during work.
Design Planning
Design planning is the first step in creating your own tree bookshelf. It helps you visualize the final product and organize your work. Careful planning saves time and materials. This phase focuses on choosing a tree shape, measuring and sketching your design, and keeping safety in mind.
Choosing The Tree Shape
Pick a tree shape that fits your space and style. Simple shapes are easier to build and look clean. Think about branches as shelves. They should hold books without bending. Curvy or straight branches work well. Keep the shape balanced to avoid tipping.
Measuring And Sketching
Measure the wall space where the bookshelf will go. Note the height, width, and depth. Use these numbers to draw your tree on paper. Sketch each branch and shelf clearly. Mark where books will rest. This helps avoid mistakes during cutting and assembly.
Safety Considerations
Safety is important during design and build. Make sure shelves are strong enough for book weight. Use sturdy materials and secure joints well. Avoid sharp edges and splinters. Plan for the bookshelf to stand steady and not tip over. Think about wall mounting for extra support.
Cutting The Wood
Cutting the wood is a key step in building your tree bookshelf. Precise cuts ensure the shelf fits together well. Take your time and prepare your tools carefully. Safety is important, so wear goggles and gloves.
Start by organizing your wood pieces. This helps you cut faster and avoid mistakes. Clear workspace and good lighting make the process easier.
Marking The Pieces
Mark each piece clearly before cutting. Use a pencil and ruler for straight lines. Measure twice to avoid errors. Mark the shape of branches and shelves on the wood. This guide keeps your cuts accurate and neat.
Using A Jigsaw
A jigsaw is perfect for cutting tree shapes and curves. Hold the wood firmly on a flat surface. Follow the pencil lines slowly and steadily. Avoid rushing to prevent splintering the wood. Change blades if they get dull for clean cuts.
Sanding Edges
Sand the edges after cutting to smooth rough spots. Use medium-grit sandpaper first. Then, switch to fine-grit for a soft finish. Sand both flat and curved edges carefully. This step makes your bookshelf safe and pleasant to touch.
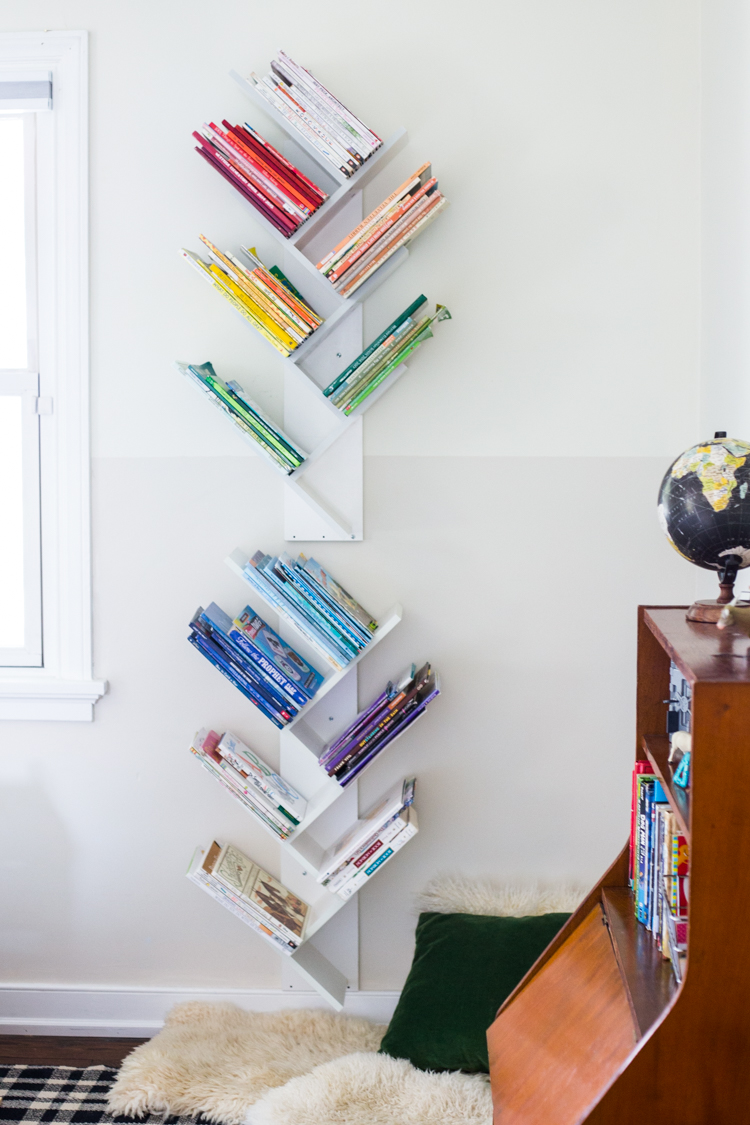
Credit: livefreecreative.co
Assembling The Bookshelf
Assembling your tree bookshelf is an exciting step. It brings your design to life and creates a unique storage space. You will join parts, secure shelves, and ensure the whole structure is stable. Follow these simple steps to build a strong and beautiful bookshelf.
Joining Techniques
Start by fitting the branches and trunk pieces together. Use wood glue to hold edges tightly. Add screws or nails for extra strength. Drill small pilot holes to avoid splitting the wood. Clamps help keep parts in place while the glue dries. Take time to align pieces carefully. A precise fit makes the shelf look professional.
Securing The Shelves
Place the shelves on the branch arms. Use brackets or small wooden blocks underneath for support. Screw these supports into the shelves and branches. Check that each shelf is level before tightening screws. This stops books from sliding off. Secure shelves firmly to handle the weight of your books. Double check all screws are tight before moving on.
Ensuring Stability
Test the bookshelf for wobbling or rocking. Add extra supports or braces if needed. Attach the bookshelf to a wall with brackets for safety. Use a spirit level to check vertical and horizontal balance. A steady bookshelf lasts longer and holds more weight. Stability is key to a safe, functional tree bookshelf.
Finishing Touches
Finishing touches bring your tree bookshelf to life. They protect the wood and make it look great. This final step ensures your project lasts for years. Let’s explore easy ways to complete your bookshelf beautifully.
Painting Or Staining
Choose paint or stain based on the style you want. Paint adds color and hides wood grain. Stain shows the natural beauty of the wood. Apply thin, even coats with a brush or cloth. Let each coat dry fully before adding the next.
Adding Protective Coating
Protective coatings shield your bookshelf from damage. Use clear polyurethane or varnish for a strong finish. Apply with a clean brush in smooth strokes. This layer guards against scratches and water stains. Let it dry completely to keep your shelf safe.
Decorative Elements
Decorative touches make your tree bookshelf unique. Add small hooks for hanging items or fairy lights for charm. Use stencils or decals to create patterns on the wood. Simple decorations bring personality and warmth to your shelf.
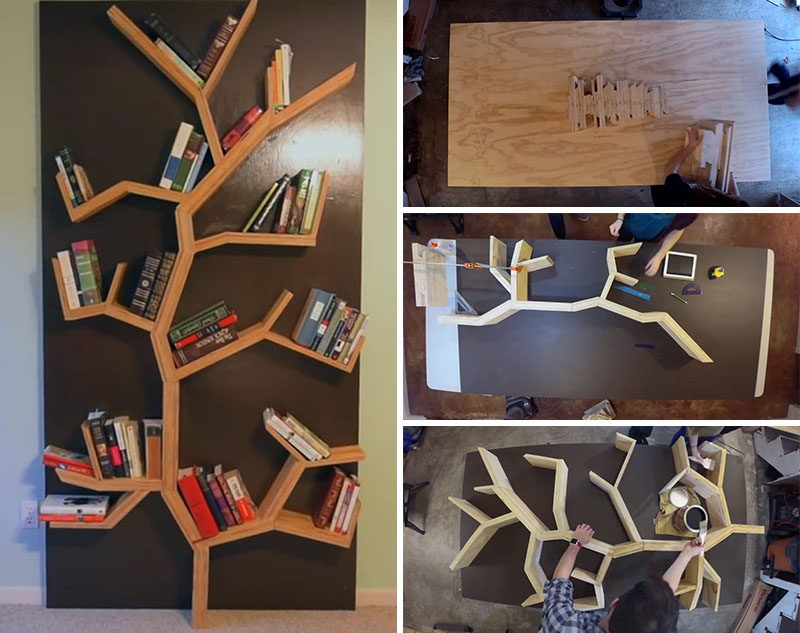
Credit: www.contemporist.com
Placement Tips
Placing your tree bookshelf correctly helps it stand out and last longer. Good placement also keeps your books safe and easy to reach. Think about space, light, and wall type before putting the shelf up. Let’s explore some useful tips for placing your tree bookshelf.
Ideal Locations
Choose a spot with enough space around the shelf. Avoid tight corners or cluttered areas. A well-lit room helps you find books easily. Natural light is best but avoid direct sunlight. Sunlight can fade the wood and books. Keep the shelf away from heat sources like heaters. This prevents warping or damage to the wood.
Wall Mounting Options
Use strong anchors to hold the weight of the shelf and books. Drywall anchors work well for most walls. For brick or concrete walls, use masonry anchors. Measure carefully before drilling holes. Level the shelf to keep books from sliding off. Secure mounting prevents accidents and keeps the shelf stable.
Maintaining The Bookshelf
Dust the shelf regularly to keep it clean. Use a soft cloth to avoid scratches. Check the mounts every few months for tightness. Tighten screws if the shelf feels loose. Keep the shelf dry to prevent mold or mildew. Use furniture polish to keep the wood shiny and healthy.
Frequently Asked Questions
How Do I Start Making A Tree Bookshelf?
Begin by selecting a sturdy wood type and sketching your tree design. Gather necessary tools like saws and sandpaper. Cut and assemble the branches and shelves carefully, ensuring stability and smooth finishes for a safe, attractive bookshelf.
What Tools Are Essential For Building Tree Bookshelves?
Essential tools include a saw, drill, screws, sandpaper, measuring tape, and wood glue. These tools help cut, shape, and assemble your bookshelf securely. Having the right tools ensures precision and safety during the building process.
How Can I Ensure My Tree Bookshelf Is Stable?
Use strong wood and secure all joints with screws and wood glue. Add a sturdy base or wall mounts for extra support. Stability prevents accidents and keeps your bookshelf durable for holding books safely.
What Wood Type Is Best For Tree Bookshelves?
Hardwoods like oak, maple, or walnut are ideal for durability and aesthetic appeal. These woods resist wear and provide a beautiful finish. Avoid softwoods to ensure your bookshelf lasts longer and supports weight well.
Conclusion
Creating your own tree bookshelf adds charm to any room. It saves money and lets you be creative. You can choose the size and shape you like. Using basic tools makes the project easy to finish. Enjoy the pride of building something useful and unique.
This bookshelf will hold your books and your memories. Start small, take your time, and have fun. Your space will feel warm and inviting with this natural piece. Give it a try and see how rewarding it feels.