Are you tired of your bookshelf tipping over or taking up too much floor space? Mounting your bookshelf to the wall is a simple way to keep your space organized, safe, and stylish.
In this guide, you’ll learn easy steps to securely attach your bookshelf so it stays put and looks great. Whether you’re a DIY beginner or just want to get it right the first time, this article will give you the confidence and know-how to transform your room.
Keep reading—you’re just moments away from mastering the perfect wall-mounted bookshelf!
Choose The Right Bookshelf
Choosing the right bookshelf is a key step before mounting it to the wall. The shelf must suit your space and hold your items safely. A good choice makes installation easier and keeps your books secure.
Think about where you want to place the shelf and what you will put on it. The right size, weight, and style help the shelf fit well and look great in your room.
Consider Size And Weight
Pick a bookshelf that fits your wall space perfectly. Measure the area to avoid buying one too big or too small. A shelf that is too large may be hard to mount securely.
Think about how heavy the shelf will be when full. Heavy shelves need strong support and good wall anchors. Light shelves are easier to mount but hold less weight.
Material And Design Factors
Bookshelves come in wood, metal, plastic, and more. Wood shelves look warm and classic. Metal shelves are strong and modern.
Choose a design that matches your room’s style. Simple designs are easier to mount and keep clean. Some shelves have open backs for easier wall mounting.

Credit: www.amazon.com
Gather Essential Tools
Gathering the right tools is the first step to mount a bookshelf safely and correctly. Using proper tools makes the task easier and ensures the shelf stays secure on the wall. Prepare everything before starting to avoid interruptions and mistakes.
Tools For Measuring And Marking
Start with a tape measure to check the wall space and shelf size. A level is important to keep the shelf straight. Use a pencil to mark the spots for drilling. Mark clearly but lightly to erase if needed. A stud finder helps locate wall studs for strong support.
Drilling And Mounting Equipment
A power drill is essential to make holes in the wall. Choose drill bits that match the wall type and screw size. Use wall anchors if you cannot drill into studs. Screwdrivers help to tighten screws firmly. Safety goggles protect your eyes from dust and debris.
Locate Wall Studs
Mounting a bookshelf to a wall needs strong support. Wall studs are vertical wooden beams inside walls. They hold the weight and keep your shelf safe. Before drilling, find these studs carefully. This step prevents damage and keeps your shelf steady.
Two main ways help you locate studs. One is using a stud finder, a tool made for this job. The other way is using simple tricks and signs on your wall. Both methods work well. Choose one that fits you best.
Using A Stud Finder
A stud finder is a small electronic device. Turn it on and place it flat on the wall. Slowly move it sideways. The device beeps or lights up when it finds a stud. Mark the spot with a pencil. Repeat to find more studs along the wall.
Stud finders are easy and fast. They give accurate results most of the time. Batteries may be needed. Always check the device instructions before use. This tool saves effort and helps avoid mistakes.
Alternative Methods To Find Studs
No stud finder? No problem. Several old-school tricks can help. Knock on the wall and listen for a solid sound. A hollow sound means no stud behind. A hard sound shows a stud is there. Mark these spots carefully.
Look for electrical outlets or switch plates. They usually attach to studs. Measure about 16 or 24 inches from these spots. Wall studs often follow this spacing. Use a tape measure and pencil to mark them.
Use a small nail or drill bit to test spots. Gently poke the wall where you think a stud is. Feel for resistance. Wood behind drywall means a stud. Be careful not to cause big holes or damage.
Mark Mounting Points
Marking the mounting points is a key step in installing a bookshelf on the wall. It helps ensure the shelf stays secure and straight. Taking time to mark the points correctly saves effort later. It prevents errors that could cause the shelf to tilt or fall.
Use a pencil for light, clear marks. These marks guide where to drill holes or place anchors. Accurate marking makes the entire mounting process smoother and safer.
Aligning The Bookshelf
Start by placing the bookshelf against the wall. Hold it at the height you want it installed. Check if it looks level with other furniture or room features. Adjust the position until it fits well in your space.
Use a level tool to ensure the shelf is perfectly straight. A crooked shelf can cause books to slide off. Mark the edges lightly with a pencil to keep the shelf aligned during mounting.
Measuring For Accuracy
Measure the distance between the mounting brackets on the back of the bookshelf. Transfer these measurements to the wall. Double-check the spacing before marking the points.
Measure from the floor or ceiling to keep the shelf at the right height. Mark each mounting point precisely. Accurate marks keep the bookshelf stable and balanced once mounted.
Drill Pilot Holes
Drilling pilot holes is an essential step in mounting a bookshelf to the wall. These small holes guide the screws and prevent the wood or wall from splitting. They make the installation easier and more secure. Taking time to drill pilot holes ensures the shelf stays firmly attached over time.
Choosing The Right Drill Bit
Pick a drill bit slightly smaller than the screw’s diameter. This size helps the screw grip tightly without cracking the wood. Use a wood drill bit for wooden studs and a masonry bit for brick or concrete walls. Matching the bit to the material improves hole accuracy and screw hold.
Safety Tips During Drilling
Wear safety glasses to protect your eyes from dust and debris. Keep fingers clear of the drill bit path to avoid injury. Hold the drill steady and apply even pressure. Start drilling slowly, then increase speed once the bit grips. Always unplug the drill when changing bits or not in use.
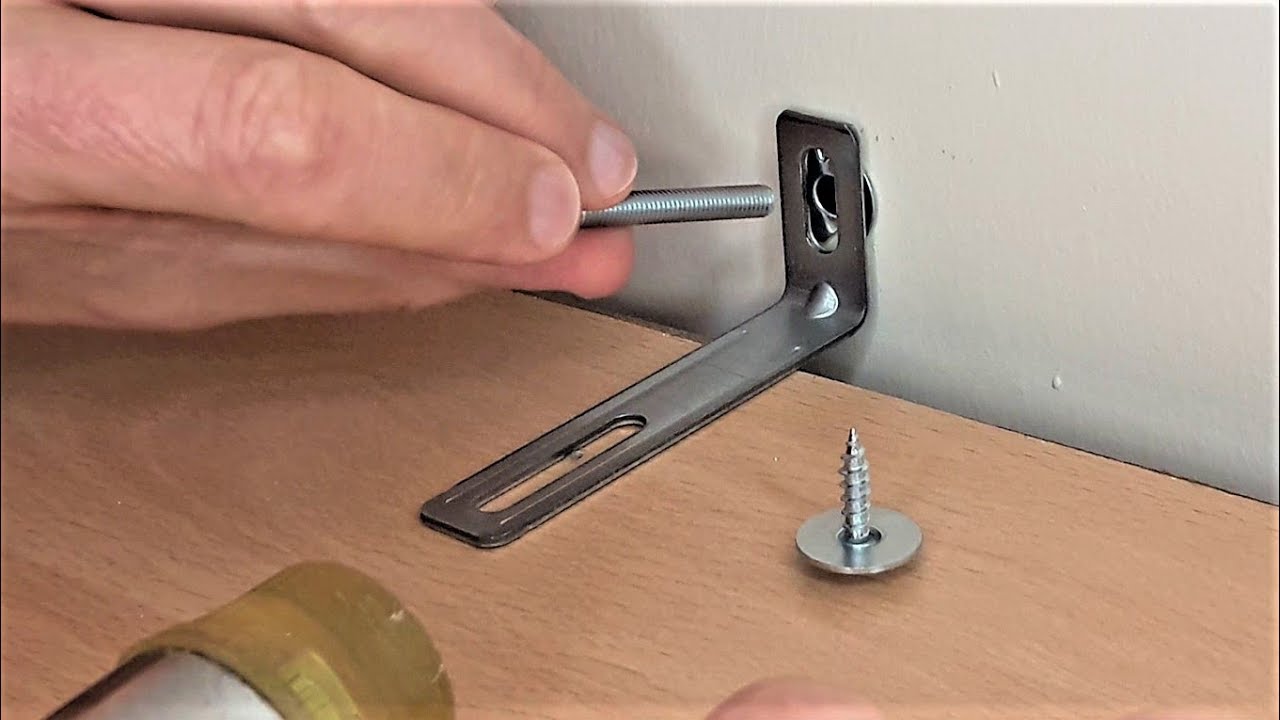
Attach Mounting Brackets
Attaching mounting brackets is a key step in securing your bookshelf to the wall. Brackets hold the shelf in place and keep it steady. Choosing the right bracket and fixing it properly ensures safety and stability.
Follow simple steps to attach the brackets. This helps your bookshelf stay strong and avoid accidents. Let’s explore the types of brackets and how to secure them correctly.
Types Of Brackets To Use
Choose brackets based on your shelf size and weight. L-brackets are common and easy to install. They fit under the shelf and attach to the wall. Floating brackets hide the support and give a clean look. Corner brackets offer extra strength for heavy shelves. Select brackets made of metal for durability. Plastic brackets may not hold heavy books well. Match the bracket size with your shelf thickness for the best fit.
Securing Brackets To Wall And Shelf
Start by marking where the brackets will go on the wall. Use a level to keep them straight. Find wall studs to anchor brackets securely. Drill pilot holes to avoid splitting wood or drywall. Use screws that fit the bracket holes and wall type. Attach brackets tightly to the wall first. Then, place the shelf on brackets and mark screw holes underneath. Drill pilot holes in the shelf and screw brackets firmly. Double-check the shelf is level and stable before placing items on it.
Mount The Bookshelf
Mounting the bookshelf is the crucial step where your preparation turns into a sturdy fixture. This phase requires care to avoid damage and ensure safety. Proper mounting keeps your bookshelf stable and secure on the wall. Focus on handling and positioning the shelf carefully. Then check its level and stability before fixing it permanently.
Lifting And Positioning
Lift the bookshelf with help if it is heavy. Hold it close to the wall. Align the shelf with the marks made earlier. Keep it steady to avoid shifting. Position the shelf where you want it to stay. Double-check the placement before securing it.
Ensuring Level And Stability
Use a level tool to check the shelf’s alignment. Adjust until the bubble sits in the center. This ensures the shelf is perfectly horizontal. Tap the shelf lightly to test stability. If it wobbles, reposition or tighten the screws. Secure the shelf firmly but avoid over-tightening.
Test Stability And Adjust
After mounting the bookshelf, testing its stability is crucial. This step ensures safety and prevents accidents. A stable bookshelf holds your books securely and lasts longer. Small adjustments can fix any issues found during testing.
Checking For Wobbles
Stand near the bookshelf and gently push it from different sides. Notice any movement or shaking. Even slight wobbling can cause damage over time. Use a level tool to check if the shelf is perfectly horizontal. Fix any tilt before adding weight.
Tightening And Reinforcing
Use a screwdriver to tighten all screws and brackets. Loose screws cause instability and noise. Add extra brackets if the shelf feels weak. Reinforcing corners improves strength and support. Double-check the wall anchors are secure inside the wall.
Safety Tips And Maintenance
Mounting a bookshelf to the wall keeps it steady and safe. Proper care helps avoid accidents and damage. Follow simple safety tips and maintain the shelf regularly. This keeps your space neat and secure.
Regular Inspections
Check the bookshelf often for any signs of wear. Look for loose screws, cracks, or bending in the brackets. Tighten screws if you find any that are loose. Replace damaged parts immediately to keep the shelf stable. Regular checks stop small problems from becoming big ones.
Preventing Overloading
Do not put too many heavy items on the shelf. Each shelf has a weight limit. Exceeding this limit can cause the shelf to fall. Spread books and objects evenly to balance the load. Avoid stacking too many heavy books in one spot. This keeps the shelf strong and safe over time.

Credit: ikeahackers.net
Credit: www.youtube.com
Frequently Asked Questions
How Do I Securely Mount A Bookshelf To The Wall?
To securely mount a bookshelf, locate wall studs and use proper anchors or screws. Use a level to keep it straight. Always pre-drill holes and use brackets or mounting plates for stability. This ensures safety and prevents the shelf from falling.
What Tools Do I Need To Mount A Bookshelf On Drywall?
You need a stud finder, drill, screwdriver, level, measuring tape, and appropriate wall anchors or screws. These tools help locate studs, create secure holes, and ensure the shelf is mounted evenly and safely on drywall.
Can I Mount A Bookshelf Without Studs?
Yes, you can mount a bookshelf without studs using heavy-duty wall anchors like toggle bolts. These anchors distribute weight evenly and provide strong support on drywall, but they may hold less weight compared to stud-mounted shelves.
How High Should I Mount A Bookshelf On The Wall?
Mount the bookshelf at eye level or slightly above for easy access. Typically, 48 to 60 inches from the floor is ideal. Adjust height based on room layout and shelf size for both aesthetics and usability.
Conclusion
Mounting a bookshelf to the wall keeps it safe and steady. Use the right tools and follow steps carefully. Check the wall type before you start drilling. Measure twice to place brackets correctly. Secure shelves well to hold your books without risk.
A steady bookshelf saves space and adds style. Take your time, and enjoy your new setup.