Are you ready to build a wood bunk bed but not sure where to start? Putting together a bunk bed might seem tricky, but with the right steps, you can do it confidently and quickly.
Imagine having a sturdy, safe bed that saves space and adds charm to your room—all made by your own hands. In this guide, you’ll find clear, simple instructions that make the process easy to follow. Stay with me, and by the end, you’ll have your wood bunk bed assembled perfectly and ready to use.
Let’s get started!
Tools And Materials Needed
Putting together a wood bunk bed needs the right tools and materials. This step helps the process go smoothly. Having everything ready saves time and avoids frustration. The right gear ensures safety and a strong build. Here is a clear list of what you need before you start.
Essential Tools
- Screwdriver – A Phillips head works best.
- Allen wrench – Often included with the bed kit.
- Hammer – Useful for tapping parts into place.
- Measuring tape – To check dimensions accurately.
- Level – Ensures the bed is even and safe.
- Power drill – Speeds up screw driving (optional).
Required Materials
- Wooden bed parts – Frame, slats, guardrails, and ladders.
- Screws and bolts – Usually come with the kit.
- Wood glue – Adds extra strength to joints.
- Sandpaper – Smooths rough edges before assembly.
- Instructions manual – Follow it step-by-step.
Safety Gear
- Safety glasses – Protect your eyes from dust and splinters.
- Work gloves – Prevent cuts and blisters.
- Dust mask – Keeps you safe from wood dust.
- Knee pads – Comfort while working on the floor.
Preparing The Workspace
Preparing the workspace is the first step to build a wood bunk bed safely and quickly. A clean, organized area helps avoid mistakes and saves time. It also keeps all parts visible and easy to reach. Clear space means fewer accidents and stress. Let’s focus on two key tasks: clearing the area and organizing parts and hardware.
Clearing The Area
Start by removing furniture and items from the room. Leave enough space to move around freely. The workspace should be flat and stable. A large room or garage works best. Clean the floor to prevent slipping or losing small parts. Good lighting helps see details clearly. Open windows for fresh air and comfort.
Organizing Parts And Hardware
Sort all wood pieces by size and shape. Keep screws, bolts, and tools in small containers. Label containers if possible. Check the instruction manual for part names. Group similar hardware together to avoid confusion. Lay out parts in the order you will use them. This simple step speeds up assembly and reduces errors.
Assembling The Bed Frame
Assembling the bed frame is the first big step to build a wood bunk bed. It sets the base for the whole structure. Doing it right makes the bed safe and strong. Follow clear steps and keep parts organized. This helps the process go smoothly and fast.
Connecting The Side Rails
Start by identifying the side rails. These long pieces connect the headboard and footboard. Place them on a flat surface. Align the holes on the rails with the holes on the headboard and footboard. Use bolts or screws to join them tightly. Make sure the rails are straight. Tighten the screws evenly to avoid wobbling. Double-check that both sides are secure before moving on.
Attaching The Headboard And Footboard
Next, attach the headboard and footboard to the side rails. Position the headboard upright at one end. Slide the footboard in the same way at the other end. Use the provided hardware to fasten both. Check that the corners meet perfectly. Secure all bolts firmly but do not over-tighten. The frame should feel sturdy and balanced. Take time to inspect every joint closely.
Installing The Slats
Installing the slats is an important step in building a wood bunk bed. The slats hold the mattress and provide support. You need to place and secure them carefully to ensure safety and comfort. Follow these simple steps to install the slats correctly.
Positioning The Slats
Start by laying out the slats evenly across the bed frame. Space each slat about two to three inches apart. This spacing allows air to flow under the mattress. Make sure the slats rest firmly on the side rails. Check that none of the slats hang over the edge. Even spacing helps distribute weight evenly.
Securing The Slats
Use screws or nails to fix the slats to the frame. Drill pilot holes to avoid splitting the wood. Attach each slat tightly to prevent movement. Double-check that all slats are secure before placing the mattress. Proper securing increases the bed’s stability and safety.
Building The Ladder
Building the ladder for your wood bunk bed is a key step. The ladder must be strong and safe. Follow clear steps to put it together correctly. This section shows how to assemble the ladder parts and attach it to the bed frame.
Assembling Ladder Components
Start by laying out all ladder parts on a flat surface. Check that you have the side rails and the steps. Use screws or bolts to attach each step between the rails. Make sure each step is level and tight. Tighten all connections firmly. This ensures the ladder holds weight safely.
Attaching Ladder To The Frame
Place the ladder next to the bunk bed frame. Align the top of the ladder with the bed’s upper rail. Use screws or brackets to fix the ladder in place. Double-check the ladder is steady and secure. Test it by gently pulling and pushing. A well-attached ladder prevents accidents and keeps the bed safe.

Credit: www.simplyhandmadestudios.com
Adding Safety Features
Adding safety features to a wood bunk bed is very important. Safety keeps children safe and gives parents peace of mind. Proper safety measures prevent falls and accidents. Focus on simple steps to make the bed secure and strong.
Installing Guardrails
Guardrails stop children from falling out of the top bunk. Use the guardrails that come with the bed or buy strong ones. Attach the rails tightly to the bed frame. Make sure the rails cover most of the bed’s side. Check the height of the guardrails; it should be at least five inches above the mattress. Tight screws keep the rails stable and safe.
Checking Stability
Stability is key for a safe bunk bed. After assembly, push the bed lightly to test its steadiness. Look for any wobbling or loose parts. Tighten all bolts and screws again. Use a level to check if the bed stands evenly. Place the bed on a flat floor to avoid tipping. Regularly check the bed for wear and tear to keep it safe.
Final Checks And Adjustments
After assembling your wood bunk bed, final checks and adjustments ensure safety and stability. This step helps avoid accidents and increases bed durability. Take your time and examine every part carefully.
Tightening Screws And Bolts
Check all screws and bolts one by one. Use the right tool to tighten them firmly. Loose screws can cause the bed to wobble or collapse. Avoid overtightening to prevent wood damage. Tighten only until secure and steady.
Ensuring Bed Levelness
Place a level tool on each bed surface. Confirm the bed is flat and balanced. Uneven beds can make sleeping uncomfortable and unsafe. Adjust the legs or base to fix any tilt. A level bunk bed stands strong and steady.
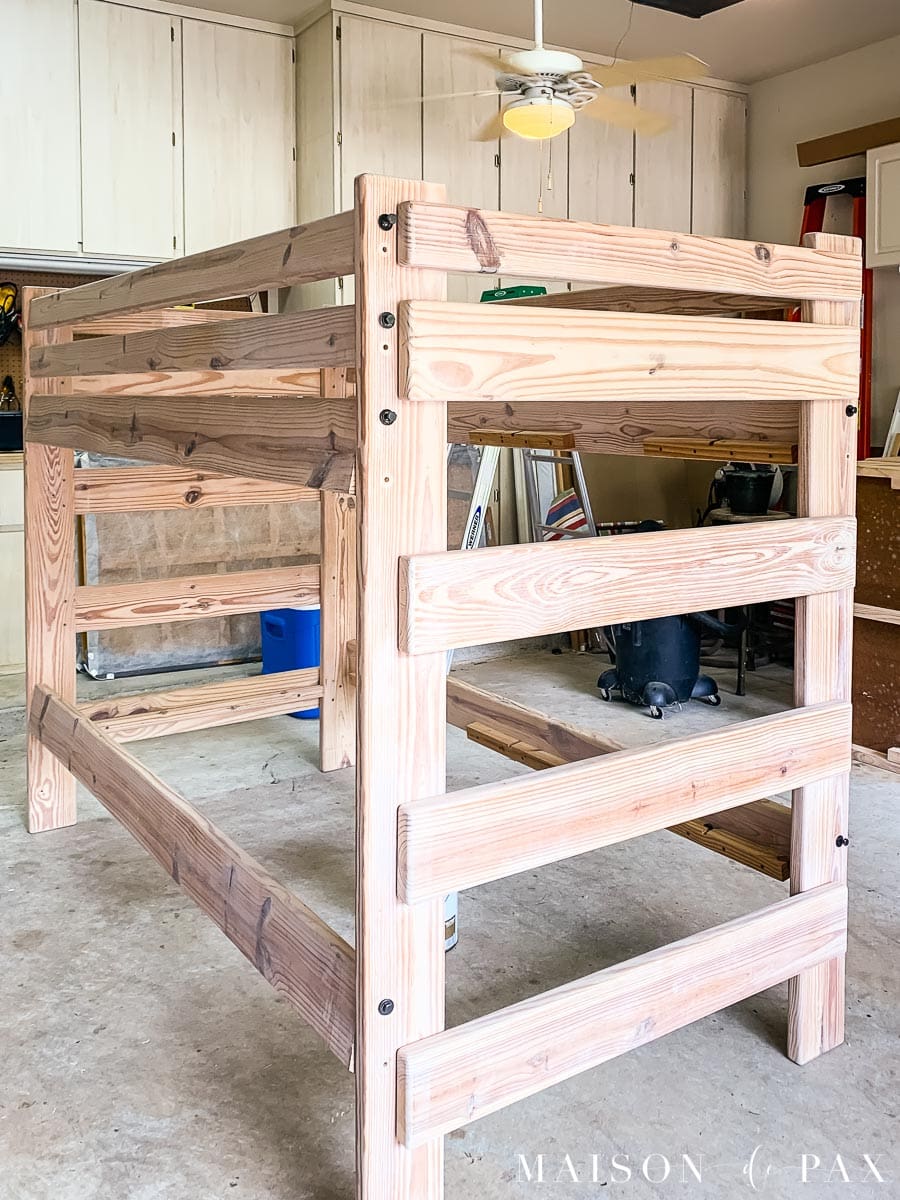
Credit: www.maisondepax.com
Maintenance Tips
Maintaining your wood bunk bed is essential for safety and durability. Simple care steps keep it strong and looking good. Regular attention prevents damage and extends its life. Here are some easy maintenance tips to follow.
Regular Inspections
Check all bolts and screws every month. Tighten any loose parts to avoid wobbling. Look for cracks or splits in the wood. Examine joints and connections closely. Early fixes stop bigger problems later. Make sure ladders and guardrails are secure. Replace any damaged pieces right away.
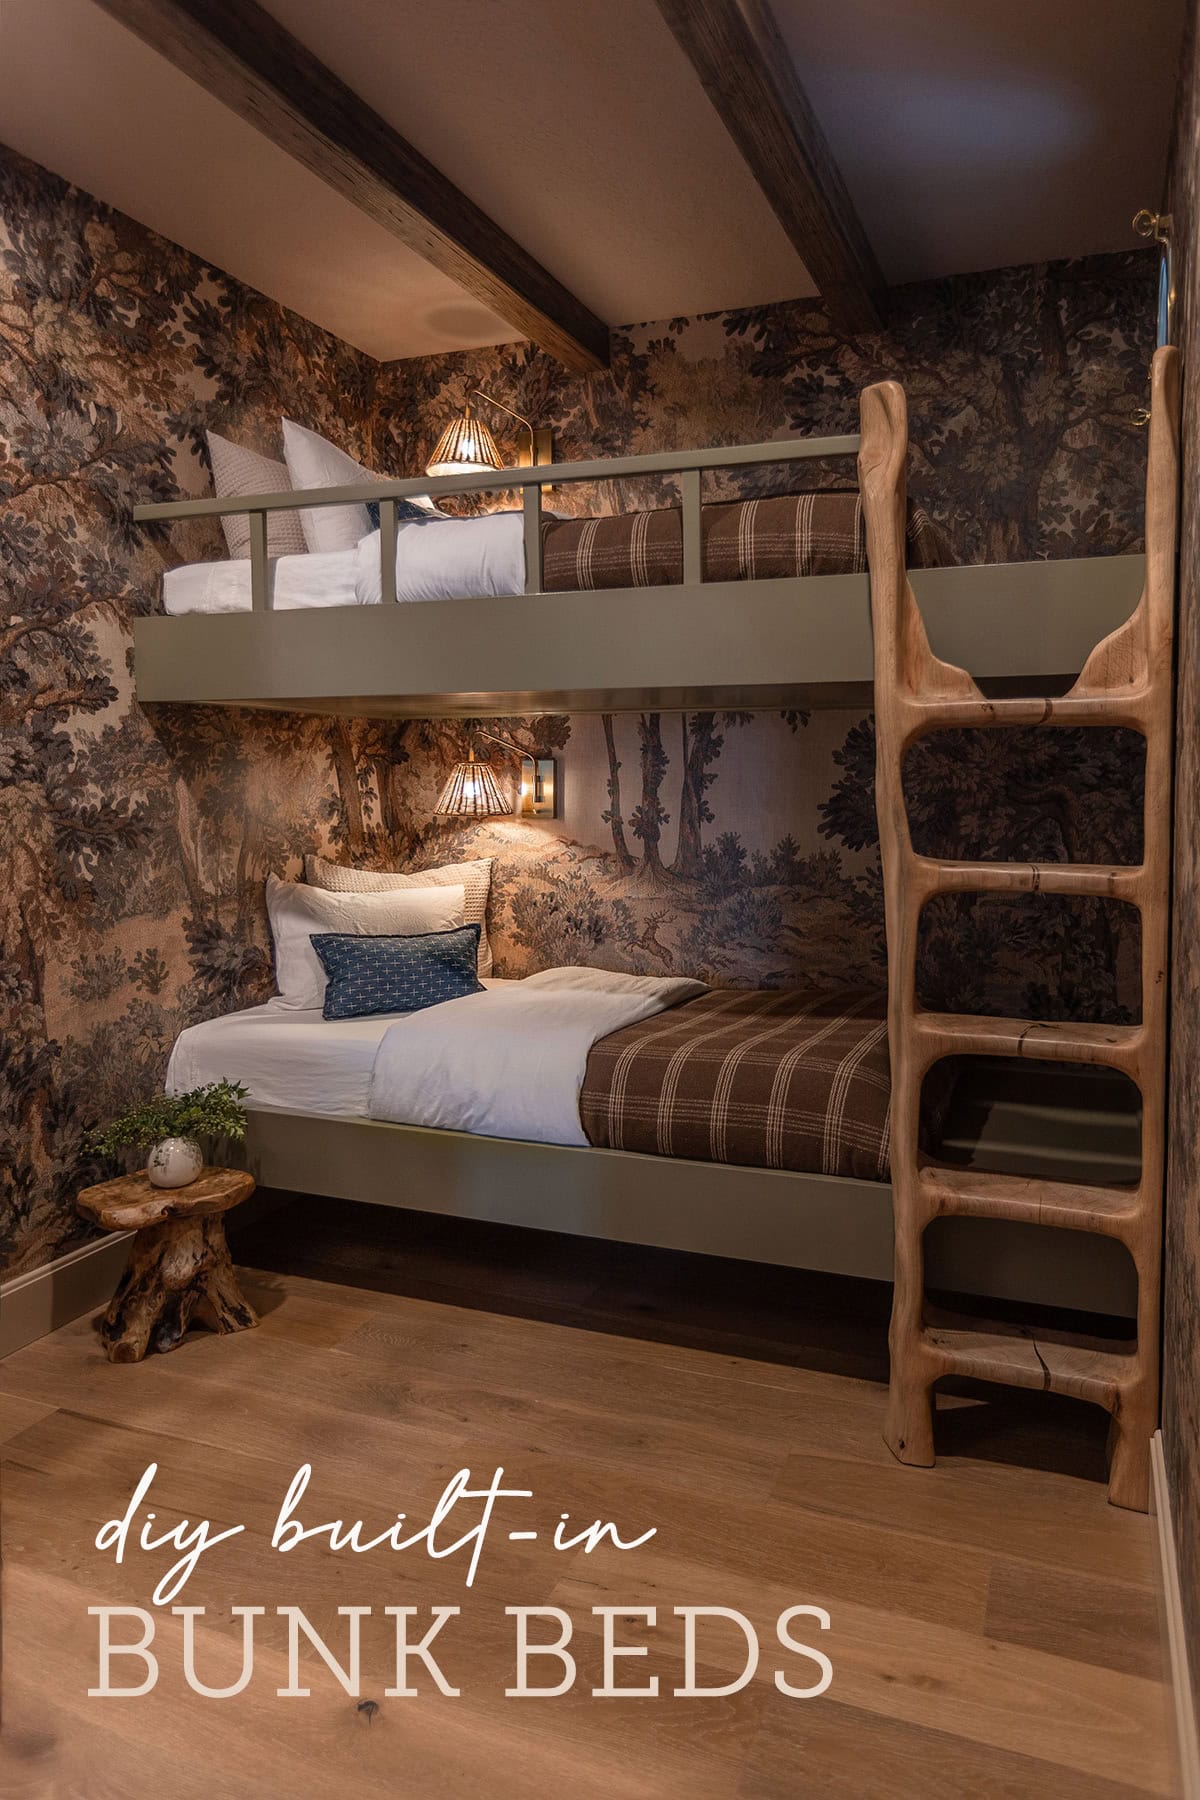
Cleaning And Care
Dust the bed weekly with a soft cloth. Avoid harsh cleaners that can damage the wood finish. Use mild soap and water for tough spots. Dry the surface well after cleaning. Keep the bed away from direct sunlight and moisture. Use furniture polish occasionally to protect the wood. Clean bedding regularly to reduce dirt buildup on the bed.
Credit: www.jennasuedesign.com
Frequently Asked Questions
How Long Does It Take To Assemble A Wood Bunk Bed?
Assembly usually takes between 1 to 3 hours. Time depends on your experience and the bed’s complexity. Having clear instructions and proper tools speeds up the process.
What Tools Are Needed To Put A Wood Bunk Bed Together?
Common tools include a screwdriver, Allen wrench, hammer, and sometimes a drill. Check the manual for specific tools your bed requires. Using the right tools ensures a sturdy, safe assembly.
How Do I Ensure My Wood Bunk Bed Is Safe?
Tighten all screws and bolts firmly. Check for loose parts regularly. Use guardrails and secure the bed to the wall if possible to prevent tipping.
Can One Person Assemble A Wood Bunk Bed Alone?
Yes, but it may be challenging. Having a second person helps handle heavy parts and speeds up assembly. Safety and accuracy improve with two people.
Conclusion
Building a wood bunk bed can be simple and fun. Follow the steps carefully and take your time. Use the right tools and check each part as you go. Safety matters, so tighten all screws well. A sturdy bunk bed lasts for years and keeps kids safe.
Enjoy your new bed and the space it saves. With patience, anyone can assemble a wood bunk bed easily. Ready to start your project?