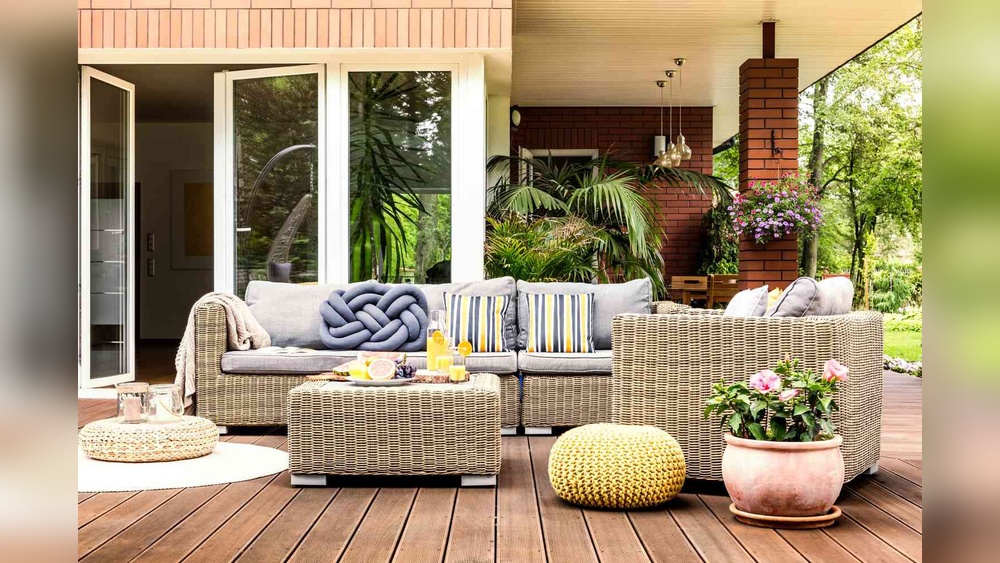
Is your metal outdoor furniture looking old and rusty? You might be ready to toss it out, but hold on!
You can bring it back to life with a few simple steps. Imagine enjoying your backyard with furniture that looks brand new, without spending a lot of money. In this guide, you’ll learn exactly how to redo your rusty metal furniture quickly and easily.
Stick with me, and you’ll discover tricks that make the job less messy and more satisfying. Ready to transform your outdoor space? Let’s get started!

Credit: www.youtube.com
Assessing Rust Damage
Assessing rust damage is the first step to restore metal outdoor furniture. It helps you understand how bad the rust is. This guides you on the tools and methods to use for repair. Proper assessment saves time and effort. It also ensures the furniture lasts longer after fixing.
Identifying Surface Vs. Deep Rust
Surface rust looks like small, orange spots on the metal. It usually sits on top and does not eat deep into the metal. Deep rust is different. It creates pits or holes and weakens the metal structure. You can test by scraping gently with a tool. If the metal feels soft or crumbles, the rust is deep. Surface rust is easier to clean and fix. Deep rust needs stronger treatment or metal replacement.
Tools For Inspection
Use a wire brush to scrape off loose rust. A screwdriver or metal pick helps check if rust is deep. Tap the metal with a small hammer. Listen for hollow sounds that show weak spots. A flashlight shines into cracks and holes for a better view. Wear gloves to protect your hands during inspection. These simple tools help find all rust areas before you start fixing.
Gathering Supplies
Before you start redoing your metal outdoor furniture, gather all the supplies. Having the right tools and materials makes the job easier and better. It also saves time and effort. Prepare everything in one place to avoid interruptions during the work.
Essential Tools And Materials
Start with basic tools like wire brushes and sandpaper. These help remove rust and old paint. You will also need safety gloves and goggles to protect your hands and eyes. A drop cloth or old newspaper protects the ground from paint and debris. Have a clean cloth or rags ready for wiping dust and dirt away.
Choose a sturdy paintbrush or spray paint suitable for metal surfaces. A small bucket or container works well for mixing rust remover or paint. Don’t forget a screwdriver or wrench if you need to take apart any furniture pieces.
Choosing Rust Removers And Paints
Select rust removers made for outdoor metal furniture. Some are gel-based and stay on surfaces longer. Others are liquid and easy to apply with a brush. Read labels carefully to ensure safety and effectiveness.
Pick paints designed to resist weather and rust. Rust-inhibiting primers help paint stick and last longer. Choose colors that match your style or outdoor space. Satin or semi-gloss finishes look nice and clean.
Preparing The Furniture
Preparing metal outdoor furniture for restoration is a key first step. Proper preparation helps remove rust and dirt. It also ensures the new finish will last longer. Taking time to prepare carefully saves effort later.
Start by cleaning the furniture thoroughly. This removes dust, dirt, and loose rust flakes. Cleaning also makes it easier to see damaged areas. After cleaning, follow safety steps to protect yourself.
Cleaning Dirt And Debris
Use a stiff brush to remove loose dirt and rust. A wire brush works well on metal surfaces. Wash the furniture with warm soapy water next. This clears away grease and grime. Rinse with clean water and let it dry completely. Drying prevents new rust from forming.
Safety Precautions
Wear gloves to protect your hands from sharp rust spots. Use goggles to shield your eyes from dust and debris. Work in a well-ventilated area to avoid breathing in dust. Cover your clothes to prevent stains. Always handle tools carefully to avoid injuries.
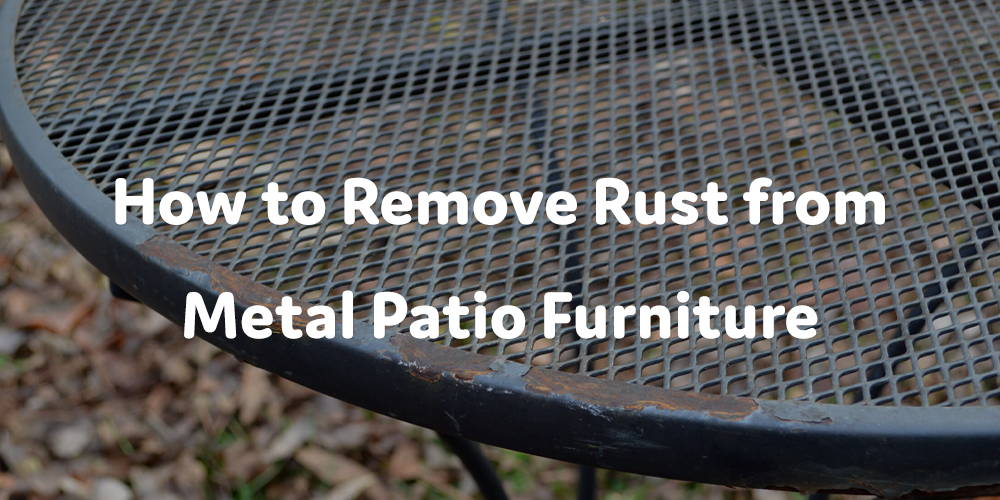
Removing Rust
Removing rust is the first and most important step in redoing metal outdoor furniture. Rust can damage the metal and make it weak. Cleaning the rust well helps the new paint or finish stick better. There are several ways to remove rust, each with its own tools and methods.
Manual Methods: Sanding And Scraping
Sanding and scraping are simple ways to remove rust by hand. Use sandpaper or a metal scraper to rub off the rust. Start with rough sandpaper and move to finer grit for a smooth surface. This method works well for small areas or light rust. It takes time but gives good control over the process.
Chemical Rust Removers
Chemical rust removers dissolve rust quickly. Apply the remover with a brush or spray on the rusty parts. Let it sit for the time shown on the product label. Then wipe or rinse the rust away. Always use gloves and work outside or in a ventilated area. Chemicals can be strong but make rust removal easier.
Using Wire Brushes And Power Tools
Wire brushes and power tools speed up rust removal. Attach a wire brush to a drill or use a handheld wire brush. These tools scrub off rust faster than manual methods. They work well on large areas or thick rust. Wear safety glasses and gloves to protect yourself from flying debris.
Smoothing The Surface
Smoothing the surface is a key step in redoing metal outdoor furniture with rust. It removes rough spots and prepares the metal for painting. A smooth surface helps paint stick better and last longer. This step also improves the furniture’s look and feel.
Sanding Techniques
Start by using coarse sandpaper to remove rust and old paint. Use a sanding block or electric sander for even pressure. Sand in circular motions to avoid scratches. Switch to finer sandpaper to smooth the surface. Clean dust with a cloth after sanding. Always wear a mask to avoid breathing dust.
Filling Holes And Imperfections
Check for holes or dents in the metal. Use metal filler or epoxy putty to fill these spots. Apply filler with a putty knife, pressing firmly. Let it dry completely as per instructions. Sand the filled areas smooth with fine sandpaper. This creates an even surface for painting. Wipe clean to remove all dust before painting.
Priming The Metal
Priming the metal is a key step in redoing rusty outdoor furniture. It protects the surface from rust and helps paint stick better. Skipping this step can cause paint to peel and metal to corrode again. Proper priming creates a smooth base for a fresh look that lasts.
Types Of Primers For Metal
Choose the right primer for your metal furniture. Rust-inhibiting primers stop rust from spreading. They work well on old, rusty spots. Zinc-rich primers add extra protection against corrosion. They are good for outdoor use. Oil-based primers dry hard and resist moisture. Water-based primers dry quickly and clean up easily.
Applying Primer Evenly
Clean the metal surface before priming. Remove dust, grease, and rust flakes. Use a brush or spray for primer. Spray gives an even coat on detailed areas. Brush works well for small spots. Apply thin, even layers. Let each layer dry before adding more. Avoid thick coats to prevent drips and bubbles.
Painting Tips
Painting metal outdoor furniture with rust requires smart tips to get great results. The right paint and technique help protect the metal and make the furniture look new again. Follow these painting tips to refresh your rusted furniture.
Choosing The Right Paint
Select paint made for metal surfaces. Rust-resistant or rust-inhibiting paints work best. Look for paints labeled for outdoor use to fight weather damage. Oil-based paints last longer on metal than water-based types. Primer is important. Use a rust-inhibiting primer first. It stops rust from coming back. Primer also helps paint stick better.
Techniques For Long-lasting Finish
Start with clean, dry furniture. Remove loose rust and old paint with a wire brush or sandpaper. Apply primer evenly and let it dry fully. Use thin, even coats of paint. Thick coats can peel or drip. Allow each coat to dry before adding another. Spray paint can give smooth coverage but use in a well-ventilated area. Finish with a clear topcoat for extra protection against rain and sun.
Credit: www.furnituremaxi.com
Sealing And Protecting
After removing rust and repainting your metal outdoor furniture, sealing and protecting it is key. This step stops moisture from causing rust again. It also keeps the paint looking fresh for longer. Good sealing protects your furniture from rain, sun, and dirt. Proper protection means your furniture stays strong and beautiful through all seasons.
Applying Clear Coats
Clear coats add a strong layer over paint. They prevent scratches and fading from sunlight. Use a spray or brush-on clear coat made for metal. Apply thin, even layers to avoid drips. Let each layer dry fully before adding the next. Clear coats keep the color bright and shield the metal underneath. This simple step extends the life of your furniture.
Weatherproofing Strategies
Weatherproofing stops water and air from reaching metal surfaces. Use special sealants or waterproof sprays made for outdoor use. Check that all joints and corners are well-covered. Cover your furniture with a waterproof cover when not in use. Store cushions inside or in dry places. These habits reduce damage from rain, snow, and sun. Weatherproofing helps your furniture stay strong and rust-free year-round.
Maintenance For Longevity
Maintaining metal outdoor furniture is key to making it last longer. Rust can damage the metal and spoil its look. Careful upkeep keeps the furniture strong and attractive. Small efforts regularly stop big problems later.
Regular Cleaning Routines
Clean metal furniture often to remove dirt and moisture. Use a soft brush or cloth with mild soap. Rinse well and dry completely to avoid rust. Avoid harsh chemicals that can harm the metal surface. Regular cleaning stops rust from starting and keeps paint fresh.
Touch-up Tips To Prevent Future Rust
Check furniture for scratches or chips in the paint. These spots let rust form quickly. Use rust-resistant paint to cover damaged areas. Apply paint in thin, even layers. Allow the paint to dry fully before using the furniture. Touch-ups keep metal safe and looking good for years.

Credit: www.bhg.com
Frequently Asked Questions
How Do I Remove Rust From Metal Outdoor Furniture?
Use a wire brush or sandpaper to scrub off rust. Apply a rust remover solution for stubborn spots. Rinse and dry the metal thoroughly before repainting or sealing.
What Is The Best Paint For Metal Outdoor Furniture?
Choose a rust-resistant spray paint or enamel designed for metal. These paints protect against weather and prevent future rust. Apply primer first for better adhesion and durability.
How Often Should I Maintain Metal Outdoor Furniture?
Inspect your furniture every 3 to 6 months. Clean dirt and debris regularly. Touch up paint chips immediately to avoid rust formation and prolong furniture life.
Can I Use Household Items To Remove Rust?
Yes, white vinegar and baking soda work well for light rust. Soak or scrub affected areas, then rinse and dry thoroughly. These are eco-friendly and cost-effective options.
Conclusion
Rust on metal outdoor furniture can look bad and cause damage. Fixing it takes some effort but is worth it. Clean the rust, sand the surface, and use rust-proof paint. This stops rust from coming back. Taking care of your furniture keeps it strong and good-looking.
Small repairs save money and make your space nice. Try these steps to bring your metal furniture back to life. Enjoy your outdoor area with furniture that looks fresh and lasts longer.