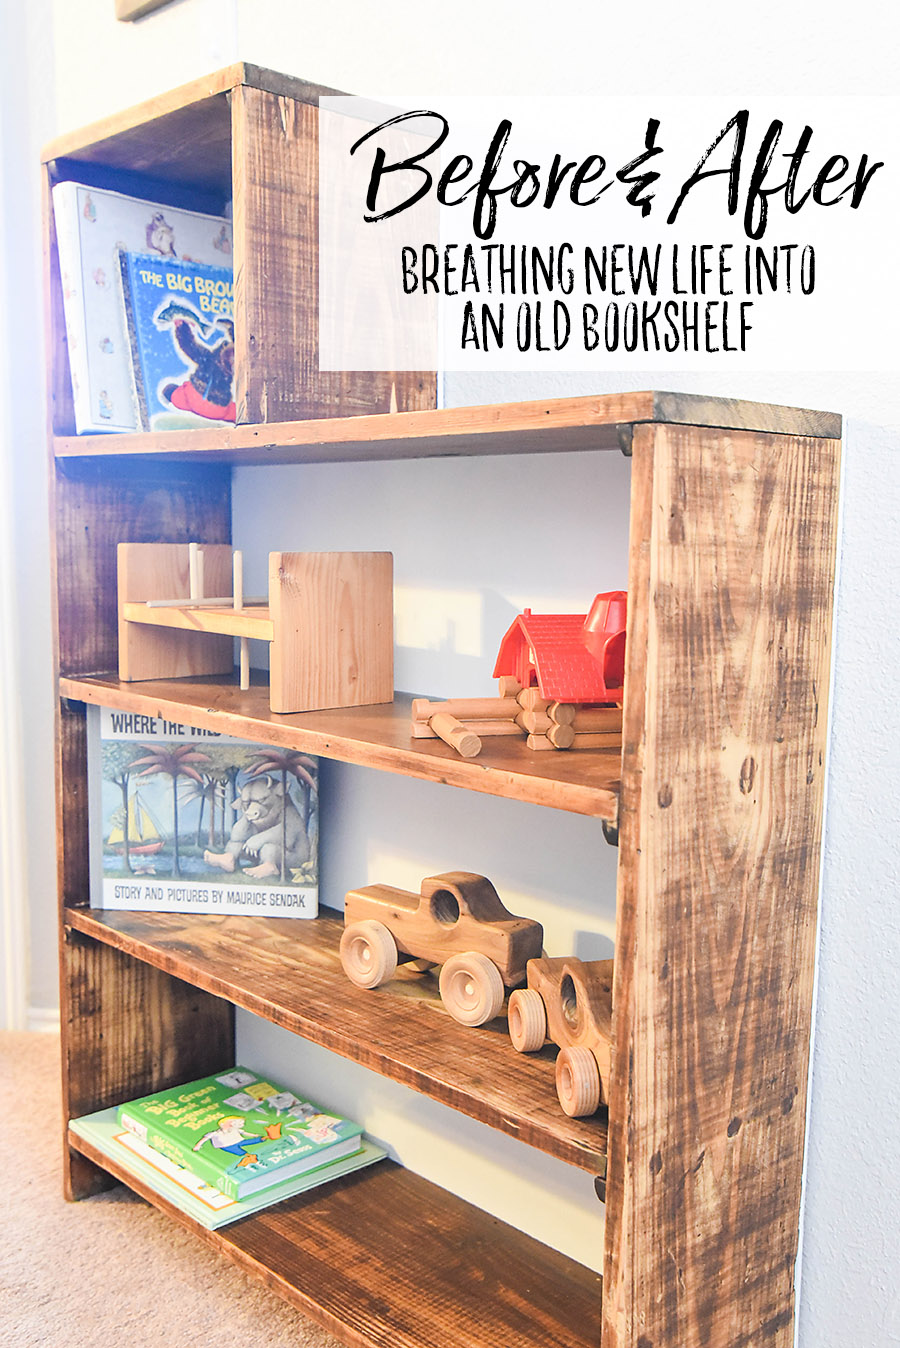
Do you have a wooden bookshelf that looks worn out or outdated? Refinishing it can bring new life to your favorite piece without spending a lot of money.
Imagine turning that scratched, dull shelf into a stunning centerpiece for your room. In this guide, you’ll discover simple steps to refinish your wooden bookshelf like a pro. Whether you’re a beginner or just want a fresh look, you’ll find easy tips that make the process smooth and satisfying.
Ready to transform your bookshelf and impress everyone who sees it? Let’s get started!
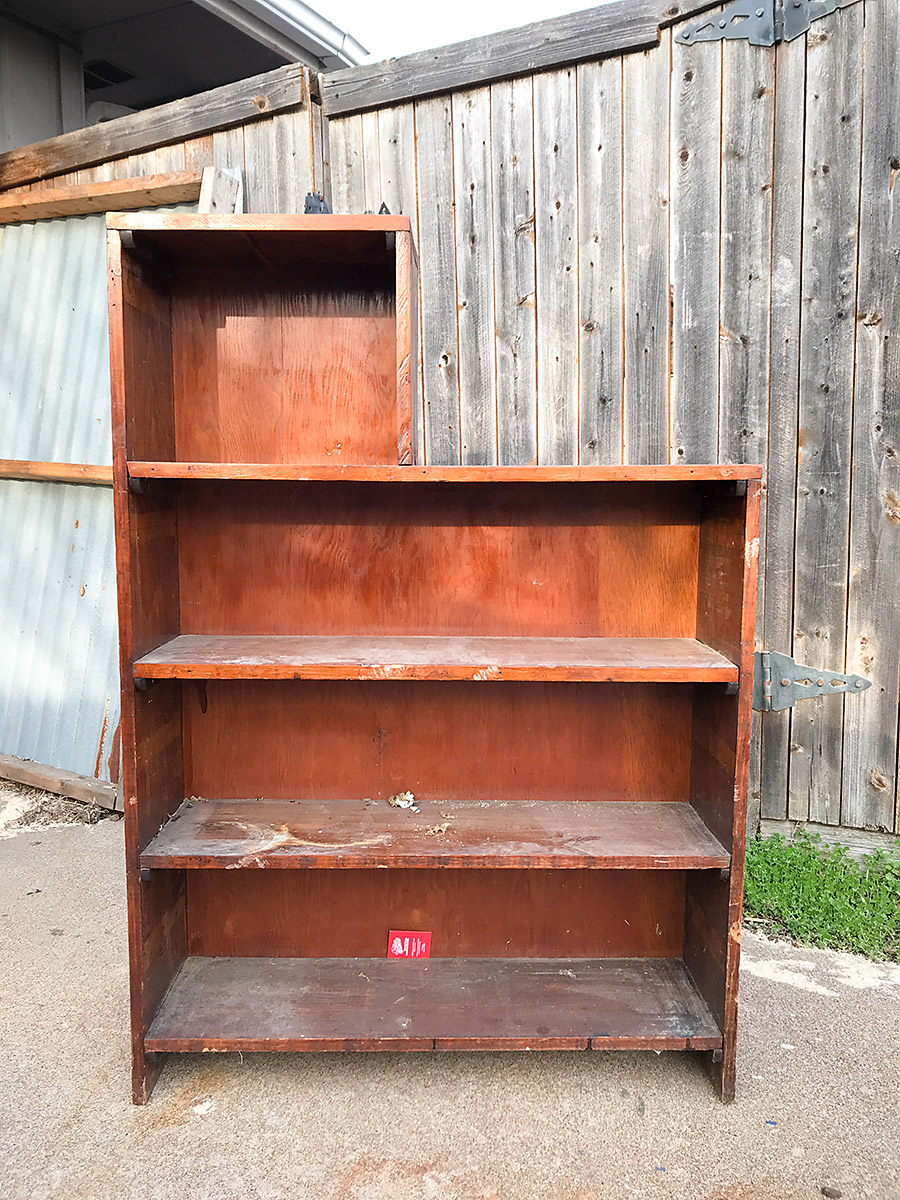
Credit: ourhandcraftedlife.com
Preparing The Bookshelf
Applying stain or paint is a key step in refinishing your wooden bookshelf. It changes the look and protects the wood. Choosing the right method helps you get a smooth and lasting finish. This section explains the tools, techniques, and drying tips for a perfect coat.
Tools And Materials Needed
Gather all supplies before starting. You need stain or paint, brushes, or foam applicators. Use sandpaper to smooth the surface first. Have a clean cloth to wipe off dust. Gloves protect your hands. A drop cloth keeps your work area clean. Stir sticks help mix the stain or paint.
Techniques For Even Application
Apply stain or paint in thin, even layers. Brush with the grain of the wood to avoid streaks. Use long, steady strokes to cover the surface. Avoid overloading the brush to prevent drips. Wipe off excess stain after a few minutes for a uniform look. Keep a wet edge to blend strokes smoothly.
Drying And Additional Coats
Let the first coat dry completely. Drying time depends on the product and weather. Check the label for exact times. Sand lightly between coats to remove rough spots. Apply additional coats for deeper color or better coverage. Wait until each coat dries fully before adding the next.
Choosing The Right Finish
Sealing and protecting your wooden bookshelf is the key to keeping it beautiful and strong. This step stops water, dust, and scratches from damaging the wood. It also helps the finish last longer, so your shelf looks fresh for years.
Choose the right sealant and apply it carefully. Then, let it dry well before use. Small efforts here bring big rewards for your bookshelf’s life.
Choosing A Sealant
Pick a sealant that fits your shelf’s use and look. Polyurethane is tough and works well for shelves that hold heavy items. It gives a shiny or matte finish.
Water-based sealants dry fast and have less smell. Oil-based ones last longer but take more time to dry. Consider clear sealants to keep the wood’s natural color.
Applying The Protective Coat
Use a clean brush or cloth for smooth application. Apply thin, even coats to avoid drips and bubbles. Let each coat dry fully before adding the next one.
Lightly sand between coats with fine sandpaper. This helps the next layer stick better. Clean off dust before applying more sealant.
Curing Time And Maintenance Tips
Let the shelf cure for at least 24 to 48 hours. Avoid placing items on it during this time. Full curing may take up to a week for best protection.
Clean the shelf with a soft cloth and mild cleaner. Avoid harsh chemicals that can wear the sealant. Reapply sealant every few years to keep the wood safe.
Applying Stain Or Paint
After refinishing your wooden bookshelf, reassembling and styling bring your project to life. Careful steps make the shelf both strong and beautiful. Thoughtful touches add personality and charm. Arranging books and decor creates a cozy, inviting space.
Reattaching Hardware
Start by putting back all screws, knobs, and handles. Use a screwdriver that fits well to avoid damage. Tighten each piece firmly but gently. Check for loose parts and fix them. Make sure doors and drawers open smoothly. Clean hardware with a soft cloth for shine. Old hardware can be replaced for a fresh look.
Adding Decorative Touches
Small details add style and warmth to your shelf. Place plants or small vases on empty spots. Use baskets or boxes to hide clutter. Add framed photos or artwork for a personal touch. Consider a small lamp for soft light. Keep decorations balanced, not crowded. Choose items that match the room’s style and colors.
Arranging Books And Decor
Organize books by size, color, or theme. Stack some books horizontally to break monotony. Mix books with decorative items for variety. Leave space for air and light to flow. Group similar items for a neat look. Change arrangements often to keep the shelf fresh. Use the shelf to show your style and interests.
Credit: simplepracticalbeautiful.com
Sealing And Protecting
Troubleshooting common problems helps improve your refinishing project. Small mistakes often happen but can be fixed easily. Learning how to solve these issues saves time and frustration.
Fixing Uneven Stain
Uneven stain makes the bookshelf look patchy. Use a clean cloth to wipe off extra stain from darker spots. Apply more stain lightly to lighter areas. Work in thin layers for better results. Sand lightly between coats to smooth the surface.
Removing Paint Drips
Paint drips create bumps and rough spots. Wait until the paint is dry. Gently sand the drips with fine-grit sandpaper. Be careful not to sand too much. Clean the area with a damp cloth before repainting or staining.
Repairing Surface Imperfections
Surface imperfections include scratches and dents. Fill small dents with wood filler using a putty knife. Let it dry fully before sanding smooth. For scratches, sand lightly and apply matching stain or paint. Smooth surfaces show off your bookshelf’s new finish better.
Credit: ourhandcraftedlife.com
Frequently Asked Questions
How Do I Prepare A Wooden Bookshelf For Refinishing?
Start by removing all items and dust from the bookshelf. Sand the surface with medium-grit sandpaper to remove old finish. Clean the dust thoroughly before applying any new finish. Proper preparation ensures better adhesion and a smoother final look.
What Type Of Finish Is Best For Wooden Bookshelves?
Oil-based polyurethane offers durability and rich color for bookshelves. Water-based finishes dry faster and have less odor. Choose based on desired appearance and use. Both protect wood and enhance its natural beauty.
Can I Refinish A Bookshelf Without Sanding?
Light scratches can be fixed without sanding using wood filler or restorer. However, sanding is crucial for removing old finish and ensuring smoothness. Skipping sanding may lead to poor finish adhesion and uneven texture.
How Long Does It Take To Refinish A Wooden Bookshelf?
Refinishing usually takes 1-3 days depending on drying times. Sanding, staining, and sealing each require adequate drying. Rushing the process can affect the final quality and durability.
Conclusion
Refinishing a wooden bookshelf can bring new life to old furniture. It takes time and patience, but the results are worth it. Sanding, staining, and sealing protect the wood and enhance its beauty. Each step helps you create a piece that fits your style.
Enjoy the process and watch your bookshelf transform. This project is great for beginners and offers a sense of pride. A refreshed bookshelf adds charm to any room. Give it a try and see the difference yourself.