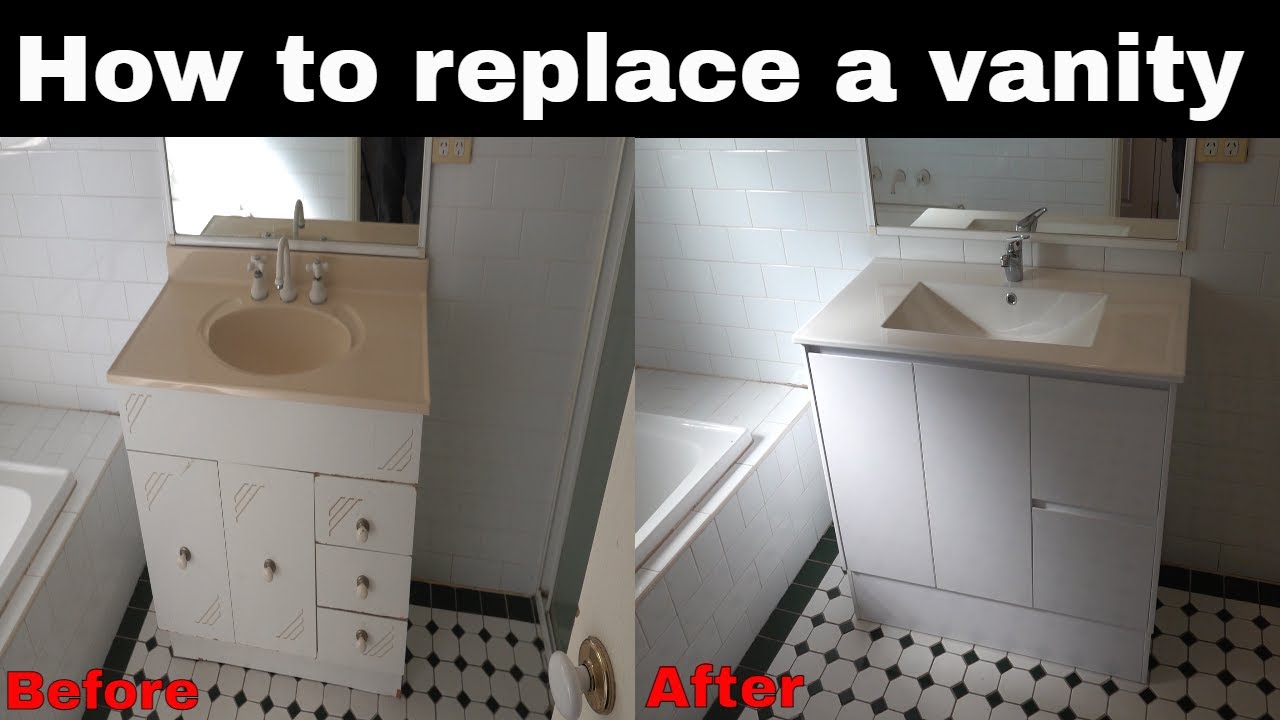
Are you tired of your old, worn-out vanity cabinet dragging down the look of your bathroom? Replacing it might seem like a big job, but with the right steps, you can do it yourself and transform your space quickly.
Imagine opening your bathroom door to a fresh, stylish cabinet that fits perfectly and makes your daily routine easier. In this guide, you’ll discover simple, clear instructions to replace your vanity cabinet without stress or costly mistakes. Ready to upgrade your bathroom and boost your home’s value?
Keep reading, and you’ll be surprised at how easy it can be.

Credit: southernhospitalityblog.com
Tools And Materials Needed
Replacing a vanity cabinet requires the right tools and materials. Having everything ready makes the job faster and easier. It helps avoid interruptions during work. Below is a list of what you need to gather before starting.
Basic Hand Tools
Start with basic hand tools. A screwdriver set is essential for removing screws. A hammer helps with small adjustments. A tape measure ensures accurate fitting. A level checks if the cabinet is straight. Pliers assist in gripping and twisting parts.
Power Tools
A drill speeds up screw removal and installation. Use drill bits suitable for wood or metal. A jigsaw or circular saw may be needed for cutting. These tools make custom fitting easier. Safety glasses protect your eyes while using power tools.
Materials For Installation
Gather new screws and wall anchors for secure mounting. Use silicone caulk to seal edges and prevent water damage. Wood shims help level the cabinet on uneven floors. Sandpaper smooths rough edges or surfaces. Primer and paint refresh the cabinet or wall if needed.
Safety Gear
Wear gloves to protect your hands from cuts. Use safety glasses to shield eyes from dust and debris. A dust mask prevents inhalation of fine particles. Proper footwear protects feet from falling objects.

Credit: www.youtube.com
Preparing The Bathroom
Preparing the bathroom is the first step in replacing a vanity cabinet. It helps avoid damage and keeps the work area clear. Taking time to prepare saves effort later and makes the process smoother.
Start by clearing space around the vanity. Remove items from the countertop and nearby shelves. Protect the floor with a drop cloth to catch debris or water. A clean, organized area helps you work safely and efficiently.
Shutting Off Water Supply
Turn off the water supply to prevent leaks and flooding. Locate the shutoff valves under the sink or near the main water line. Turn valves clockwise until tight. If no local shutoff exists, close the main water supply.
After shutting off water, open the faucet to drain remaining water. This step lowers pressure in pipes and reduces spills. Keep a bucket and towels nearby to catch any drips.
Removing Fixtures And Accessories
Remove all fixtures connected to the vanity before detaching the cabinet. Start with the faucet by loosening mounting nuts and disconnecting water lines. Use a wrench but avoid overtightening or stripping bolts.
Next, detach the sink if it is separate from the cabinet. Unscrew clips or bolts holding it in place. Carefully lift the sink to avoid damage. Remove any towel bars, mirrors, or hooks attached to the vanity.
Keep all screws and small parts in a container for reuse or disposal. Label parts if needed to avoid confusion later. A tidy workspace helps you stay organized during the project.
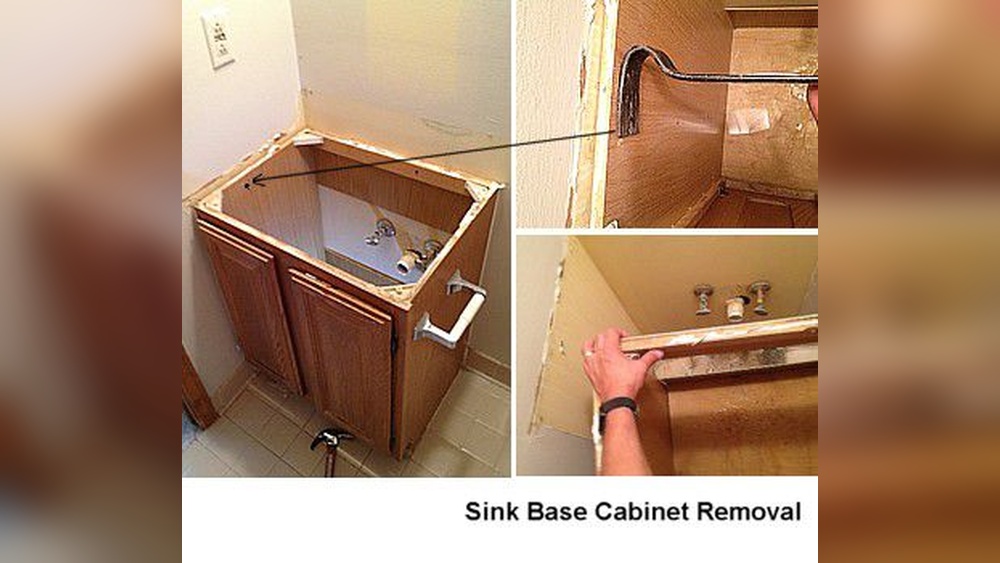
Removing The Old Vanity
Removing the old vanity is the first step in replacing your bathroom cabinet. This task needs care to avoid damaging plumbing or walls. Take your time and prepare the space before starting. Clear the area around the vanity for easy access. Gather all tools needed, like wrenches and screwdrivers. Safety is important, so turn off the water supply before touching any pipes.
Follow each step carefully to remove the old vanity smoothly. This process includes disconnecting plumbing and detaching the cabinet itself. These tasks help make space for your new vanity cabinet.
Disconnecting Plumbing
Begin by turning off the main water valve. This stops water flow to the sink pipes. Next, open the faucet to drain any water left in the pipes. Place a bucket under the drain pipe to catch water spills. Use a wrench to loosen the slip nuts on the drain and water supply lines. Carefully disconnect the pipes from the vanity. Check for any leaks before moving on.
Detaching The Vanity
Remove any screws or nails holding the vanity to the wall. Use a screwdriver or drill for this step. Gently pull the vanity away from the wall. If the cabinet sticks, check for hidden fasteners or caulk. Cut through caulk with a utility knife if needed. Lift the vanity out of place carefully to avoid damage. Clear the area and clean the floor for the new installation.
Measuring And Selecting The New Vanity
Measuring and selecting the new vanity is a key step in replacing your bathroom cabinet. Precise measurements help avoid fitting problems. Picking the right style and size ensures the new vanity matches your space and needs.
Taking Accurate Measurements
Start by measuring the width of the current vanity from wall to wall. Measure the depth from the front edge to the back wall. Check the height from the floor to the top of the cabinet. Note the position of plumbing pipes and outlets. Use a tape measure and write down every number clearly. Double-check your measurements for accuracy. These details help find a vanity that fits perfectly.
Choosing The Right Style And Size
Decide on a style that matches your bathroom’s look. Vanities come in modern, traditional, and transitional designs. Pick a size that fits your space without crowding it. Consider storage needs and countertop space. A smaller vanity works well in tight areas. A larger one offers more storage but needs enough room. Think about the sink type, such as under-mount or vessel. Match the vanity color to your bathroom’s palette. This keeps the space balanced and pleasant.
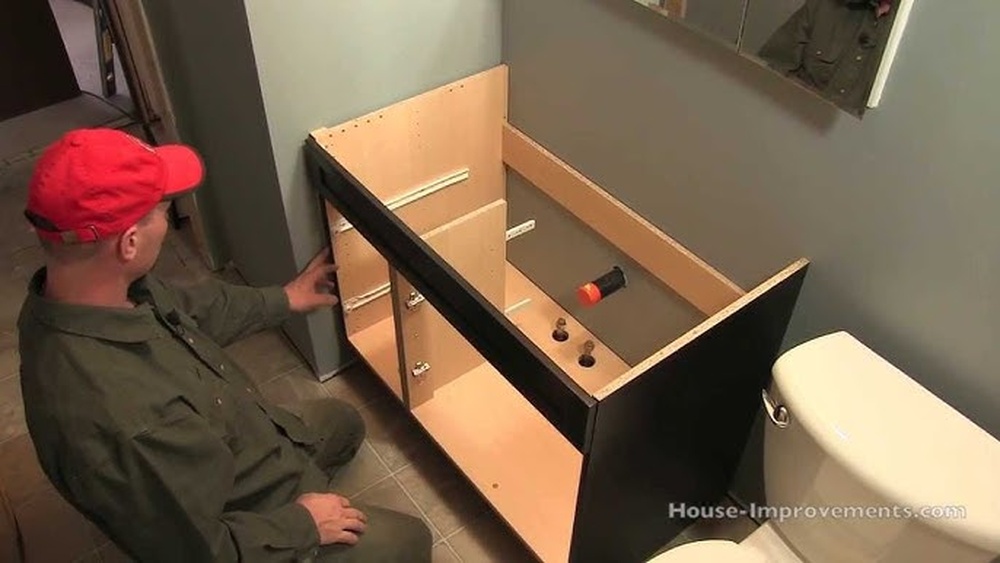
Installing The New Vanity
Installing the new vanity is a key step in your bathroom upgrade. This part needs care and attention. Proper installation makes sure the cabinet fits well and works right. Take your time to avoid mistakes and extra work later.
Positioning And Securing The Cabinet
Start by placing the vanity in the correct spot. Check it fits against the wall and floor evenly. Use a level to make sure it is straight. Small gaps can cause problems with the countertop later.
Mark the wall through the cabinet’s back panel holes. These marks show where to drill for screws. Remove the cabinet and drill pilot holes in the wall studs. Put the vanity back and screw it firmly to the wall. Tighten the screws but do not crack the cabinet.
Reconnecting Plumbing
Turn on the water supply before starting plumbing work. Connect the drain pipe to the sink drain. Make sure the connection is tight to avoid leaks. Attach the water supply lines to the faucet. Use plumber’s tape on threaded joints for a better seal.
Check for leaks by turning on the faucet slowly. Watch the pipes and connections closely. Tighten any loose fittings right away. Proper plumbing prevents water damage and keeps your bathroom safe.
Finishing Touches
Finishing touches make your new vanity cabinet look complete and polished. These small details protect your work and add style. Take time to do these steps carefully for the best result.
Sealing And Caulking
Seal all edges between the vanity and walls. Use a good quality silicone caulk for water resistance. Smooth the caulk line with a wet finger for a neat finish. This stops water from seeping into gaps. It also keeps mold and mildew away. Let the caulk dry fully before using the vanity.
Adding Hardware And Accessories
Attach knobs or handles to drawers and doors. Choose hardware that matches your bathroom style. Make sure screws are tight but not too tight. Add accessories like towel bars or soap holders if needed. These small items improve function and look. Check that everything works smoothly before finishing up.
Tips For A Smooth Upgrade
Replacing a vanity cabinet can change the whole look of your bathroom. A smooth upgrade saves time and reduces stress. Careful planning and simple steps make the process easier.
Focus on key tips to avoid common mistakes. These tips help you finish the job with confidence and good results.
Prepare Your Space Before Starting
Clear the area around the old vanity. Remove items from cabinets and countertops. Protect the floor with a drop cloth or old towels. Turn off water supply to avoid leaks. Have a bucket ready to catch any water drips.
Measure Twice, Buy Once
Measure the width, depth, and height of your current vanity. Check door and drawer clearance. Compare these with the new cabinet dimensions. This step avoids buying a vanity that does not fit.
Disconnect Plumbing Carefully
Loosen the water supply lines with a wrench. Remove the drain pipe from the sink. Use a towel to catch water spills. Take your time to avoid damaging pipes or fittings.
Remove Old Vanity Safely
Unscrew the cabinet from the wall. Pull the vanity away gently. Check for nails or screws stuck in the wall. Patch any holes or damage before installing the new cabinet.
Install The New Vanity Correctly
Place the new cabinet in position. Use a level to make sure it is even. Secure the cabinet to wall studs with screws. Reconnect plumbing and test for leaks. Tighten connections as needed.
Credit: www.youtube.com
Frequently Asked Questions
How Do I Remove An Old Vanity Cabinet Safely?
Turn off water supply and disconnect plumbing first. Remove screws and gently detach the cabinet from the wall. Use caution to avoid damaging surrounding tiles or drywall.
What Tools Are Needed To Replace A Vanity Cabinet?
You will need a screwdriver, adjustable wrench, level, measuring tape, and a drill. Additional tools may include a utility knife and plumbing tape.
How Do I Measure For A New Vanity Cabinet?
Measure the width, depth, and height of the existing space. Ensure the new vanity fits comfortably without blocking doors or plumbing fixtures.
Can I Install A Vanity Cabinet Myself?
Yes, with basic DIY skills and tools, you can install a vanity. Follow instructions carefully and ensure plumbing connections are secure to avoid leaks.
Conclusion
Replacing a vanity cabinet can seem tough at first. Step-by-step work makes it easier and safer. Take your time and follow the instructions carefully. Use the right tools and materials for the best results. A new vanity cabinet can improve your bathroom’s look and function.
Small projects like this build your confidence in home repairs. Enjoy the fresh, clean space you create. Ready for your next project? Keep practicing and learning new skills.