Are you ready to take apart your wooden bunk bed but not sure where to start? Whether you’re moving, making room for something new, or just need to store it safely, taking apart a bunk bed can feel tricky.
But don’t worry—you can do it step by step, without stress or damage. In this guide, you’ll discover simple, clear instructions that make the whole process smooth and easy. Keep reading, and you’ll have your bunk bed taken apart like a pro in no time.

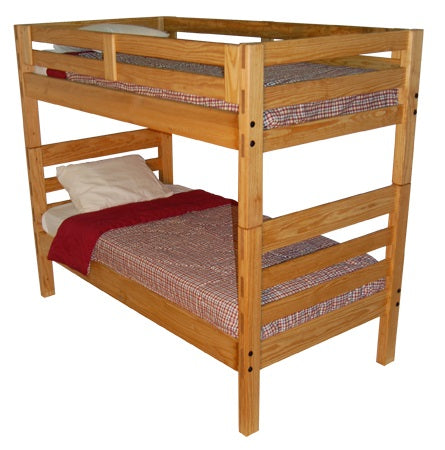
Credit: removalsandstoragex.com
Tools Needed
Taking apart a wooden bunk bed requires the right tools. These tools make the process easier and safer. Having them ready saves time and avoids frustration. Some tools are essential, while others help speed up the job.
Essential Tools
A screwdriver is a must-have for removing screws. Choose one with a comfortable handle. A Phillips head screwdriver fits most bunk bed screws. A flathead screwdriver may be needed for some parts.
An adjustable wrench helps loosen bolts and nuts. It fits different sizes without needing many tools. A hammer can gently tap parts loose if stuck. Use it carefully to avoid damage.
A set of Allen wrenches (hex keys) is often needed. Many wooden beds use hex bolts. These wrenches come in different sizes. Keep them organized to find the right size fast.
Optional Tools For Ease
A power drill with screwdriver bits speeds up screw removal. It reduces hand strain and saves time. Use a low speed to avoid stripping screws.
Rubber gloves protect your hands from splinters and dirt. They also improve grip on small parts. A pair of pliers helps hold nuts steady while loosening bolts. Needle-nose pliers are best for tight spaces.
Labeling tape and a marker are useful for marking parts. This helps when reassembling or storing the bed pieces. Keep small parts in containers to avoid losing them.
Prepare The Area
Preparing the area is the first step to safely take apart a wooden bunk bed. A clean and organized space helps you work faster and avoid accidents. Taking time now saves effort later.
Clear The Space
Remove all furniture and items near the bunk bed. Make room for tools and parts. This keeps the area safe and easy to move around in. A wide, open space helps you see everything clearly.
Protect The Floor
Lay down blankets or cardboard under the bed. This stops scratches and dents on your floor. Use thick materials to cushion heavy wooden pieces. Floor protection keeps your home looking good after the job.
Remove Bedding And Accessories
Removing bedding and accessories is the first step to take apart a wooden bunk bed. It clears the space and makes the job easier. Start by taking off all sheets, blankets, and pillows from both the top and bottom bunks.
Clear any toys, books, or personal items. These can get lost or damaged during disassembly. Removing everything helps you see all the parts of the bed clearly.
Strip The Sheets And Blankets
Pull off all sheets and blankets carefully. Fold them and put them aside. This keeps your bedding clean and ready to use later.
Remove Pillows And Cushions
Take off pillows and cushions from each bunk. Set them in a safe place. This step prevents them from getting dirty or torn.
Clear Personal Items And Toys
Check for any toys, books, or decorations on the bed. Remove everything before you start taking the bed apart. This makes the process faster and safer.
Disassemble The Guardrails
Disassembling the guardrails is an important step in taking apart a wooden bunk bed. Guardrails keep sleepers safe by preventing falls. Removing them carefully helps protect the wood and hardware. This step prepares the bed for easier transport or storage.
Locate Fasteners
Start by finding all screws or bolts holding the guardrails. Check both ends of each guardrail for metal fasteners. Some beds use brackets or wooden dowels too. Use a flashlight if needed to see hidden screws clearly. Knowing the fastener types helps choose the right tools.
Unscrew Carefully
Use a screwdriver or wrench to remove each fastener slowly. Turn screws counterclockwise to loosen them. Keep a steady hand to avoid stripping the heads. Place all screws and bolts in a container to avoid losing them. Gently pull the guardrails away once all fasteners are out.
Detach The Ladder
Detaching the ladder from a wooden bunk bed is a simple yet important step. It ensures safety and prepares the bed for moving or storage. This part often bears weight and must be removed carefully to avoid damage.
Check Attachment Points
Look closely at where the ladder connects to the bed frame. These points usually have screws or bolts. Identify if the ladder is screwed or bolted on. Sometimes, brackets hold the ladder in place. Note all fasteners before starting.
Remove Ladder Safely
Use the right tools like a screwdriver or wrench. Loosen each screw or bolt carefully. Hold the ladder firmly to prevent it from falling. Remove all fasteners before pulling the ladder away. Place the ladder on a soft surface to avoid scratches or dents.

Credit: removalsandstoragex.com
Take Apart The Upper Bed Frame
Taking apart the upper bed frame of a wooden bunk bed requires care and patience. Start by clearing the area around the bed for easy movement. This part is important to ensure safety and avoid damage. Follow the steps carefully to separate each component smoothly.
Remove Slats
Begin by removing the slats that support the mattress. These wooden slats usually rest on ledges or fit into slots. Lift each slat gently to avoid breaking them. If screws hold the slats, use a screwdriver to remove them. Keep the slats in a safe place to avoid losing them.
Separate Frame Components
Next, separate the main frame parts of the upper bed. Locate the bolts or screws joining the side rails to the headboard and footboard. Use the right tools to unscrew these fasteners carefully. Pull the frame parts apart slowly to prevent cracks in the wood. Store all hardware together for easy reassembly later.
Disassemble The Lower Bed Frame
Disassembling the lower bed frame is the first big step in taking apart a wooden bunk bed. This part holds the mattress and supports the whole lower bunk. Taking it apart carefully helps avoid damage and makes moving easier. Follow these steps to remove each piece safely and keep everything organized.
Remove Slats
Start by taking off the slats. These are the thin wooden strips that hold the mattress. Check how they are attached. Most slats rest on ledges or are screwed in place. Use a screwdriver to remove any screws gently. If slats just rest on the frame, lift them carefully one by one. Keep the slats in a pile to avoid losing them.
Separate Frame Components
Next, separate the main frame parts. Wooden bunk beds usually have side rails, end panels, and support beams. Look for bolts or screws connecting these pieces. Use the right tools to unscrew them slowly. Pull the parts apart carefully. Avoid forcing anything to prevent cracks or breaks. Lay the pieces flat and label them if needed for easier reassembly.
Handle The Bed Posts
Removing the bed posts is a key step in taking apart a wooden bunk bed. The posts hold the structure together, so handle them carefully. Taking them apart properly avoids damage and makes reassembly easier.
Prepare a clean, flat space to lay the posts down after removal. Keep track of all screws and small parts during this step.
Unscrew Posts
Use a screwdriver or drill to unscrew the bed posts. Turn screws counterclockwise to loosen them. Work slowly to avoid stripping the screws or damaging the wood.
Remove all screws connecting the posts to the frame. Check both the top and bottom connections. Gently pull the posts away once all screws are out.
Store Hardware
Collect all screws, bolts, and washers from the posts. Place them in a labeled container or ziplock bag. This prevents losing parts and keeps everything organized.
Keep the hardware container with the bed pieces. It helps when you need to put the bed back together later. A simple system saves time and frustration.
Organize And Store Parts
After taking apart a wooden bunk bed, organizing and storing the parts properly makes reassembly simple. Keeping everything neat saves time and reduces frustration. It helps avoid lost pieces and confusion later.
Sorting parts right away keeps the process smooth. Use clear labels and secure storage for all components. This method keeps your workspace tidy and parts protected.
Label Components
Label every piece clearly. Use masking tape and a marker to write names or numbers. Stick labels on edges or flat surfaces that are easy to see.
Mark parts like side rails, guardrails, and ladder pieces separately. This way, each piece is easy to find during reassembly. It also prevents mixing up similar parts.
Keep a simple list of all labeled parts. Cross-check the list after packing to ensure nothing is missing.
Pack Fasteners
Collect all screws, bolts, and nuts in a small container. Use a clear plastic bag or a small box with a lid.
Label the container with details like “bunk bed screws.” Include washers and any special fasteners. This keeps everything in one place and stops loss.
Store the container with the wooden parts or in a safe spot. Fasteners are small and easy to misplace without proper care.
Credit: shelteroutfitters.com
Safety Tips
Start by clearing the area around the bunk bed to avoid tripping. Use proper tools and wear gloves to protect your hands. Keep screws and small parts in a container to prevent loss.
Work With A Partner
Taking apart a wooden bunk bed is easier and safer with help. A partner can hold parts steady while you unscrew bolts. This teamwork reduces the risk of dropping heavy pieces. It also speeds up the process. Two people can share the load and avoid strain or injury.
Avoid Damage
Protect the wood by using the right tools. Use a screwdriver that fits the screws well. Avoid forcing parts apart to prevent cracks or splits. Place a soft cloth under parts to stop scratches. Keep screws and small pieces in a container to avoid losing them.
Frequently Asked Questions
How Do I Safely Disassemble A Wooden Bunk Bed?
Start by removing mattresses and bedding. Use proper tools like screwdrivers or Allen wrenches. Unscrew bolts carefully, keeping hardware organized. Avoid forcing joints to prevent damage. Work methodically from top to bottom for safety.
What Tools Are Needed To Take Apart A Bunk Bed?
You typically need a screwdriver, Allen wrench, and a rubber mallet. A power drill can speed up the process. Keep a container handy for screws and bolts. Having these tools ensures smooth, damage-free disassembly.
How To Keep Bunk Bed Parts Organized During Disassembly?
Use labeled bags or containers for screws and small parts. Take photos of each step for easy reassembly. Group similar components together. This organization prevents loss and simplifies the rebuilding process later.
Can I Disassemble A Bunk Bed Alone?
Yes, but it’s safer with a helper. Some parts can be heavy or awkward. Having assistance reduces the risk of injury and damage. If alone, work slowly and use stable surfaces for support.
Conclusion
Taking apart a wooden bunk bed is easier than it seems. Follow the steps carefully and take your time. Keep all screws and small parts in a safe place. Use the right tools to avoid damage or injury. Work with a friend for extra help and safety.
This simple process helps you move or store the bed quickly. Enjoy your clear space once the bed is taken apart. You can always put it back together later. Simple, safe, and stress-free.