Are you tired of cluttered entryways and messy coats lying around? Imagine having a stylish, functional coat rack that fits perfectly in your space and adds a touch of charm to your home.
Making your own accordion coat rack is easier than you think, and it’s a project you can finish in just a few hours. In this guide, you’ll discover simple steps and handy tips to create a unique rack that keeps your coats, hats, and scarves organized.
Ready to transform your space and impress your guests? Let’s get started!
Materials Needed
Gathering the right materials is key to making a sturdy accordion coat rack. Good materials ensure your rack lasts long and looks great on your wall.
Focus on quality wood and the right hardware. Also, prepare the right tools to make the job easier and safer.
Wood Selection
Choose wood that is strong and easy to work with. Pine and oak are popular options for their durability.
Pick wood pieces that are smooth and straight. Avoid any wood with cracks or knots.
Measure the wood to fit your space. Standard sizes work well for most coat racks.
Hardware Components
You need screws, nails, and hooks for your rack. These parts hold everything together and support weight.
Use metal hooks that can handle heavy coats. Make sure screws are the right length for your wood.
Consider using washers to keep screws tight and prevent damage.
Tools Required
Prepare basic tools such as a saw, drill, and screwdriver. These help you cut and assemble the wood.
A measuring tape and pencil are essential for accuracy. Mark your cuts and drill spots carefully.
Sandpaper smooths rough edges and makes the rack safe to use. A level helps keep the rack straight on the wall.
Design And Measurements
Design and measurements are the foundation of a sturdy accordion coat rack. Precise planning ensures the rack fits your space and holds coats well. Taking time to measure and mark wood parts carefully saves effort later. This section guides you through selecting the right size, marking the wood accurately, and planning the accordion mechanism for smooth operation.
Choosing The Size
Decide where you will place the coat rack. Measure the wall space to find the maximum width and height. Consider the number of coats you want to hang. A wider rack holds more coats, but needs more wall space. Choose a size that fits your space and needs comfortably.
Marking The Wood
Select wood pieces that match your chosen size. Use a pencil and ruler to mark exact lengths on the wood. Mark the points for holes and hinges clearly. Double-check all measurements before cutting. Accurate marking helps create a neat and strong coat rack.
Planning The Accordion Mechanism
Plan how the rack will open and close like an accordion. Mark the wood pieces that will connect with hinges. Space the hinges evenly for smooth folding. Test the folding movement with scrap wood if possible. A well-planned mechanism makes the rack easy to use and durable.
Cutting And Preparing Wood
Cutting and preparing wood is the first important step in making an accordion coat rack. This step ensures that your wood pieces fit together perfectly. It also helps your rack look neat and last long. Taking care with measurements and smoothing edges will make your project easier and safer.
Measuring And Cutting Panels
Start by measuring the size of each panel carefully. Use a tape measure and mark the wood with a pencil. Double-check the marks before cutting to avoid mistakes. Use a saw that fits your skill level, such as a handsaw or a jigsaw. Cut slowly and follow the lines straight. Keep the wood steady to get clean cuts.
Sanding And Smoothing Edges
After cutting, sand all edges of the wood panels. Use medium-grit sandpaper first to remove splinters. Then switch to fine-grit sandpaper to smooth the surface. Smooth edges prevent scratches and make the rack safer to handle. Sand in the direction of the wood grain for the best finish. Wipe dust off with a dry cloth before assembly.

Credit: www.remodelandolacasa.com
Assembling The Rack
Assembling the accordion coat rack is a simple process that brings all parts together. This step transforms your materials into a useful rack. Focus on careful attachment and alignment for a sturdy finish.
Attaching Hinges
Start by placing the wooden slats side by side. Attach the hinges evenly between the slats. Use small screws to secure the hinges tightly. Ensure the hinges allow the rack to fold and expand smoothly. Check that all hinges are aligned straight for balance.
Ensuring Flexibility
Test the rack by expanding and folding it gently. The rack should open wide and close compactly without resistance. Adjust any hinge that feels stiff or loose. Proper flexibility helps the rack fit various wall spaces. Keep the movement smooth to avoid damage over time.
Fixing Hooks Or Pegs
Choose strong hooks or pegs to hold coats and bags. Attach them evenly across the slats, leaving enough space between each. Screw the hooks firmly into the wood. Make sure the hooks face outward for easy hanging. The right placement keeps your items organized and accessible.
Finishing Touches
Finishing touches give your accordion coat rack a polished, complete look. They protect the wood and improve the rack’s durability. Simple steps make a big difference in both appearance and function. Follow these tips to finish your project beautifully.
Painting Or Staining
Choose paint or stain based on your room’s style. Paint offers bright colors and smooth coverage. Stain shows the wood’s natural grain and adds warmth. Apply evenly with a brush or cloth. Let it dry fully before the next step.
Adding Protective Coating
Protective coating keeps your rack safe from scratches and moisture. Use clear varnish, polyurethane, or lacquer. Apply thin coats with a clean brush. Allow each coat to dry well. This step extends the life of your rack.
Mounting The Rack
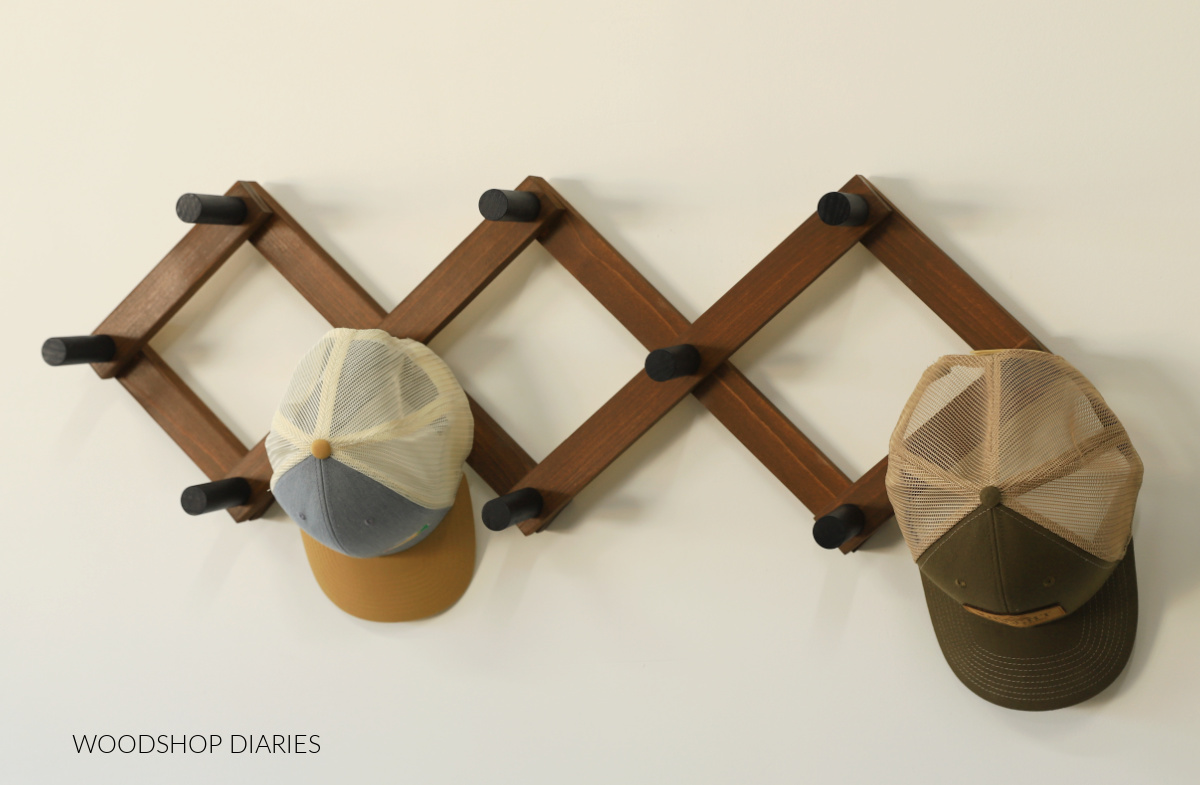
Select a sturdy wall space for mounting. Use screws and anchors suitable for your wall type. Mark holes carefully to keep the rack level. Secure the rack firmly to prevent wobbling. Test the strength by hanging a few coats gently.
Credit: www.woodshopdiaries.com
Maintenance Tips
Taking care of your accordion coat rack helps it last longer and look great. Simple maintenance keeps it strong and clean. Follow these easy steps to protect your rack.
Cleaning Advice
Dust the coat rack with a soft cloth often. Use a damp cloth to wipe dirt gently. Avoid harsh cleaners that damage the wood or finish. Dry the rack well after cleaning to stop moisture damage.
Tightening Hardware
Check screws and bolts regularly. Tighten any loose parts with a screwdriver or wrench. Loose hardware can make the rack unstable. Secure parts keep the rack safe and sturdy.
Preventing Wear
Do not overload the rack with heavy items. Use hooks evenly to spread weight. Keep the rack away from direct sunlight and moisture. These steps prevent cracks and fading over time.
Creative Customization Ideas
Creative customization transforms a basic accordion coat rack into a unique piece. It reflects your style and adds charm to your space. Simple changes can make a big difference. Explore ideas to personalize your coat rack easily.
Decorative Patterns
Paint patterns on the wood to give it character. Stripes, dots, or chevrons work well. Use stencils for neat shapes. You can also carve simple designs with a wood burner. Patterns make the rack stand out and look stylish.
Color Combinations
Choose colors that match your room’s theme. Try bold colors for a lively look. Soft pastels create a calm feel. Painting each slat a different color adds fun. Use a clear coat to protect the paint and keep it fresh.
Additional Features
Add hooks for keys or small bags. Attach a small shelf on top for hats or mail. Place magnets to hold metal items like scissors. Use rubber pads on the ends to prevent wall damage. These extras increase the rack’s usefulness and style.

Credit: www.woodshopdiaries.com
Frequently Asked Questions
What Materials Are Needed For An Accordion Coat Rack?
You need wood slats, screws, hinges, wall anchors, and paint or stain. Choose quality wood for durability. Hinges connect the slats, allowing expansion. Wall anchors secure the rack firmly. Paint or stain protects and beautifies the wood surface.
How Do I Assemble An Accordion Coat Rack?
Attach hinges between wood slats to form the expandable structure. Secure the first and last slats to the wall with anchors. Ensure the rack folds and expands smoothly. Adjust screws for tightness to prevent wobbling. Finish with paint or stain after assembly.
Can I Customize The Size Of The Coat Rack?
Yes, customize by increasing or decreasing wood slats. More slats mean a wider rack with more hooks. Adjust spacing between hooks to fit your needs. Ensure hinges align properly for smooth folding. Custom sizes fit any wall space perfectly.
How Do I Install The Coat Rack On The Wall?
Locate studs in your wall for secure mounting. Use wall anchors if no studs are available. Mark drill points through the first and last slats. Drill pilot holes and screw the rack firmly in place. Check the rack’s stability before use.
Conclusion
Building your own accordion coat rack adds style and function to any space. You control the design and size to fit your needs. The project requires only basic tools and materials you can find easily. It also gives a great sense of achievement once done.
Try making one for your home or as a gift. Small efforts bring big rewards in DIY projects. Enjoy your new, handy coat rack every day.