Have you ever wished your bookshelf could do more than just hold your books? Adding a door to your bookshelf can transform it from a simple storage unit into a stylish, secretive space that keeps dust away and hides clutter.
Imagine opening your bookshelf door to reveal a neat, organized collection or even a hidden nook. In this guide, you’ll discover easy steps to add a door to your bookshelf, giving your room a fresh look and a touch of mystery.
Ready to upgrade your bookshelf and impress everyone who sees it? Let’s dive in and make your bookshelf work harder for you.

Credit: www.youtube.com
Choosing The Right Door Style
Choosing the right door style for your bookshelf is important. The door should fit your space and needs. It affects how your bookshelf looks and works. Picking the right style can make your room feel more organized and stylish. Consider how you use the bookshelf and what design matches your home.
Sliding Vs Hinged Doors
Sliding doors save space. They slide sideways on a track and do not need extra room to open. This makes them great for small areas. Hinged doors swing open like a cabinet door. They require space in front to open fully. Hinged doors offer easy access to all shelves at once. Choose sliding doors for tight spaces and hinged doors for easy reach.
Material Options
Wood doors give a classic and warm look. They can be painted or stained to match furniture. Glass doors show off your books while protecting them from dust. Frosted or clear glass adds style and lightness. Metal doors are strong and modern. Consider durability and style when picking material.
Matching Your Decor
Match the door style to your room’s design. Traditional rooms suit wood or paneled doors. Modern spaces fit glass or metal doors. Think about colors and textures in your room. Choose doors that blend or stand out as a feature. The right door enhances your bookshelf and the whole room.
Measuring Your Bookshelf
Measuring your bookshelf is the first step to adding a door. Accurate measurements ensure the door fits perfectly. Taking time here saves frustration later. Use a tape measure and note all dimensions clearly.
Height And Width Accuracy
Measure the height from the bottom to the top of the shelf. Check the width across the opening where the door will go. Measure at several points to catch any unevenness. Use the smallest measurement for your door size. This prevents the door from being too big to fit.
Depth Considerations
Measure the depth of the bookshelf to know how thick your door can be. The door should not stick out too far from the shelf. Allow space for hinges and the door frame. Think about how the door will open without hitting nearby objects.
Door Frame Clearance
Leave space around the door edges for the frame and hinges. This clearance lets the door open and close smoothly. Measure the gap between shelves and side walls inside the shelf. Add about 1/8 inch clearance on all sides for easy movement.
Gathering Necessary Tools And Materials
Adding a door to a bookshelf is a smart way to protect your books and improve the look. Before starting, gather all tools and materials. This step saves time and makes the project easier. Having everything ready helps you work smoothly and avoid interruptions.
Essential Tools List
Prepare basic tools for the job. You need a drill to make holes for screws. A screwdriver is necessary to fix hinges and handles. A tape measure helps check dimensions accurately. Use a level to keep the door straight. Sandpaper smooths rough edges. A saw may be needed to cut wood or trim the door.
Selecting Hardware
Pick the right hinges for your door size and weight. Choose handles that match your style and fit comfortably. Screws must be strong and the right length. Consider magnetic catches or locks to keep the door closed. Hardware quality affects the door’s function and durability.
Safety Equipment
Protect yourself while working. Wear safety goggles to shield your eyes from dust and debris. Use gloves to avoid cuts and splinters. A dust mask keeps you from breathing sawdust. Good lighting helps you see details clearly. Safety ensures a smooth, accident-free project.
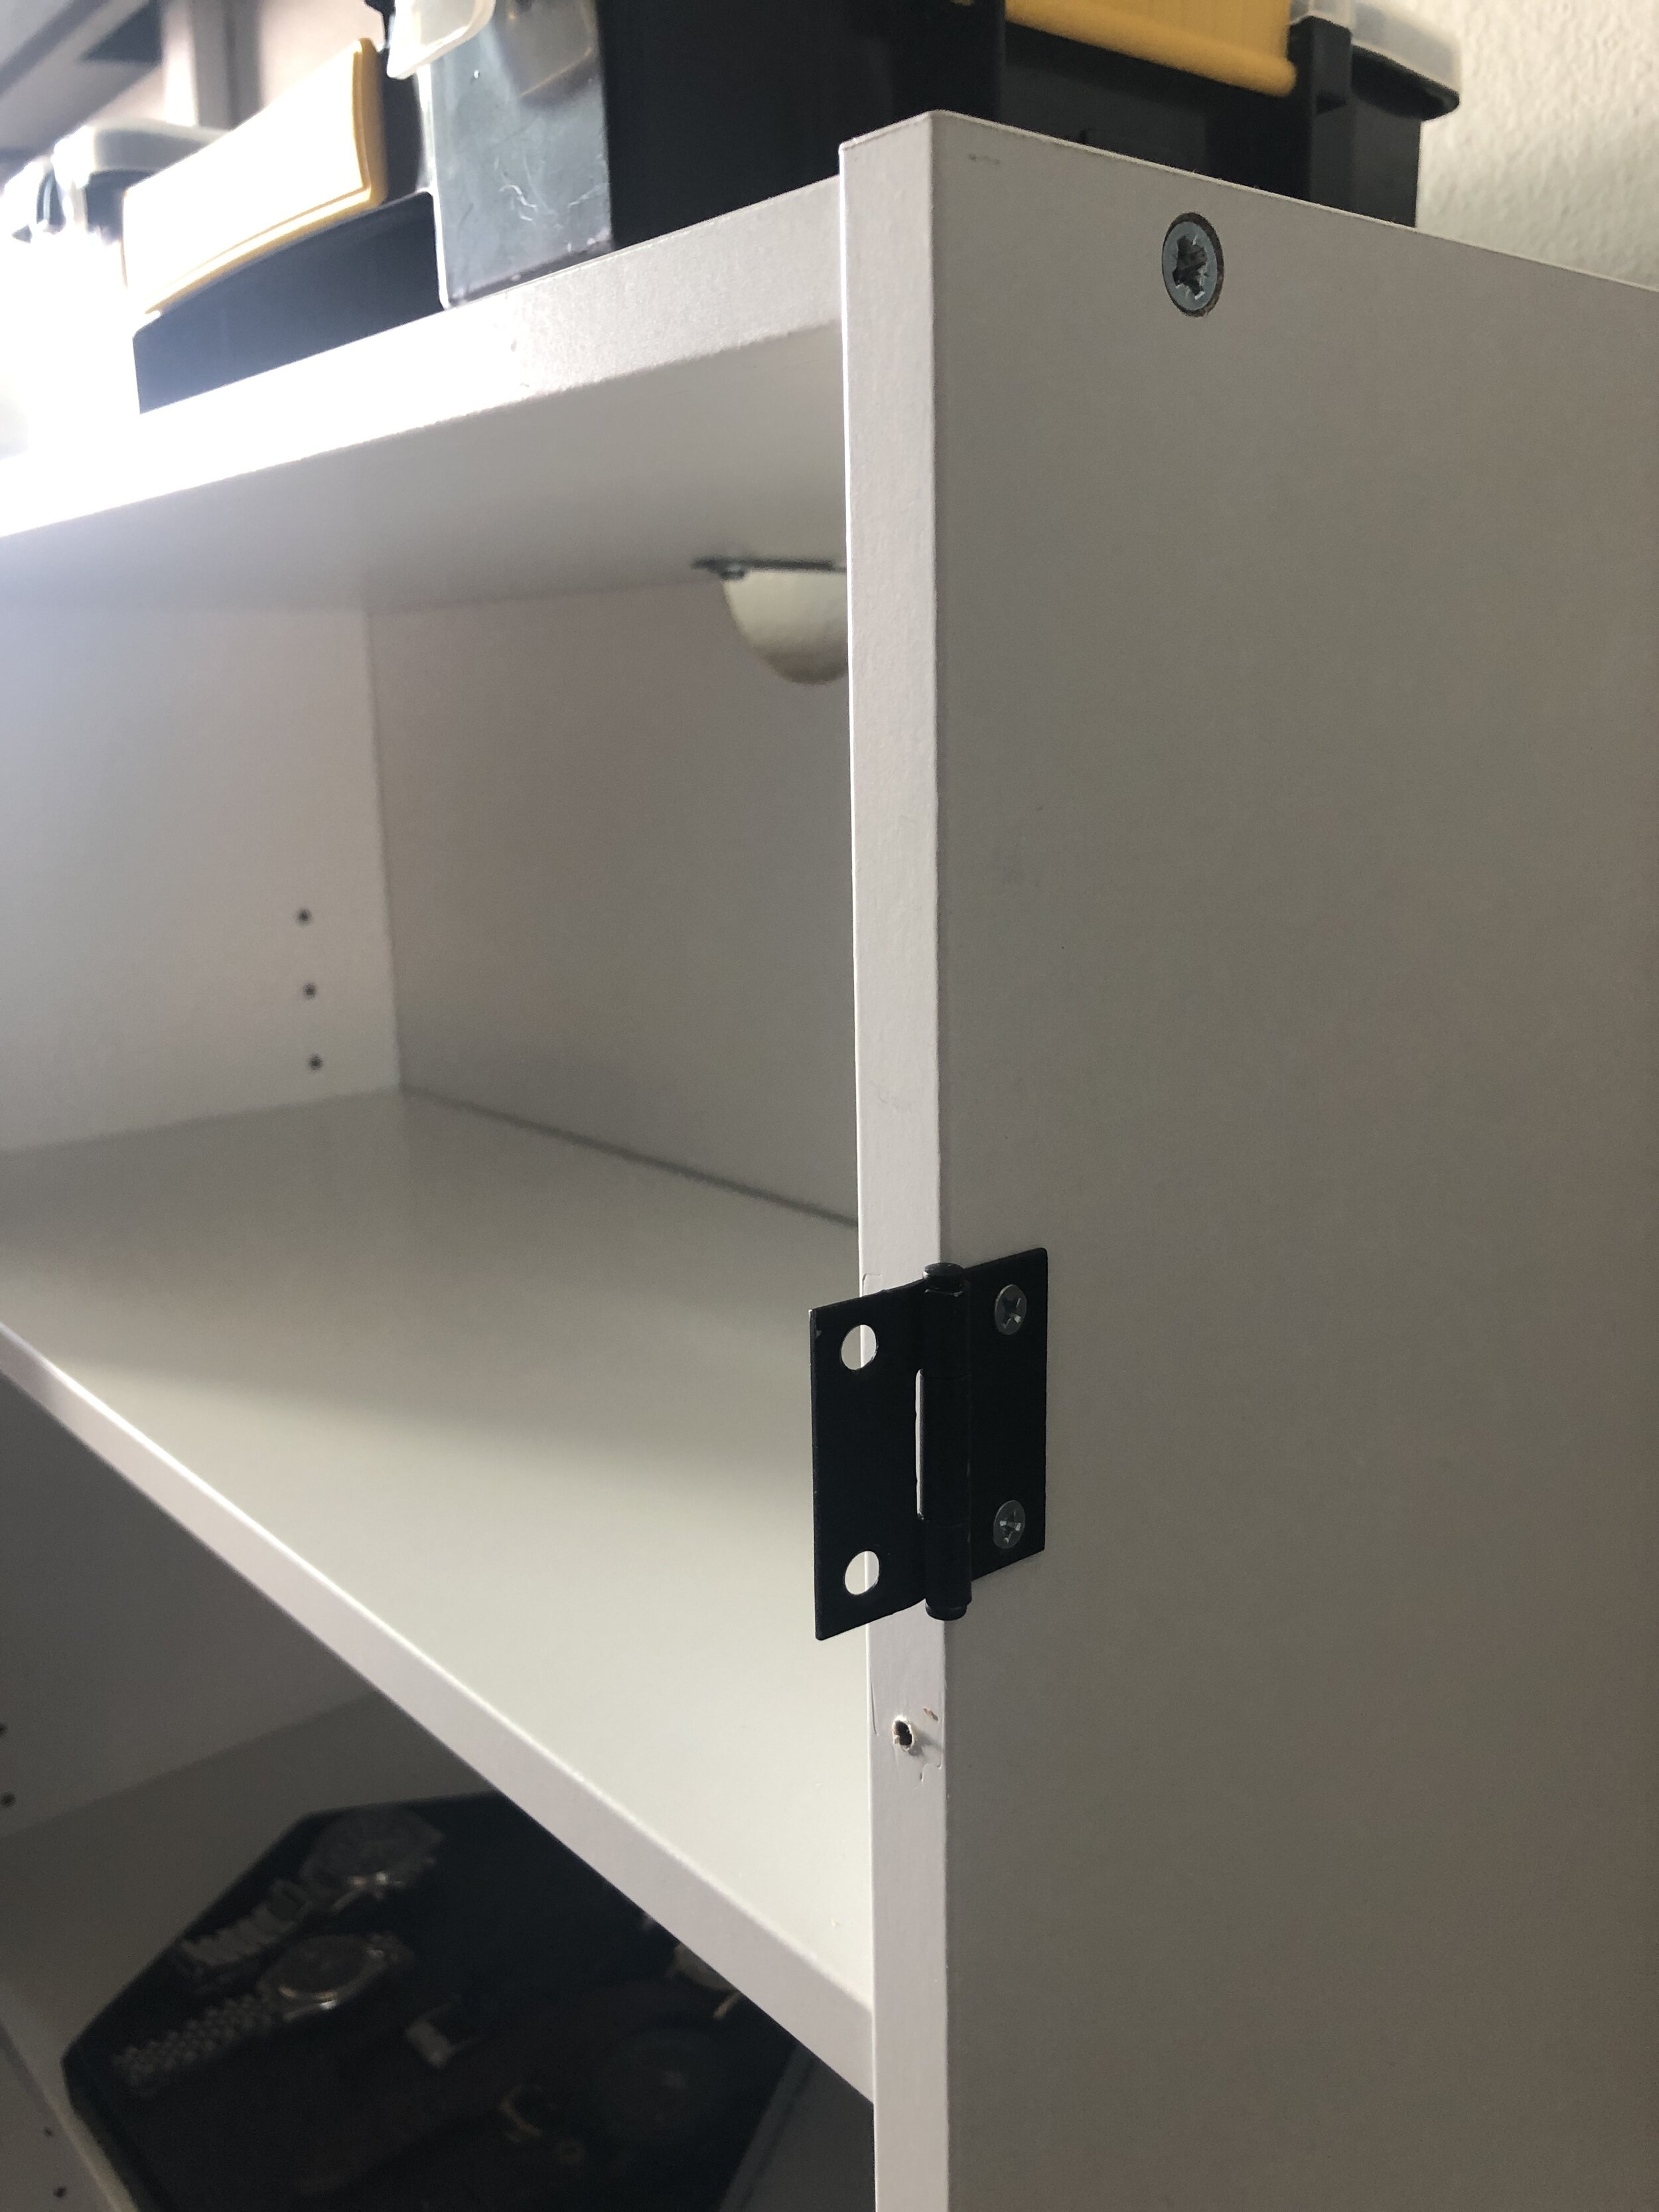
Credit: kaylasimonehome.com
Preparing The Bookshelf Surface
Preparing the bookshelf surface is a key step before adding a door. It helps the door fit well and last longer. A smooth, clean surface makes the door look better and work properly. This process takes time but improves the final result.
Cleaning And Sanding
Start by removing dust and dirt from the bookshelf. Use a soft cloth or brush to clean all surfaces. Next, sand the area where the door will attach. Sanding removes rough spots and old paint. Use fine-grit sandpaper for a smooth finish. Wipe away dust after sanding to keep the surface clean.
Repairing Damages
Check the bookshelf for cracks, holes, or dents. Fill small holes with wood filler or putty. Press the filler in and smooth it out with a putty knife. Let it dry fully before sanding the area again. Repairing damages makes the surface even and strong for the door.
Priming And Painting
Apply a coat of primer to the prepared surface. Primer helps paint stick better and protects the wood. Allow the primer to dry according to the instructions. Then, paint the surface with your chosen color. Use a brush or roller for an even coat. Let the paint dry completely before adding the door.
Installing Door Frames
Installing door frames on a bookshelf gives it a fresh look and adds functionality. The process needs care to ensure the door fits well and opens smoothly. Follow clear steps to place hinges, attach them, and check alignment for a perfect fit.
Marking Hinge Positions
Start by deciding where the hinges will go on the door and the bookshelf. Usually, place one hinge about 5 inches from the top and another 5 inches from the bottom. Use a pencil to mark these spots clearly. Make sure marks on the door match the marks on the bookshelf frame.
Attaching Hinges
Hold the hinge on the marked spot and use a screwdriver to fix screws in place. Attach the hinges first to the door. Then, hold the door against the bookshelf frame and screw the hinges into the frame. Tighten screws well, but do not force them to avoid damage.
Ensuring Alignment
Check if the door opens and closes smoothly. Look for any gaps or uneven spaces around the door edges. Adjust the hinges slightly if the door is not straight or rubs against the frame. Proper alignment keeps the door functional and neat-looking.
Attaching The Door
Attaching the door is the key step in turning your bookshelf into a functional storage unit. This part needs careful attention to ensure the door fits well and opens smoothly. Follow these steps to attach the door correctly and securely.
Positioning The Door
Place the door against the bookshelf frame. Check that the edges line up evenly with the shelves. Leave a small gap, about 1/8 inch, around the door for smooth opening. Use shims or spacers to keep the door steady. Mark the hinge spots on both the door and frame. This helps for precise hinge placement.
Securing Hinges
Attach hinges to the door first. Use a drill to make pilot holes; this stops the wood from splitting. Screw the hinges tightly but do not overtighten. Next, hold the door in position and screw the hinges to the bookshelf frame. Double-check the door stays aligned while tightening screws. Strong hinges keep the door steady over time.
Testing Door Movement
Open and close the door slowly several times. Watch for any rubbing or sticking points. Adjust the hinges slightly if the door does not move smoothly. Check the gap around the door again. The door should swing open fully without hitting the shelves. Smooth movement means your door is ready for use.
Adding Finishing Touches
Adding finishing touches to your bookshelf door gives it a polished look. These small details make a big difference in function and style. Properly chosen hardware and seals improve usability. Fine-tuning the fit ensures smooth operation and durability. Let’s explore the key steps to complete your project.
Installing Handles Or Knobs
Select handles or knobs that match your bookshelf’s style. Measure and mark the exact spot for installation. Use a drill to create holes for screws. Attach the handle or knob firmly to the door. Test the grip to ensure it feels comfortable and secure. Handles add both convenience and visual appeal.
Applying Weatherstripping
Weatherstripping prevents dust and drafts from entering the shelves. Choose a soft, adhesive weatherstrip for easy application. Clean the door edges before sticking the strip on. Press firmly to secure it along the frame. Check that the door closes tightly without gaps. This step protects your books and keeps the space neat.
Final Adjustments
Check the door’s alignment by opening and closing it several times. Tighten any loose screws on hinges and hardware. Adjust the hinges if the door swings unevenly or sticks. Sand rough edges lightly to avoid splinters. Wipe the door clean to remove dust from installation. These final tweaks ensure long-lasting use and satisfaction.
Maintaining Your New Bookshelf Door
Maintaining your new bookshelf door keeps it working well and looking great. Regular care prevents damage and ensures smooth use. Small efforts extend the door’s life and keep it neat. Follow easy steps to keep your door in top shape.
Cleaning Tips
Use a soft cloth to clean the door surface. Avoid harsh chemicals that can damage the finish. A mild soap and water mix works well for stains. Dry the door completely after cleaning to prevent moisture damage. Clean hinges and handles regularly to remove dust and dirt.
Lubricating Hinges
Apply a small amount of lubricant to the hinges. Use silicone spray or light machine oil for best results. Open and close the door several times to spread the lubricant evenly. Wipe off any excess oil to avoid attracting dust. Lubricate hinges every few months to keep them silent and smooth.
Troubleshooting Common Issues
If the door sticks, check for dirt or loose screws. Tighten screws on hinges and handles as needed. For squeaky hinges, add more lubricant carefully. If the door does not close properly, adjust the hinges slightly. Fix minor problems early to avoid bigger repairs later.
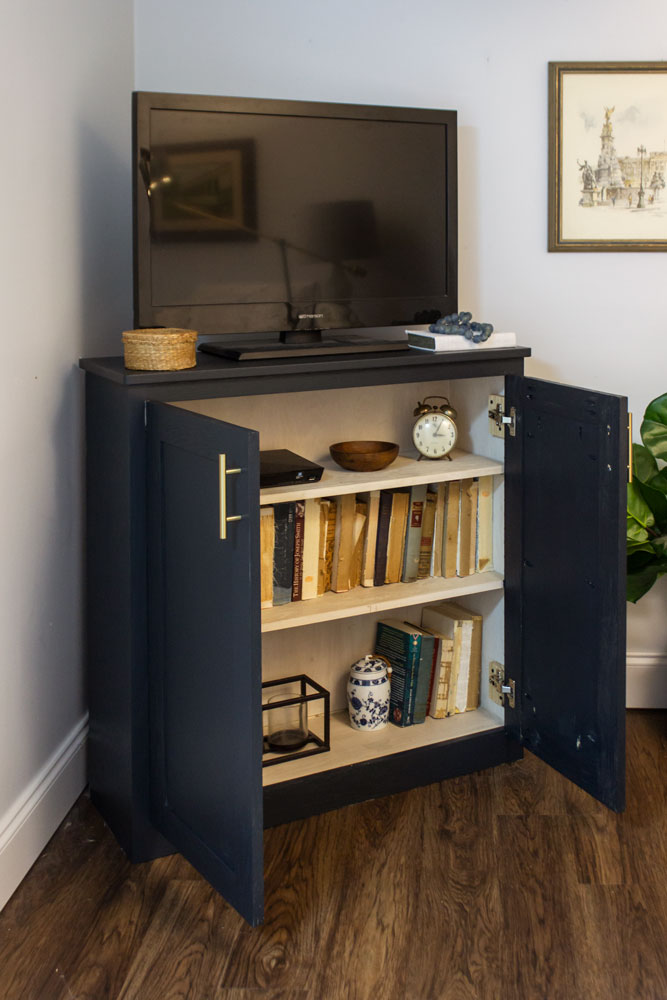
Credit: www.shadesofblueinteriors.com
Frequently Asked Questions
How Do I Choose The Right Door For A Bookshelf?
Select a door that matches your bookshelf’s style and size. Consider materials like wood or glass for durability and aesthetics. Measure the bookshelf opening accurately before purchasing or building a door. Ensure hinges and hardware suit the door type and your DIY skills.
What Tools Are Needed To Add A Door To A Bookshelf?
You’ll need a drill, screwdriver, measuring tape, level, hinges, screws, and a door handle. Sandpaper and wood glue might be useful for finishing. Choose tools based on your door material and installation complexity. Proper tools ensure a smooth, secure door fitting.
Can I Add A Door To An Existing Bookshelf Without Damage?
Yes, use surface-mounted hinges to avoid drilling into shelves. Measure carefully to align the door properly. Use protective pads to prevent scratches during installation. This method preserves the bookshelf’s integrity while adding functionality and style.
How To Ensure The Bookshelf Door Aligns Properly?
Measure twice before drilling hinge holes for precise alignment. Use a level to keep the door straight during installation. Adjust hinges gradually if the door doesn’t close evenly. Proper alignment prevents damage and ensures smooth operation.
Conclusion
Adding a door to a bookshelf can change its look and function. It keeps your books dust-free and adds a neat style. The steps are clear and easy to follow. Choose the right door and tools before you start. Take your time and work carefully.
Soon, your bookshelf will look fresh and new. Try this simple project to improve your space today.