Are you ready to add a touch of charm and warmth to your home? Building a rustic console table is easier than you think, and it’s a perfect way to showcase your personal style.
Imagine a sturdy, beautiful piece that holds your keys, displays your favorite decor, and welcomes guests—all crafted by your own hands. In this guide, you’ll discover simple steps, helpful tips, and insider tricks to create a rustic console table that fits your space and personality.
Keep reading, and by the end, you’ll have the confidence and know-how to build a piece you’ll be proud of.
Choosing The Right Wood
Choosing the right wood is a key step in building a rustic console table. The wood sets the tone and style of your piece. It affects durability, color, and texture. Picking wood that matches the rustic look helps create a warm, natural feel. Different woods offer unique grains and patterns that add charm. Consider how the wood will age and wear over time.
Best Wood Types For Rustic Style
Oak is strong and has a beautiful grain. It ages well and shows natural knots. Pine is softer but has a classic look. It is easy to work with and takes stain nicely. Cedar offers a rich color and natural resistance to decay. It adds a warm, reddish tone to the table. Walnut has dark, rich tones and a smooth finish. It brings an elegant touch to rustic furniture. Each of these woods gives a different feel but fits rustic design perfectly.
Sourcing Reclaimed Wood
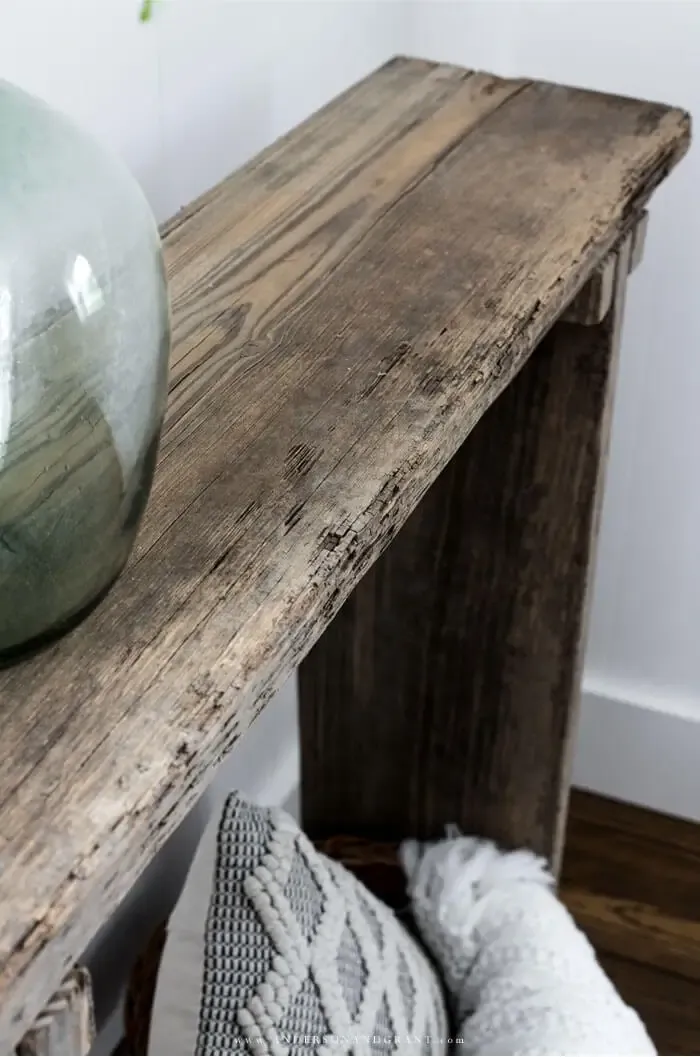
Reclaimed wood is wood taken from old buildings or furniture. It has character from years of use. Nails, marks, and weathering tell a story. This wood is eco-friendly because it reuses materials. It often has a rough texture that suits rustic style. Check local salvage yards or online sellers for reclaimed wood. Make sure the wood is clean and safe to use. Reclaimed wood adds history and uniqueness to your console table.
Credit: www.andersonandgrant.com
Gathering Tools And Materials
Building a rustic console table starts with gathering all necessary tools and materials. This step sets the foundation for a smooth building process. Having everything ready saves time and avoids interruptions.
Knowing exactly what tools and materials you need helps keep the project organized. It also ensures you work safely and efficiently. Below is a clear list to guide you through gathering the essentials.
Essential Tools List
- Measuring tape
- Pencil for marking
- Circular saw or handsaw
- Drill with drill bits
- Screwdriver
- Hammer
- Clamps
- Sandpaper or electric sander
- Wood glue
- Safety glasses
- Dust mask
Materials Checklist
- Rustic wood boards (pine or reclaimed wood)
- Wood screws
- Wood stain or paint
- Clear sealant or varnish
- Table legs (wood or metal)
- Wood filler
- Painter’s tape
Designing Your Console Table
Designing your rustic console table is the first step to a great project. It shapes how your table looks and fits your space. Good design makes the table both useful and beautiful.
Think about the style you want. Rustic tables often show natural wood and simple shapes. Your design should also match the room where the table will go. Planning carefully saves time and materials later.
Simple Rustic Designs
Rustic designs focus on natural wood and rough textures. Keep the shape basic with straight lines. Use thick wood planks for the top and sturdy legs. Avoid fancy details or smooth finishes.
Simple designs show the wood’s natural beauty. Knots, grain, and small cracks add character. Choose wood like pine, oak, or cedar for a classic rustic look. The goal is a warm, welcoming table.
Measuring And Planning
Start by measuring the space for your console table. Write down the length, width, and height you need. Leave extra room around the table for walking and other furniture.
Draw a rough sketch of your table with these measurements. Mark where legs and shelves will go. This helps you buy the right amount of wood and avoid mistakes.
Cutting And Preparing Wood
Cutting and preparing wood is the first step in building a rustic console table. It shapes the wood pieces for the table’s frame and surface. Proper cutting ensures the table fits together well. Preparing wood makes it safe and smooth for assembly and finishing.
This step requires focus and care. It sets the foundation for a strong and beautiful table.
Safe Cutting Techniques
Always wear safety glasses and ear protection before cutting. Use a sharp saw blade for clean cuts. Measure wood twice, cut once to avoid mistakes. Keep hands clear of the blade path. Use clamps to hold wood steady while cutting. Cut slowly and steadily to keep control. Take breaks if you feel tired to stay sharp and safe.
Sanding For Smooth Finish
Sand the wood with medium-grit sandpaper first. This removes rough edges and splinters. Follow with fine-grit sandpaper for a smooth surface. Sand along the wood grain, not against it. Check for any rough spots and sand again if needed. Clean dust off before assembling or finishing the table. Smooth wood looks better and feels nice to touch.
Assembling The Frame
Assembling the frame is a key step in building a rustic console table. It creates the basic shape and support for the table. Careful assembly ensures the table is strong and looks great. This part requires patience and attention to detail.
Joining Techniques
Use simple joining methods to connect the wood pieces. Butt joints work well for beginners. Align the edges and secure them with wood screws. Adding wood glue before screwing increases strength.
For a neater look, try pocket hole joints. These hide screws inside the wood. Drill angled holes and insert screws to join the parts. This method creates a clean and sturdy frame.
Ensuring Stability
Check the frame for square corners using a carpenter’s square. Adjust the pieces before tightening screws fully. Stability depends on tight joints and even support.
Reinforce corners with small metal brackets if needed. This prevents wobbling and adds durability. Test the frame by pressing on different sides. Fix any loose parts before moving on.

Credit: stonehavenlife.com
Adding Rustic Details
Adding rustic details gives your console table a warm, lived-in look. These details make the piece feel unique and full of character. Small touches bring out the charm of the wood and highlight craftsmanship. Rustic style often includes simple, natural features that show the table’s story.
Distressing Wood
Distressing wood makes new pieces appear aged and worn. Use sandpaper to roughen edges and corners lightly. You can create small dents with a hammer or nails for an authentic look. Scrape the surface gently to expose layers beneath the top finish. This process adds texture and depth to the wood. It helps the table blend well with rustic home decor.
Incorporating Metal Accents
Metal accents bring an industrial touch to rustic furniture. Add metal brackets or corner protectors to strengthen the table. Choose iron or bronze tones for a vintage feel. Screw in rustic-style handles or hooks for extra detail and function. These metal features contrast nicely with rough wood. They also make the console table more durable and stylish.
Finishing Touches
Finishing touches bring your rustic console table to life. They protect the wood and highlight its natural beauty. These final steps ensure your table lasts for years. Pay close attention to each detail to get the best results.
Staining And Sealing
Choose a stain color that matches your room’s style. Apply the stain evenly with a brush or cloth. Let it soak into the wood for a few minutes. Wipe off excess stain with a clean cloth. Allow the stain to dry completely before moving on.
Seal the wood with a clear finish to protect it. Use polyurethane, varnish, or a natural oil finish. Apply thin, even coats and let each dry fully. Lightly sand between coats for a smooth surface. Sealing prevents scratches and water damage.
Final Inspection
Check every part of your table carefully. Look for rough spots, missed stain, or uneven finish. Sand any rough areas gently with fine-grit sandpaper. Touch up any spots that need more stain or sealer. Make sure the table feels smooth and sturdy.
Test the table’s stability by pressing on different parts. Tighten any loose screws or joints. Clean off dust and fingerprints with a soft cloth. Your rustic console table is now ready to use and enjoy.
Maintaining Your Table
Maintaining your rustic console table keeps it looking great for years. Simple care steps protect the wood and finish. Regular attention prevents damage and wear. Follow these easy tips to keep your table sturdy and beautiful.
Cleaning Tips
Use a soft cloth to dust your table often. Avoid harsh chemicals that can strip the wood. A mix of mild soap and water cleans well. Wipe spills quickly to stop stains. Dry the surface completely after cleaning. Polish the wood with a natural oil once a month.
Repairing Minor Damage
Small scratches can be fixed with a wood marker or wax stick. Match the color to your table’s finish. For dents, try using a damp cloth and an iron to raise the wood fibers. Sand lightly to smooth rough spots. Fill cracks with wood filler and sand after it dries. Always test repairs in a hidden area first.

Credit: handmade-haven.com
Frequently Asked Questions
What Materials Are Needed To Build A Rustic Console Table?
You need wood planks, screws, wood glue, sandpaper, and wood stain. Choose reclaimed or pine wood for a rustic look. Also, have a saw, drill, measuring tape, and clamps ready for assembly and finishing.
How Do I Achieve A Rustic Finish On The Wood?
Sand the wood lightly and apply a wood stain or paint. Use distressed techniques like sanding edges or adding knots for authentic rustic charm. Finish with a clear sealant to protect the surface and enhance the texture.
What Are The Basic Steps To Build A Rustic Console Table?
Measure and cut wood pieces, assemble the frame, attach the tabletop and legs. Sand all surfaces smooth, then stain or paint for a rustic finish. Finally, seal the table to protect and enhance durability.
Can I Build A Rustic Console Table Without Power Tools?
Yes, you can use hand saws, manual screwdrivers, and clamps. This method takes longer but still achieves a strong, rustic table. Patience and precise measurements are key for successful hand-tool construction.
Conclusion
Building a rustic console table is a fun and rewarding project. You can customize it to fit your space and style. With basic tools and materials, anyone can create one. Take your time and enjoy the process. A handmade table adds warmth and charm to your home.
Try this project to bring a rustic touch to your decor. Simple steps lead to a beautiful result. Ready to build your own? Start now and see the difference it makes.