Hanging pictures over a console table might seem simple, but getting it just right can transform your entire room. If you’ve ever struggled with awkward spaces or unsure about the perfect height and arrangement, you’re not alone.
Imagine walking into your home and instantly feeling that warm, balanced vibe because your wall art fits perfectly above your table. In this guide, you’ll discover easy tips and tricks that make hanging pictures look effortless and stylish. Ready to turn your empty wall into a stunning focal point?
Let’s dive in.

Credit: plankandpillow.com
Choosing The Right Pictures
Choosing the right pictures to hang over a console table sets the tone for your space. The images should fit the room’s style and size. Picking art that feels balanced and inviting makes the area look complete. This guide helps you find pictures that suit your space perfectly.
Selecting Art To Match Your Space
Think about the room’s colors and style. Bright, bold art adds energy to a simple room. Soft, muted pieces bring calm to busy spaces. Choose images that connect with your room’s mood. Landscapes, abstracts, or family photos all work well. Keep the room’s size in mind. Large art fits big walls. Small art suits cozy corners.
Considering Frame Styles And Colors
Frames should complement both the art and the console table. Wooden frames add warmth and texture. Metal frames create a modern, sleek look. Match frame color to other furniture or décor. Light frames brighten dark walls. Dark frames add contrast on light walls. Avoid clashing colors or styles to keep harmony.
Mixing Sizes And Shapes
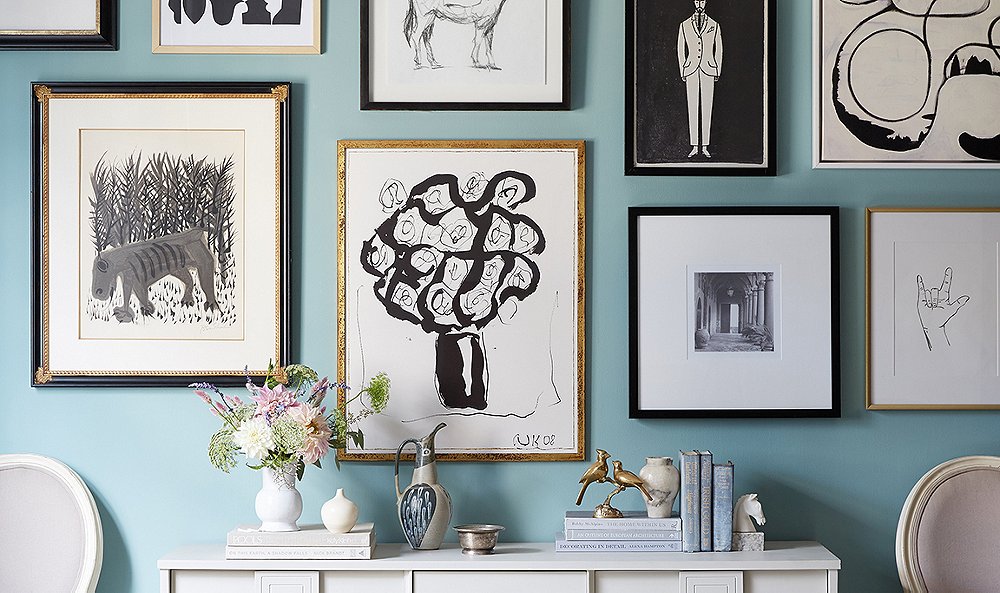
Use different sizes and shapes for visual interest. A large central picture with smaller ones around works well. Rectangles and squares create a neat look. Circles or ovals add softness and variety. Keep space between pictures even for balance. Play with arrangement before hanging to find the best fit.
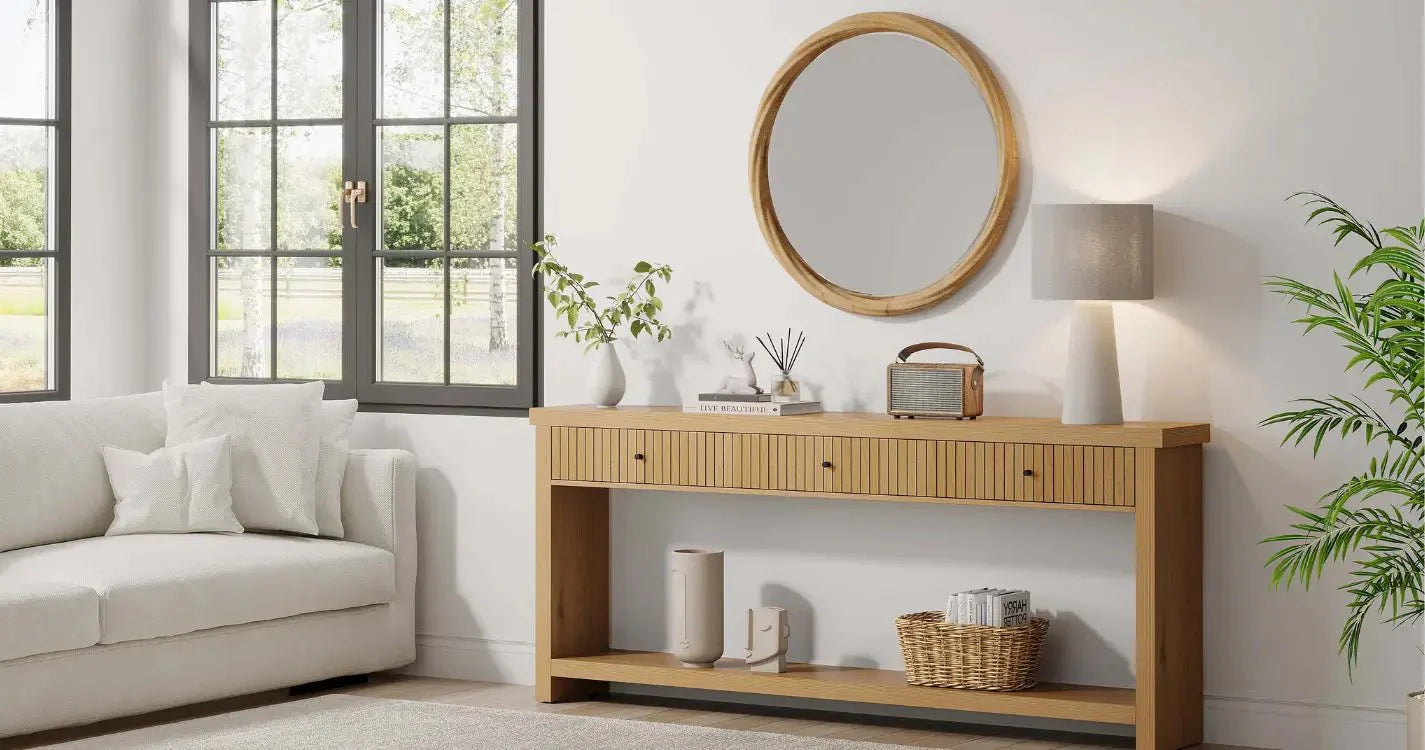
Credit: tribesigns.com
Measuring And Planning Placement
Measuring and planning placement is the first step in hanging pictures over a console table. It helps to create balance and harmony in your space. Careful measurement ensures your artwork fits well and looks attractive. Planning avoids mistakes and saves time during installation.
Determining Ideal Height
Start by finding the right height for your pictures. Hang them at eye level for the best view. Usually, the center of the artwork should be about 57 to 60 inches from the floor. Consider the height of the console table too. Leave about 4 to 6 inches of space between the table and the bottom of the frame. This keeps the art connected to the table without crowding.
Spacing Between Frames
Keep even space between each picture to create a clean look. For small frames, leave 2 to 3 inches apart. Larger frames need 3 to 5 inches of space. Avoid placing frames too close or too far. Balanced spacing helps the eyes move smoothly across the wall. It also makes the display feel organized and thoughtful.
Using Templates And Mockups
Create paper templates of your frames before hanging. Cut out the shapes to the same size as your pictures. Tape the templates on the wall with painter’s tape. This lets you test different layouts without making holes. Step back and check the overall look. Adjust spacing and height until the arrangement feels right.
Tools And Materials Needed
Hanging pictures over a console table needs the right tools and materials. These help keep your art secure and aligned. Using proper tools also makes the task faster and easier. Gathering everything before you start saves time and avoids frustration.
Essential Hanging Tools
You need a hammer or drill to put nails or screws in the wall. A tape measure helps find the right height and space for pictures. Pencils mark spots on the wall without damage. Picture wire or hanging brackets keep frames steady.
Wall Anchors And Hooks
Wall anchors support heavy pictures on drywall or plaster. They stop nails from pulling out. Hooks come in many sizes and types. Choose hooks that fit the weight of your picture frame. Use anchors for extra strength and safety.
Leveling Devices
A level keeps pictures straight. It prevents crooked frames that look messy. You can use a bubble level or a laser level. Some phones have leveling apps for quick checks. Leveling devices ensure a neat and balanced display.
Step-by-step Hanging Process
Hanging pictures over a console table can enhance any room’s style. The process needs care and simple steps. Follow this easy guide to place your art perfectly. This step-by-step hanging process helps you get it right the first time.
Marking Wall Positions
Start by choosing the right spot for each frame. Hold the picture above the console table. Use a pencil to mark the top center of the frame on the wall. Measure the distance from the top of the frame to the hanging hardware. Mark that spot below your first mark. This shows where the hook or nail will go. Double-check the marks to keep pictures level and balanced.
Installing Hooks Or Nails
Select hooks or nails that fit your frame weight. Use a hammer or drill to put hooks or nails in the marks. Make sure they are secure and not loose. Hooks hold the frame better and protect your wall. For heavier frames, use wall anchors for extra support. Always test the hook by gently pulling before hanging the frame.
Hanging And Adjusting Frames
Hang the picture on the hook or nail carefully. Step back and see if it looks straight and centered. Use a level tool to check if needed. Adjust the frame by shifting it slightly left or right. Tilt the frame forward or back for the best view. Repeat with all pictures for a neat and stylish display.
Styling Tips For Console Table Displays
Styling a console table with pictures and decor can change the look of any room. It creates a focal point and adds personality. Good styling balances the art on the wall with objects on the table. It helps keep the space neat and inviting. Here are some key tips to style your console table display.
Balancing Pictures With Table Decor
Choose pictures that match the size of your console table. Large pictures can overpower small tables. Small pictures may look lost with big tables. Place decor pieces like vases or books to balance the space. Keep some empty space to avoid clutter. Make sure the colors of the table items complement the pictures.
Creating Symmetry And Flow
Symmetry makes the display pleasing to the eye. Use pairs of objects on each side of the table. Place a large picture in the center or a set of smaller ones evenly spaced. Keep similar shapes or colors on both sides for balance. This creates a smooth flow and harmony in the room.
Incorporating Lighting
Lighting highlights your pictures and decor. Use table lamps or wall sconces near the console table. Soft light enhances the colors and details of the pictures. Avoid harsh or direct lighting that causes glare. Lighting adds warmth and makes the space cozy and attractive.
Credit: blog.onekingslane.com
Common Mistakes To Avoid
Hanging pictures over a console table can enhance your room’s style. Avoiding common mistakes helps create a balanced and attractive look. Small errors can make the space feel awkward or cluttered. Focus on the right height, wall type, and spacing to improve the display.
Hanging Too High Or Low
Placing pictures too high breaks the eye flow in the room. Too low makes the wall feel crowded and unbalanced. Aim to hang art at eye level or slightly above the console table. This placement connects the pictures to the furniture naturally. Measure before hanging to get the perfect height.
Ignoring Wall Texture And Material
Wall texture affects how pictures hang and look. Rough or uneven walls need special hooks or anchors. Soft walls like drywall require different support than brick or plaster. Ignoring wall type can cause damage or unstable hanging. Always check wall material before choosing nails or hooks.
Overcrowding The Space
Too many pictures overwhelm the console area. Crowding makes the display look messy and cramped. Leave enough space between frames to create a clean, open feel. Use fewer pieces for a simple and elegant look. Balance the size of pictures with the space available above the table.
Frequently Asked Questions
How High Should Pictures Hang Over A Console Table?
Pictures should hang about 6 to 12 inches above the console table. This spacing keeps the art visually connected to the furniture without crowding the wall space. Adjust based on the picture size and room height for balanced aesthetics.
What Size Pictures Work Best Above Console Tables?
Medium to large pictures work best above console tables. They provide enough visual impact without overwhelming the space. Consider the table’s width and wall space to select proportionate artwork for a harmonious look.
Should Pictures Be Centered Over The Console Table?
Yes, pictures should be centered over the console table for symmetry. This alignment creates a balanced and cohesive focal point. Centering helps the display look intentional and visually pleasing in the room.
Can I Hang Multiple Pictures Above A Console Table?
Yes, you can hang multiple pictures as a gallery wall. Arrange them with even spacing and in a cohesive style. This creates visual interest and allows for personal expression above the console table.
Conclusion
Hanging pictures over a console table adds charm and style to any room. Choose the right size and position for balance. Use simple tools to keep pictures secure and level. Personal touches make your space feel warm and inviting. Take your time and enjoy arranging art that suits your taste.
A well-placed picture can change the whole look of your space. Small efforts create big differences in home decor. Try different layouts until you find what feels right. Your walls tell a story—make it a good one.
