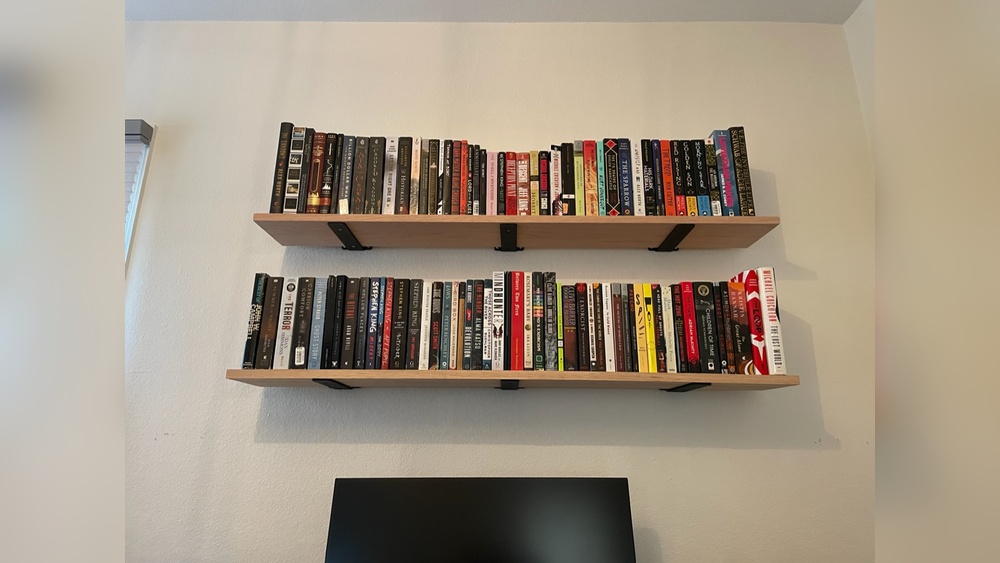
Are you tired of empty corners gathering dust in your room? Imagine turning that unused space into a stylish corner bookshelf that holds your favorite books, decor, and memories.
Making your own corner bookshelf is easier than you think, and you don’t need to be a woodworking expert. In this guide, you’ll discover simple steps to build a beautiful, sturdy bookshelf that fits perfectly in your space. Keep reading, and soon you’ll have a unique piece that organizes your things and adds charm to your home.

Credit: woodwork.cooperjason.com
Choosing The Right Corner
Choosing the right corner for your bookshelf is important. It helps you use space well and keeps the room neat. This step needs careful thought and simple planning. Understanding your space and the corner type makes building easier and better.
Measuring Your Space
Start by measuring the corner where the bookshelf will go. Use a tape measure to get the length of each wall. Note the height from floor to ceiling. Check for any obstacles like baseboards or vents. These details help decide the bookshelf size and shape.
Write down all measurements clearly. Double-check to avoid mistakes. Remember, the shelf must fit perfectly without crowding the room.
Selecting The Corner Type
Not all corners are the same. Some are sharp, forming a 90-degree angle. Others might be rounded or irregular. Identify your corner type to choose the right design.
Sharp corners work well for triangular or L-shaped shelves. Rounded corners need curved or custom shelves. Pick a style that suits your room and the corner shape. This choice affects both look and function.
Materials And Tools Needed
Building a corner bookshelf needs the right materials and tools. Choosing good wood and having the right tools makes the project easier. It also helps you get strong and neat shelves. Prepare everything before starting to save time and avoid problems.
Wood Selection
Pick wood that is strong and easy to work with. Pine and plywood are good choices for beginners. Pine is soft and cuts well. Plywood has smooth surfaces and less warping. Avoid wood with cracks or knots. Choose wood that fits your room style and budget.
Essential Tools List
Gather tools for measuring, cutting, and assembling. A tape measure and pencil help mark the wood. Use a saw to cut the pieces accurately. Sandpaper smooths rough edges. A drill makes holes for screws. Screwdriver or power driver tightens screws. Clamps hold pieces steady while gluing or screwing. Safety glasses and gloves protect you during work.
Designing Your Bookshelf
Designing your corner bookshelf is the first step to a successful project. This phase shapes how the final piece fits in your room. Thoughtful design makes your bookshelf both useful and stylish.
Plan carefully to match the space and your needs. Consider how much storage you want. Think about the style that matches your home.
Basic Shape And Size
Start by measuring the corner where the bookshelf will go. Measure the height from floor to ceiling. Measure the width along both walls. Use these numbers to decide the shelf’s size.
Choose a shape that fits well. Common shapes include triangular, L-shaped, or trapezoid. Pick a shape that uses the corner space best. Keep the shelf height comfortable to reach.
Customizing Shelves
Think about what you will put on the shelves. Books come in different sizes. Include some tall shelves for large books. Add smaller shelves for paperbacks or decorations.
Decide if you want fixed or adjustable shelves. Adjustable shelves allow you to change space later. Fixed shelves add more strength and stability. Use sturdy materials for heavy books.
Credit: abeautifulmess.com
Cutting And Preparing Wood
Cutting and preparing wood is the first big step in making a corner bookshelf. This step sets the base for a strong, neat, and lasting shelf. Proper preparation helps the wood fit perfectly and look great.
Careful measuring, cutting, and sanding make the whole project easier. It also saves time and avoids mistakes later. Let’s break down each part of this process.
Marking Measurements
Start by measuring the wood pieces carefully. Use a tape measure and pencil for clear marks. Mark the length and width for each shelf and side panel. Double-check all measurements before cutting. Precise marks prevent wrong cuts and wasted wood.
Safe Cutting Techniques
Use a saw that fits your project size. Always wear safety glasses and gloves. Cut slowly and follow the marked lines. Keep your hands clear of the blade. Use clamps to hold the wood steady. Safety first keeps accidents away.
Sanding For Smooth Finish
Sand each cut edge with fine-grit sandpaper. Smooth surfaces help the wood look good and fit tight. Sand until the wood feels soft and free of splinters. Wipe away dust with a dry cloth. This step prepares wood for painting or staining.
Assembling The Frame
Assembling the frame is the key step to build a sturdy corner bookshelf. This part shapes the whole unit and supports the shelves. Follow each step carefully to make sure everything fits well and stays strong.
Joining The Sides
Start by connecting the two side panels. Use wood glue on the edges for extra hold. Then, join the panels using screws or nails. Make sure the corners form a perfect right angle. This creates the basic shape of the bookshelf.
Securing The Shelves
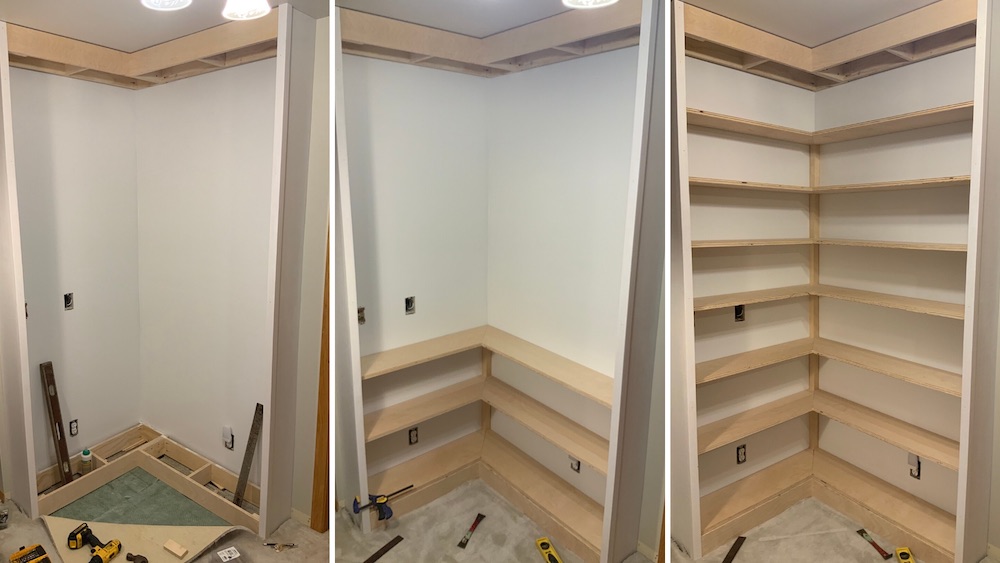
Next, place the shelves inside the frame. Mark the spots where each shelf will sit. Use brackets or wooden cleats to hold the shelves firmly. Attach these supports to the side panels with screws. Check that each shelf is level before tightening.
Ensuring Stability
Stability is important to keep the bookshelf safe. Add corner braces inside the frame for extra strength. Tighten all screws and check for any wobbling. Place the bookshelf against the wall and use anchors if needed. This prevents tipping and keeps the unit steady.
Finishing Touches
Finishing touches give your corner bookshelf a polished look. They protect the wood and enhance its beauty. Taking time with these steps makes your project last longer and look great.
Painting Or Staining
Choose paint or stain based on the style you want. Paint offers color and hides wood grain. Stain highlights the wood’s natural patterns and color. Use a brush or cloth for even coverage. Apply thin coats and let each dry before the next. This prevents drips and uneven spots.
Adding Protective Coating
Protective coating seals the paint or stain. It guards against scratches, spills, and dust. Polyurethane is a popular choice for durability. Apply it with a clean brush in thin layers. Let each layer dry fully before adding more. This step keeps your bookshelf looking new longer.
Installing The Bookshelf
Installing the corner bookshelf is the step where your project starts to come alive. This part needs careful attention to make sure the shelf stays strong and looks good. Proper installation keeps your books safe and your room neat. Follow these steps for a solid setup.
Positioning In The Corner
Place the shelf in the corner to check its fit. Make sure it sits flush against both walls. Use a level to see if it is straight. Adjust the shelf until it is balanced. Mark the spots on the wall where screws will go. These marks guide you during mounting.
Wall Mounting Tips
Find studs behind the wall using a stud finder. Screwing into studs gives the shelf strong support. Use anchors if studs are not in the right place. Drill pilot holes to avoid wall damage. Tighten screws but do not overdo it. Check the shelf for stability after mounting.
Credit: woodwork.cooperjason.com
Styling Your Shelf
Styling your corner bookshelf is a fun way to make your space look great. A well-styled shelf shows your personality and keeps things tidy. It also makes books and items easy to find. Let’s explore simple steps to style your shelf beautifully.
Organizing Books
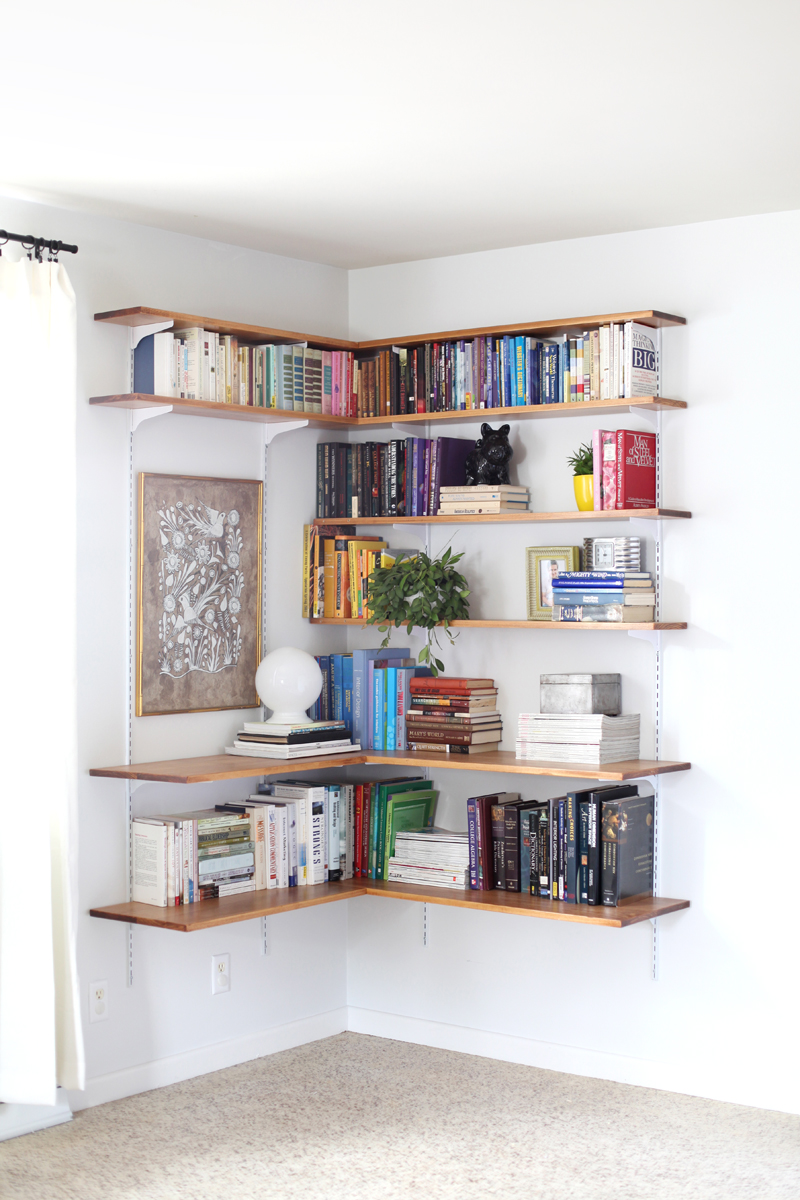
Start by sorting your books by size, color, or topic. Place larger books at the bottom for stability. Use vertical and horizontal stacks to create variety. Keep your favorite books at eye level for easy reach. Avoid crowding shelves to keep a neat look. Leave some empty space to let your shelf breathe.
Adding Decorative Items
Add small plants or vases to bring life and color. Use photo frames or art pieces to add personality. Place decorative objects like candles or sculptures in empty spots. Mix items of different shapes and heights for balance. Remember, less is more—avoid cluttering your shelf. This mix keeps your shelf interesting and inviting.
Frequently Asked Questions
How Do I Choose The Right Wood For A Corner Bookshelf?
Select wood that is sturdy and easy to work with, like pine or plywood. Consider your budget and room decor. Proper wood ensures durability and a smooth finish for your corner bookshelf project.
What Tools Are Essential For Making A Corner Bookshelf?
Basic tools include a saw, drill, measuring tape, level, and screws. Sandpaper and wood glue also help. Having the right tools ensures accurate cuts and a strong assembly.
How Can I Maximize Storage On A Corner Bookshelf?
Use adjustable shelves to fit different book sizes. Incorporate vertical dividers for organization. Utilize the entire corner space to enhance storage capacity efficiently.
What Finishing Options Suit A Diy Corner Bookshelf?
You can paint, stain, or varnish your bookshelf. Choose finishes that match your room’s style. Proper finishing protects the wood and improves the shelf’s appearance.
Conclusion
Building a corner bookshelf adds space and style to any room. Choose the right wood and tools before starting. Follow steps carefully to create a sturdy shelf. Take your time and measure twice for best results. A handmade bookshelf brings pride and function together.
Enjoy filling it with your favorite books and decor. Small projects like this boost your DIY skills nicely. Try different designs to match your room’s look. Keep practicing, and your woodworking will keep improving.