Are you looking for a simple, creative way to add storage and style to your space? Building a bookshelf out of a pallet might be just what you need.
It’s a fun project that anyone can do, even if you’re not an expert. Imagine turning a plain wooden pallet into a sturdy, unique bookshelf that shows off your personality. In this guide, you’ll discover easy steps to make your own pallet bookshelf, save money, and enjoy the satisfaction of creating something with your own hands.
Ready to transform your space? Let’s get started!
Choosing The Right Pallet
Choosing the right pallet is the first step in building a sturdy bookshelf. The pallet affects how strong and safe your shelf will be. It also impacts the look and finish of your project. Picking a pallet that fits your needs saves time and effort later.
Types Of Pallets To Use
Not all pallets are the same. Some are made from softwood, like pine, which is easy to work with. Hardwood pallets, such as oak, are stronger but harder to cut. Look for pallets that have flat boards and few gaps. Avoid pallets with broken or missing slats. Pallets with a smooth surface reduce sanding time.
Checking For Safety And Quality
Safety is important when reusing pallets. Avoid pallets treated with harmful chemicals. Look for stamps that show the pallet was heat-treated, not chemically treated. Check for signs of mold, rot, or insect damage. Pallets that smell bad or look dirty should be avoided. Test the pallet for strength by pressing on the boards. Choose pallets that feel solid and sturdy for your bookshelf.
Gathering Tools And Materials
Building a bookshelf out of a pallet starts with gathering the right tools and materials. Having everything ready saves time and makes the project easier. It also helps to avoid interruptions during work. This section lists the essential tools and extra supplies needed for a smooth process.
Essential Tools Needed
First, a saw is necessary to cut the pallet wood to size. A handsaw or circular saw works well. A drill helps to make holes and fasten screws. Sandpaper or an electric sander smooths rough edges. Measuring tape ensures accurate cuts and fitting. A hammer or screwdriver is needed for nails or screws. Safety gear like gloves and goggles protects hands and eyes during work.
Additional Supplies
You will need screws or nails to hold the bookshelf together. Wood glue adds extra strength to joints. Paint or wood stain improves the finish and protects the wood. Brushes or rags help apply paint or stain evenly. Wood filler fixes any holes or cracks in the pallet. Optional items include brackets for extra support and felt pads to protect floors.
Preparing The Pallet
Preparing the pallet is the first step in building a sturdy bookshelf. It ensures the wood is safe and ready to use. Taking time to prepare the pallet well makes the building process easier and the final product stronger.
Cleaning And Sanding
Start by cleaning the pallet thoroughly. Remove dirt, dust, and any loose debris. Use a stiff brush or a power washer for this job. Let the pallet dry completely before sanding.
Sanding smooths the wood surface. It removes rough spots and splinters. Use medium-grit sandpaper to begin, then finish with fine-grit for a smooth feel. Sand all sides of the pallet for safety and better paint or stain adhesion.
Removing Unwanted Parts
Look for nails, staples, or broken pieces in the pallet. Use pliers or a hammer to pull out all nails and staples carefully. Remove any damaged or weak wood sections. This step prevents injury and creates a clean base for your bookshelf.
Cut off extra wood pieces that do not fit your design. A handsaw or power saw can help trim the pallet to the right size. Removing unwanted parts makes the pallet easier to work with and improves the bookshelf’s appearance.
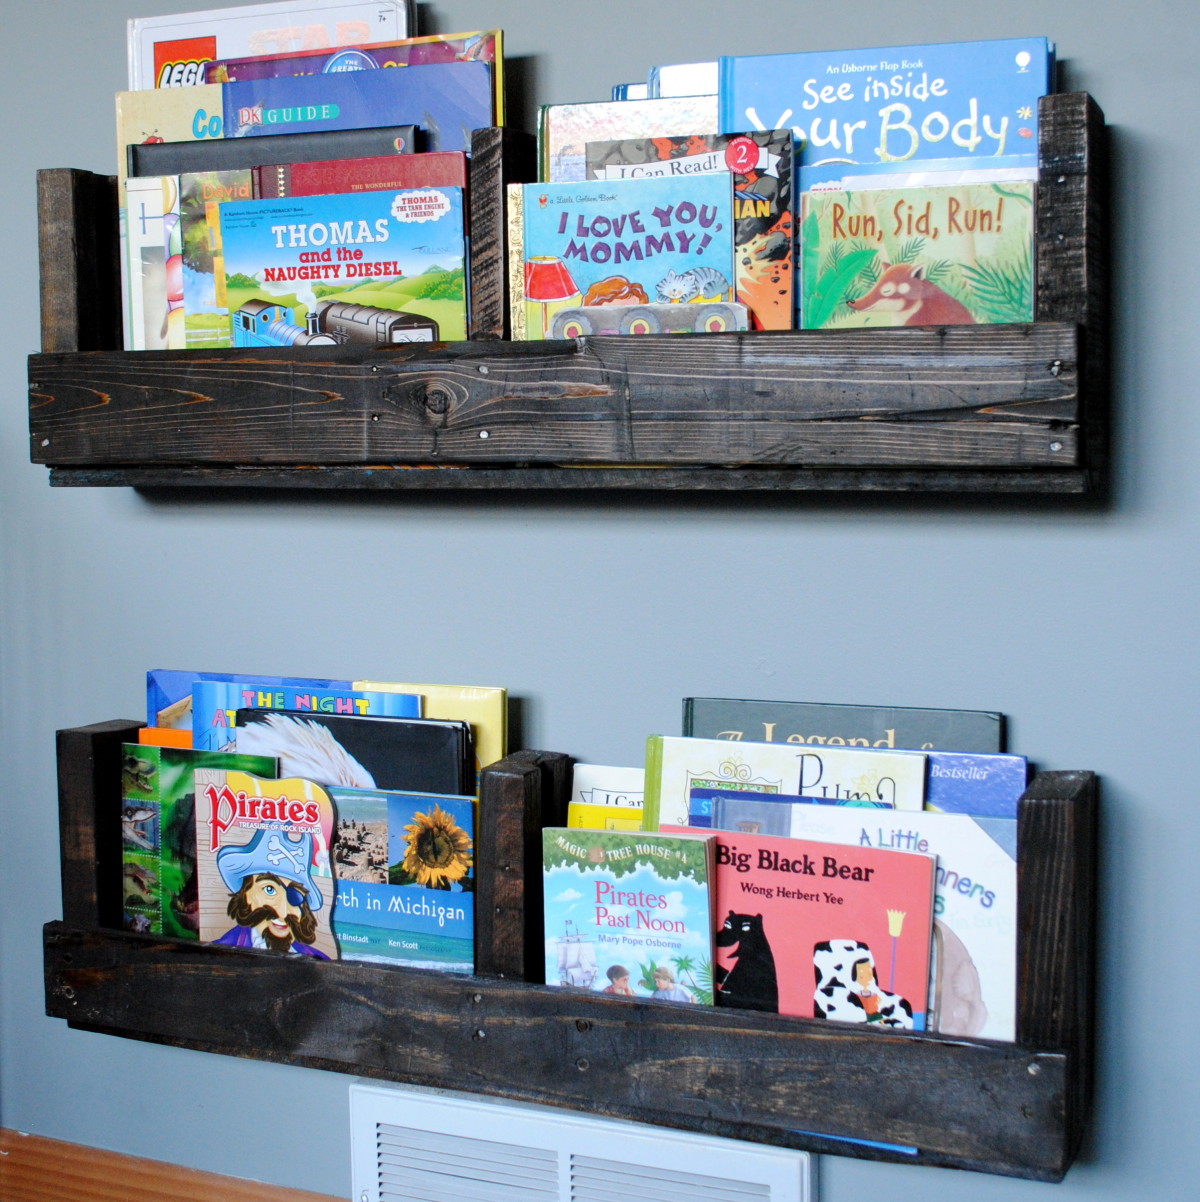
Credit: jennaburger.com
Designing Your Bookshelf
Designing your bookshelf is the first step in creating a useful and attractive piece. It sets the foundation for your project. A clear design helps avoid mistakes and saves time. Take your time to plan carefully.
Think about where you want to place the bookshelf. The size and style should fit the space well. Your design should match your needs and the room’s look.
Measuring And Planning
Start by measuring the space where the bookshelf will go. Write down the height, width, and depth. This helps you know the exact size to build. Use a tape measure for accuracy.
Draw a simple sketch of your bookshelf. Mark the overall dimensions. Plan how many shelves you want. Keep in mind the weight each shelf will hold. This will guide your material choice.
Customizing Shelf Sizes
Not all books are the same size. Custom shelves allow you to fit different items. Design some shelves taller for large books. Make others shorter for small books or decorations.
Think about the thickness of the pallet wood. Make shelves strong enough to hold your books. Adjust the width of each shelf based on what you want to store. This makes your bookshelf practical and neat.
Cutting And Assembling
Cutting and assembling are key steps in building a pallet bookshelf. These steps shape the wood and bring the parts together. Proper cutting ensures pieces fit well. Careful assembly makes the shelf strong and stable. Follow clear steps for best results.
Making Precise Cuts
Start by measuring the pallet wood accurately. Mark the wood with a pencil for clear cutting lines. Use a saw that matches your skill level. Cut slowly to avoid splintering the wood. Smooth the edges with sandpaper after cutting. Precision here saves time during assembly.
Joining The Pieces
Arrange the cut pieces to form the bookshelf frame. Use wood glue on edges for a tight bond. Reinforce joints with nails or screws for strength. Check alignment often to keep the shelf square. Let glue dry fully before adding shelves. Strong joints keep your bookshelf steady.
Finishing Touches
Finishing touches make your pallet bookshelf look complete and neat. They protect the wood and improve its appearance. Taking time on these steps ensures your shelf lasts longer and fits well in your space.
Sanding And Smoothing
Start by sanding the entire bookshelf surface. Use medium-grit sandpaper to remove rough spots and splinters. Then, switch to fine-grit paper for a smooth finish. Always sand in the direction of the wood grain. This helps avoid scratches and keeps the wood looking natural. Wipe off dust with a damp cloth before moving on.
Painting Or Staining Options
Choose paint or stain based on the style you want. Paint offers bright colors and covers flaws well. Stain enhances the wood’s natural look and grain. Apply thin, even coats with a brush or cloth. Let each coat dry completely before adding the next. Consider a clear sealant to protect your finish from wear and moisture. This step keeps your bookshelf looking good for years.
Mounting And Placement
Mounting and placement are key steps in finishing your pallet bookshelf. Proper mounting keeps it safe and stable. Placement affects the room’s look and how easy it is to use your shelf. Think about both before hanging your bookshelf.
Wall Mounting Tips
Find studs in the wall for strong support. Use a stud finder tool or knock to hear solid spots. Screw heavy-duty brackets into the studs to hold the shelf. Make sure the screws are long and thick enough.
Check the shelf level with a spirit level. Adjust screws or brackets to keep it straight. Avoid mounting on drywall alone; it can break under weight. Use wall anchors if no studs are available, but be cautious.
Ideal Room Placement
Place the bookshelf in a spot that is easy to reach. Near a reading chair or desk works well. Avoid direct sunlight to protect books from fading. Keep it away from damp areas to prevent damage.
Think about the room size. A large shelf fits better on a bigger wall. Small rooms benefit from vertical placement to save floor space. Match the shelf height with other furniture for a balanced look.

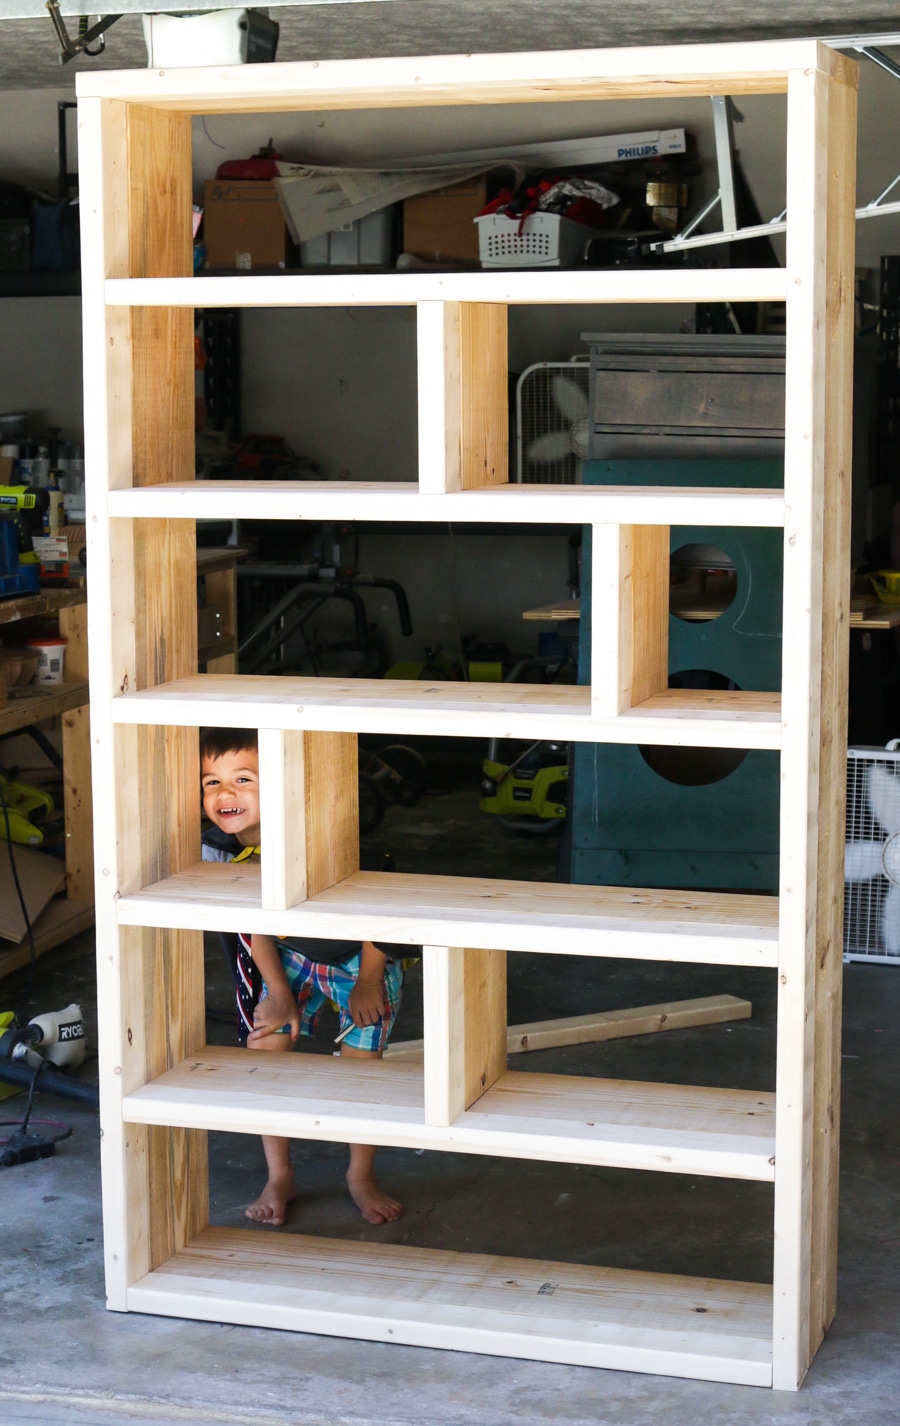
Credit: www.youtube.com
Maintenance And Care
Keeping your pallet bookshelf in good shape takes simple care. Regular upkeep helps it last longer and look great. Small efforts protect the wood and keep it clean. Follow easy tips for cleaning and damage prevention below.
Cleaning Tips
Dust the bookshelf often with a soft cloth. Use a dry or slightly damp cloth to avoid water damage. Avoid harsh chemicals that can harm the wood. For sticky spots, use mild soap with water. Wipe the surface gently and dry quickly. Clean spills right away to stop stains.
Preventing Damage
Place the bookshelf away from direct sunlight. Sunlight can fade and dry out the wood. Keep it away from damp places to avoid mold and warping. Use felt pads under items to stop scratches. Avoid overloading shelves to prevent bending or breaking. Check for loose nails or screws and tighten them regularly.
Credit: jenwoodhouse.com
Frequently Asked Questions
How Do I Prepare A Pallet For Bookshelf Building?
Start by inspecting the pallet for damage and nails. Sand the wood smooth to avoid splinters. Clean the pallet with a brush and mild soap. Let it dry completely before construction. This prep ensures a safe and sturdy bookshelf base.
What Tools Are Needed To Build A Pallet Bookshelf?
You will need a hammer, nails or screws, a drill, sandpaper, measuring tape, and a saw. Optional tools include clamps and wood glue. These tools help you cut, assemble, and finish the bookshelf efficiently.
How Can I Customize My Pallet Bookshelf Design?
Customize by sanding for a smooth finish and painting or staining the wood. Add shelves, hooks, or decorative trim for style and function. Tailor the size to fit your space and storage needs. Personal touches make your bookshelf unique.
Is A Pallet Bookshelf Sturdy And Durable?
Yes, pallet wood is strong and durable when properly prepared. Reinforce joints with screws or brackets for added stability. Regular maintenance like tightening screws and occasional sanding helps prolong its lifespan.
Conclusion
Building a bookshelf from a pallet is simple and fun. You save money and create something useful. Just follow the steps carefully and take your time. Pallet wood gives a rustic, natural look to your shelf. You can paint or stain it to match your room.
This project helps you reuse materials and reduce waste. Start with a good pallet and basic tools. Soon, you will have a unique shelf to hold your books and decorations. Give it a try and enjoy your new creation.