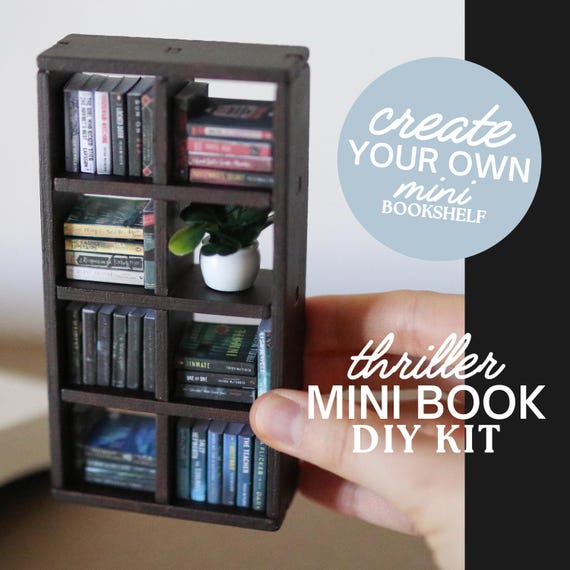
Are you tired of searching for the perfect bookshelf that fits your space and style? What if you could create one yourself, exactly the way you want it?
Making a custom bookshelf kit is easier than you think, and it gives you complete control over size, design, and materials. Imagine having a unique piece that not only organizes your books but also adds charm to your room. In this guide, you’ll discover simple steps and insider tips to build your own custom bookshelf kit without stress or confusion.
Ready to transform your space with a personalized touch? Let’s get started!

Credit: www.amazon.com
Choosing The Right Materials
Choosing the right materials is key to making a strong and beautiful custom bookshelf kit. The materials affect the shelf’s durability, look, and ease of assembly. Picking quality wood and the right tools makes your project smooth and satisfying. This guide helps you select the best wood types and hardware for your bookshelf.
Types Of Wood For Bookshelves
Hardwoods like oak and maple are strong and last long. They hold heavy books without bending. Softwoods such as pine are lighter and easier to cut. They are good for simple or decorative shelves. Plywood offers a smooth surface and resists warping. It’s also budget-friendly and easy to work with. Choose wood that fits your style and budget. Consider the wood’s weight and finish too.
Tools And Hardware Needed
Basic tools include a saw, drill, screwdriver, and measuring tape. These help cut and join wood parts accurately. Sandpaper smooths rough edges for a clean look. Use wood screws or nails to hold pieces together. Brackets or shelf pins support shelves safely. Wood glue adds extra strength to joints. Having the right tools and hardware makes building faster and easier.
Credit: www.etsy.com
Planning Your Bookshelf Design
Planning your bookshelf design is the first step to creating a perfect custom kit. It helps you use your space well and build a shelf that fits your needs. Careful planning saves time and materials.
Start by knowing the space where you want to place the bookshelf. Think about what you want to store. Books, decorations, or both? This will guide your design choices.
Measuring Your Space
Measure the height, width, and depth of the area clearly. Use a tape measure and write down the numbers. Check for any obstacles like vents or power outlets.
Measure twice to avoid mistakes. Think about the space around the shelf for walking or opening doors.
Sketching Your Layout
Draw a simple sketch of your bookshelf. Mark the overall size based on your measurements. Add shelves and dividers where needed.
Decide on shelf height and spacing. Leave room for tall books or items. Sketching helps visualize the final look and catch errors early.
Cutting And Preparing Wood Pieces
Cutting and preparing wood pieces is a key step in building custom bookshelf kits. Accurate cuts help the pieces fit well together. Proper preparation ensures a smooth finish and strong structure.
Take your time measuring each piece before cutting. Use quality tools for better results. Preparing wood carefully prevents mistakes and saves effort later.
Safe Cutting Techniques
Always wear safety goggles and gloves. Use a sharp saw blade for clean cuts. Clamp the wood firmly to avoid slipping. Cut slowly and steadily to keep control. Follow the marked lines closely for accuracy. Keep your fingers away from the blade path. Turn off power tools before adjusting them. Work in a well-lit and clean area to see clearly.
Sanding And Smoothing Edges
Use medium-grit sandpaper to remove rough spots. Sand along the wood grain for a smooth finish. Check all edges for splinters and uneven surfaces. Switch to fine-grit sandpaper for a softer feel. Wipe dust off with a clean cloth before assembly. Smooth edges prevent injury and improve the shelf’s look. Take care to sand corners gently to keep their shape.

Credit: www.youtube.com
Assembling The Bookshelf Frame
Assembling the bookshelf frame is the first big step in building your custom kit. This frame forms the main structure and holds everything together. Take time to fit each piece carefully. A strong frame means a sturdy bookshelf that lasts for years.
Gather all frame parts and tools before starting. Check the instructions to match each piece. Align edges properly to avoid gaps or weak joints. Precision is key for a smooth assembly process.
Joining Techniques
Use screws or dowels to join frame parts. Screws offer strong, quick connections. Drill pilot holes to avoid wood splitting. Dowels fit into pre-drilled holes, creating tight joints. Both methods keep the frame stable and secure.
Apply wood glue on joints for extra strength. Clamp pieces together until glue dries. This prevents movement and adds durability. Choose the joining method based on your tools and skill level.
Securing Shelves In Place
Place shelves inside the frame once it is solid. Use shelf pins or brackets to hold shelves. Pins fit into small holes on the side panels. Brackets screw directly into the frame for extra support.
Make sure shelves are level before securing. Adjust pins or brackets for a perfect fit. A level shelf prevents books from sliding or tipping. Secure every shelf firmly for safe use.
Finishing Touches
Finishing touches give your custom bookshelf kits a complete look. These details make your project stand out and match your room style. Choose simple ways to enhance your bookshelf. Small changes create big impressions.
Painting And Staining Options
Painting or staining protects wood and adds color. Choose paint for a bright, clean look. Use stain to show natural wood grains. Sand your shelves lightly before applying. Use a brush or cloth for even coverage. Let each coat dry fully before adding another. Seal with clear varnish for durability. Test colors on a scrap piece first. Think about your room’s color scheme. Matching tones bring harmony to your space.
Adding Decorative Elements
Decorative elements add character and charm. Consider adding trim or molding around edges. Use wallpaper or fabric on the back panel for contrast. Attach small hooks or knobs for extra function. Place decorative brackets under shelves for support and style. Choose elements that fit your personal taste. Keep decorations simple to avoid clutter. These small touches make your bookshelf unique and inviting.
Maintaining Your Bookshelf
Maintaining your custom bookshelf kit is key to keeping it sturdy and good-looking. Regular care helps extend its life and keeps it safe for your books. Simple steps can prevent damage and make your shelf look fresh longer.
Cleaning Tips
Dust your bookshelf often to stop dirt buildup. Use a soft cloth or a feather duster for gentle cleaning. Avoid wet cloths that can harm the wood or finish. For sticky spots, use a slightly damp cloth and dry it fast. Keep liquids away from edges and joints to avoid warping.
Repairing Minor Damages
Small scratches and dents happen over time. Use wood filler or putty to fill small holes. Sand the area gently after it dries to smooth the surface. For light scratches, try a matching wood stain or crayon. Tighten loose screws or brackets to keep the shelf strong. Fixing these problems early stops bigger damage later.
Frequently Asked Questions
What Tools Do I Need For Custom Bookshelf Kits?
You need basic tools like a drill, screwdriver, measuring tape, level, and hammer. Some kits may include specialized tools.
How Long Does It Take To Assemble A Custom Bookshelf Kit?
Assembly usually takes 1 to 3 hours depending on the kit complexity and your experience level.
Can I Customize The Size Of Bookshelf Kits?
Yes, many kits allow size adjustments by modifying shelves or adding extra panels for a perfect fit.
Are Custom Bookshelf Kits Durable And Sturdy?
Most kits use quality materials like plywood or MDF, ensuring durability and sturdiness when assembled properly.
Conclusion
Building a custom bookshelf kit can be simple and fun. You control the size and style to fit your space. Using the right tools makes the job easier. Take your time to measure carefully. Choose materials that are strong and look good.
Step by step, you will see your bookshelf come alive. This project adds a personal touch to any room. Start small, learn, and enjoy the process. Your custom shelf will hold more than just books—it holds your effort and creativity.
