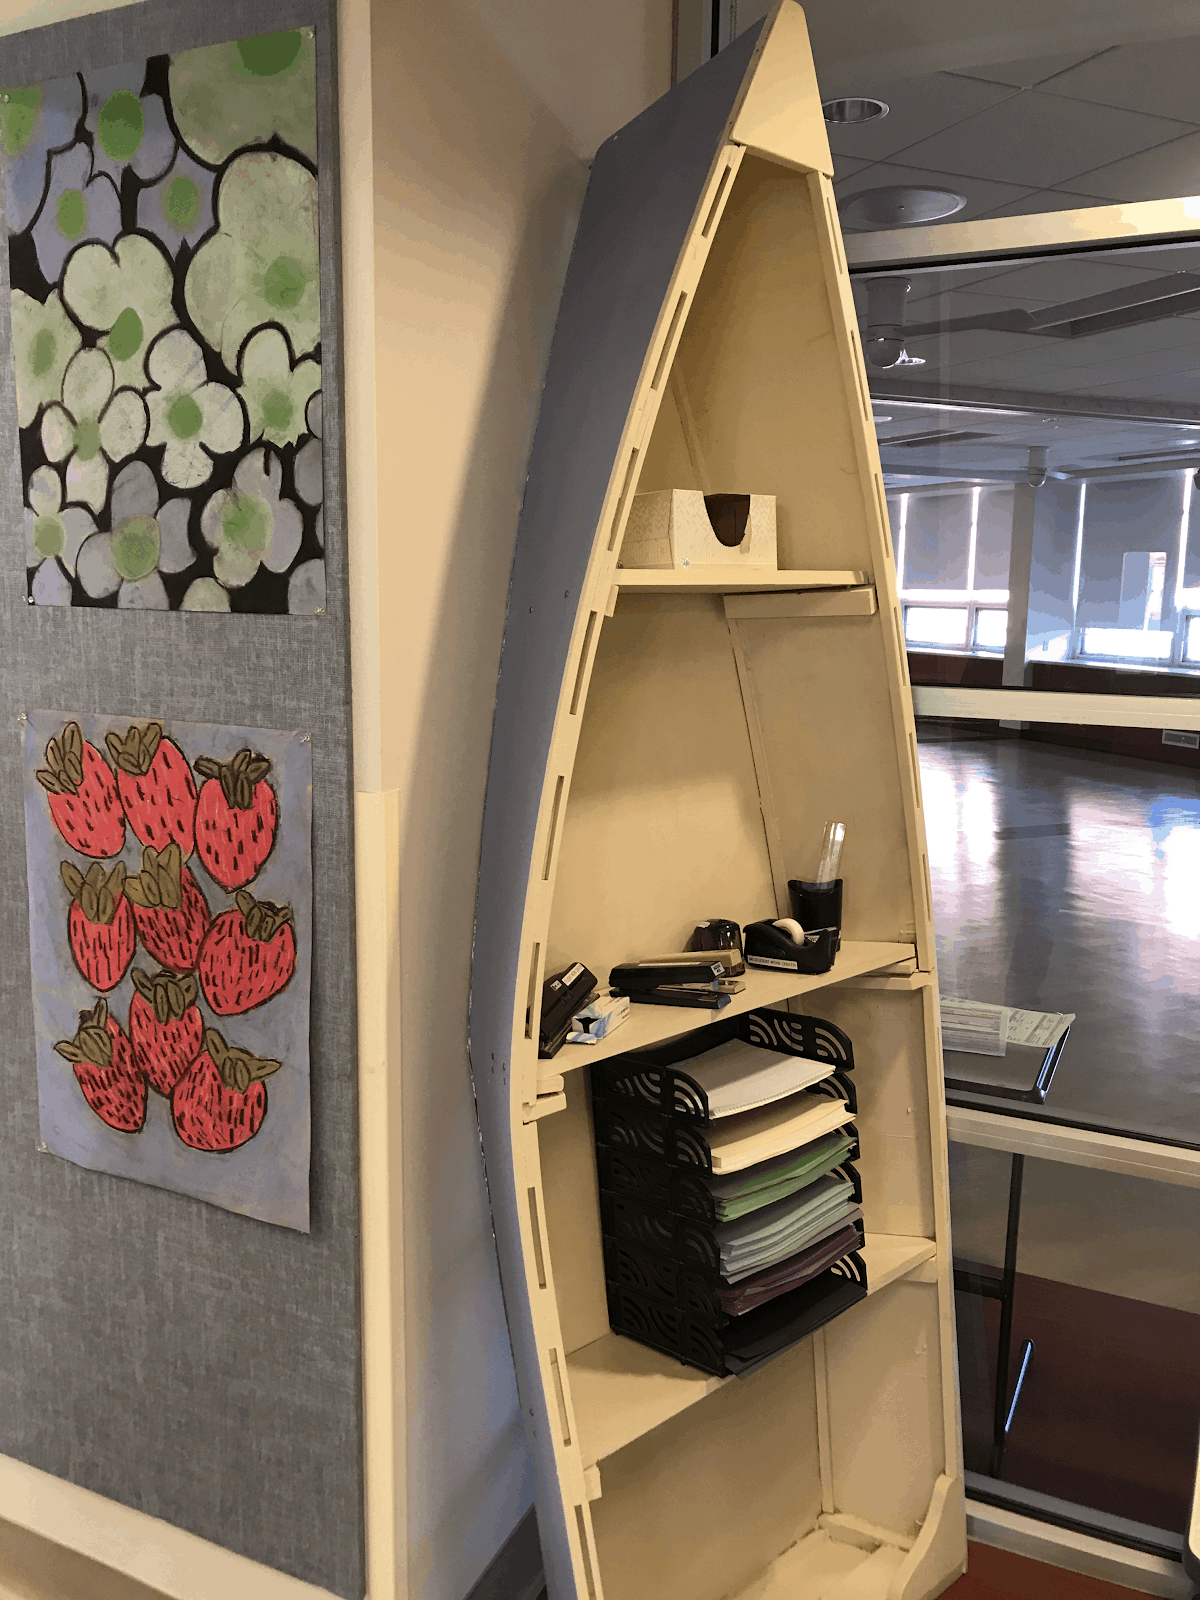
Are you looking for a unique way to add charm and storage to your space? Building a 6 foot boat bookshelf might be exactly what you need.
Imagine having a beautiful, handcrafted piece that not only holds your favorite books but also sparks conversations. In this guide, you’ll discover simple steps to create your own boat-shaped bookshelf, even if you’ve never built furniture before. Ready to turn your creativity into a stunning, functional piece?
Keep reading, and you’ll learn how to make it happen with ease.

Credit: www.etsy.com
Materials And Tools Needed
Gathering the right materials and tools is the first step to build a 6-foot boat bookshelf. Using proper supplies ensures your project is strong and looks great. This section covers the wood, hardware, and tools you need for the build.
Wood Selection
Choose wood that is sturdy and easy to work with. Pine or cedar works well for beginners. These woods are light, affordable, and have a smooth surface. For a more polished look, consider oak or maple. Make sure the wood is dry and free of cracks. You will need boards for the sides, shelves, and base.
Hardware And Fasteners
Use screws and nails made of stainless steel to avoid rust. Wood glue adds extra strength to joints. Sandpaper helps smooth rough edges before finishing. You may want to use wood filler to cover any holes or imperfections. Finish with paint or varnish to protect the wood and enhance its look.
Tools Checklist
Have these tools ready before starting the build. A saw cuts the wood to size. A drill makes holes for screws. A screwdriver helps fasten hardware. A measuring tape ensures precise dimensions. A level keeps shelves straight. Clamps hold pieces together while glue dries. Safety gear like gloves and goggles protects you during work.
Design And Measurements
Design and measurements play a key role in building a 6 foot boat bookshelf. They guide each step of the project. Careful planning helps the bookshelf look great and fit well in your space.
Start by thinking about the boat shape. This sets the style and overall feel. Next, decide on shelf dimensions. They determine how much you can store. Finally, mark the wood clearly. This makes cutting and assembling easier.
Choosing The Boat Shape
Pick a boat shape that fits your room and style. A simple canoe shape works well for beginners. It has smooth curves and looks elegant. You can also try a more detailed shape if you feel confident. Sketch the outline on paper first. This helps you see the size and shape clearly.
Shelf Dimensions
Set the length at 6 feet for a balanced look. Decide the shelf height based on the books you want to store. A good depth is between 8 and 12 inches. Make sure shelves are wide enough to hold tall books. Leave space between shelves for easy access.
Marking The Wood
Use a pencil and ruler to mark the wood pieces. Draw the boat shape outline on the plywood sheet. Mark lines for each shelf location. Double-check all measurements before cutting. Clear marks keep your cuts precise and clean.
Cutting The Wood
Cutting the wood is a key step in building your 6-foot boat bookshelf. It shapes all parts of the shelf. Precision is important to ensure the pieces fit well. Take your time and follow measurements closely.
Use the right tools for clean, straight cuts. Preparing your wood before assembly makes the building process easier and faster. This section guides you through cutting the frame and shelves safely and accurately.
Safety Tips
Always wear safety goggles to protect your eyes. Use ear protection to guard your hearing. Keep fingers away from the blade at all times. Work in a clean, well-lit area to see clearly. Secure wood firmly before cutting to avoid slips.
Cutting The Frame
Measure the frame pieces carefully before cutting. Mark each piece with a pencil for accuracy. Use a circular saw or handsaw for straight cuts. Cut slowly to maintain control and prevent mistakes. Sand the edges to smooth any rough spots.
Cutting The Shelves
Measure shelf lengths based on your design plan. Mark all shelves clearly to avoid confusion. Cut shelves one by one for better precision. Check each shelf against the frame after cutting. Sand the shelf edges for a polished finish.
Credit: www.gettingsmart.com
Assembling The Frame
Building the frame is the first big step in making your 6-foot boat bookshelf. This frame gives the shelf its shape and strength. Take your time and follow each step carefully. A strong frame means a sturdy bookshelf that lasts for years.
Joining The Sides
Start by placing the two side panels upright. Use wood glue on the edges to hold them tight. Clamp the sides together to keep them in place. Drill pilot holes to avoid splitting the wood. Secure the sides with screws for extra strength.
Attaching The Bottom
Next, fit the bottom panel between the sides. Make sure it sits flush with the edges. Apply wood glue along the bottom edges. Screw the panel into the sides using pilot holes. The bottom supports the weight of your books and items.
Reinforcing The Structure
Add support braces inside the frame for more stability. Cut small wooden blocks to fit in corners. Glue and screw these braces at each corner. This stops wobbling and keeps the frame square. Double-check all screws are tight before moving on.
Installing The Shelves
Installing the shelves is an important step when building your 6-foot boat bookshelf. This part gives the bookshelf its function and style. Careful measuring and secure fixing make sure the shelves hold your books safely. You want the shelves to fit well and stay strong for years.
Measuring Shelf Placement
Start by deciding the height of each shelf. Use a tape measure to mark where each shelf will go. Keep space between shelves enough for your books. Mark the spots clearly on the inside of the bookshelf frame. Double-check the marks to avoid mistakes. Even spacing looks neat and helps balance the weight.
Securing The Shelves
Choose screws or brackets to hold the shelves in place. Drill pilot holes to prevent wood from splitting. Attach the brackets or screw the shelves firmly to the frame. Make sure each shelf sits level before tightening. Use a level tool to check. Secure shelves prevent wobbling and keep books safe.
Ensuring Stability
Check the entire bookshelf for any loose parts. Press on each shelf to test its strength. Add extra support if a shelf feels weak. Glue joints can add more stability. Tight screws and strong supports stop shelves from sagging. A stable bookshelf lasts longer and looks better.

Credit: www.amazon.sa
Sanding And Finishing
Sanding and finishing are key steps in building your 6-foot boat bookshelf. These steps protect the wood and give it a smooth, beautiful look. Proper sanding removes rough spots and prepares the surface for paint or stain. Finishing adds color and seals the wood from moisture and damage.
Sanding Techniques
Start sanding with medium-grit sandpaper, like 120 grit. Sand along the wood grain to avoid scratches. Check for rough edges or splinters and smooth them out. After the first pass, use fine-grit sandpaper, like 220 grit, for a soft finish. Wipe off dust with a clean cloth before moving on.
Applying Paint Or Stain
Choose paint or stain based on your preferred look. Stain shows the wood grain, paint covers it completely. Apply a thin, even coat with a brush or cloth. Let it dry fully before adding a second coat. Lightly sand between coats with fine sandpaper for smoothness. This step improves color and durability.
Sealing The Wood
Seal the wood with clear varnish or polyurethane. This layer protects from water and wear. Use a clean brush and apply thin coats. Allow each coat to dry before applying the next. Two to three coats give the best protection. Light sanding between coats helps the finish stick well.
Final Assembly And Placement
The final assembly and placement bring your 6-foot boat bookshelf to life. This step combines all parts and sets the shelf in its perfect spot. Careful work here makes sure your bookshelf is stable and looks great.
Attaching Decorative Elements
Start by adding any decorative pieces you have prepared. These might include wooden trim, metal accents, or boat-themed details. Use wood glue or small nails to secure them firmly. Check that all decorations are even and aligned. Let any glue dry completely before moving the shelf.
Positioning The Bookshelf
Choose a spot with good light and enough space. Place the bookshelf against a flat wall for strong support. Avoid areas with high humidity to protect the wood. Use a level to check the shelf sits straight. Adjust the feet or add shims if needed for balance.
Maintenance Tips
Dust the bookshelf regularly with a soft cloth. Wipe spills immediately to avoid stains. Check screws and nails every few months to keep the shelf secure. Treat the wood with polish or wax to maintain its shine. Keep the shelf away from direct sunlight to prevent fading.
Frequently Asked Questions
What Materials Are Needed To Build A 6 Foot Boat Bookshelf?
You need plywood, wood glue, screws, paint, sandpaper, and boat-shaped templates. Quality wood ensures durability. Proper tools like saws and drills are essential for assembly.
How Long Does It Take To Build This Bookshelf?
Building a 6 foot boat bookshelf usually takes 6 to 8 hours. Time varies by skill level and tools available. Planning and preparation can reduce construction time.
Can Beginners Build A Boat-shaped Bookshelf Easily?
Yes, beginners can build it with clear instructions and basic woodworking skills. Start with simple cuts and take safety precautions. Practice helps improve precision and confidence.
How To Finish And Protect The Boat Bookshelf?
Use primer, paint or wood stain to finish the bookshelf. Apply a clear sealant to protect against moisture and wear. Proper finishing enhances appearance and durability.
Conclusion
Building a 6-foot boat bookshelf is a fun and useful project. You can make it with simple tools and easy steps. This bookshelf adds charm and storage to any room. Take your time, measure well, and follow each step carefully.
Soon, you will enjoy a sturdy, beautiful shelf made by your own hands. Keep practicing woodworking to improve skills and create more furniture. Enjoy your new bookshelf and the pride in making it yourself!
