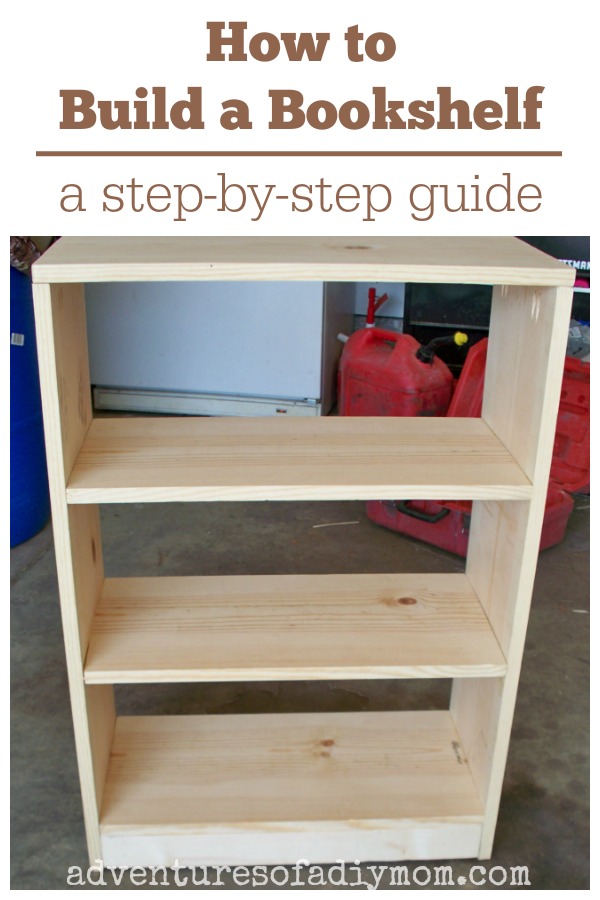
Are you ready to create your own beautiful bookshelf but don’t know where to start? Building a bookshelf might seem tricky at first, but with the right steps, you can do it easily—even if you’ve never worked with wood before.
Imagine having a custom shelf that fits perfectly in your space and holds all your favorite books. In this guide, you’ll discover simple tips and clear instructions that make the whole process smooth and enjoyable. Keep reading, and by the end, you’ll have the confidence to build a sturdy, stylish bookshelf all on your own.
Choosing The Right Materials
Choosing the right materials is the first step in building a sturdy bookshelf. The materials affect the strength, look, and cost of your project. Picking good wood, tools, and safety gear makes the work easier and the final shelf better.
Types Of Wood For Bookshelves
Wood choice is key for a strong bookshelf. Pine is soft, easy to cut, and budget-friendly. Oak is hard, durable, and looks classic. Plywood is made of layers glued together. It is stable and less likely to warp. MDF is smooth and cheap but less strong. Choose wood based on your budget and shelf style.
Essential Tools And Hardware
Basic tools help you build with ease. A saw cuts the wood to size. A drill makes holes and drives screws. Sandpaper smooths rough edges. Wood glue adds strength between boards. Screws and brackets hold parts firmly. Having these tools ready speeds up your work.
Safety Gear To Use
Safety gear protects you during the project. Safety glasses shield your eyes from dust and chips. Gloves protect your hands from splinters. A dust mask keeps you from breathing sawdust. Ear protection helps with loud tools. Wear these items every time you work.
.JPG)
Credit: www.adventuresofadiymom.com
Planning Your Bookshelf
Planning your bookshelf is the first step to a successful build. It sets the foundation for the entire project. Careful planning helps avoid mistakes and saves time. Think about what you want and how the shelf will fit in your space. This section guides you through important planning stages. It covers size, style, and drawing your design.
Determining Shelf Dimensions
Start by measuring the space where the bookshelf will go. Note the height, width, and depth available. Consider the size of books and items you want to store. Standard shelves hold most books, but tall books need extra height. Leave a little room for air and easy access. Decide how many shelves you want. Balance between too many and too few. Correct dimensions make your bookshelf practical and neat.
Designing For Space And Style
Think about the room’s style and colors. Match the bookshelf design with your furniture and walls. Choose between open shelves or ones with doors. Open shelves show your books and decor clearly. Closed shelves protect items from dust. Pick materials that suit your style and budget. Wood is classic, while metal looks modern. The design should feel natural in your space.
Sketching Your Blueprint
Draw a simple plan on paper or use software. Sketching helps visualize the final product. Include all measurements and shelf positions. Mark where screws and supports will go. Use clear lines and labels. This blueprint guides you during building. It reduces errors and saves material. Keep the sketch handy as you build your bookshelf.
Cutting And Preparing Wood
Cutting and preparing wood is an important step in building a bookshelf. It sets the base for a strong, neat, and lasting piece. Taking time here helps avoid mistakes later. You will learn how to measure, cut safely, and smooth the wood edges for a clean finish.
Measuring And Marking
Measure the wood pieces carefully before cutting. Use a tape measure to get exact lengths. Mark the spots clearly with a pencil or chalk. Double-check your marks to avoid cutting errors. Straight lines make cutting easier and more accurate.
Safe Cutting Techniques
Always wear safety goggles and gloves to protect yourself. Use the right saw for your wood type and thickness. Keep your hands away from the blade while cutting. Cut slowly and steadily to keep control. Clamp the wood down to stop it from moving.
Sanding For Smooth Edges
After cutting, the wood edges may feel rough. Use sandpaper or a sanding block to smooth them. Sand along the grain to avoid scratches. Smooth edges help prevent splinters and improve the look. Take your time to get a nice finish on every piece.
Credit: www.adventuresofadiymom.com
Assembling The Frame
Assembling the frame is the first big step in building your bookshelf. This part creates the basic shape and holds all shelves together. A strong frame means a sturdy bookshelf that lasts long. Take your time to get each piece right. Use simple tools and follow the steps carefully. Soon, you will see the bookshelf taking shape.
Joining Side Panels And Shelves
Start by placing the side panels upright. Align the shelves between them. Make sure each shelf fits snugly in place. Use clamps if needed to hold pieces steady. Check that all edges line up well. This creates a clean, straight frame. Avoid gaps or uneven joints for strength.
Using Screws And Nails
Use screws for a strong hold. Screws grip wood better than nails. Pre-drill holes to stop wood from splitting. Drive screws in slowly and straight. Nails can help, but use them with care. Hammer nails gently to avoid damage. Mix screws and nails for the best frame.
Checking For Stability
Once assembled, test the frame’s stability. Push the frame lightly from all sides. It should not wobble or shift. Tighten any loose screws or nails. Add extra support if needed. A stable frame keeps your bookshelf safe and sturdy.
Finishing Touches
Finishing touches give your bookshelf a polished and durable look. These final steps protect the wood and improve the shelf’s appearance. Taking time on these details makes your project last longer and look great in any room.
Applying Paint Or Stain
Choose a paint or stain that fits your room’s style. Paint covers the wood fully and adds color. Stain soaks into the wood and shows its natural grain. Use a brush or cloth to apply thin, even coats. Let each coat dry before adding the next one. This prevents drips and gives a smooth finish.
Adding Protective Coats
Protective coats guard against scratches and water damage. Polyurethane is a common choice for durability. Apply it carefully with a clean brush. Thin coats work best to avoid bubbles or runs. Let each layer dry completely. Lightly sand between coats for a smooth surface.
Installing Back Panels And Supports
Back panels add strength and prevent books from falling. Use thin plywood or hardboard for the back. Cut it to fit your shelf size exactly. Attach it with nails or screws along the edges. Add extra supports under shelves for heavy books. Supports keep shelves straight and stable over time.
Placing And Organizing
Placing and organizing your new bookshelf is key to making it useful and attractive. You want it to fit well in your space and hold your books safely. Thoughtful placement helps your room look neat and keeps your favorite items easy to reach.
Organizing your books and decor thoughtfully brings life to your shelf. You can mix books with decorative pieces to create a balanced, inviting look. This section covers how to pick the best spot, secure the shelf, and arrange your items neatly.
Choosing The Perfect Location
Find a spot with enough space for your bookshelf. Avoid places that block windows or walkways. Choose a flat, stable floor to keep your shelf steady. Check for nearby outlets if you want to add lighting later. A spot with good light makes reading titles easier. Avoid areas with high humidity to protect your books.
Securing The Bookshelf
Secure your bookshelf to the wall for safety. Use brackets or straps designed for shelves. This prevents tipping, especially in homes with children or pets. Follow the hardware instructions carefully for a strong hold. Check the shelf regularly for any wobbling. Tighten screws and fix loose parts as needed.
Arranging Books And Decor
Group books by size or subject for a clean look. Place larger books on lower shelves for balance. Add decorative items like plants or photo frames to break up rows of books. Leave some empty space to avoid clutter. Use bookends to keep books upright and tidy. Rotate your decor seasonally for a fresh appearance.

Credit: www.youtube.com
Frequently Asked Questions
What Tools Do Beginners Need To Build A Bookshelf?
Beginners need basic tools: a saw, drill, screwdriver, measuring tape, level, and clamps. These tools help cut, assemble, and secure the bookshelf parts accurately and safely.
How Much Time Does It Take To Build A Bookshelf?
Building a simple bookshelf usually takes 3 to 5 hours. Time varies based on design complexity, skill level, and material preparation.
What Materials Are Best For A Beginner’s Bookshelf?
Plywood or pine wood are ideal for beginners. They are affordable, easy to cut, and sturdy enough for most bookshelf designs.
How Do I Ensure My Bookshelf Is Stable?
Use strong joints, level the shelves, and secure the bookshelf to the wall. Proper assembly and anchoring prevent wobbling and ensure safety.
Conclusion
Building a bookshelf is easier than it seems. Take your time and follow each step carefully. Use the right tools and measure twice before cutting. Enjoy the process and learn as you go. Soon, you will have a sturdy shelf for your books.
This project helps improve your skills and confidence. Keep practicing with simple projects like this one. Your home will feel more personal and organized. Start small, stay patient, and watch your work come to life. You can do this!