Are you looking for a simple, creative way to organize your books and add charm to your space? Building a bookshelf out of crates is a fun and affordable project you can do yourself.
Imagine turning plain wooden crates into a stylish storage solution that fits your style perfectly. You’ll discover easy steps and clever tips to build your own crate bookshelf, even if you’ve never done a DIY project before. Keep reading, and by the end, you’ll have everything you need to create a unique bookshelf that shows off your personality and keeps your favorite reads close at hand.
Choosing The Right Crates
Choosing the right crates is key to building a strong and stylish bookshelf. The crates must fit your space and hold your books safely. Picking the best crates also affects the look of your shelf. Understanding the types, materials, size, and weight capacity helps you make the best choice.
Types Of Crates
Wooden crates are classic and sturdy. They give a warm, natural look. Plastic crates are light and easy to clean but may not be as strong. Metal crates offer an industrial style and hold heavy items well. Open or slatted crates create a light feel. Closed crates give a solid look and hide clutter.
Materials To Consider
Wood is popular for its strength and beauty. Pine is affordable and easy to work with. Oak or maple are harder and last longer. Plastic crates resist moisture and are good for damp areas. Metal crates are tough and handle weight well. Think about where you place the shelf and pick material that fits.
Size And Weight Capacity
Choose crates that fit your room size and style. Small crates suit tight spaces or small books. Large crates hold big books and decor items. Check the weight capacity to avoid sagging. Strong crates keep your shelf steady and safe. Stack crates evenly to balance the weight.
Gathering Tools And Supplies
Before starting your bookshelf project, gather all tools and supplies. Having everything ready saves time and makes the work easier. This step ensures a smooth building process without interruptions. Focus on basic tools, hardware, and safety gear.
Basic Tools Needed
You need a drill to make holes and drive screws. A screwdriver helps tighten screws if no drill is available. A hammer is useful for light tapping and fixing nails. A measuring tape ensures precise crate placement and alignment. Sandpaper smooths rough edges and surfaces. A pencil marks where to cut or drill.
Additional Hardware
Wood screws hold the crates firmly together. L-brackets add stability and support. Wood glue strengthens joints between crates. Furniture pads protect your floor from scratches. Optional caster wheels let you move the shelf easily.
Safety Gear
Wear safety glasses to protect your eyes from dust and debris. Use gloves to prevent splinters and cuts. A dust mask keeps you safe from inhaling wood particles. Dress in comfortable clothes that cover your arms and legs.
Preparing The Crates
Preparing the crates is an important step before building your bookshelf. It makes sure the crates look good and last long. Cleaning, sanding, painting, and sealing help protect the wood. These steps also make the crates smooth and safe to use.
Cleaning And Sanding
Start by cleaning the crates with a damp cloth. Remove dirt, dust, and any labels. Let them dry completely before sanding. Use medium-grit sandpaper to smooth rough edges. Sand inside and outside the crates carefully. This removes splinters and old paint. Finish with fine-grit sandpaper for a smooth surface. Wipe away dust with a dry cloth.
Painting And Staining Options
Choose paint or stain based on your style. Paint offers many color choices. It hides wood imperfections well. Stain shows the natural wood grain. It adds warmth and character. Apply paint or stain with a brush or cloth. Use thin, even coats. Let each coat dry before adding another. This helps avoid drips and blotches.
Sealing For Durability
Sealing protects the crates from water and damage. Use clear polyurethane or varnish. Apply with a clean brush in thin layers. Let each layer dry fully. Sand lightly between coats for a smooth finish. Sealing makes the wood last longer. It also keeps the color bright and fresh. This step is key for a strong bookshelf.
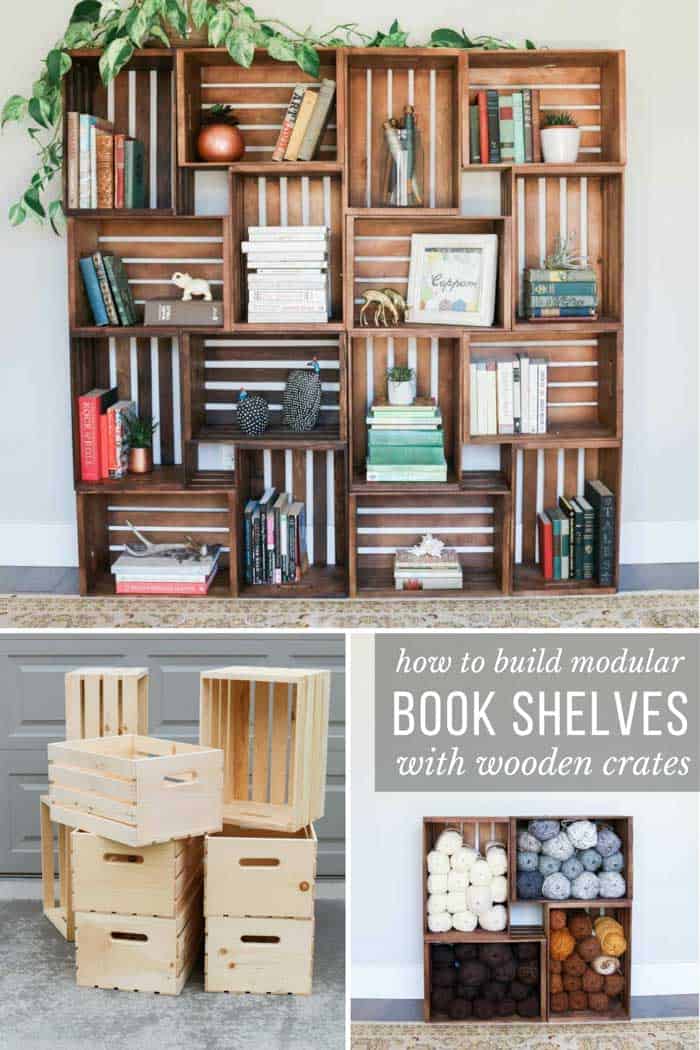
Credit: makeanddocrew.com
Assembling The Bookshelf
Assembling a bookshelf from crates is a fun and creative project. It lets you design a unique piece that fits your space perfectly. The process involves planning the layout, stacking the crates correctly, and securing them for safety. Each step helps build a strong and attractive bookshelf.
Layout And Design Ideas
Start by choosing the style you want. You can make a simple vertical stack or a more complex shape. Try arranging crates in different patterns on the floor first. This helps you see what looks best and fits your room. Consider mixing crate sizes for variety. Leave space for larger books or decorations. Think about how many shelves you need. Plan for both function and style.
Stacking And Aligning Crates
Place the crates carefully to keep the shelf stable. Align the edges so the bookshelf looks neat and even. Check that each crate sits flat on the one below. Use a level tool if you have one. This stops the shelf from leaning or wobbling. Make sure the crate openings face the same way. This gives your bookshelf a clean, uniform look.
Securing Crates Together
Fasten the crates to stop them from shifting or falling. Use screws or strong brackets to join the crates. Drill holes first to avoid splitting the wood. Attach brackets inside the corners for extra strength. You can also use wood glue for added hold. Secure the bookshelf to the wall for safety, especially if it is tall. This keeps your books and items safe from accidents.
Mounting And Stability
Mounting and stability are key to a safe, strong bookshelf made from crates. Properly securing the crates keeps the shelf steady. This prevents accidents and protects your books and walls.
Focus on attaching the shelf to the wall. Add extra support brackets. Use tips to stop the shelf from tipping over. These steps create a secure and lasting bookshelf.
Attaching To Walls
Use wall anchors or screws to attach the crate shelf. Find studs in the wall for the strongest hold. Drill holes through the crates and into the studs. Secure the shelf firmly to stop it from moving.
Adding Support Brackets
Support brackets add strength to the shelf. Place brackets under the crates or on the sides. Screw them tightly to both the crates and the wall. This helps the shelf carry heavier books safely.
Preventing Tipping
Keep the shelf low and close to the wall. Avoid stacking too many heavy items on top. Use anti-tip straps or brackets to fix the shelf to the wall. This stops the shelf from falling forward.
Customizing Your Bookshelf
Customizing your bookshelf made from crates lets you create a unique storage piece. It reflects your style and fits your space perfectly. This step makes your project more personal and useful.
Adding Shelves Or Dividers
Adding shelves or dividers helps organize books and items better. Use thin wood or sturdy cardboard to create extra levels inside crates. Secure them with nails or strong glue. This prevents books from falling over and keeps things neat.
Dividers create smaller sections inside each crate. They are great for sorting different types of books or decorations. Measure carefully to fit the space. This simple change improves both looks and function.
Decorative Touches
Decorative touches make your bookshelf stand out. Paint the crates in colors that match your room. Use stencils or patterns for extra style. Sand edges for a smooth finish.
Try adding fabric liners inside crates for color and texture. Stick wallpaper or use washi tape on crate surfaces. These small changes add charm without much effort.
Incorporating Lighting
Incorporating lighting brightens your bookshelf and highlights your items. Use small LED strip lights or fairy lights inside or around crates. Battery-operated lights are easy to install and move.
Place lights to avoid glare and shadows. This creates a cozy and inviting atmosphere. Lighting also helps find books in darker rooms or evenings.
Maintaining Your Bookshelf
Maintaining your bookshelf made from crates keeps it strong and looking good. Regular care helps it last longer. Small efforts protect your work and your books.
Cleaning Tips
Dust your bookshelf often with a soft cloth. Use a dry cloth or one slightly dampened with water. Avoid harsh cleaners that can damage wood or paint. Clean corners and edges carefully. This prevents dirt buildup and keeps your shelves neat.
Repairing Wear And Tear
Check for loose screws or nails regularly. Tighten or replace them to keep crates stable. Sand rough or splintered areas gently to avoid injuries. Use wood glue for small cracks or splits. Fix problems early to avoid bigger damage later.
Seasonal Care
Keep your bookshelf away from direct sunlight to prevent fading. Avoid placing it near heaters or air conditioners. These can dry or warp the wood. In humid seasons, use a dehumidifier or air out the room. Proper care in different seasons protects your crate bookshelf well.
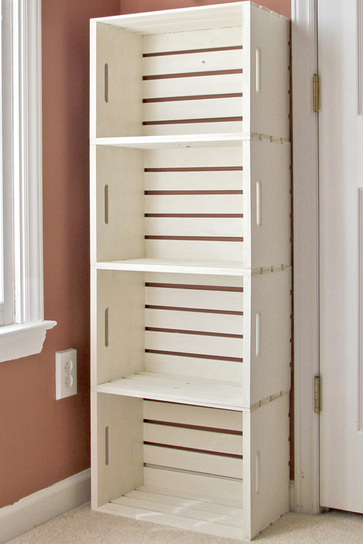
Credit: www.calmcradle.com
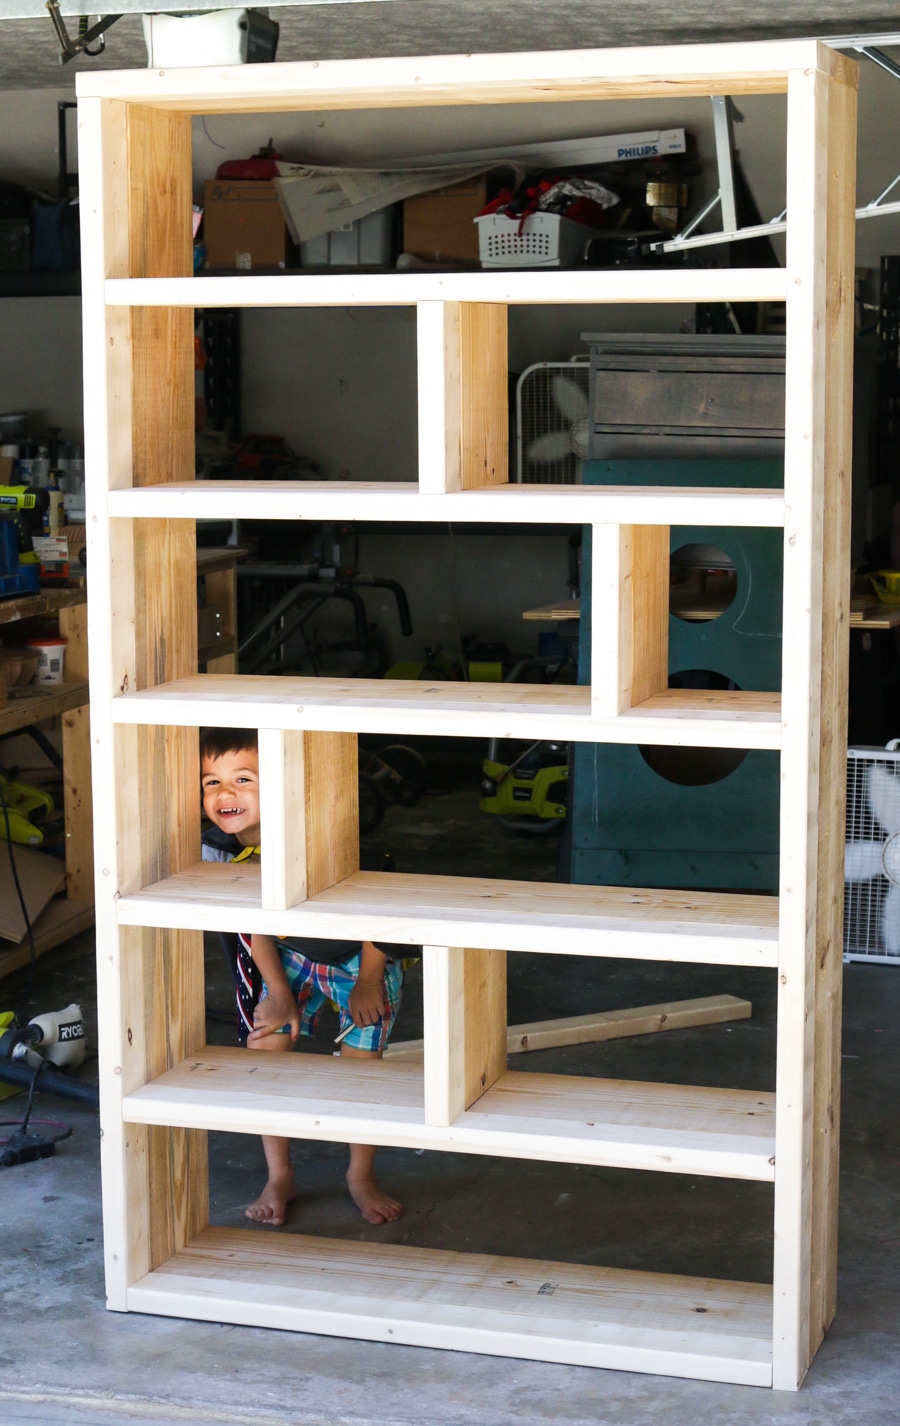
Credit: jenwoodhouse.com
Frequently Asked Questions
How Do I Choose The Right Crates For A Bookshelf?
Select sturdy wooden crates with uniform sizes for stability. Ensure they can support your books’ weight. Check for smooth surfaces to avoid damage. Quality crates enhance durability and appearance.
What Tools Are Needed To Build A Crate Bookshelf?
Basic tools include a drill, screws, screwdriver, measuring tape, and sandpaper. Optional items are wood glue and paint for finishing. These tools help assemble and customize your bookshelf easily.
How Can I Secure Crates For Stability?
Stack crates evenly and use screws or brackets to fasten them. Adding wood glue between crates increases strength. Anchoring the bookshelf to a wall prevents tipping hazards.
Can I Customize My Crate Bookshelf Design?
Yes, you can paint, stain, or distress crates for a unique look. Arrange crates in various configurations to fit your space. Adding decorative elements personalizes your bookshelf style.
Conclusion
Building a bookshelf from crates is simple and fun. You only need a few materials and some patience. This project saves money and adds charm to your space. You can arrange crates in many ways to fit your style. Personalize it with paint or decorations.
Enjoy your new shelf that holds books and more. Try this DIY project to create a unique home item. It brings both function and creativity together nicely. Start your crate bookshelf today and see the difference it makes.