Looking for a way to keep your entryway neat and stylish? Building a coat rack bench might be exactly what you need.
Imagine having a spot where you can hang your coat, store your shoes, and even sit down to put them on—all in one handy piece of furniture. It’s not just practical; it adds charm to your home. If you’ve ever thought about making one yourself but didn’t know where to start, this guide will walk you through every step.
By the end, you’ll have the skills and confidence to create a coat rack bench that fits your space perfectly. Ready to transform your home and simplify your daily routine? Let’s dive in!
Materials And Tools
Gathering the right materials and tools is the first step to build a coat rack bench. Having everything ready helps the project run smoothly. It saves time and reduces mistakes. This section covers wood choices, necessary tools, and extra hardware.
Choosing The Right Wood
Pick wood that is strong and easy to work with. Pine is a good choice for beginners. It is affordable and light. Oak and maple are harder woods. They last longer but can be tough to cut. Consider the style of your home. Match the wood color and texture to your space.
Essential Tools List
Prepare these basic tools before starting. A saw is needed to cut the wood pieces. A drill will help make holes for screws. Sandpaper smooths rough edges. A measuring tape ensures the right size. A screwdriver is necessary to fasten parts together. Clamps hold pieces steady while working. Safety glasses protect your eyes during cutting and drilling.
Optional Hardware And Accessories
Add hooks for hanging coats and bags. You can use metal or wooden hooks. Soft cushions make the bench more comfortable. Paint or stain enhances the wood’s look. Sealants protect the wood from moisture. Small baskets or storage bins fit under the bench for extra space.

Credit: www.instructables.com
Designing Your Coat Rack Bench
Designing your coat rack bench is the first step toward a useful and stylish piece. Think about how you want it to look and work in your space. This part sets the foundation for building a bench that fits your needs perfectly.
Focus on size, style, storage, and comfort. These choices affect how well the bench will serve your daily routine.
Selecting The Size And Style
Measure the wall space where you plan to place the bench. Choose a size that fits well without crowding the room. Pick a style that matches your home’s decor. Simple designs work well in small spaces. Ornate styles add charm to larger areas. Keep the shape and colors balanced for a neat look.
Planning Storage Features
Decide what items you want to store. Hooks for coats and hats are essential. Shelves or cubbies help keep shoes and bags organized. Closed compartments hide clutter and keep things tidy. Open shelves make items easy to grab. Think about your daily needs to plan useful storage.
Incorporating Seating Comfort
Choose a bench height that is easy to sit on. Add a soft cushion or padded seat for comfort. Use durable, easy-to-clean materials for the seat cover. Make sure the bench is wide enough for sitting comfortably. A cozy seat invites people to use the bench often.
Preparing The Wood Pieces
Preparing the wood pieces is the first step in building a sturdy coat rack bench. It ensures all parts fit well and look good. Proper preparation makes the assembly process smooth and efficient. Focus on accuracy and care to avoid mistakes later.
Measuring And Marking
Start by measuring each wood piece carefully. Use a tape measure for exact lengths. Mark the wood clearly with a pencil. Mark the cutting lines straight and easy to see. Double-check measurements before marking to avoid errors.
Cutting Techniques
Use the right saw for clean, straight cuts. A circular saw works well for long cuts. Follow the marked lines slowly and steadily. Keep your hands safe and steady while cutting. Make sure cuts are precise to ensure a good fit.
Sanding And Smoothing
Sand all cut edges to remove rough spots. Use medium-grit sandpaper first, then fine grit for smoothness. Sand in the direction of the wood grain. Check for splinters or uneven areas. Smooth surfaces help paint or stain stick better.

Credit: www.reddit.com
Assembling The Frame
Building the frame is the first step to a strong coat rack bench. This part gives the bench its shape and support. Follow the steps carefully to make a sturdy base. Use the right tools and check each connection as you go. The frame includes the base, legs, support beams, and the seat. Each piece must fit well for safety and durability.
Joining The Base And Legs
Start by placing the base flat on the floor. Attach each leg to the corners of the base. Use screws or bolts to hold them tightly. Make sure the legs stand straight. Check for any wobble before moving to the next step. Tighten all fasteners to keep the legs secure.
Attaching Support Beams
Support beams add strength to the frame. Position them between the legs under the base. Secure each beam with screws on both ends. The beams stop the legs from moving. Double-check that the beams are level and firmly attached. This step makes the bench stable and safe to use.
Securing The Seat
Place the seat board on top of the frame. Align it so all edges match the frame. Screw the seat down into the base and support beams. Use enough screws to avoid any movement. Press down firmly to keep the seat flat. This step finishes the frame and prepares it for finishing touches.
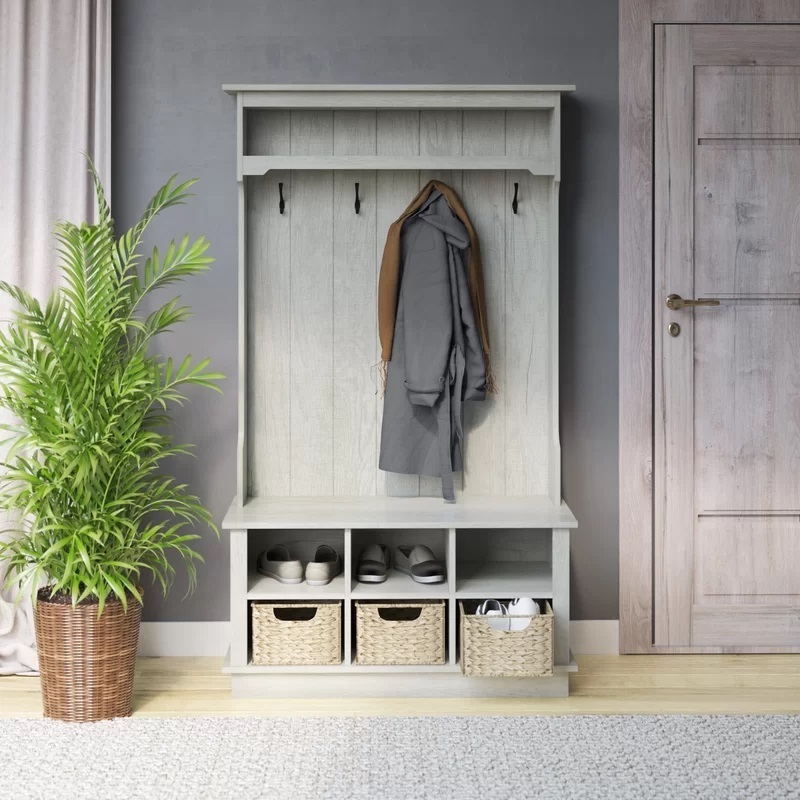
Adding Coat Hooks And Storage
Adding coat hooks and storage to your coat rack bench makes it more useful. It helps keep your entryway tidy and organized. Hooks hold coats, hats, and bags. Storage spaces keep shoes and small items neat. This section shows how to add hooks and storage effectively.
Positioning Hooks For Accessibility
Place hooks at different heights for easy reach. Lower hooks work well for kids’ coats. Higher hooks fit adult jackets and bags. Space hooks evenly to avoid crowding. Leave enough room to hang bulky coats. Think about daily use and convenience.
Installing Shelves Or Compartments
Add shelves or compartments under the bench for shoes or gloves. Use sturdy wood for strong shelves. Keep compartments open or add doors for a clean look. Measure the space before cutting shelves. Make sure shelves fit well without blocking hooks.
Enhancing With Baskets Or Bins
Baskets or bins keep small items organized and out of sight. Choose baskets that fit inside compartments. Label bins to find things quickly. Use plastic or wicker baskets for easy cleaning. Baskets add style and function to your bench.
Finishing Touches
Finishing touches give your coat rack bench a polished look. They protect the wood and enhance its beauty. This part is as important as the building process. Take time to choose the right paint, stain, or coating. Small details can make a big difference.
Painting And Staining Options
Choose paint or stain based on the style you want. Paint covers the wood fully and offers many color choices. Stain shows the wood grain and adds warmth. Use light colors for a fresh look. Dark stains give a classic and rich feel. Test on a small spot before applying fully.
Applying Protective Coatings
Protective coatings keep your bench safe from damage. Use clear varnish, polyurethane, or wax. These coatings prevent scratches and water damage. Apply thin layers and let each dry well. This step helps your bench last longer and stay beautiful.
Decorative Accents And Details
Decorative accents personalize your bench. Add hooks in fun shapes or colors. Use cushions or fabric for comfort and style. Attach small signs or labels for a unique touch. These little details create charm and make your bench stand out.
Maintenance Tips
Maintaining your coat rack bench keeps it looking fresh and lasting longer. Regular care prevents damage and keeps the wood strong. Small fixes stop bigger problems later. Follow these tips to keep your bench in top shape.
Cleaning And Care
Dust your bench often using a soft cloth. Wipe spills quickly with a damp cloth to avoid stains. Use mild soap and water for deeper cleaning. Avoid harsh chemicals that can damage the finish. Dry the bench well after cleaning to stop water damage.
Fixing Common Issues
Tighten loose screws or bolts with a screwdriver. Sand rough spots gently to remove splinters. Use wood filler for small cracks or holes. Replace broken hooks or parts to keep the bench functional. Check the bench regularly for any signs of wear.
Extending Bench Lifespan
Apply wood polish or oil every few months to protect the surface. Keep the bench away from direct sunlight and moisture. Use felt pads under the legs to avoid floor scratches. Avoid placing heavy objects that may cause strain. Regular care helps your bench stay sturdy and good-looking.
Credit: www.drfabregues.com
Frequently Asked Questions
What Materials Are Needed To Build A Coat Rack Bench?
You need wood planks, screws, hooks, wood glue, paint, and sandpaper. Optional items include cushions for seating comfort and wood stain for finish.
How Long Does It Take To Build A Coat Rack Bench?
Building typically takes 4 to 6 hours, depending on skill level. This includes cutting, assembling, sanding, and painting or staining.
Can I Customize The Size Of My Coat Rack Bench?
Yes, you can adjust the bench length and height to fit your space. Customize hook placement to suit your storage needs.
What Tools Are Required For Building A Coat Rack Bench?
Essential tools include a saw, drill, screwdriver, measuring tape, and a sander. Optional tools can speed up the assembly process.
Conclusion
Building a coat rack bench adds style and function to your space. It offers a handy spot to sit and store coats or shoes. You can customize it to fit your room’s size and look. This project helps you save money and enjoy a useful piece of furniture.
With some basic tools and patience, anyone can create it. Try this simple project to improve your home’s entryway today.
