Are you tired of cluttered entryways and coats thrown over chairs? Building your own wooden coat rack can be a simple and rewarding way to organize your space.
Imagine having a sturdy, stylish rack that fits perfectly in your home—and knowing you made it yourself. In this guide, you’ll discover easy steps to create a coat rack that not only looks great but lasts for years. Ready to transform your hallway and impress your guests?
Let’s get started!
Choosing The Right Wood
Choosing the right wood is key to building a sturdy wooden coat rack. Wood type affects strength, look, and lifespan. Pick wood that fits your style and usage needs. Think about where the coat rack will hang and how much weight it must hold.
Types Of Wood For Durability
Hardwoods like oak, maple, and walnut offer great durability. They resist dents and scratches better than softwoods. Pine and cedar are softwoods but still work well for light use. Oak has a strong grain and lasts many years. Maple is smooth and holds up under heavy coats. Choose hardwood for a rack that lasts and stays sturdy.
Wood Finishes And Textures
Wood finishes protect and improve the wood’s appearance. Options include varnish, oil, and wax. Varnish creates a hard, shiny layer that resists water. Oil soaks into the wood and brings out the natural color. Wax adds a soft, smooth feel but needs reapplying. Texture affects how the rack feels to touch. Sanding wood smooth gives a clean look. Leaving some grain rough can add rustic charm.
Sourcing Sustainable Materials
Use wood from sustainable sources to protect the environment. Look for wood certified by FSC or similar groups. Reclaimed wood is eco-friendly and adds character. Local wood reduces transportation impact and supports community. Avoid wood from endangered forests or illegal logging. Sustainable wood choices help build a better future while creating your coat rack.
Tools And Materials Needed
Building a wooden coat rack needs the right tools and materials. Having everything ready helps the project go smoothly. This section lists what you need to get started. Use this guide to gather your supplies before you begin.
Essential Tools For Assembly
Start with a saw to cut the wood pieces. A drill helps make holes and secure screws. Sandpaper smooths rough edges for a clean finish. A measuring tape ensures accurate cuts and placements. A hammer is useful for nails or small adjustments. A screwdriver tightens screws easily. Clamps hold pieces firmly while you work.
Hardware And Accessories
Choose sturdy hooks for hanging coats. Use wood screws to join parts securely. Nails can support smaller wood pieces. Wood glue adds extra strength between joints. Consider wall anchors if mounting the rack on drywall. Pick screws that fit the wood thickness well. The right hardware keeps the rack stable and durable.
Safety Gear To Use
Wear safety goggles to protect your eyes. Gloves keep your hands safe from splinters. Use ear protection if loud tools are in use. A dust mask stops you from breathing sawdust. Proper gear prevents injuries during building. Always prioritize safety while working on your project.
Designing Your Coat Rack
Designing your wooden coat rack is an important first step. It sets the look and function of the rack. Think about where you will place it and how many items it needs to hold. Planning well helps avoid mistakes and saves time later.
Focus on size, hook style, and extra storage options. These choices affect both style and usefulness. A well-designed rack fits your space and daily needs perfectly.
Determining Size And Capacity
Start by measuring the wall space for your coat rack. Pick a size that fits without crowding the room. Count how many coats and bags you want to hang. Plan for a few extra hooks to hold guests’ items.
A narrow coat rack works well for small spaces. A wider rack suits busy entryways or mudrooms. Balance size with your available space and daily use.
Selecting Hook Styles
Choose hooks that match your room’s style and your needs. Simple metal hooks offer a clean, modern look. Wooden hooks blend well with rustic or natural decor. Double hooks add space for more items on each spot.
Check the hook’s strength. Strong hooks hold heavy coats and bags easily. Soft rounded hooks prevent damage to clothes. Think about shape, size, and material to find the best fit.
Incorporating Shelves Or Storage
Add shelves for extra storage and display space. A top shelf holds hats, gloves, or decorative items. Small cubbies below the hooks keep shoes or scarves organized. Shelves make the rack more useful and tidy.
Keep shelves sturdy but simple. Avoid making the rack too heavy or bulky. Use open shelves for easy access or closed boxes for hidden storage. Customize storage based on your daily habits.
Cutting And Preparing Wood
Cutting and preparing wood is the first step to build a strong coat rack. It helps create perfect pieces that fit well. Careful cutting saves time and avoids mistakes. Smooth wood looks better and lasts longer.
Follow these simple steps to measure, cut, and sand your wood. This will make your coat rack neat and safe to use.
Measuring And Marking Cuts
Use a tape measure to find the exact length of each piece. Mark the wood clearly with a pencil or chalk. Mark twice to avoid errors. Check your marks before cutting to be sure.
Cutting Techniques For Precision
Use a saw that fits your wood size and type. Cut slowly along the marks. Keep your hand steady for straight edges. A guide or clamp helps keep the wood in place. Always wear safety glasses to protect your eyes.
Sanding And Smoothing Surfaces
Sand all wood pieces after cutting to remove rough edges. Start with coarse sandpaper and finish with fine grit. Sand along the grain for a smooth finish. Wipe the dust off before assembling your coat rack.
Assembling The Coat Rack
Assembling the coat rack is the key step to bring your project to life. Careful work here ensures your rack is strong and useful. Follow simple steps to join parts, attach hooks, and check stability. This helps create a rack that lasts long and looks great.
Joining Pieces Securely
Start by aligning the wooden pieces correctly. Use wood glue along the edges for a strong bond. Clamp the pieces tightly and let the glue dry well. For extra strength, add screws or nails. Drill pilot holes first to avoid splitting the wood. Check that all parts fit snugly before moving on.
Attaching Hooks And Hardware
Choose hooks that fit your style and needs. Mark their positions evenly on the rack surface. Use screws to fix hooks firmly in place. Tighten screws until hooks do not move. For heavier coats, use larger hooks and screws. This step makes your rack ready to hold items securely.
Ensuring Stability And Balance
Place the rack on a flat surface to test balance. Adjust legs or base if the rack wobbles. Add support brackets if needed for extra strength. Check all connections once more for tightness. A stable coat rack is safe and easy to use. This final check keeps your rack durable and reliable.

Credit: www.eatwinwin.com
Finishing Touches
Finishing touches make your wooden coat rack look complete and last longer. These final steps protect the wood and add style. Follow these simple tips to give your rack a polished, attractive finish.
Applying Stain Or Paint
Choose a stain or paint that suits your room’s style. Stain highlights the wood grain and gives a natural look. Paint offers many color options and covers the wood fully. Use a brush or cloth to apply evenly. Let it dry completely before moving on.
Sealing For Protection
Seal your coat rack to protect it from moisture and wear. Clear sealers or varnishes keep the wood safe and shiny. Apply thin coats with a brush. Wait for each coat to dry before adding another. This step helps your rack stay strong for years.
Adding Decorative Elements
Decorate your rack to match your home’s style. Add hooks, knobs, or metal accents for function and charm. Use wood carvings or stencils for a unique look. Keep decorations simple to avoid clutter. These details make your coat rack special and personal.
Mounting And Placement Tips
Mounting and placement play a big role in how useful and sturdy your wooden coat rack will be. Choosing the right style and location makes a difference. Secure installation keeps it safe and lasting. This section helps you decide the best way to place and mount your coat rack.
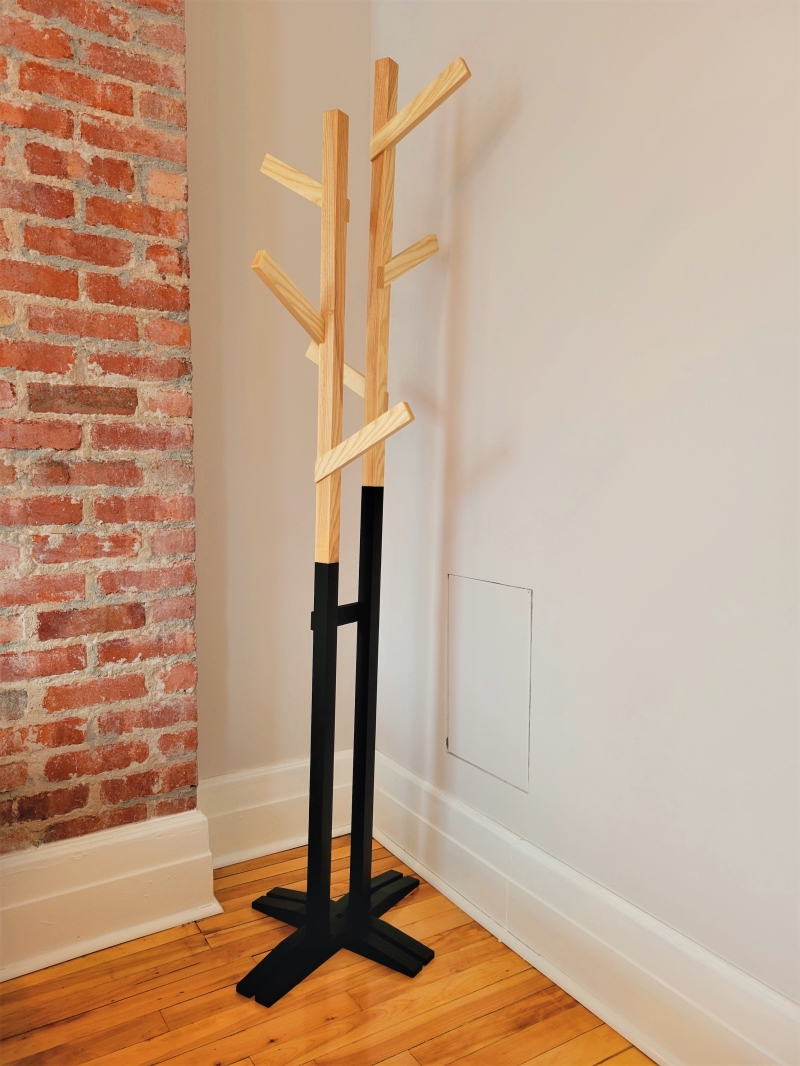
Wall-mounted Vs. Freestanding Options
Wall-mounted racks save floor space. They keep hallways clear and look neat. These racks need strong walls for support. Freestanding racks are easy to move. They offer more storage and can fit in many places. Choose based on your space and needs.
Choosing The Best Location
Pick a spot near the door for quick access. Avoid areas that block walkways. Make sure there is enough room for coats to hang freely. Check lighting so the rack is easy to see. A dry place stops wood from warping or rotting.
Securing To Walls Safely
Use studs for the strongest hold. Find studs with a stud finder tool. Use screws made for wood and walls. Avoid drywall anchors alone; they may fail under weight. Drill pilot holes to prevent wood from splitting. Tighten screws firmly but don’t overtighten.
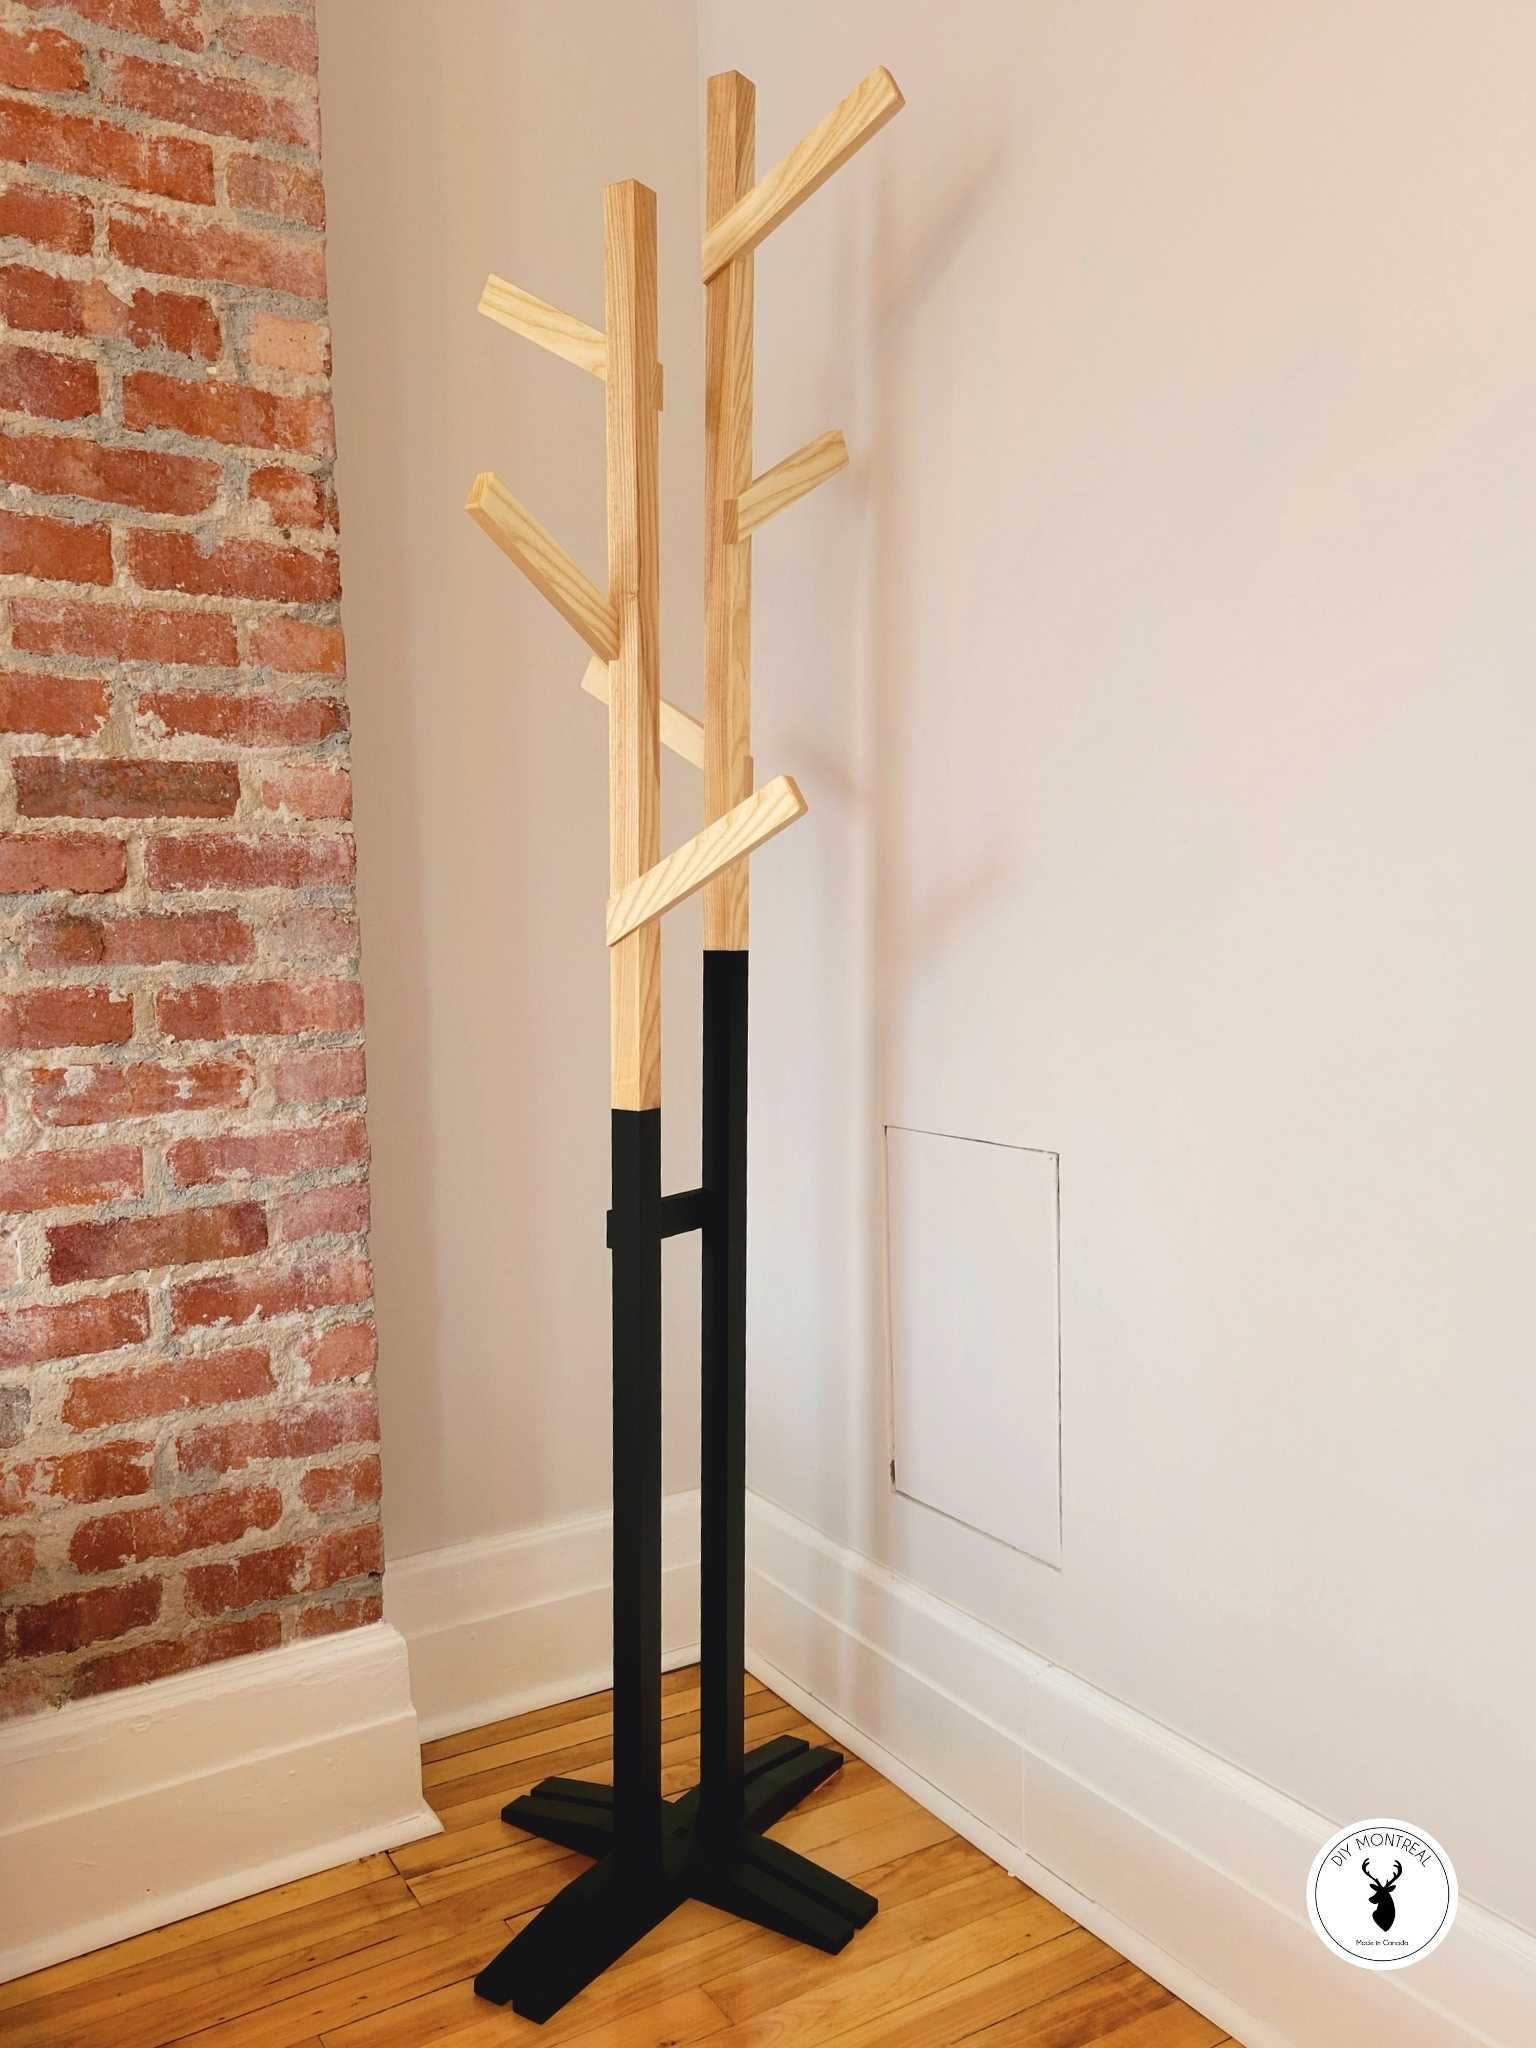
Credit: www.diymontreal.com
Maintenance And Care
Taking care of your wooden coat rack keeps it strong and beautiful for years. Regular maintenance prevents damage and keeps wood looking fresh. Simple steps can help you enjoy your rack longer.
Cleaning And Dusting
Dust your coat rack weekly. Use a soft cloth or feather duster. Avoid wet cloths on bare wood. For sticky spots, lightly dampen cloth with water. Dry immediately to stop water damage. Regular cleaning stops dust buildup and wood wear.
Repairing Minor Damages
Small scratches or dents happen over time. Use wood filler or wax sticks matching your rack’s color. Gently rub the filler into scratches. Let it dry, then smooth with fine sandpaper. For loose hooks, tighten screws or replace them. Quick fixes keep the rack safe and neat.
Extending Lifespan Of Your Rack
Keep the rack away from direct sunlight. Sunlight can fade and dry wood. Avoid placing it near heaters or damp areas. Use wood polish or oil every few months. This nourishes wood and prevents cracking. Proper care makes your coat rack last longer and look great.
Credit: www.excelcare24.co.uk
Frequently Asked Questions
What Materials Do I Need To Build A Wooden Coat Rack?
You need wood planks, screws, hooks, a drill, sandpaper, wood glue, and paint or stain. These materials ensure durability and a polished finish for your coat rack.
How Do I Choose The Right Wood For A Coat Rack?
Choose hardwoods like oak or maple for strength and durability. Softwoods like pine are easier to work with and more affordable but less durable.
What Tools Are Essential For Building A Wooden Coat Rack?
Essential tools include a saw, drill, screwdriver, measuring tape, level, and clamps. These tools help you cut, assemble, and secure the coat rack accurately.
How Can I Customize My Wooden Coat Rack Design?
Add different hook styles, paint colors, or wood stains. You can also incorporate shelves or decorative carvings to match your home decor.
Conclusion
Building a wooden coat rack is simple and rewarding. Choose the right wood and tools to start. Measure and cut carefully for a good fit. Assemble the parts with nails or screws. Sand the surface for a smooth finish. Paint or stain to match your style.
This project saves money and adds charm to your home. Enjoy the pride of using something you made yourself. Try making different styles as you gain confidence. Keep practicing, and your skills will grow fast.