Are you ready to add a unique touch to your home with a piece you built yourself? Building a wooden console table is easier than you might think, and it lets you create something truly special.
Imagine having a stylish table that fits perfectly in your space, made exactly to your taste and needs. In this guide, you’ll discover simple, step-by-step instructions that anyone can follow—even if you’re new to woodworking. By the end, you’ll have the skills and confidence to build a beautiful wooden console table that stands out and lasts for years.
Let’s get started on turning your ideas into real, solid wood!
Choosing The Right Wood
Choosing the right wood is key to building a strong and beautiful console table. Wood affects the look, feel, and lifespan of your project. Picking the right type and quality ensures your table lasts for years. It also makes your work easier and more enjoyable.
Types Of Wood For Console Tables
Hardwoods like oak, maple, and walnut are popular choices. They are strong and resist dents and scratches. Softwoods like pine or cedar are easier to shape. These woods cost less and have a warm look. Choose wood that fits your style and budget.
Wood Quality And Durability
Check wood for cracks, knots, or warping. Smooth, straight boards are easier to work with. High-quality wood lasts longer and holds screws better. Durable wood means your table stays stable over time. Avoid wood that feels soft or looks damaged.
Sourcing Materials
Buy wood from trusted local suppliers or lumber yards. Fresh wood is less likely to have hidden defects. Reclaimed wood offers unique character but needs careful inspection. Make sure wood is properly dried to avoid shrinking later. Plan your wood needs before buying to reduce waste.
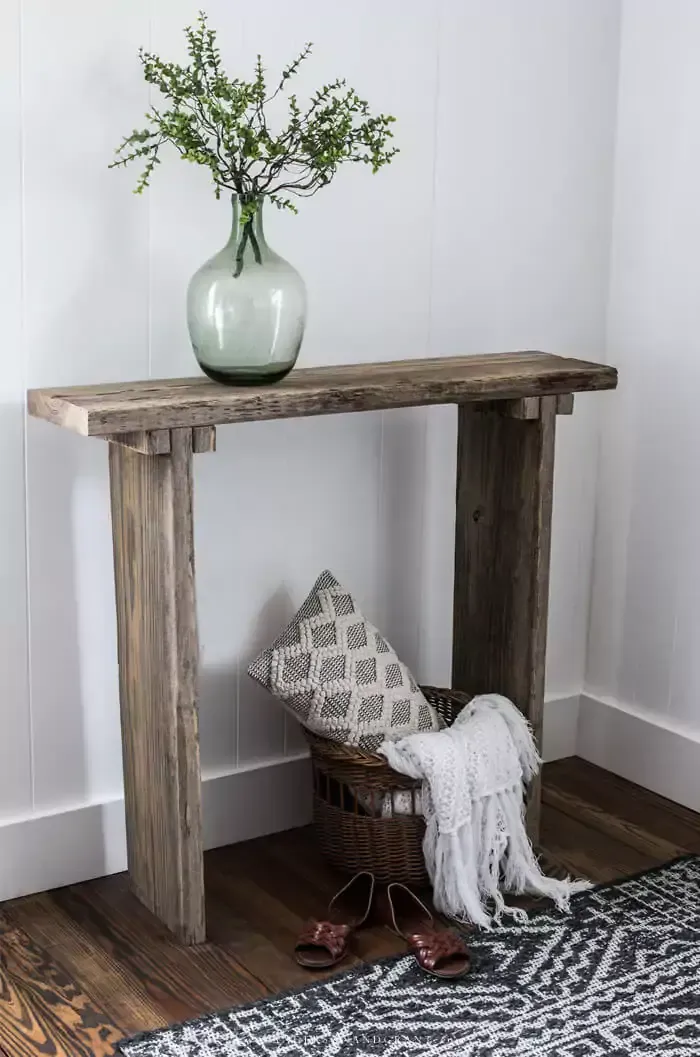
Credit: www.andersonandgrant.com
Tools And Materials Needed
Building a wooden console table requires the right tools and materials. Having everything ready makes the process smooth and enjoyable. This section lists what you need to start your project.
Essential Tools
Gather basic woodworking tools before beginning. A saw helps cut wood pieces to size. A drill is needed for making holes and driving screws. Sandpaper smooths rough edges and surfaces. A measuring tape ensures accurate dimensions. Clamps hold pieces together while you work. A screwdriver is important for tightening screws.
Hardware And Fasteners
You will need screws or nails to join wood parts. Wood glue adds extra strength to joints. Choose screws that fit your wood thickness. Consider using brackets for added support. Make sure hardware is rust-resistant to last longer.
Safety Equipment
Protect yourself while working with wood and tools. Wear safety goggles to shield your eyes from dust and debris. Use ear protection if you work with loud power tools. Gloves protect your hands from splinters and cuts. A dust mask helps you breathe clean air while sanding.
Designing Your Console Table
Designing your wooden console table is the first step in creating a useful piece. A good design helps you build a table that fits your space and needs. Start by thinking about where the table will go and what it will hold.
Keep your design simple and clear. This makes the building process easier and the final product stronger.
Basic Dimensions And Proportions
Decide the height, width, and depth of your table. A common height is about 30 inches, which fits most rooms. The width can vary from 36 to 60 inches depending on your space. Depth should be around 12 to 18 inches to keep the table slim but useful.
Make sure the proportions look balanced. Too wide or too narrow can make the table feel awkward.
Sketching Your Design
Draw a simple sketch of your console table. Show the front, side, and top views. Use pencil and paper or a digital tool if you prefer. Include measurements on your sketch.
Sketching helps you see the final shape and catch mistakes early. It also guides you when cutting wood and assembling parts.
Planning For Storage And Style
Think about how much storage you want. Open shelves, drawers, or a mix can work well. Choose storage based on what you want to keep on or in the table.
Style is also important. Simple lines suit modern rooms, while carved details fit traditional looks. Match the table style to your room decor for a nice finish.
Preparing The Wood
Preparing the wood is the first step in building a wooden console table. It sets the base for a strong and beautiful piece. Proper preparation ensures your wood pieces fit well and look smooth. It also helps avoid mistakes that cost time and materials.
This stage includes measuring and marking the wood, cutting it to size, and sanding the surfaces. Each task requires care and attention. Let’s explore these steps in detail.
Measuring And Marking
Start by measuring the wood carefully. Use a tape measure and a pencil. Mark the exact lengths and widths needed for each part. Double-check your measurements to avoid errors. Clear, straight lines guide your cuts and keep pieces uniform.
Cutting The Wood Pieces
Cut along the marked lines using a saw suited for your wood type. Take your time and follow the lines closely. A clean cut means better fitting parts. Wear safety gear and work on a stable surface. Keep cuts straight and precise for a neat finish.
Sanding And Smoothing
After cutting, sand each wood piece. Use medium-grit sandpaper first to remove rough edges. Then, switch to fine-grit sandpaper for a smooth finish. Sand along the grain to avoid scratches. Smooth surfaces improve the table’s look and help paint or stain stick better.
Assembling The Frame
Assembling the frame is an important step in building your wooden console table. This stage shapes the table’s basic structure. A strong frame ensures your table stays steady and lasts long. Take your time to follow each step carefully. Use the right tools and materials for best results.
Joining Legs And Supports
Start by attaching the legs to the side supports. Use wood glue and screws for a firm hold. Align each leg carefully at the corners. Pre-drill holes to avoid splitting the wood. Make sure the legs are straight and even. This creates a solid base for the table.
Securing The Frame
After joining the legs, add the middle support beams. These beams keep the frame from wobbling. Use screws and wood glue to fix them in place. Check that all parts fit tightly together. Tight joints help the table carry weight safely.
Checking For Stability
Place the frame on a flat surface. Press down gently on each corner to test balance. The frame should not rock or move. If it does, tighten the screws or adjust the legs. A stable frame is key for a durable console table.
Attaching The Tabletop
Attaching the tabletop is a key step in building a wooden console table. This part gives the table its final shape and strength. A well-attached tabletop ensures stability and a neat look. Take your time to position and fasten it carefully. The goal is a solid, level surface that lasts.
Positioning The Top
Place the tabletop upside down on a soft surface. This prevents scratches and dents. Next, set the table base on top of the tabletop. Align the edges evenly on all sides. Check that the tabletop overhang is the same all around. Adjust the base until it fits perfectly under the top.
Fastening Techniques
Use wood screws or pocket hole screws to attach the top. Drill pilot holes to avoid splitting the wood. Screw the base into the tabletop firmly but not too tight. Tight screws keep the parts together without damaging them. Use clamps to hold the pieces steady during screwing. This helps prevent shifting and gaps.
Ensuring A Level Surface
Flip the table upright and check the surface with a level tool. The tabletop must be flat and even. If not, adjust the screws or add shims under the base. Recheck the level after each adjustment. A level surface keeps the table stable and prevents items from sliding off.
Finishing Touches
Finishing touches give your wooden console table its final look. These steps improve its appearance and protect the wood. Taking time on these details ensures your table lasts long and looks great.
Filling Gaps And Imperfections
Start by checking your table for small holes or cracks. Use wood filler to fill these gaps. Apply it with a putty knife and smooth the surface. Let it dry completely before sanding it down. Sanding makes the surface even and ready for finishing.
Applying Stain Or Paint
Choose a stain or paint that fits your style. Stain shows the wood grain and adds color. Paint offers a solid, colorful look. Apply the stain or paint evenly with a brush or cloth. Work in the direction of the wood grain. Let the first coat dry before adding more. Multiple thin coats give a better finish than one thick coat.
Adding Protective Coatings
Protective coatings keep your table safe from scratches and spills. Use clear varnish, polyurethane, or wax. Apply the coating evenly with a brush or cloth. Let it dry fully between coats. Two or three coats provide strong protection. This step keeps your table looking new for years.

Credit: farmhouseishblog.com
Maintenance Tips
Keeping a wooden console table looking great takes some care. Regular maintenance helps protect the wood and keeps the table strong. Simple steps can stop damage and keep the table clean and shiny. Follow these tips to enjoy your handmade piece for many years.
Cleaning Your Console Table
Dust the table often with a soft cloth. Avoid using rough materials that can scratch the wood. Use a damp cloth for sticky spots, then dry the surface fast. Avoid harsh chemicals that can harm the finish. Mild soap mixed with water works well for cleaning.
Preventing Damage
Use coasters under drinks to stop water rings. Place mats under hot items to prevent burns. Keep the table away from direct sunlight to avoid fading. Avoid placing heavy or sharp objects directly on the surface. Be careful when moving the table to protect joints and legs.
Periodic Upkeep
Check the table for loose screws or joints every few months. Tighten any loose parts to keep the table sturdy. Apply a wood polish or wax to keep the surface smooth. Refinish the table if the wood starts to look dull or worn. These small steps extend the life of your console table.

Credit: www.hartleyhomedesign.com
Frequently Asked Questions
What Tools Do I Need To Build A Wooden Console Table?
You need a saw, drill, measuring tape, screwdriver, clamps, sandpaper, and wood glue. These tools ensure precise cuts and assembly. Safety gear like goggles and gloves is also important for protection during the build.
Which Wood Type Is Best For A Console Table?
Hardwoods like oak, maple, or walnut are ideal for durability and aesthetics. Softwoods like pine are budget-friendly but less durable. Choose wood based on your style, budget, and the table’s intended use.
How Long Does It Take To Build A Wooden Console Table?
Building a console table typically takes 4 to 8 hours. Time varies based on skill level and complexity of the design. Preparation and drying time for glue or finish may extend the total duration.
How Do I Finish My Wooden Console Table?
Sand the table smooth, then apply a wood stain or paint. Finish with a clear polyurethane coat for protection. This enhances appearance and durability, protecting the wood from damage and wear.
Conclusion
Building a wooden console table can be a fun and rewarding project. You only need some basic tools and materials. Following clear steps helps you create a sturdy and beautiful piece. Take your time and measure carefully. Personalize the table to fit your space and style.
Enjoy the satisfaction of making something with your own hands. This project improves your skills and adds charm to your home. Try it and see how simple woodworking can be. A wooden console table brings warmth and function to any room.