Are you ready to give your bathroom a fresh new look? Installing a vanity cabinet and sink might seem tricky, but with the right steps, you can do it yourself and save money.
Imagine transforming your space quickly and easily, making it both stylish and functional. In this guide, you’ll discover simple instructions that anyone can follow, even if you’ve never done this before. Keep reading, and by the end, you’ll have the confidence to take on this project and enjoy the results every day.

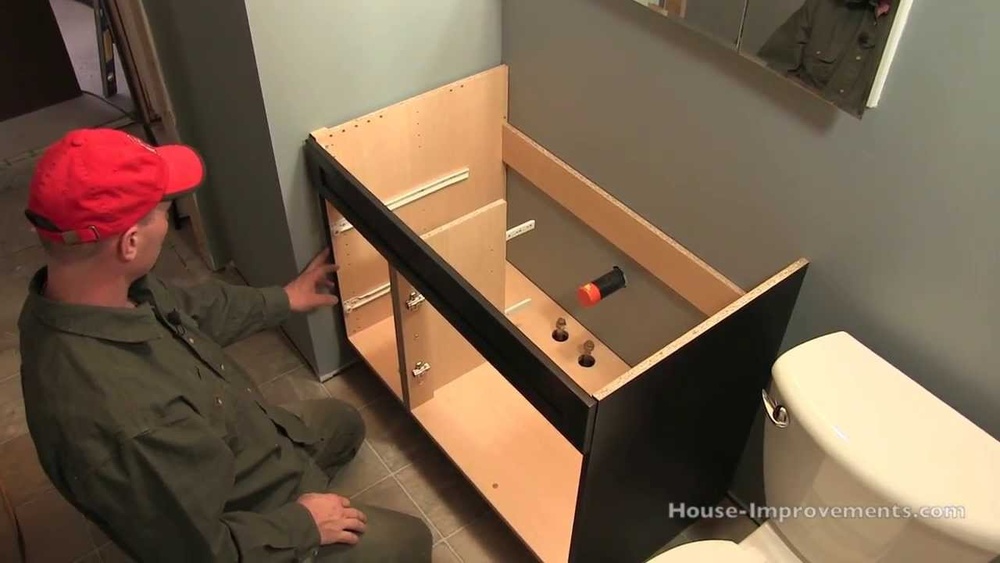
Credit: www.youtube.com
Preparing The Workspace
Preparing the workspace is the first step to installing a vanity cabinet and sink. A clean and organized area helps you work faster and safer. It also prevents damage to your new fixtures and existing plumbing. Taking time to prepare makes the installation smooth and stress-free.
Gathering Tools And Materials
Collect all necessary tools before starting. You will need a drill, screwdriver, wrench, level, tape measure, and plumber’s putty. Also, prepare the vanity cabinet, sink, faucet, drain assembly, and mounting hardware. Having everything ready prevents interruptions during work.
Clearing The Installation Area
Remove old cabinets, sinks, and any clutter from the space. Clean the floor and walls to avoid debris under the new cabinet. Make sure the area is dry to prevent slipping or damage. Clearing the space gives you room to work comfortably.
Shutting Off Water Supply
Turn off the water supply valves under the sink. If there are no local valves, shut off the main water supply. Open the faucet to drain any water left in the pipes. This step stops water leaks and keeps the workspace dry.
Removing The Old Vanity
Removing the old vanity is the first step in installing a new cabinet and sink. It is important to do this carefully to avoid damage to the walls and plumbing. This process involves disconnecting the plumbing, detaching the vanity, and cleaning the area. Each step must be done with attention and care.
Disconnecting Plumbing
Start by turning off the water supply. Locate the shut-off valves under the sink and close them. Next, open the faucet to release any water pressure. Use a wrench to disconnect the water supply lines from the faucet. Then, disconnect the drain pipe from the sink drain. Place a bucket under the pipes to catch any water left inside. Take your time to avoid spills and damage.
Detaching The Vanity
Remove any screws or nails that hold the vanity to the wall. Check inside the cabinet and around the edges for fasteners. Use a screwdriver or drill to remove them carefully. Once loose, gently pull the vanity away from the wall. Be careful not to damage the wall or floor. If the vanity is heavy, ask for help to move it safely.
Cleaning The Area
Clear any dust, dirt, or debris left behind. Use a broom or vacuum to clean the floor. Wipe down the wall to remove any marks or residue. Inspect the area for damage or mold. Repair or treat any issues before installing the new vanity. A clean, smooth surface makes installation easier and lasts longer.
Assembling The Vanity Cabinet
Assembling the vanity cabinet is a key step in installing your new sink. It sets the foundation for a strong, functional bathroom fixture. Taking your time to build the cabinet correctly helps avoid problems later. Follow clear steps to put each part together in order.
Following Manufacturer Instructions
Start by reading the instructions from the manufacturer. These guides show which pieces fit where. They also list the tools you need for assembly. Follow each step carefully to prevent mistakes. Keep small parts like screws and hinges organized. Use the recommended screws and hardware for best results.
Attaching Doors And Drawers
Attach the doors and drawers after the main frame is ready. Align the hinges so the doors open smoothly. Check that drawers slide in and out without sticking. Adjust hinges or slides if needed. Make sure doors close evenly and flush with the cabinet edges.
Ensuring Stability
Check the cabinet’s stability before installing the sink. Tighten all screws and connections firmly. Place the cabinet on a flat surface and test for wobbling. Use shims under the cabinet if the floor is uneven. A stable cabinet supports the sink safely and lasts longer.
Installing The Vanity Cabinet
Installing the vanity cabinet is the first major step in your bathroom upgrade. This process sets the base for the sink and other fixtures. Proper placement and secure attachment ensure safety and durability.
Take your time during this stage. A well-installed cabinet makes the whole project smoother. Follow these key steps to position, level, and secure your vanity cabinet.
Positioning The Cabinet
Place the cabinet in the desired spot against the wall. Check that it fits well within the space. Leave room for plumbing and doors to open easily. Mark the wall where the cabinet edges meet for accurate alignment.
Leveling And Securing To Wall
Use a level tool to check the cabinet’s balance. Adjust the cabinet feet or add shims to fix any tilt. Drill pilot holes through the cabinet back into wall studs. Secure the cabinet using screws. This anchors the cabinet firmly in place.
Checking For Stability
Push and pull the cabinet gently. It should feel solid and unmoving. Check all screws are tight and the cabinet is flush with the wall. A stable cabinet prevents damage and supports the sink properly.
Mounting The Sink
Mounting the sink is a key step in installing your vanity cabinet. It ensures your sink sits firmly and looks great. This process involves careful preparation and steady hands. Follow these steps to secure the sink properly.
Applying Sealant
Start by applying a bead of silicone sealant along the edge of the cabinet top. Use a sealant that is water-resistant to prevent leaks. Spread the sealant evenly to create a smooth surface. This sealant will hold the sink in place and block water from seeping underneath.
Placing The Sink On Cabinet
Carefully lower the sink onto the cabinet top. Align the sink edges with the cabinet edges. Make sure the sink sits flat without gaps. Press down gently to ensure the sealant spreads evenly and bonds well.
Securing The Sink
Next, secure the sink using clips or brackets provided by the manufacturer. Tighten the clips evenly to avoid shifting the sink. Check that the sink is stable and does not move. Wipe away any excess sealant before it dries.
Credit: www.lowes.com
Connecting Plumbing Fixtures
Connecting plumbing fixtures is a key step in installing your vanity cabinet and sink. It brings the water flow to your faucet and drains waste water safely. This part needs careful attention to avoid leaks and ensure smooth operation.
Follow clear steps to connect the faucet, attach water supply lines, and test for leaks. These actions make your new vanity fully functional and reliable.
Installing Faucet And Drain
Start by placing the faucet in the sink holes. Secure it with mounting nuts underneath. Attach the drain assembly to the sink drain hole. Use plumber’s putty to seal around the drain. Tighten all parts firmly to prevent water leaks.
Attaching Water Supply Lines
Connect hot and cold water supply lines to the faucet valves. Use flexible supply hoses for easier fitting. Hand-tighten the connections, then use a wrench for a snug fit. Avoid over-tightening to prevent damage to the fittings.
Testing For Leaks
Turn on the water supply slowly. Check all connections for drips or moisture. Use a dry cloth to spot small leaks. Tighten any loose fittings as needed. Watch the drain for any water escaping during use.
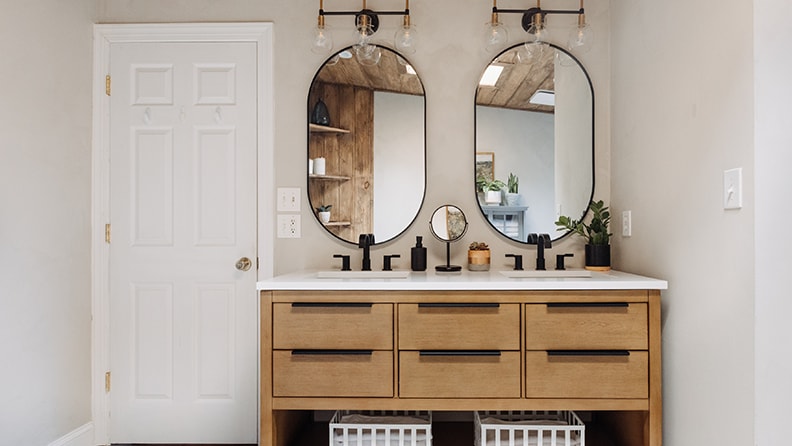
Final Touches
Finishing your vanity cabinet and sink installation requires careful attention. Final touches improve appearance and prevent future problems. Small steps now save time and effort later.
Sealing Edges
Apply a thin bead of silicone caulk around the edges where the sink meets the wall. This stops water from leaking behind the cabinet. Smooth the caulk with a wet finger or a caulk tool for a clean look. Check all corners and gaps to ensure full coverage.
Cleaning The Installation
Remove any dust, dirt, or excess caulk from the vanity and sink. Use a soft cloth and mild cleaner to wipe all surfaces. Clean the faucet and handles to make them shine. A clean area shows your work in the best light.
Inspecting For Functionality
Turn on the water supply and test the faucet. Check for leaks under the sink and around connections. Open and close doors and drawers to confirm smooth operation. Fix any issues before finishing up.

Credit: www.fontanashowers.com
Frequently Asked Questions
How Do I Prepare The Area For Vanity Cabinet Installation?
Clear the space, turn off water supply, and remove the old vanity. Ensure walls and floors are clean and level before starting the installation.
What Tools Are Needed To Install A Vanity Cabinet And Sink?
You need a drill, level, wrench, screwdriver, silicone caulk, tape measure, and plumbing tools for a smooth installation process.
How Do I Secure The Vanity Cabinet To The Wall?
Use a stud finder to locate studs, then drill pilot holes. Attach the cabinet with screws directly into the studs for stability.
How To Connect The Sink To The Plumbing System?
Attach the faucet and drain, then connect water supply lines and drain pipes securely. Check for leaks before finalizing the installation.
Conclusion
Installing a vanity cabinet and sink can improve your bathroom quickly. Follow each step carefully for a safe setup. Double-check all connections to avoid leaks and damage. Take your time and use the right tools. This project saves money compared to hiring a professional.
Enjoy your new vanity and the fresh look it brings. Keep maintenance simple by cleaning regularly. You now have the confidence to handle basic bathroom upgrades. Simple tasks can make a big difference. Ready to try another home project?


