Have you ever thought about making your own bookshelf using just paper? It might sound surprising, but with the right steps, you can create a sturdy and stylish shelf that holds your favorite books.
Imagine having a unique piece that you built yourself—customized to fit your space and style. In this guide, you’ll discover simple techniques to turn ordinary paper into a practical bookshelf. Ready to impress yourself and your friends with this creative project?
Keep reading, and let’s get started!
Materials Needed
Gathering the right materials is the first step to making a bookshelf with paper. The quality and type of paper affect the strength and look of your shelf. Also, some extra supplies help put everything together and keep the shelf sturdy.
Types Of Paper
Choose thick paper to support weight. Cardstock and construction paper work well. Avoid thin paper like printer sheets; they tear easily. Newspaper and magazine pages add a unique look but need layers for strength. Try combining different papers for a custom style.
Additional Supplies
Gather glue that dries clear and strong. White craft glue or a glue stick works fine. Use scissors or a craft knife for cutting shapes. A ruler helps measure paper precisely. Tape can hold pieces while glue dries. Consider a cutting mat to protect surfaces. A pencil is useful for marking cuts.
Choosing A Design
Choosing the right design for your paper bookshelf is important. The design affects how strong and useful your bookshelf will be. It also changes how much time you spend making it. Think about what style fits your needs and skills before you start.
Simple Vs. Complex Styles
Simple designs use basic shapes and fewer parts. They are easier and faster to build. Simple shelves work well for light books or small rooms. Complex styles have many parts and shapes. They look more decorative and hold heavier books. Complex designs take more time and skill to make.
Size And Dimensions
Decide how big you want your bookshelf to be. Measure the space where you will place it. Make sure the size fits your room and book collection. Small shelves are good for light books and small areas. Larger shelves hold more books but need more paper and support. Choose dimensions that match your needs and available materials.
Preparing The Paper
Preparing the paper is the first and most important step in making a paper bookshelf. Good preparation ensures the structure will be strong and last longer. Choosing the right paper and handling it carefully helps create a neat and sturdy shelf.
Cutting Techniques
Cut the paper into even strips or sheets. Use a sharp blade or scissors to get clean edges. Straight cuts make folding and joining easier. Measure twice before cutting to avoid mistakes. Consistent sizes help the bookshelf stay balanced and strong.
Reinforcement Methods
Strengthen the paper by layering several sheets together. Glue layers carefully to avoid wrinkles or bubbles. Use tape or paper strips on edges to prevent tearing. Folding edges tightly adds extra support. Reinforced paper holds weight better and keeps the shelf stable.

Credit: www.instructables.com
Building The Frame
Building the frame is the first step in making a sturdy paper bookshelf. This frame acts as the skeleton, giving shape and support. Careful folding and joining ensure it holds weight well. Take your time to create strong edges and connections. The frame’s strength depends on accuracy and neat work.
Folding And Shaping
Start by folding the paper into strong shapes like triangles or rectangles. Fold along clear, sharp lines for better strength. Use thick paper or multiple layers for durability. Shape each piece to match the size of your shelf sections. Crease firmly with your fingers or a tool. Good folding creates a solid base for the frame.
Joining Pieces
Connect the folded pieces using glue or tape. Press firmly to ensure pieces stick well together. Join edges carefully to keep the frame square and stable. Use extra paper strips to reinforce corners and joints. Allow glue to dry completely before moving on. Strong joints keep the bookshelf from collapsing under weight.
Constructing The Shelves
Constructing the shelves is a key step in making a paper bookshelf. Shelves must be strong and neat. Paper alone is thin, so build layers for support. Careful layering and securing create sturdy shelves.
This part shapes how your bookshelf will hold books. Patience and precision make a difference.
Layering Paper
Start by cutting paper into equal strips. Use thick paper or card stock for strength. Stack strips flat on a clean surface. Apply glue between each sheet for bonding. Press layers firmly to avoid air gaps.
Repeat until the stack reaches the desired thickness. Let it dry completely before moving on. The thicker the stack, the stronger the shelf.
Securing Shelves
Attach the layered paper shelves to the frame carefully. Use strong glue or double-sided tape. Hold the shelf in place until it sticks well. Add small paper reinforcements under the shelf for extra support.
Check each shelf for stability before adding weight. Proper securing prevents sagging or collapse. This step ensures your paper bookshelf stays durable over time.
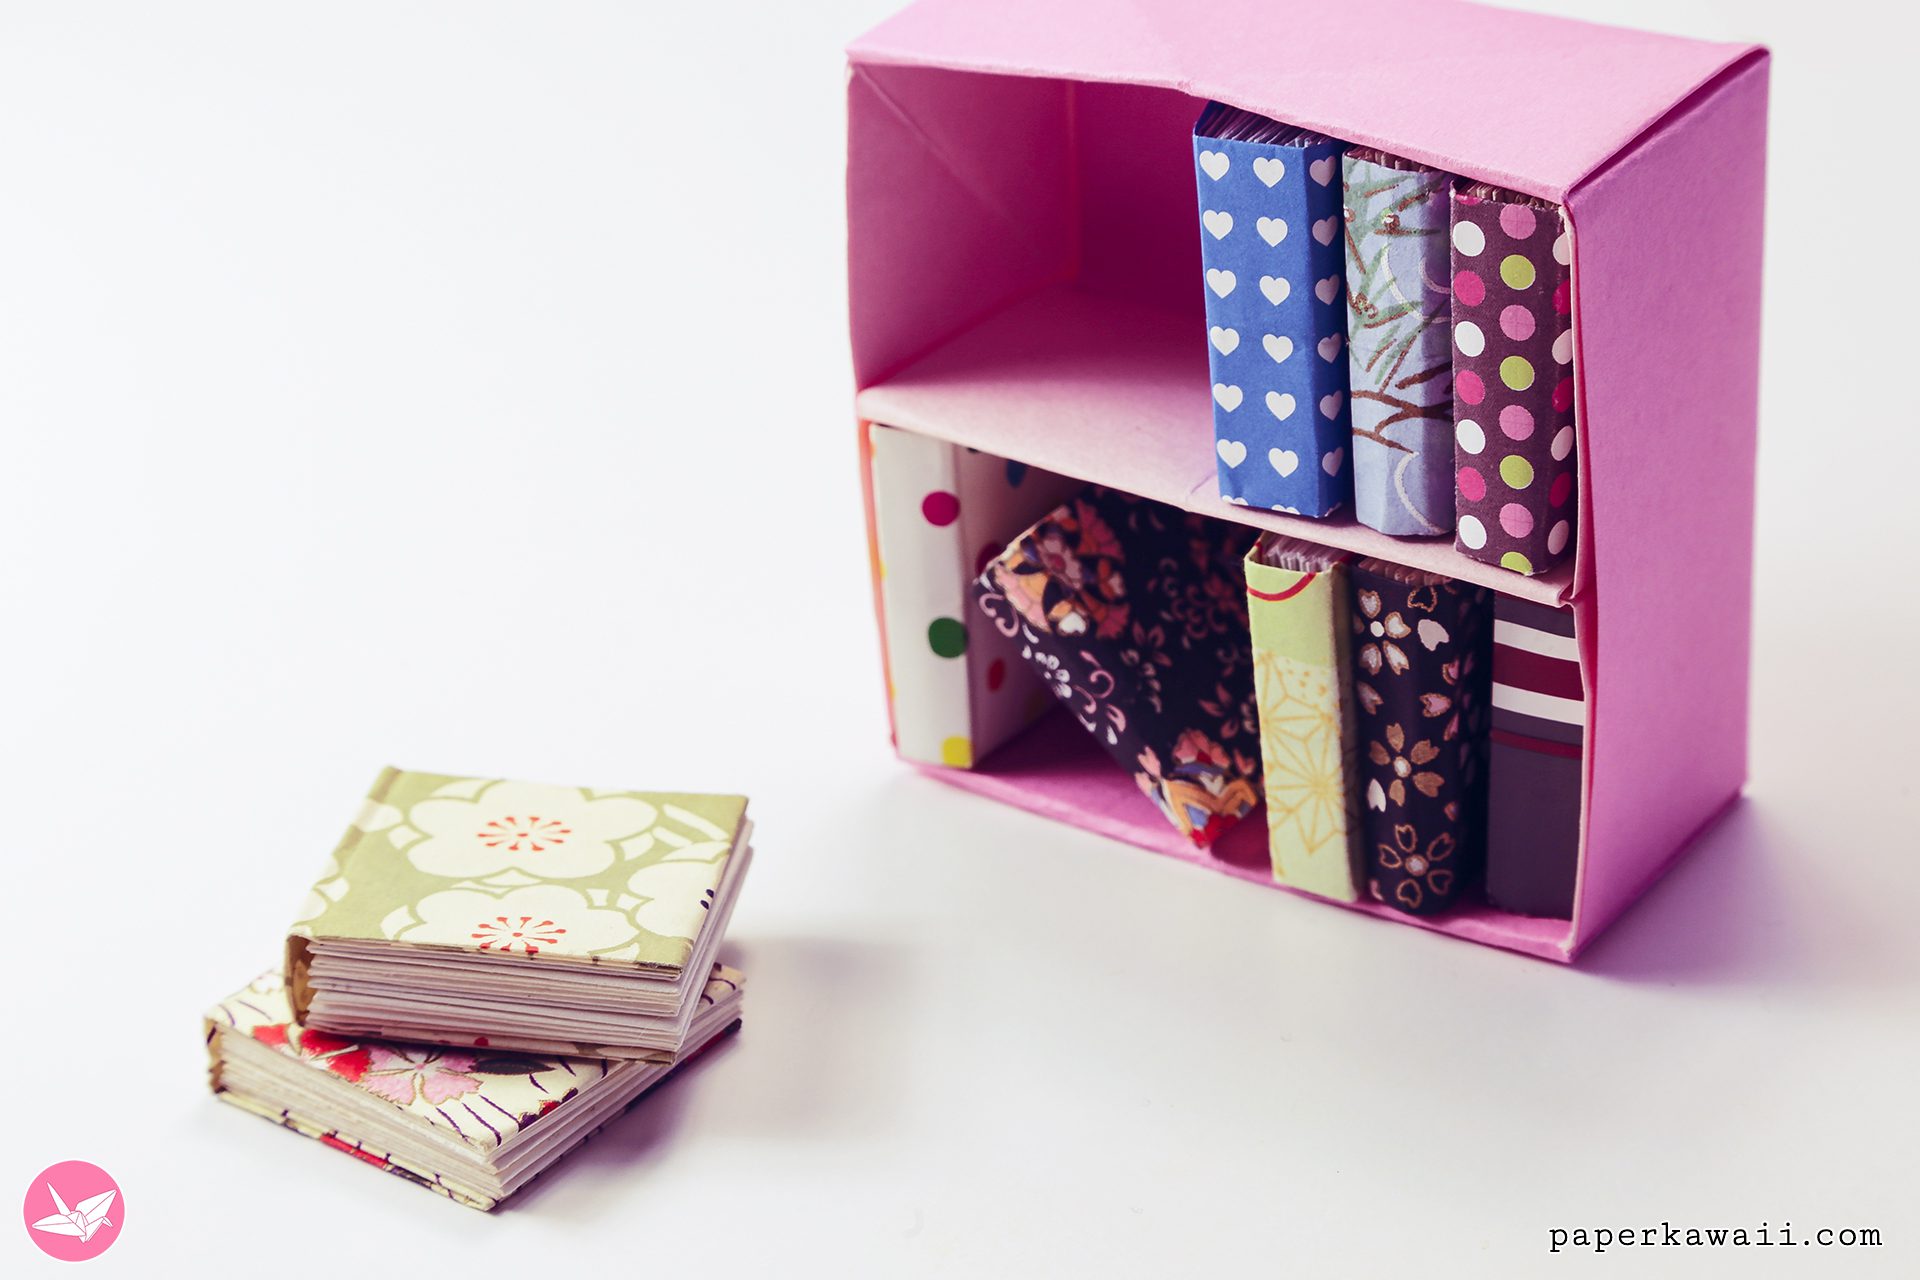
Credit: www.paperkawaii.com
Finishing Touches
Finishing touches give your paper bookshelf a complete look. They help protect and decorate it. These final steps make your project last longer and look nice.
Decorative Options
Decorate your bookshelf with paint, stickers, or washi tape. Choose colors that match your room. Patterns add personality and style. You can also glue fabric or paper cutouts. These ideas make your shelf unique and fun.
Protective Coating
Apply a clear sealant to protect your paper bookshelf. Use spray or brush-on varnish. This coat stops moisture and dirt from damaging the shelf. Let it dry fully before use. Protective coating keeps your shelf strong and clean for a long time.
Tips For Durability
Building a bookshelf with paper is fun and creative. To keep it strong and lasting, follow some simple tips. These ideas help your shelf hold up well over time. Careful planning and small steps make a big difference.
Focus on the weight your shelf can hold and how to care for it. These tips help your paper bookshelf stay useful and neat for many months.
Weight Limits
Paper shelves cannot hold heavy books. Use light books, magazines, or small items only. Spread weight evenly across the shelf surface. Avoid piling too many objects in one spot. Test the shelf with light objects first. Increase weight slowly to see how it holds. Remember, paper can bend or tear easily. Strong support inside the shelf helps carry more weight.
Maintenance Advice
Keep your bookshelf dry at all times. Paper weakens if it gets wet or damp. Clean dust gently using a soft cloth or brush. Avoid using water or wet cleaners. Check the shelf regularly for bends or weak spots. Fix any damage quickly to avoid bigger problems. Store the shelf away from direct sunlight. Sunlight can make paper fade and fragile. Use a clear coat spray for extra protection if possible.

Credit: www.youtube.com
Frequently Asked Questions
How Durable Is A Bookshelf Made With Paper?
A paper bookshelf can be surprisingly sturdy if made with thick, reinforced paper. Use multiple layers and strong adhesives. Avoid heavy books; it’s best for lightweight items. Proper sealing also increases durability and protects against moisture.
What Materials Are Needed To Make A Paper Bookshelf?
You need thick cardboard or heavy paper, glue, scissors, a ruler, and paint or decorative paper. Reinforcements like wooden sticks or tape can help. These materials are affordable and easy to find, making the project accessible for beginners.
Can A Paper Bookshelf Hold Heavy Books Safely?
No, paper bookshelves are not designed for heavy books. They work best for lightweight books, magazines, or decorative items. For heavier loads, consider reinforcing with wooden supports or choosing a more robust material for your bookshelf.
How Long Does It Take To Make A Paper Bookshelf?
It usually takes 2 to 4 hours, depending on complexity and drying time. Simple designs are quicker, while intricate ones require more precision. Allow glue and paint to dry completely for best results.
Conclusion
Making a bookshelf with paper is simple and fun. You need only a few materials and some patience. This project lets you create a useful shelf without buying wood or tools. It’s a great way to reuse old paper and reduce waste.
You can customize the size and shape to fit your space. Plus, it helps improve your crafting skills step by step. Try this easy project to add a personal touch to your room. Enjoy making something unique with your own hands.

