
Are you looking to give your bathroom a fresh new look without spending a fortune? Turning a simple cabinet into a stylish bathroom vanity is easier than you think.
With just a few smart steps, you can create a unique and functional piece that fits your space perfectly. Imagine having a vanity that matches your style and meets your storage needs—built by you. Keep reading, and you’ll discover how to transform a basic cabinet into the centerpiece of your bathroom.
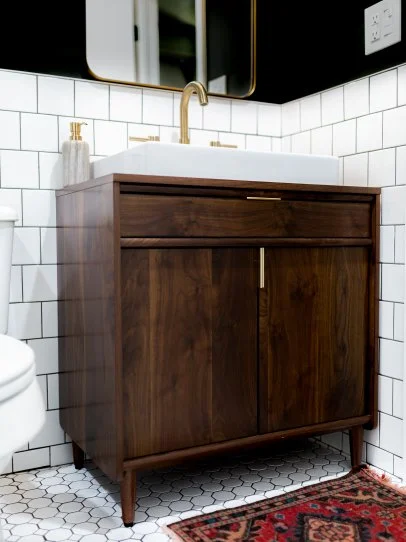
Your dream vanity is closer than you realize!

Credit: anoregoncottage.com
Choosing The Right Cabinet
Choosing the right cabinet is key to creating a beautiful bathroom vanity. The cabinet will hold your sink and storage items. It also shapes the room’s look and feel. Picking the perfect cabinet means checking size, material, and style. Each factor affects how well the vanity works and fits your bathroom space.
Size And Dimensions
Measure your bathroom space before selecting a cabinet. The cabinet should fit without crowding the room. Consider the width, height, and depth carefully. Make sure there is enough space for doors and drawers to open. Also, leave room around the vanity for easy movement. A cabinet too big or small can make the bathroom feel off balance.
Material Considerations
Choose materials that resist moisture and last long. Bathrooms are humid, so wood should be treated or sealed. MDF and plywood are common because they handle moisture well. Avoid particleboard, as it can swell with water. Look for finishes that protect against water damage. Durable materials keep your vanity looking good over time.
Style And Design
Select a cabinet style that matches your bathroom’s decor. Traditional, modern, or rustic designs can change the room’s mood. Consider the color and hardware to create harmony. Simple designs often fit many styles and rooms. The right cabinet style makes your vanity a focal point and boosts the bathroom’s appeal.

Credit: www.youtube.com
Gathering Essential Tools And Materials
Before turning a cabinet into a bathroom vanity, gather all necessary tools and materials. Having everything ready helps the project go smoothly. It saves time and avoids interruptions.
Collecting the right tools and materials ensures a strong, durable vanity. It also makes the work safer and easier to manage. Prepare well for a better result.
Tools Needed
- Measuring tape
- Power drill with drill bits
- Screwdriver set
- Jigsaw or handsaw
- Level
- Clamps
- Sandpaper or electric sander
- Paintbrush or roller
Materials Required
- Cabinet for vanity base
- Bathroom sink
- Faucet
- Plumbing pipes and fittings
- Sealant or silicone
- Paint or wood finish
- Wood screws
- Countertop (optional)
Safety Gear
- Safety goggles
- Dust mask
- Work gloves
- Hearing protection
Preparing The Cabinet
Preparing the cabinet is the first step in turning it into a bathroom vanity. This stage sets the foundation for a smooth build. Proper preparation makes installation easier and improves the final look. Take time to clean, modify, and adjust the cabinet for its new purpose.
Cleaning And Sanding
Start by cleaning the cabinet inside and out. Remove all dust, dirt, and grease using a mild cleaner. A clean surface helps paint or finish stick better. After cleaning, sand the cabinet with medium-grit sandpaper. Sanding smooths rough spots and removes old finish. Wipe away dust with a damp cloth before moving on.
Removing Doors And Drawers
Next, remove the cabinet doors and drawers carefully. Use a screwdriver to take off hinges and handles. Removing these parts makes it easier to work on the cabinet frame. Store all hardware in a safe place. You may reuse some pieces or replace them later.
Making Structural Adjustments
Check the cabinet for any needed changes. Cut holes for plumbing or drains as required. Reinforce weak spots with wood glue or nails. Remove any shelves that block plumbing space. Adjust the cabinet height if needed for the sink. These changes prepare the cabinet for bathroom use.
Installing Plumbing Components
Installing plumbing components is a key step in turning a cabinet into a bathroom vanity. This process ensures the sink works properly and water flows without leaks. Careful planning and precise work help avoid common plumbing problems.
Cutting Openings For Pipes
Mark the spots on the cabinet where pipes will go through. Use a drill or jigsaw to cut holes for the drain and water lines. Cut slowly to keep edges clean and avoid damaging the cabinet. Check that pipes fit smoothly through openings.
Fitting The Sink Drain
Attach the drain assembly to the sink before placing it on the cabinet. Use plumber’s putty or silicone to seal around the drain. Tighten the drain parts by hand and then with a wrench. Make sure the drain is secure and leaks are sealed.
Connecting Water Lines
Connect the hot and cold water supply lines to the faucet. Use flexible water supply tubes for easier installation. Tighten connections with a wrench but do not over-tighten. Turn on water and check for leaks. Fix any leaks by tightening or replacing washers.
Adding Vanity Top And Sink
Adding a vanity top and sink is a key step in turning a cabinet into a bathroom vanity. This part gives your vanity a finished look and makes it functional. Choose a vanity top that fits your style and needs. Attach the sink carefully for a clean, stable setup. Finally, seal and finish to protect surfaces from water damage and wear.
Selecting A Vanity Top
Pick a vanity top that matches your bathroom size. Consider materials like quartz, marble, or laminate. Quartz and marble look elegant but cost more. Laminate is budget-friendly and easy to clean. Measure your cabinet’s width and depth to find the right size. Choose a color and style that fits your bathroom decor.
Attaching The Sink
Most vanity tops come with a pre-cut hole for the sink. Place the sink in the hole to check the fit. Use silicone caulk around the edge of the sink to seal it. Press the sink firmly into place. Let the caulk dry for at least 24 hours. Connect the plumbing to ensure no leaks. Tighten all connections but avoid over-tightening.
Sealing And Finishing
Apply a waterproof sealant around the edges of the vanity top. This stops water from seeping into the cabinet. Use a clear silicone sealant for a neat finish. Wipe away any excess sealant before it dries. Let the sealant cure as per the instructions. Check for gaps and add more sealant if needed. A well-sealed vanity lasts longer and stays beautiful.
Painting And Finishing Touches
Painting and finishing touches bring your cabinet to life as a bathroom vanity. These steps protect the wood and give it style. A smooth, clean finish makes the piece look fresh and new.
Small details like hardware and decorations add personality. They make the vanity fit your bathroom’s look and feel. This section explains how to prime, paint, add hardware, and decorate your cabinet.
Priming And Painting
Start by cleaning the cabinet surface well. Remove dust and grease for better paint hold. Use a high-quality primer to cover bare wood or old paint. Primer stops paint from peeling and improves color.
Choose paint made for bathrooms or kitchens. These paints resist moisture and stains. Apply two thin coats of paint, letting each dry fully. Use a brush for edges and a roller for flat areas. Light sanding between coats helps smooth the surface.
Installing Hardware
Hardware like knobs and handles make the vanity easy to use. Pick styles that match your bathroom design. Measure and mark where each piece will go. Drill holes carefully and attach hardware firmly. Check that doors and drawers open smoothly.
Adding Decorative Elements
Decorations add charm and style to your vanity. Consider trim, stencils, or decals for a unique look. Use waterproof materials to avoid damage. Small plants or candles nearby enhance the overall feel. Keep decorations simple to avoid clutter.
Installing The Vanity In The Bathroom
Installing the vanity in the bathroom is an important step in your project. This process makes sure your cabinet fits well and works perfectly as a vanity. Proper installation keeps the vanity safe and stable. It also helps prevent future problems with plumbing or damage.
Positioning And Leveling
Place the vanity where you want it in the bathroom. Check the space around it to be sure it fits well. Use a level tool on the top of the cabinet. Adjust the vanity until it is perfectly level. Use shims under the cabinet if the floor is uneven. This step stops water from pooling or cabinet doors from sticking.
Securing To Wall
Find the studs in the wall behind the vanity. Use a stud finder for this task. Drill holes through the back of the cabinet into the studs. Use long screws to attach the vanity to the wall. Tighten the screws to keep the vanity steady. This step stops the vanity from moving or tipping over.
Final Plumbing Connections
Connect the drain pipe to the sink drain. Attach the water supply lines to the faucet. Check all connections for leaks by turning on the water. Tighten any loose fittings with a wrench. Make sure water flows freely and drains properly. This step ensures your vanity is ready for use.
Credit: www.hgtv.com
Maintaining Your Diy Vanity
Maintaining your DIY vanity keeps it looking fresh and working well. Regular care helps avoid damage and costly repairs. Simple steps protect your cabinet and extend its life. Here are key tips to keep your vanity in top shape.
Cleaning Tips
Use a soft cloth for daily cleaning. Avoid harsh chemicals that can damage the finish. Mild soap and water work best. Wipe spills immediately to prevent stains. Clean around fixtures gently to avoid loosening them.
Preventing Water Damage
Seal edges with waterproof sealant to stop water from seeping in. Fix leaks quickly to protect wood and paint. Use mats or trays to catch water around the sink. Avoid placing wet items directly on the vanity surface. Keep ventilation good to reduce moisture buildup.
Routine Checks
Inspect your vanity weekly for signs of wear or damage. Check hinges, knobs, and drawer slides for looseness. Tighten screws as needed to keep everything secure. Look for cracks or peeling finish and repair early. Routine checks prevent small issues from growing.
Frequently Asked Questions
How Do I Convert A Cabinet Into A Bathroom Vanity?
To convert a cabinet into a vanity, remove doors, add a sink cutout, and install plumbing. Ensure the cabinet is water-resistant and sturdy for bathroom use.
What Tools Are Needed To Make A Vanity From A Cabinet?
You’ll need a jigsaw, drill, screwdriver, measuring tape, level, and plumbing tools. Safety gear like gloves and goggles is also essential.
Can Any Cabinet Be Turned Into A Bathroom Vanity?
Most wooden or MDF cabinets can be converted, but avoid particleboard. Ensure it fits your bathroom space and supports the sink and plumbing weight.
How Do I Waterproof A Cabinet For Bathroom Use?
Apply waterproof sealant or paint on all surfaces. Use water-resistant materials inside and add a protective finish to prevent moisture damage.
Conclusion
Transforming a cabinet into a bathroom vanity saves money and adds style. The steps are clear and easy to follow. Choose the right cabinet and materials for a good fit. Take your time to measure and cut carefully. A fresh coat of paint can brighten the space.
Installing the sink and plumbing finishes the project. This DIY task can improve your bathroom’s look quickly. Try it yourself and enjoy a unique, functional vanity. Small changes make a big difference. Ready to give your bathroom a new feel?
