Are you looking for a fun and creative project to make for your child’s dolls? Making a doll bunk bed out of wood is easier than you might think.
With just a few simple tools and some basic materials, you can build a sturdy and charming bed that your child will love. Imagine the joy on their face when they see a handmade bunk bed ready for their favorite dolls.
In this guide, you’ll find clear, step-by-step instructions that anyone can follow. Ready to create something special that lasts? Let’s get started!
Materials Needed
Building a doll bunk bed from wood needs the right materials. Choosing the correct items makes the project easier and safer. This section lists all materials needed to start your craft. You will find types of wood, tools, and extra supplies needed for the job.
Types Of Wood
Choose wood that is light and easy to cut. Pine and plywood are good options. Pine is soft, easy to shape, and affordable. Plywood is strong and smooth, perfect for bed surfaces. Avoid hardwoods; they are harder to work with. Make sure the wood is smooth to prevent splinters.
Tools Required
Basic tools help you work faster and more accurately. A saw is needed to cut wood pieces. A drill is useful for making holes and fixing screws. Sandpaper smooths rough edges and surfaces. A measuring tape ensures you cut the right sizes. A screwdriver helps secure screws tightly.
Additional Supplies
Besides wood and tools, you need some extra items. Wood glue strengthens joints and keeps parts together. Screws and small nails hold the bed firmly. Paint or wood finish protects the wood and adds color. Brushes help apply paint evenly. Safety gear like goggles and gloves protect your hands and eyes.

Credit: www.youtube.com
Planning Your Design
Planning your design is the first step to making a doll bunk bed out of wood. This part sets the foundation for a sturdy and attractive bed. Careful planning saves time and materials. It helps you avoid mistakes during building.
Start by understanding the size of your doll and the space you want the bed to fit. Sketching your ideas on paper makes the project clear. Decide on the bed’s exact dimensions to match the doll size and room space.
Measuring Doll Size
Measure your doll’s height from head to toe. Check the width across the doll’s shoulders. Note the depth from the front to the back. These numbers guide your bed size. Make sure to add a little space for comfort.
Sketching The Bed Frame
Draw a simple picture of the bunk bed frame on paper. Include two levels to show the bunk style. Mark where the ladder and guardrails will go. Use clear lines and labels. This sketch acts as your building plan.
Choosing Bed Dimensions
Pick bed dimensions based on the doll size and room space. The length should be a bit longer than the doll. The width must allow the doll to lie down comfortably. Height depends on the space between the two bunks. Leave enough space for the doll’s head.
Cutting The Wood
Cutting the wood is the first big step in making a doll bunk bed. It shapes the parts you will later join. Precise cutting helps the bed look neat and fit together well. Taking time here saves work later.
Marking The Pieces
Start by measuring each part carefully. Use a pencil to mark the wood. Draw straight lines where you will cut. Check your marks twice. Clear marks guide your saw for clean cuts.
Safe Cutting Techniques
Wear safety goggles and gloves before cutting. Hold the wood steady with clamps or a helper. Use a saw with a fine blade for smooth edges. Cut slowly along your marks. Stop if the saw binds or feels stuck.
Preparing Wood Surfaces
After cutting, smooth the edges with sandpaper. Sand down any splinters or rough spots. Clean the wood dust away with a cloth. Smooth wood pieces join better and look nicer. This step makes your doll bunk bed safe for play.

Credit: www.ana-white.com
Assembling The Frame
Assembling the frame is the most important step in making a doll bunk bed out of wood. This part gives the bed its shape and strength. Take your time to measure and cut the wood pieces correctly. Use a good wood glue and screws to hold everything firmly. Safety is key, so check that all parts fit well and are smooth to touch.
Building The Bed Sides
Start by cutting two long wooden boards for each side of the bunk bed. These will form the vertical frame. Cut smaller pieces for the head and foot of the bed. Sand all edges to avoid splinters. Attach the smaller pieces between the long boards to create a rectangle. Use wood glue and screws for a strong hold. Make sure the sides are straight and even.
Constructing The Bed Slats
Cut several thin wooden slats for the mattress base. The slats should be evenly spaced to support the doll mattress well. Sand the slats to keep them smooth and safe. You can paint or stain the slats before fixing them. Make sure the slats are the same length as the bed sides. This will help the mattress stay in place.
Joining The Parts Together
Now connect the bed sides with the slats. Lay the sides flat on a table. Place the slats across the inside of the frame. Space them evenly and fix each slat with screws or nails. Check that the frame is square and strong. Tighten all screws to keep the bed steady. Your doll bunk bed frame is ready for finishing touches.
Adding Finishing Touches
Adding finishing touches to your wooden doll bunk bed makes it look complete and polished. These final steps improve safety and give the bed a beautiful look. Focus on smooth surfaces, color options, and small decorations.
Sanding For Smoothness
Start by sanding all wood surfaces with fine-grit sandpaper. This removes rough spots and splinters. Sand corners and edges carefully to avoid sharp points. Smooth wood feels nice to touch and is safer for children. Wipe away dust with a clean cloth before painting or staining.
Painting And Staining Options
Choose paint or stain based on the style you want. Use non-toxic paint made for wood toys. Light colors make the bed look bright and cheerful. Stains show the wood’s natural grain and add warmth. Apply thin coats and let each dry well. This prevents peeling and uneven color.
Decorative Details
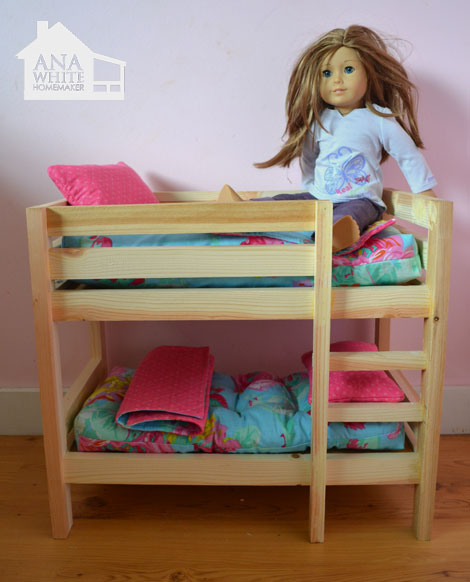
Add small details to make the bed special. Use stickers or stencils for patterns and shapes. Glue on tiny wooden shapes or buttons as accents. Soft fabric cushions or blankets fit nicely on each bunk. These details personalize the bed and invite play.
Credit: www.ana-white.com
Safety Tips
Safety is the top priority when making a doll bunk bed out of wood. Careful steps protect you and others. Follow these safety tips to avoid accidents and create a strong, safe bed.
Handling Tools Properly
Use tools with care. Always wear safety glasses to protect your eyes. Keep fingers away from sharp blades and drill bits. Work on a stable surface to prevent slips. Turn off power tools when not in use. Store tools out of children’s reach. Read instructions before starting with any new tool.
Ensuring Stability
Check all joints and screws tightly. A loose part can cause the bed to fall. Use wood glue along with screws for extra strength. Make sure the bed stands firm on flat ground. Test the bed by pressing gently to check wobbling. Sand all rough edges to avoid splinters. Stability keeps the bed safe for play.
Non-toxic Finishes
Choose paints and finishes that are non-toxic. Kids often touch and hold the bed. Use water-based paints for safer use. Avoid finishes with strong chemical smells. Let the bed dry fully before using. Non-toxic finishes protect health and keep the bed looking nice.
Troubleshooting Common Issues
Building a doll bunk bed from wood is fun but can come with some challenges. Common issues may appear during or after assembly. Knowing how to fix these problems helps your project stay strong and look great. This section covers simple solutions for common problems.
Fixing Loose Joints
Loose joints make the bed weak and unsafe. Tighten screws or nails first. If the hole is too big, add wood glue or small wooden pieces to fill gaps. Clamp the joint until the glue dries. This will keep parts tight and steady.
Correcting Uneven Surfaces
Uneven surfaces cause the bed to wobble or not fit well. Sand the wood with fine sandpaper to smooth rough spots. Use a level to check flatness. If one side is higher, shave small amounts off the wood. This balances the whole structure.
Adjusting Bed Size
The bed size might not fit your dolls or space perfectly. Measure your dolls before cutting wood. Cut pieces slowly and check sizes often. To make the bed bigger, add longer side rails or taller legs. For a smaller bed, trim the wood carefully.
Frequently Asked Questions
What Materials Do I Need To Build A Wooden Doll Bunk Bed?
To build a wooden doll bunk bed, you need plywood, wood glue, nails, sandpaper, paint, and screws. Also, a saw and drill are essential tools for cutting and assembling.
How Long Does It Take To Make A Doll Bunk Bed?
Making a doll bunk bed usually takes 3 to 5 hours. This depends on your skill level and the complexity of the design.
Can I Customize The Doll Bunk Bed Design?
Yes, you can customize size, color, and decorations. Personalizing the bed makes it unique and suits your doll’s style perfectly.
Is Woodworking Safe For Beginners To Try?
Woodworking is safe for beginners with proper tools and supervision. Always wear safety goggles and follow instructions carefully to avoid accidents.
Conclusion
Building a wooden doll bunk bed is a fun and simple project. It lets you create a special toy for kids or collectors. You only need basic tools and some wood pieces. Follow the steps carefully to make a strong and safe bed.
Taking your time helps avoid mistakes. Enjoy the process and feel proud of your work. This craft adds charm to any dollhouse or playroom. Try it today and see how rewarding it can be.
