Are you looking for a stylish and practical way to organize your books without taking up too much space? Making a fabric bookshelf could be the perfect solution for you.
It’s easy to create, affordable, and adds a cozy touch to any room. Imagine having a unique bookshelf that fits your style and keeps your favorite reads close at hand. Keep reading, and you’ll discover simple steps to make your own fabric bookshelf that looks great and works even better.
Your clutter-free, beautiful space is just a few minutes away!

Credit: www.icanteachmychild.com
Choosing The Right Fabric
Choosing the right fabric is key to building a sturdy and attractive fabric bookshelf. The fabric must support the weight of books and keep its shape over time. It also affects the look and feel of your shelf. Picking the proper fabric makes your project both functional and beautiful.
Durability And Weight Considerations
The fabric must be strong enough to hold books without tearing. Look for thick, tightly woven materials. Light fabrics may stretch or sag under heavy weight. A durable fabric keeps your bookshelf stable and safe. Check the fabric’s weight, often measured in grams per square meter (GSM). Higher GSM usually means stronger fabric.
Selecting Colors And Patterns
Choose colors that match your room’s style. Solid colors offer a clean, simple look. Patterns add personality and can hide dirt or stains better. Darker colors often look neater over time. Bright colors can make the bookshelf a focal point. Pick patterns that do not distract from your books.
Recommended Fabric Types
Canvas is a popular choice due to its strength and durability. Denim also works well and gives a casual, modern feel. Upholstery fabric is designed to last and can handle weight easily. Avoid thin cotton or silk, as they tear quickly. Felt can be used for lightweight shelves but may not hold heavy books.
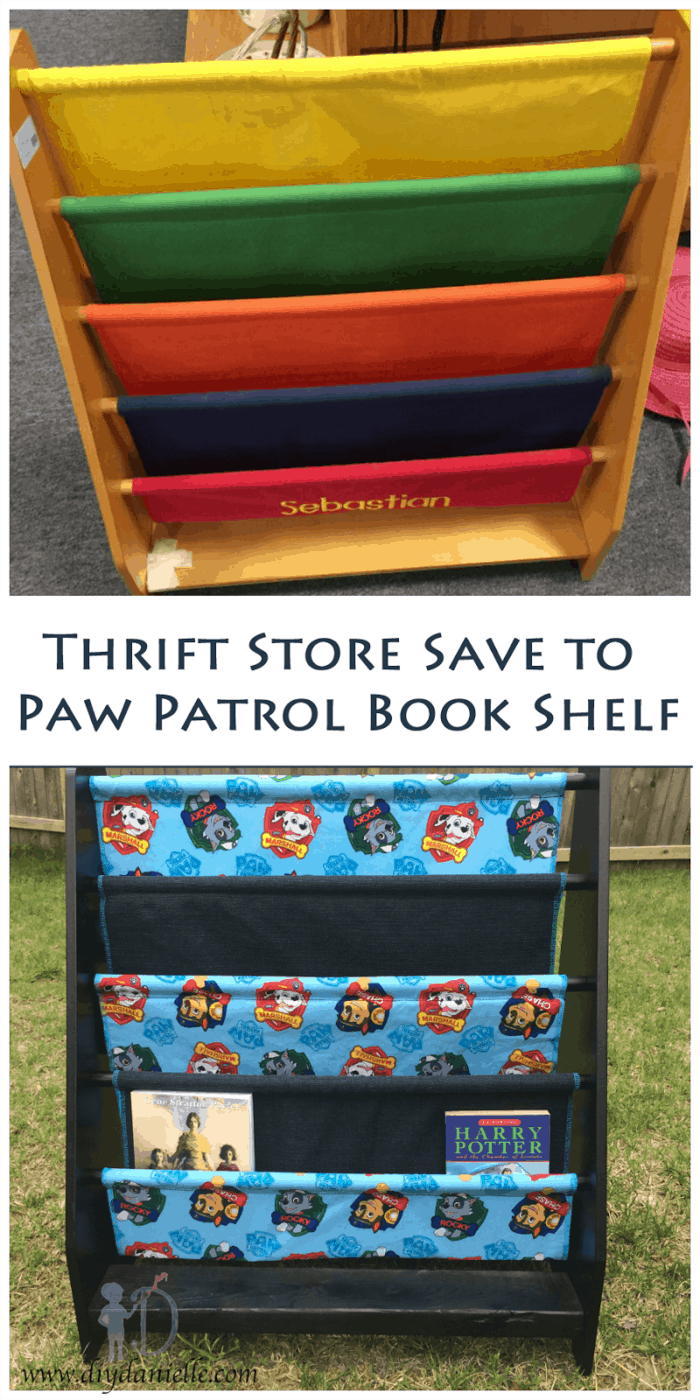
Credit: diydanielle.com
Gathering Materials And Tools
Before making a fabric bookshelf, gather all needed materials and tools. This step helps the project go smoothly. Having everything ready saves time and avoids interruptions. Choose good quality supplies for a sturdy and neat bookshelf. Below is a list of must-have items and some optional accessories for a personal touch.
Essential Supplies List
- Strong fabric, like canvas or denim
- Wooden dowels or rods for support
- Measuring tape or ruler
- Fabric scissors or rotary cutter
- Sewing machine or needle and thread
- Fabric glue or hot glue gun
- Marker or fabric chalk for marking
- Clamps or clips to hold fabric in place
- Sanding paper for smoothing wooden rods
Optional Accessories For Customization
- Decorative buttons or patches
- Fabric paint for designs
- Ribbon or trim for edges
- Velcro strips for removable parts
- Iron-on labels for naming shelves
- Extra pockets or pouches
- Hooks for hanging small items
Measuring And Cutting Fabric
Measuring and cutting fabric is a key step in making a fabric bookshelf. This step ensures the fabric fits perfectly and the bookshelf looks neat. Precise measurements help avoid waste and save time. Cutting fabric carefully prevents frayed edges and keeps the material strong. Follow simple methods for best results.
Taking Accurate Measurements
Start by measuring the bookshelf frame. Use a soft tape measure for flexibility. Measure each side that needs fabric. Write down each measurement clearly. Double-check the numbers before cutting. Add a little extra fabric for seams. This extra space makes sewing easier. Accurate measuring ensures the fabric fits well.
Cutting Techniques For Clean Edges
Use sharp fabric scissors for clean cuts. Cut on a flat, stable surface. Avoid using dull scissors that can fray fabric. Pin the fabric layers if cutting more than one. Cut slowly and follow the marked lines. Use a rotary cutter for straight edges. This tool helps make smooth, precise cuts. Clean edges make your bookshelf look professional.
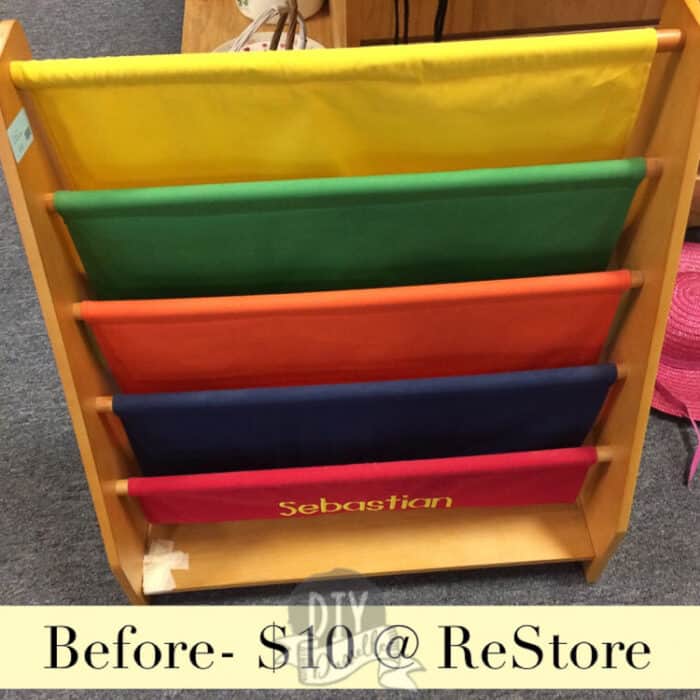
Credit: diydanielle.com
Sewing The Bookshelf Panels
Sewing the bookshelf panels is an important step in making a fabric bookshelf. The panels form the sides and shelves that hold your books. Sewing them carefully ensures the bookshelf is strong and looks neat. This step involves stitching fabric pieces together with the right techniques.
Basic Stitching Methods
Start with straight stitches to join fabric pieces. Keep your stitches even and tight. Use a sewing machine for better control and speed. Backstitch at the beginning and end to secure the seam. Use a medium stitch length for durability. Press the seams flat with an iron. This helps the panels look smooth and professional.
Adding Reinforcements For Strength
Reinforce corners and edges with extra stitching. Double stitch areas that will hold heavy books. Use interfacing or extra fabric layers inside panels. This adds firmness and stops sagging. Sew binding tape along edges for neatness and strength. Reinforcements keep your bookshelf sturdy and long-lasting.
Assembling The Fabric Bookshelf
Assembling the fabric bookshelf is a simple and rewarding step. It brings all parts together to create a sturdy, usable shelf. Follow clear, easy steps to make sure your bookshelf holds books safely and looks great in your space.
Attaching Panels Together
Start by lining up the fabric panels. Each panel should fit snugly with the next. Use strong fabric glue or sew the edges for a secure bond. Check the corners carefully to avoid gaps. Smooth out any wrinkles or folds as you join the panels. This ensures a neat and even finish.
Incorporating Support Structures
Add wooden or plastic rods inside the fabric sleeves. These rods keep the shelves firm and prevent sagging. Place the supports evenly to spread the weight of your books. Use velcro or ties to hold supports in place inside the fabric. This strengthens the overall frame and improves stability.
Adding Storage Features
Adding storage features to your fabric bookshelf makes it more useful. You can organize books and small items neatly. Thoughtful design helps save space and keeps things tidy. This section explains how to add pockets, compartments, and adjustable shelves to your fabric bookshelf.
Creating Pockets And Compartments
Pockets and compartments increase storage options. Sew fabric pockets on the sides or front of the bookshelf. Use different sizes to hold small items like pens or notes. Reinforce pocket edges with extra stitching to keep them strong. Compartments can be made by adding fabric dividers inside shelves. These help separate books or other belongings. Pockets and compartments keep everything easy to find.
Including Adjustable Shelves
Adjustable shelves add flexibility to your fabric bookshelf. Use fabric strips with buttonholes or Velcro to hold shelves in place. This lets you change shelf height based on what you store. Adjustable shelves fit tall books or smaller items comfortably. Make sure shelves are sturdy by using thick fabric or adding support boards. Change shelf positions anytime for different storage needs.
Finishing Touches
Finishing touches are the final steps in making your fabric bookshelf look great and last longer. These small details make a big difference. They help protect the fabric and add a personal style to your project.
Decorative Elements
Decorative elements give your bookshelf a unique look. Use fabric paint to create patterns or add colors. Sew on patches or small fabric shapes for extra style. Attach buttons or ribbons for a fun touch. These details make your bookshelf more attractive and personal.
Protective Coatings And Treatments
Protective coatings keep your fabric bookshelf clean and safe. Use a fabric protector spray to guard against stains and spills. Choose a clear spray that does not change the fabric’s look. Test the spray on a small area first. Let it dry fully before using the bookshelf. This helps keep your fabric strong and fresh for a long time.
Maintaining Your Fabric Bookshelf
Maintaining your fabric bookshelf is key to keeping it looking fresh and lasting longer. Fabric can attract dust, stains, and small tears over time. Regular care helps preserve its shape and color. A few simple steps can make a big difference.
Cleaning Tips
Dust your fabric bookshelf often using a soft brush or cloth. This removes dirt before it settles deep into the fabric. For stains, use a mild soap and water solution. Gently dab the spot with a clean cloth. Avoid soaking the fabric to prevent damage. Let the shelf dry completely in a well-ventilated area. Avoid direct sunlight to protect the color.
Repairing Minor Damages
Check your fabric bookshelf regularly for small tears or loose threads. Use a needle and thread to sew tiny holes before they grow. For loose seams, apply fabric glue for a quick fix. Avoid heavy repairs that might distort the shelf shape. Fix damages promptly to keep your bookshelf sturdy and neat.
Frequently Asked Questions
What Materials Are Needed For A Fabric Bookshelf?
You need sturdy fabric, wooden dowels, sewing tools, and strong thread. Also, prepare scissors, measuring tape, and hooks for hanging. These materials ensure durability and easy assembly of your fabric bookshelf.
How Do You Assemble A Fabric Bookshelf?
Cut fabric panels to size, sew pockets for shelves, and insert wooden dowels. Attach hooks or straps for hanging. Follow step-by-step instructions for secure and stable assembly.
Can A Fabric Bookshelf Hold Heavy Books?
Fabric bookshelves are best for lightweight to medium-weight books. Overloading may cause sagging or damage. Use reinforced fabric and dowels for better support.
How To Maintain And Clean A Fabric Bookshelf?
Spot clean with mild detergent and a soft cloth. Avoid harsh chemicals or soaking. Regularly check for loose stitches or wear to maintain durability.
Conclusion
Making a fabric bookshelf is simple and fun. You only need a few materials and some patience. This project saves space and adds style to any room. You can customize colors and sizes as you like. It also helps keep books neat and easy to find.
Try making one today and enjoy your new, handy shelf. Small steps lead to great results. Happy crafting!