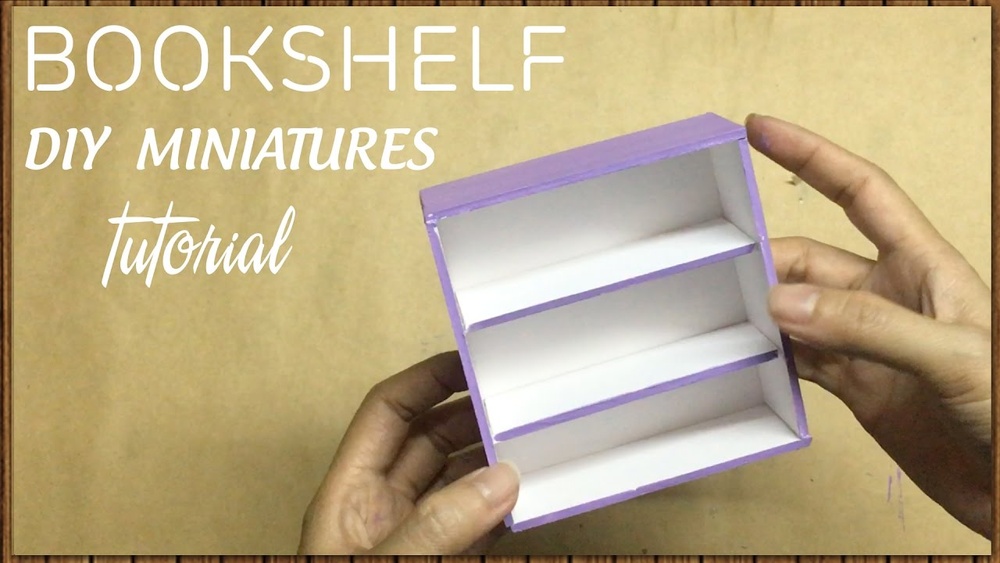
Have you ever wanted a stylish mini bookshelf but don’t want to spend a lot of money or buy bulky furniture? What if you could create your own unique shelf using just cardboard?
Making a mini bookshelf out of cardboard is easier than you think. It’s a fun, creative project that lets you organize your favorite books while adding a personal touch to your space. Keep reading, and you’ll discover simple steps that anyone can follow to build a sturdy, eye-catching bookshelf right at home.
Your perfect little bookshelf is just a few folds and cuts away!
Materials Needed
Gathering the right materials is key to building a sturdy mini bookshelf from cardboard. The quality of your materials affects how strong and neat your bookshelf looks. Prepare everything before starting to save time and avoid interruptions.
Choosing The Right Cardboard
Pick thick, strong cardboard for best results. Look for double-walled or triple-walled sheets. These types hold weight better and resist bending. Avoid thin cardboard from cereal boxes. Large flat pieces work well for cutting shelves and sides.
Essential Tools
Use a sharp utility knife or box cutter for clean cuts. A metal ruler helps measure and guide the blade. Keep a pencil handy to mark lines on the cardboard. Use strong glue or hot glue to join pieces. Have some heavy books or clips to hold glued parts while drying.
Optional Decorative Items
Decorate your bookshelf to make it unique. Use colored paper, wrapping paper, or fabric to cover surfaces. Paint works well if you want a solid color look. Stickers or washi tape add fun designs. Choose items that match your room’s style.

Credit: www.youtube.com
Preparing The Cardboard
Preparing the cardboard is the first step in making a mini bookshelf. This step ensures your bookshelf will be sturdy and fit together well. Taking your time here makes building easier later. You need to measure, cut, and strengthen the cardboard pieces.
Measuring And Marking
Start by measuring the size of your bookshelf parts. Use a ruler or measuring tape for accuracy. Mark lines clearly with a pencil on the cardboard. Mark all pieces before cutting. This helps avoid mistakes and keeps pieces even.
Cutting Techniques
Use a sharp craft knife or box cutter for clean cuts. Cut along your pencil lines slowly and steadily. Place the cardboard on a cutting mat or hard surface. Avoid tearing the cardboard by applying gentle pressure. Straight cuts make assembly easier and neater.
Reinforcing The Cardboard
Strengthen your cardboard pieces by doubling them up. Glue two layers of cardboard together for extra support. Focus on shelves and sides that will hold weight. Reinforcement prevents bending and keeps your bookshelf stable. Let glue dry completely before moving on.
Assembling The Bookshelf
Assembling the mini bookshelf is an exciting step. It turns flat cardboard pieces into a functional shelf. Follow these simple steps to build a sturdy and neat bookshelf. Keep your tools ready and work on a clean surface.
Creating The Base And Sides
Start by cutting the base from thick cardboard. The base should be strong to hold weight. Next, cut two side panels of equal height. Attach the sides to the base using glue or tape. Make sure the sides stand straight and firm. Hold the pieces until the glue dries. This forms the basic frame of your bookshelf.
Building The Shelves
Measure the space between the sides for shelves. Cut cardboard strips to fit this width. You can add two or three shelves depending on size. Attach each shelf inside the frame with glue or tape. Ensure shelves are level and spaced evenly. Press firmly and wait for them to dry. This creates the storage space for your books.
Securing The Structure
Reinforce the joints by adding extra tape on edges. Use corner braces made from small cardboard pieces for support. Attach these inside corners where shelves meet sides. This prevents wobbling and adds strength. Check the shelf’s stability by pressing gently. Let all glue and tape dry completely before use.
Credit: www.littleladoo.com
Finishing Touches
Finishing touches bring your mini bookshelf to life. They make it look smooth and neat. These steps protect your work and add personality. Follow simple methods for a clean, pretty result.
Smoothing Edges
Use sandpaper to smooth the cardboard edges. Sand gently to avoid tearing. Smooth edges prevent paper cuts. They make the shelf safer and nicer. Check all corners and sides carefully.
Painting And Decorating
Choose paint that works on cardboard. Acrylic paint dries fast and looks bright. Use thin layers to avoid warping. Let each layer dry before the next. Decorate with stickers, markers, or washi tape. Personal touches make it unique and fun.
Adding Protective Coating
Apply a clear sealant to protect paint and cardboard. A water-based varnish works well. It stops moisture from damaging the shelf. Use a soft brush for even coating. Let it dry fully before use. This step helps your bookshelf last longer.
Tips For Durability
Making a mini bookshelf from cardboard is fun and eco-friendly. To keep it strong and lasting, follow some key tips. These will help your shelf hold books safely and stay in good shape for a long time.
Weight Distribution
Place heavy books at the bottom. This keeps the shelf balanced. Avoid putting too many books on one side. Spread the weight evenly across all shelves. This stops the cardboard from bending or breaking.
Avoiding Moisture Damage
Keep your bookshelf away from water and damp places. Cardboard soaks up moisture easily. Use a sealant or waterproof paint to protect it. This stops the shelf from getting soft or weak over time.
Regular Maintenance
Check your bookshelf often for signs of wear. Fix any dents or bends quickly. Clean dust and dirt with a dry cloth. Small care steps help your shelf last much longer.
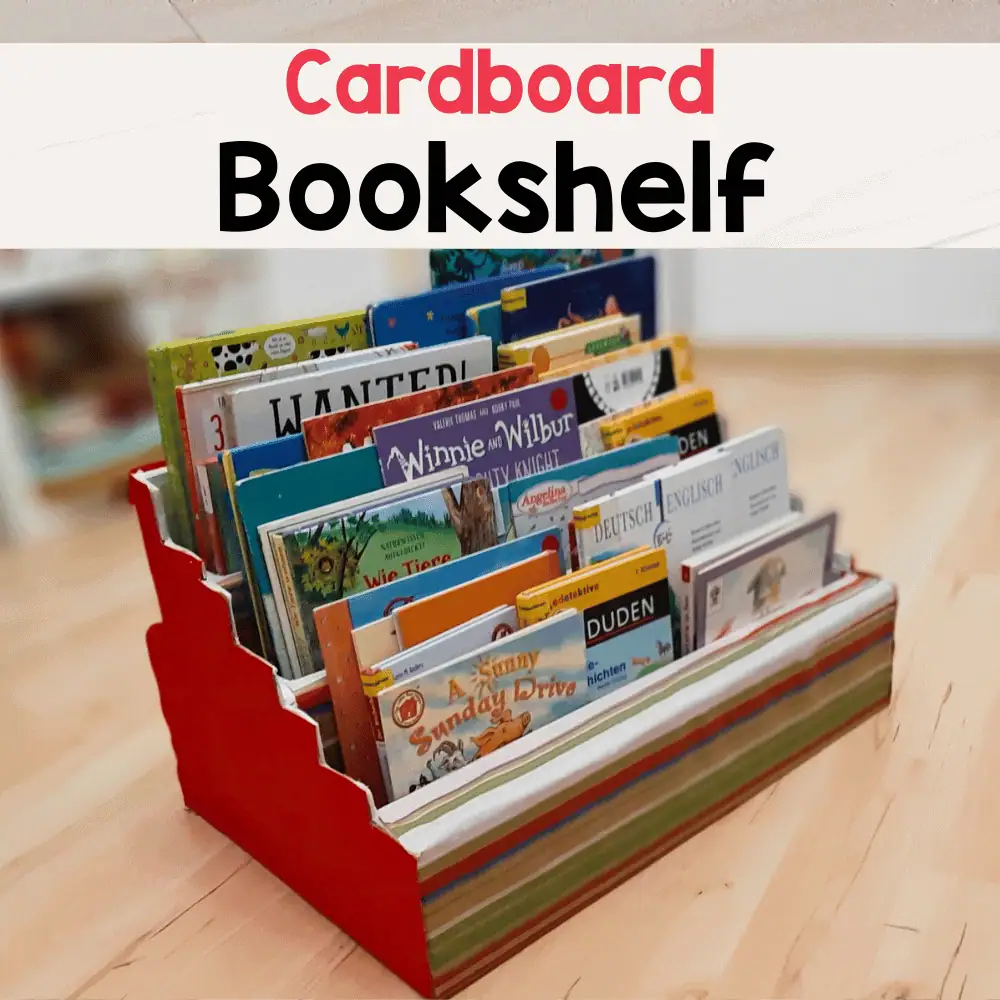
Creative Variations
Creative variations make your mini bookshelf unique and practical. You can change size, add storage, or use recycled materials. These ideas help match the shelf to your space and style. Experimenting keeps the project fun and personal.
Customizing Size And Shape
Adjust the size to fit your room or desk. Make the shelf taller or wider for more books. Try different shapes like hexagons or triangles. Shapes add style and fit tight spaces. Measuring first helps the shelf fit perfectly.
Incorporating Storage Features
Add small drawers or compartments for extra storage. Use hooks on the sides for keys or notes. Create cubbies for small items like pens or chargers. Storage features keep your desk tidy and organized. Think about what you want to store before building.
Using Recycled Materials
Use old cardboard boxes from around the house. Collect paper rolls or small cartons for parts. Recycled materials save money and help the environment. Paint or decorate to give old cardboard new life. This approach makes the project eco-friendly and creative.

Credit: www.reddit.com
Frequently Asked Questions
What Materials Are Needed For A Cardboard Mini Bookshelf?
You need sturdy cardboard, a ruler, pencil, craft knife, glue, and tape. Optional items include paint and decorative paper for finishing.
How Do You Ensure The Bookshelf Is Stable?
Use thick cardboard and reinforce edges with extra layers. Secure joints tightly with strong glue or tape for added stability.
Can A Mini Cardboard Bookshelf Hold Heavy Books?
It’s best for lightweight or small books. Heavy books may cause bending or collapsing over time.
How Long Does It Take To Build The Bookshelf?
Building usually takes 1 to 2 hours, depending on complexity and drying time for glue.
Conclusion
Creating a mini bookshelf from cardboard is simple and fun. You only need a few materials and some patience. This project saves money and helps reduce waste. You can customize the size and shape to fit your space. It also makes a great decoration or gift.
Try making one today and enjoy your new, handy shelf. Small steps like this bring creativity into everyday life. Give it a try—you might be surprised by the results.