Are you looking for a simple and affordable way to organize your books? Making a small bookshelf at home with cardboard is easier than you think.
You don’t need special tools or skills, just some basic materials and a little creativity. Imagine having a custom bookshelf that fits perfectly in your space and shows off your favorite reads. Keep reading, and you’ll discover step-by-step how to build your own sturdy, stylish bookshelf with things you already have at home.
Let’s get started!
Materials Needed
Gathering the right materials is the first step to build a small bookshelf from cardboard. Choose strong and sturdy cardboard to hold your books safely. Also, prepare tools that make cutting and assembling easy and precise. This list helps you get ready for the project.
Types Of Cardboard
Use thick and corrugated cardboard for the best support. Double-wall cardboard works well for bigger shelves. Avoid thin cardboard because it bends and breaks easily. Old boxes from appliances or furniture are great options. Look for clean, dry pieces without tears or stains.
Additional Tools And Supplies
Keep a sharp craft knife or box cutter for neat cuts. A metal ruler helps measure and cut straight lines. Use strong glue or hot glue to stick pieces firmly. Tape can add extra strength at joints. Sandpaper smooths rough edges and makes the shelf look better.

Credit: www.youtube.com
Planning Your Bookshelf
Planning your small bookshelf is the first step to a successful project. It helps you use materials well and get a neat result. Careful planning saves time and avoids mistakes. Think about the space where the shelf will go. Visualize how many books or items you want to store.
Good planning makes building easier and the final shelf stronger. Start by deciding size and design. Then, measure and mark your cardboard carefully. This way, cutting and assembling become simple tasks.
Choosing The Size And Design
Decide how tall and wide your bookshelf should be. Check the wall or area where it will stand. Think about the height of your tallest books. Choose a design that fits your style and room. Simple shapes work best for cardboard shelves. Keep shelves not too deep to save space. Plan for enough shelves to hold your books well.
Measuring And Marking Cardboard
Use a ruler or measuring tape to get exact sizes. Mark the cardboard with a pencil for clear cuts. Double-check each measurement before cutting. Draw straight lines for neat edges. Mark all parts, including shelves and sides, carefully. Accurate marks help your bookshelf fit perfectly together.
Cutting The Cardboard
Cutting the cardboard is the first important step in building your small bookshelf. This step shapes the parts you will use. Accurate cuts ensure the bookshelf is strong and looks neat. Take your time and prepare your tools before starting.
Safe Cutting Techniques
Always cut on a flat surface to keep the cardboard steady. Use a sharp utility knife for clean cuts. Dull blades can tear the cardboard and cause accidents.
Cut away from your body and fingers to avoid injuries. Use a metal ruler to guide your cuts for straight lines. Take small, careful strokes instead of one big cut.
Creating Shelf Panels And Supports
Measure and mark your panels before cutting. Each shelf panel needs to be the same size for balance. Cut extra pieces to use as supports under the shelves.
Double or triple layers of cardboard add strength. Glue these layers together before cutting for better support. Make sure all pieces fit well before moving on.
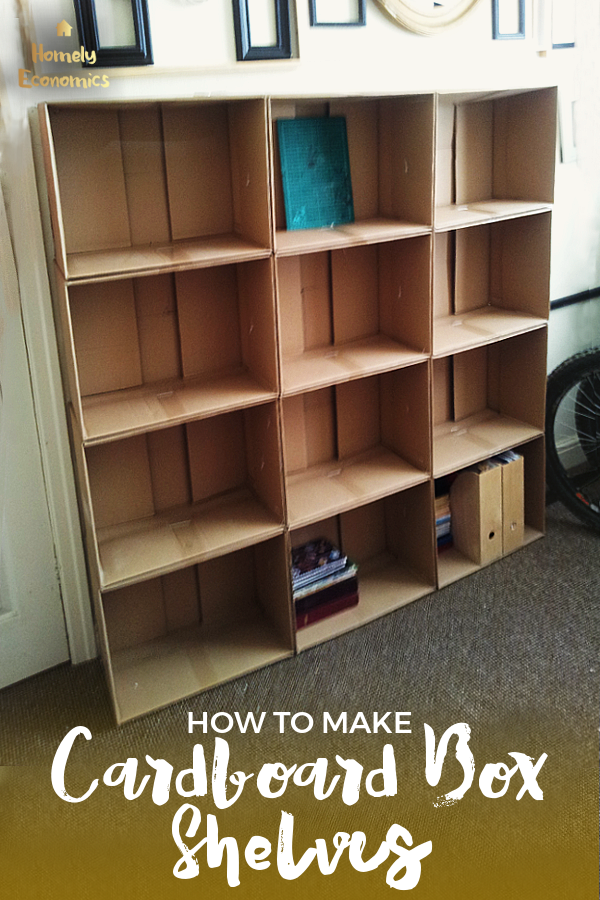
Credit: homelyeconomics.com
Assembling The Bookshelf
Assembling the bookshelf is the key step to bring your project to life. This part requires patience and care. The cardboard panels need to fit well and hold strong.
Follow each step carefully to ensure a solid and neat bookshelf. The right assembly helps your shelf hold books safely and last longer.
Joining Panels Securely
Start by aligning the edges of the panels. Use strong glue designed for cardboard. Apply glue evenly on the edges for a better hold.
Press the panels together firmly. Hold them in place until the glue sets. Use clamps or heavy objects to keep panels steady.
Double-check all corners to avoid gaps. Gaps can weaken the structure and cause instability.
Reinforcing Structure For Stability
Add extra strips of cardboard inside the joints. Glue these strips along the seams to add strength.
Use tape to wrap around the corners for more support. This prevents the panels from bending or breaking.
Place small cardboard blocks at shelf corners. These blocks help to hold the shelves straight and steady.
Check the shelf for any loose parts. Secure them with more glue or tape as needed.
Finishing Touches
Finishing touches give your small cardboard bookshelf a polished look. They help protect your work and add style. Taking time on these steps makes your project last longer and look better.
Painting And Decorating
Choose paint that dries fast and sticks well to cardboard. Acrylic paint is a good choice. Use bright colors or soft tones to match your room. Apply one or two thin coats for smooth coverage.
Try simple patterns like stripes or dots. You can also use stencils for neat shapes. Stick on paper, fabric, or washi tape for extra decoration. Let each layer dry fully before adding the next.
Adding Protective Coating
Protect your paint and cardboard with a clear sealant. Water-based varnish or spray sealant works well. This coating stops moisture and dirt from damaging the shelf.
Apply the sealant in a thin, even layer. Let it dry completely before using the bookshelf. This step keeps your shelf strong and looking fresh for a long time.

Credit: www.youtube.com
Tips For Durability
Making a small bookshelf from cardboard is fun and creative. To keep it lasting long, focus on durability. This means making the shelf strong enough to hold books without bending or breaking. Simple tips help your bookshelf stay sturdy and useful for a long time.
Weight Limits And Load Distribution
Cardboard has limits on how much weight it can hold. Do not put too many heavy books on one shelf. Spread the books evenly across the shelves. Place heavier books at the bottom. This helps stop the shelves from sagging. Use extra cardboard layers for shelves that hold more weight. Reinforce the edges with tape or glue for added support.
Maintenance And Care
Keep your cardboard bookshelf dry at all times. Water weakens cardboard and causes damage. Clean dust with a soft, dry cloth only. Avoid using wet or harsh cleaners. Check the shelves regularly for wear or soft spots. Fix small tears or bends quickly with glue or tape. Store the bookshelf in a cool, dry place away from direct sunlight.
Frequently Asked Questions
How Durable Is A Cardboard Bookshelf?
A cardboard bookshelf can be surprisingly sturdy when made with strong, layered cardboard. Proper construction and sealing increase its durability for light to medium book storage.
What Materials Do I Need To Make A Cardboard Bookshelf?
You need thick cardboard sheets, a ruler, a box cutter, glue, tape, and paint or decorative paper for finishing.
Can I Customize The Size Of My Cardboard Bookshelf?
Yes, you can easily adjust the dimensions to fit your space by measuring and cutting cardboard to your preferred size.
How Do I Make A Cardboard Bookshelf More Stable?
Reinforce corners with extra cardboard layers and use strong glue or tape. Adding a backing piece improves overall stability.
Conclusion
Building a small bookshelf with cardboard saves money and space. It uses simple tools and easy steps anyone can follow. You create something useful with your own hands. This project also helps recycle old materials, which is good for the environment.
Try different shapes and sizes to fit your needs. Enjoy your new bookshelf and the pride of making it yourself. Keep practicing, and your skills will improve over time. Small projects like this bring fun and learning together.