Looking for a way to add style and storage to your space without taking up floor room? A wall hanging bookshelf might be just what you need.
It’s a simple, creative project that lets you display your favorite books and décor while keeping your room organized. Imagine having a unique shelf that fits perfectly on your wall and shows off your personality. In this guide, you’ll discover easy steps to make your own wall hanging bookshelf, even if you’re new to DIY.
Ready to turn your empty wall into a stunning focal point? Let’s get started!

Credit: www.youtube.com
Materials Needed
Gathering the right materials is the first step to making a wall hanging bookshelf. Picking good wood, tools, and hardware ensures your project is strong and looks nice. Prepare all items before you start for a smooth building process.
Wood Types And Sizes
Choose wood that fits your space and style. Pine is a soft wood, easy to cut and affordable. Oak is harder and lasts longer but costs more. For size, a common choice is a plank 1 inch thick, 8-12 inches wide, and 24-36 inches long. These sizes suit most wall shelves and hold books well.
Tools Required
Basic tools make building easier. A saw cuts the wood to size. A drill helps make holes for screws. Sandpaper smooths rough edges. A level keeps your shelf straight on the wall. A screwdriver or power driver is needed to fasten screws securely.
Hardware And Accessories
Use strong brackets or wall anchors to hold the shelf. Screws must match the wood type and thickness. Choose anchors suitable for your wall type, like drywall or brick. Optional items include wood glue for extra strength and paint or stain to finish the shelf’s look.

Credit: createdbyv.com
Choosing The Right Design
Choosing the right design for your wall hanging bookshelf is important. It sets the tone for your room and matches your style. The design affects how much space you use and how your books look on display. Think about your needs and the room’s look before you start.
Simple Vs. Decorative Styles
Simple shelves have clean lines and a basic shape. They fit well in small or modern rooms. Simple styles are easy to build and use less material.
Decorative shelves have unique shapes and extra details. They add charm and personality to any room. Choose decorative styles if you want the shelf to be a focal point.
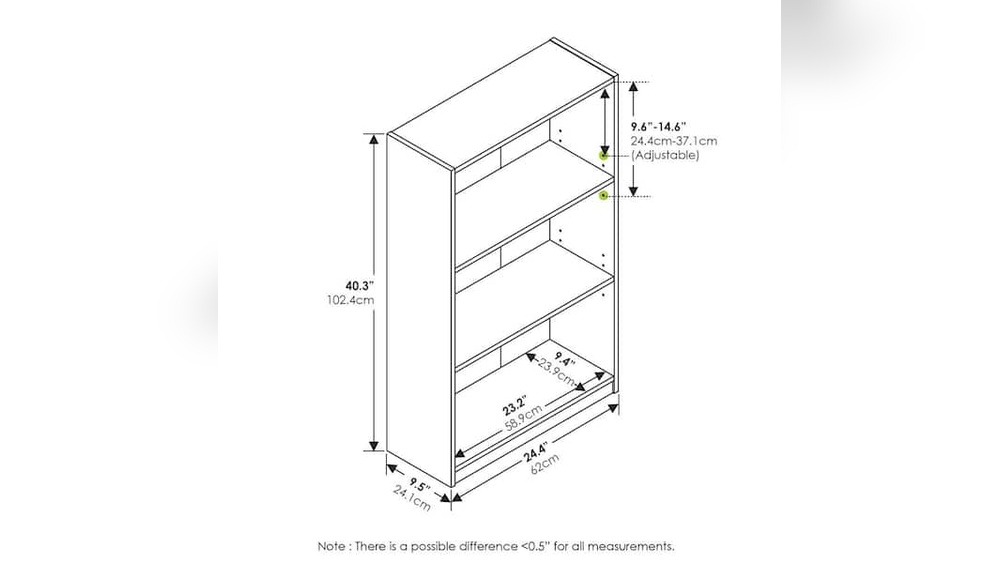
Measuring Your Space
Measure the wall space where you want to hang the shelf. Note the width, height, and depth available. Check for any obstacles like light switches or windows. Accurate measurements help avoid mistakes and wasted time.
Selecting Shelf Dimensions
Pick shelf length based on your wall space and book sizes. Depth should fit most books without crowding or overhang. Height between shelves depends on the tallest books you plan to store. Balance size for function and style.
Preparing The Wood
Preparing the wood is the first step in making a wall hanging bookshelf. It ensures the wood is safe, smooth, and ready to use. Good preparation makes the shelf strong and beautiful. Take your time to do this right for the best result.
Cutting To Size
Start by measuring the wood carefully. Mark the wood pieces you need. Use a saw to cut the wood to the right size. Straight cuts help the shelf look neat. Always wear safety gear while cutting.
Sanding And Smoothing
After cutting, sand the wood with sandpaper. This removes rough edges and splinters. Sand until the surface feels smooth to touch. Smooth wood helps paint or finish stick better. Use fine-grit sandpaper for the best finish.
Applying Finish Or Paint
Choose a finish or paint that fits your style. Use a brush to apply thin, even coats. Let each coat dry fully before adding another. Finish protects the wood and makes it last longer. Paint adds color and makes the shelf stand out.
Assembling The Shelf
Assembling the wall hanging bookshelf is a key step in your project. It transforms raw wood pieces into a functional and stylish shelf. This stage requires care and precision to ensure a strong build that lasts.
Start by organizing all parts and tools. Clear space helps keep the process smooth. Follow each step carefully to avoid mistakes. Focus on joining, securing, and stabilizing the shelves for the best results.
Joining Techniques
Use wood glue for strong bonds between pieces. Apply glue evenly on the edges before pressing them together. Reinforce joints with nails or screws for extra strength. Pre-drill holes to prevent wood from splitting. Choose dowels or biscuits for clean, hidden joints. Clamp pieces tightly until the glue dries. Solid joints keep the shelf sturdy over time.
Securing Shelves
Attach shelves firmly to the frame using screws. Measure and mark spots to keep shelves level. Drive screws carefully, avoiding damage to the wood. Use brackets if extra support is needed. Check each shelf holds weight without wobbling. Proper securing prevents sagging and accidents.
Ensuring Stability
Check the shelf for any wobble or imbalance. Adjust screws or add braces to fix movement. Use wall anchors to hold the shelf safely on the wall. Make sure the shelf sits flush and straight. Stability protects your books and wall from damage. A steady shelf looks professional and lasts longer.
Mounting The Bookshelf
Mounting the bookshelf on the wall is a key step. It keeps your books safe and your space tidy. Proper mounting also ensures the shelf stays strong and stable over time. Follow these steps carefully to make sure your wall hanging bookshelf is secure and looks great.
Locating Wall Studs
Find the studs behind your wall. Studs are wooden beams that hold weight well. Use a stud finder tool for accuracy. Move the tool slowly across the wall. Mark the stud spots with a pencil. Mounting the shelf on studs gives strong support. Avoid drywall alone; it cannot hold heavy weight.
Using Anchors And Screws
Choose anchors and screws that fit your wall type. For drywall without studs, use wall anchors. Insert anchors into drilled holes. Push screws into anchors securely. If mounting on studs, screws alone work well. Use screws long enough to hold the shelf firmly. Tighten screws but do not overdo it. Over-tightening may damage the wall or shelf.
Leveling The Shelf
Place the shelf on the mounting points. Use a level tool to check if it is straight. Adjust the shelf until it is perfectly horizontal. Mark screw spots if needed. Tighten all screws slowly while checking the level. A level shelf looks neat and prevents books from sliding off.
Decorating And Styling
Decorating and styling a wall hanging bookshelf is a fun way to make your space unique. This step brings your personality into the room. You can mix books with art and small plants for a fresh look. Styling is about balance and color. It also means making your shelf neat and inviting.
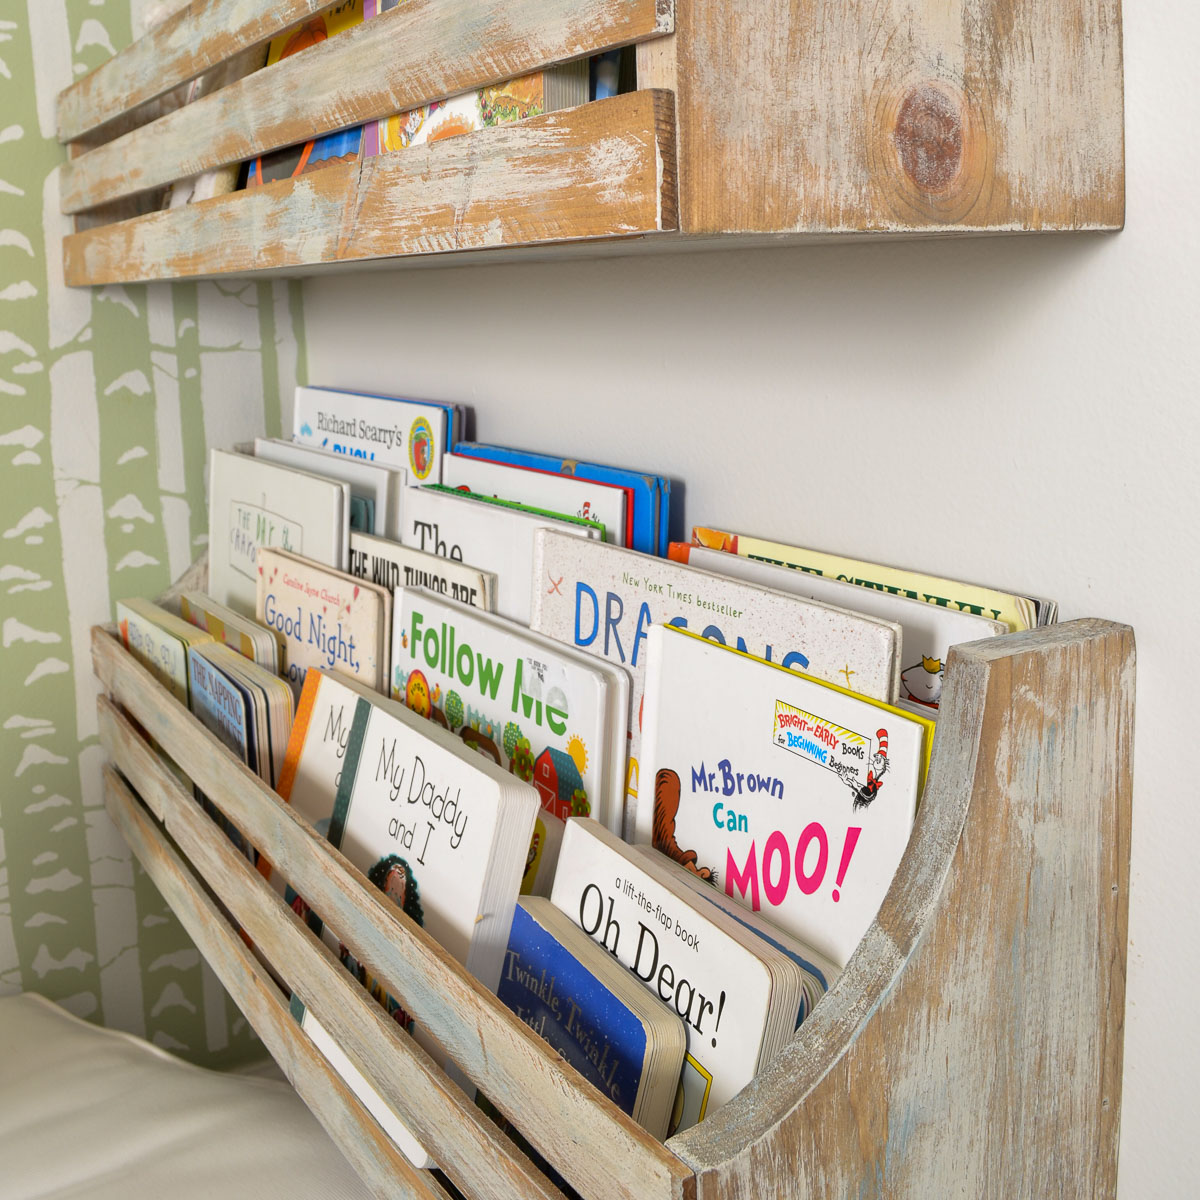
Arranging Books
Place books vertically and horizontally for variety. Stack some books to create different heights. Group books by color or size for a clean look. Keep favorite books within easy reach. Avoid overcrowding to keep the shelf tidy.
Adding Decorative Items
Use small plants to add green and life. Add framed photos or small art pieces for interest. Use candles or small sculptures to add texture. Keep decorations simple to avoid clutter. Leave some empty space for a balanced feel.
Maintaining The Shelf
Dust the shelf regularly to keep it clean. Check for loose screws or weak spots. Remove items that no longer fit your style. Re-arrange books and decor to refresh the look. Keep the shelf organized to enjoy it fully.
Common Mistakes To Avoid
Making a wall hanging bookshelf is a fun project. Many people make mistakes that cause problems. Avoiding these common errors helps keep your shelf safe and strong. It also makes your work look better. Here are some key mistakes to watch out for.
Overloading The Shelf
Putting too many books or heavy items on your shelf can cause it to fall. Each shelf has a weight limit. Do not ignore this limit. Spread out your items evenly. Use lighter objects if you want to display many things.
Ignoring Wall Type
Different walls need different supports. Drywall, brick, and concrete all require special anchors. Using the wrong support can cause the shelf to fall. Check your wall type before hanging. Choose the right screws and anchors for your wall.
Skipping Safety Checks
Not checking your work can lead to accidents. Always test the shelf’s strength before loading it. Use a level to make sure it is straight. Tighten all screws and bolts firmly. These steps protect your shelf and your home.
Credit: refreshliving.us
Frequently Asked Questions
What Materials Are Needed For A Wall Hanging Bookshelf?
You need wood boards, brackets, screws, wall anchors, a drill, a level, and paint or stain. These materials ensure a sturdy and attractive bookshelf.
How Do I Safely Mount A Wall Hanging Bookshelf?
Locate wall studs using a stud finder. Use appropriate anchors and screws to secure brackets. Always double-check level alignment before drilling.
Can I Customize The Size Of My Bookshelf?
Yes, you can adjust the length and width of the wood boards. Customize based on available wall space and book collection size.
What Type Of Wood Is Best For Wall Hanging Bookshelves?
Pine, oak, and plywood are popular choices. They offer strength, durability, and a good finish for various decor styles.
Conclusion
Creating a wall hanging bookshelf adds charm and space to any room. It saves floor space and keeps books organized. You only need a few tools and some patience. The project is simple and fun to do at home. Try different designs that match your style.
Enjoy your new shelf and the neat look it brings. Keep your books close and your walls stylish. This DIY project suits beginners and experts alike. Give it a try today and see the difference.