Looking for a stylish way to showcase your favorite books while saving floor space? A wall hanging bookshelf might be just what you need.
Imagine having a unique piece that not only holds your books but also adds charm to your room. You don’t have to be a woodworking expert to create one. In this guide, you’ll discover simple steps to make your own wall hanging bookshelf that fits your style and space perfectly.
Ready to turn your wall into a stunning display? Let’s get started!
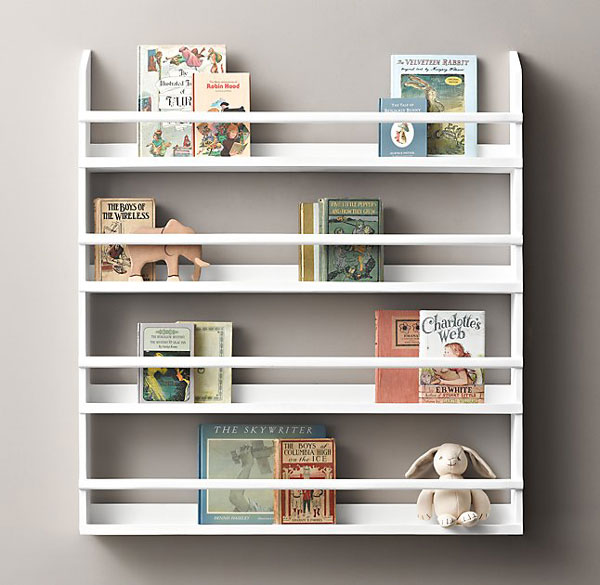
Credit: createdbyv.com
Choosing Materials
Choosing the right materials is a key step in making a wall hanging bookshelf. The materials affect the shelf’s strength, look, and durability. Good choices make the project easier and the results better. Consider wood, hardware, and finishes carefully.
Selecting Wood Types
Wood is the main material for your bookshelf. Pine is a softwood that is easy to cut and affordable. Oak is harder and lasts longer, but it costs more. Plywood offers a smooth surface and resists warping. Choose wood that matches your style and budget. Check for straight boards without cracks.
Picking The Right Hardware
Hardware holds the shelf on the wall safely. Use strong brackets or hidden mounts. Screws must fit the wall type, like drywall or studs. Metal brackets are sturdy and simple to install. Make sure all hardware parts support the weight of books. Safety is important to avoid falls.
Choosing Finishes And Paints
Finishes protect the wood from damage and moisture. Clear varnish keeps the natural look and adds shine. Paint lets you add color and match room decor. Use water-based paints for easy cleanup and less smell. Sand the wood before finishing for a smooth surface. Let each coat dry fully.
Tools You’ll Need
Before starting your wall hanging bookshelf project, gather all the tools you need. Having the right tools helps you work faster and better. It also keeps the project safe and fun. Here are the main tools you will use.
Basic Hand Tools
Start with simple hand tools. A tape measure helps you get exact sizes. Use a pencil to mark your wood. A carpenter’s square checks your corners are straight. A hammer drives nails carefully. Sandpaper smooths rough edges. These tools are easy to find and use.
Power Tools For Efficiency
Power tools save time and effort. A drill makes holes fast and clean. Use a circular saw to cut wood pieces evenly. A screwdriver bit helps to tighten screws quickly. If you have a jigsaw, it can cut curves for design. These tools make the work smooth and neat.
Safety Equipment
Safety must come first. Wear safety glasses to protect your eyes from dust. Use earplugs to reduce loud noise from power tools. A dust mask stops you from breathing sawdust. Work gloves protect your hands from splinters. Keep a first aid kit nearby for small cuts.
Designing Your Bookshelf
Designing your wall hanging bookshelf is the first step to a beautiful and useful piece. This part lets you plan how it will look and fit your space. A good design makes sure your shelf holds books safely and looks great on your wall.
Deciding Shelf Dimensions
Start by measuring the wall space where the shelf will hang. Decide how wide and tall the shelf should be. Think about the size of your books and how many you want to store. Leave some space for bigger books or decorations.
Keep the depth of the shelf enough to hold books without them falling. Usually, 8 to 12 inches works well. Choose dimensions that balance storage and wall space.
Sketching Your Layout
Draw a simple sketch of your bookshelf design on paper. Mark the shelves and their distances from each other. This helps you see how the shelf looks before building.
Use a ruler to keep lines straight and neat. Add notes about shelf sizes and materials. This plan guides you during the building process.
Customizing For Your Space
Think about your room’s style and colors. Choose a design that fits the room’s look. You can add shapes or extra shelves for a unique touch.
Make sure the shelf does not block windows, lights, or switches. Adjust your design to fit these needs. This makes your shelf both pretty and practical.
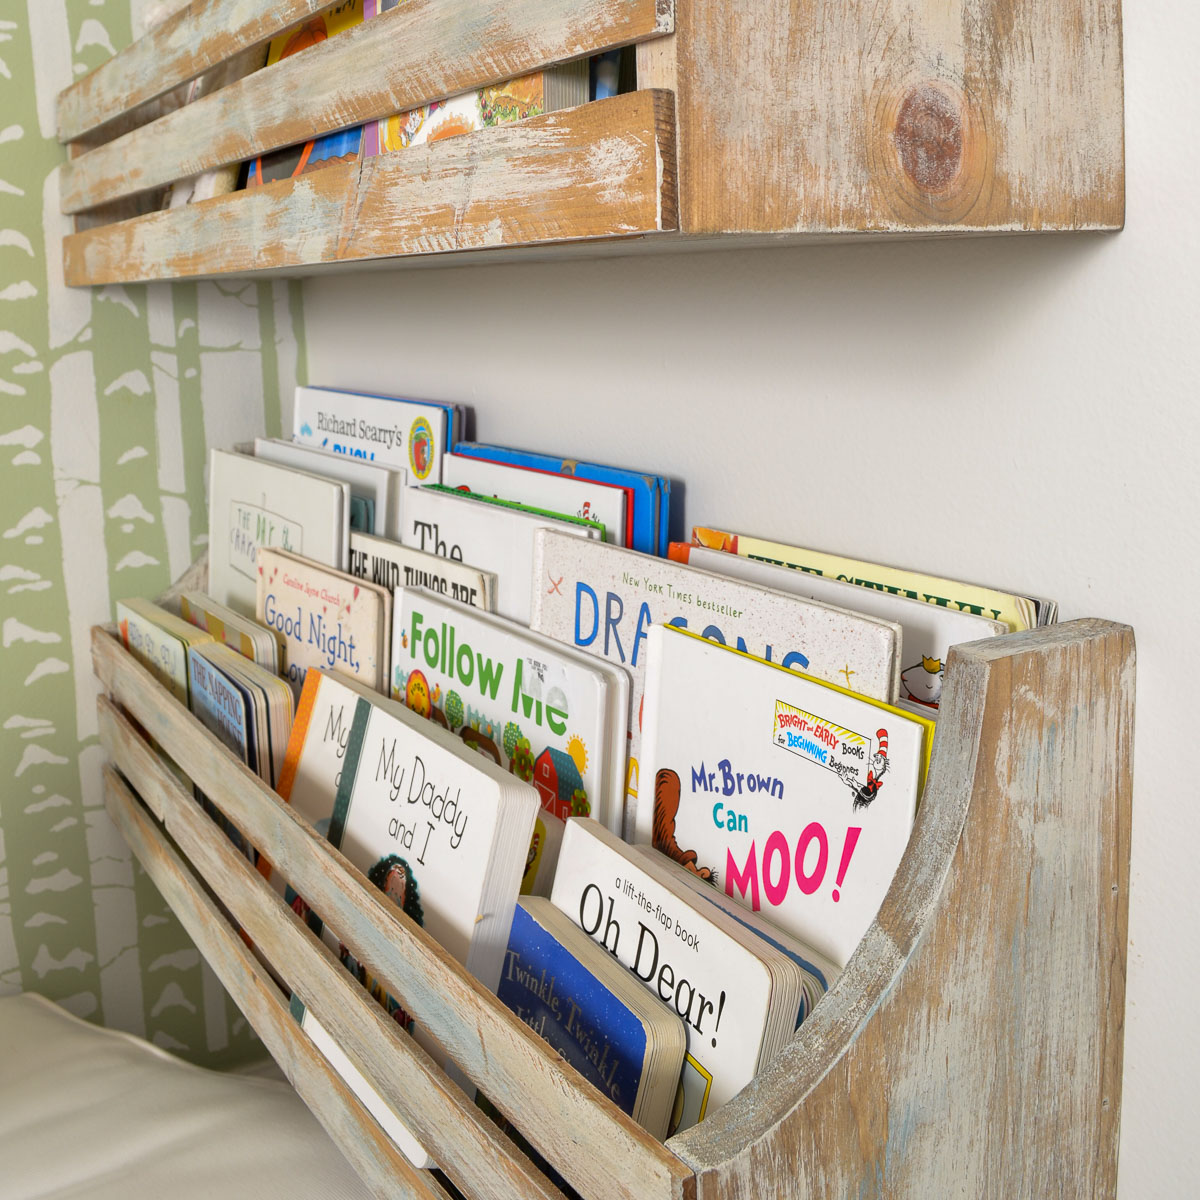
Credit: refreshliving.us
Cutting And Preparing Wood
Cutting and preparing wood is a key step in making a wall hanging bookshelf. It sets the base for a strong and neat shelf. Taking your time here saves effort later. Work carefully and follow each step closely.
Measuring And Marking
Start by measuring the wood pieces you need. Use a tape measure for accuracy. Mark the cut lines with a pencil. Check twice before cutting. Clear marks help you cut straight and avoid mistakes.
Cutting Techniques
Choose the right saw for your wood type. A handsaw works well for small cuts. For longer or straight cuts, use a circular saw. Cut slowly and follow your marks closely. Keep your hands steady and safe during cutting.
Sanding And Smoothing
After cutting, sand the edges to remove rough spots. Use medium-grit sandpaper first. Then, finish with fine-grit for smoothness. Sand in the wood grain direction. Smooth edges prevent splinters and give a clean look.
Assembling The Shelf
Assembling the wall hanging bookshelf is an important step. It brings all parts together. Careful assembly ensures the shelf looks great and holds books safely. Follow clear steps for a strong, neat shelf.
Joining Pieces Securely
Start by aligning the wood pieces carefully. Use wood glue on the edges for a tight bond. Clamp the pieces together to keep them in place. Drill pilot holes before screwing to avoid splitting. Use screws that fit the wood thickness. Tighten screws enough to hold parts firmly.
Attaching Support Brackets
Pick sturdy metal brackets for support. Position brackets under the shelf edges. Mark drill holes on the wall and shelf. Drill holes and insert wall anchors if needed. Screw brackets to the shelf and the wall. Check brackets are flush and hold tightly.
Ensuring Stability
Test the shelf by pressing gently on top. It should not wobble or tilt. Tighten any loose screws or brackets. Use a level to check the shelf is straight. Add extra support brackets for larger shelves. A stable shelf holds books safely over time.
Finishing Touches
Finishing touches bring your wall hanging bookshelf to life. These final steps improve its look and protect it. They make your project feel complete and ready to use.
Small details create a big impact. Focus on paint, decorations, and surface protection. These actions help your shelf last longer and fit your style.
Applying Paint Or Stain
Choose paint or stain to match your room’s style. Paint gives bright colors and covers wood grain. Stain shows the wood’s natural beauty.
Use smooth, even strokes with a brush or sponge. Apply thin coats for better results. Let each coat dry fully before the next.
Adding Decorative Elements
Add small decorations to make your shelf unique. Use stencils, decals, or hand-painted designs. Attach small hooks or metal accents for extra flair.
Keep decorations simple and neat. They should enhance, not overpower, the shelf’s look. Choose items that match your room’s theme.
Protecting The Surface
Apply a clear sealant to protect paint or stain. Use a polyurethane or varnish made for wood. This layer guards against scratches and moisture.
Apply sealant in thin layers and let dry completely. Sand lightly between coats for a smooth finish. This step helps your shelf stay beautiful for years.
Mounting On The Wall
Mounting your wall hanging bookshelf is a key step. It keeps your shelf safe and steady. Proper mounting stops accidents and damage. Follow simple steps to make your shelf strong on the wall. This part explains how to find the right spots and secure the shelf well.
Finding Studs And Anchors
Studs are wooden beams behind the wall. They hold heavy items better than drywall alone. Use a stud finder tool to locate them. Move the finder slowly over the wall. Mark the spots where it beeps or shows metal. If no studs are in the right place, use wall anchors. Anchors spread the weight and hold screws firmly in drywall.
Leveling And Positioning
Mark the position of your shelf on the wall. Use a pencil and a tape measure to get it right. Place a level on the marks. Adjust until the bubble is centered. This keeps the shelf straight. A crooked shelf looks bad and can cause books to fall. Double-check all marks before drilling holes.
Securing The Shelf Safely
Drill pilot holes in the marked spots. Use screws that fit your anchors or studs. Screw the brackets or shelf mounts tightly. Avoid over-tightening, which can damage the wall or shelf. Test the shelf by pressing gently to check stability. Add more support if needed. Safety matters most for wall-mounted shelves.

Credit: www.youtube.com
Styling Your Bookshelf
Styling your wall hanging bookshelf makes it more than just a storage space. It becomes a part of your room’s personality. A well-styled shelf invites you and your guests to explore and enjoy. Simple touches can change the whole look and feel.
Arranging Books Creatively
Place books both vertically and horizontally. Stack some books flat to create visual interest. Mix tall and short books for variety. Group books by color or theme to create a neat look. Leave some space around books to avoid clutter.
Incorporating Decorative Items
Add small plants or succulents for a fresh touch. Use photo frames or small art pieces to personalize. Include objects like candles, vases, or collectibles. These items break the monotony of books. They add charm and character to your shelf.
Maintaining Balance And Flow
Distribute books and decor evenly across the shelf. Avoid overcrowding any single section. Keep a mix of heavy and light items for balance. Make sure there is a clear view of each item. This keeps the shelf looking neat and inviting.
Frequently Asked Questions
What Materials Do I Need For A Wall Hanging Bookshelf?
You need wood boards, screws, wall anchors, a drill, sandpaper, paint or stain, and a level. Choose sturdy wood for durability and style.
How Do I Securely Mount A Wall Hanging Bookshelf?
Locate wall studs using a stud finder. Use appropriate screws and anchors to ensure the shelf supports weight safely. Double-check with a level.
Can I Customize The Size Of My Bookshelf?
Yes, measure your available wall space first. Cut wood boards to desired dimensions. Custom sizes fit your room and storage needs perfectly.
How Long Does It Take To Build A Wall Hanging Bookshelf?
It typically takes 2 to 4 hours, depending on your experience and shelf complexity. Allow extra time for drying paint or stain.
Conclusion
Creating a wall hanging bookshelf adds style and space to any room. You only need a few tools and some patience. Follow the steps carefully, and you will have a unique shelf to display your books. It also keeps your room tidy and organized.
This simple project suits beginners and can be done in a few hours. Try customizing it with your favorite colors or designs. Enjoy your new shelf and the extra space it provides. Keep practicing, and your DIY skills will grow.