Are you tired of searching for the perfect bookshelf that fits both your space and style? Imagine having a sturdy, stylish Amaxong bookshelf that you built yourself—customized exactly how you want it.
In this guide, you’ll discover simple, step-by-step instructions to create your own Amaxong bookshelf without any hassle. Whether you’re a beginner or just looking for a fresh project, this article will help you turn plain wood into a beautiful, functional piece.
Keep reading, and by the end, you’ll be ready to build a bookshelf that impresses everyone and organizes your space perfectly.
Materials Needed
Building an Amaxong bookshelf starts with gathering the right materials. Choosing quality items makes the project easier and the final product strong. Knowing what you need saves time and avoids extra trips to the store.
This section lists the materials and tools required. It helps prepare you fully before starting the work.
Wood Selection
Select wood that is strong and smooth. Pine, oak, or plywood are good choices. Pine is cheaper and easy to cut. Oak is harder and lasts longer. Plywood offers a smooth finish and is stable. Measure the size of shelves before buying wood.
Tools Required
Prepare basic woodworking tools. A saw cuts the wood to size. A drill makes holes for screws. Sandpaper smooths rough edges. A screwdriver tightens screws. A tape measure ensures accurate cuts. A level keeps shelves straight and balanced.
Additional Supplies
Buy screws that fit your wood thickness. Wood glue adds extra strength. Wood filler hides nail holes and cracks. Paint or stain finishes the bookshelf. Brushes or rags apply the finish. Safety gear like gloves and goggles protects you during work.
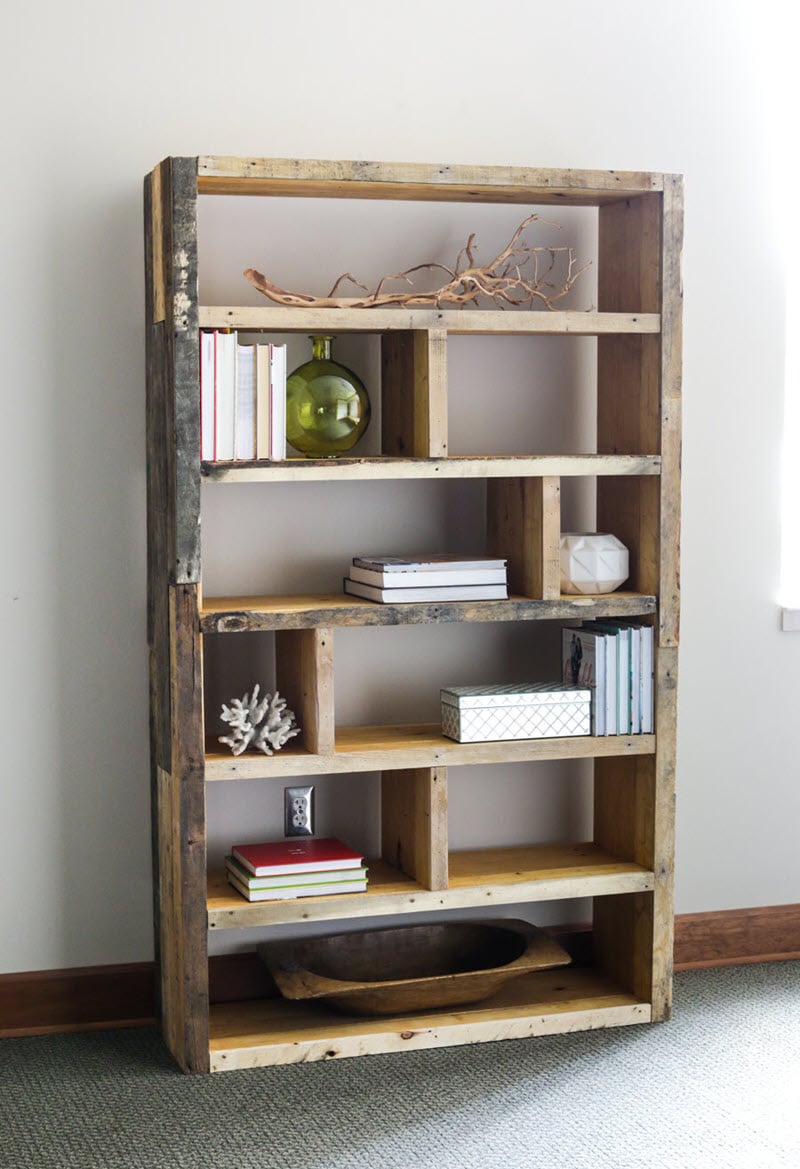
Credit: jenwoodhouse.com
Design Planning
Design planning is the first step to build an Amazon bookshelf. It helps organize ideas and ensures the bookshelf fits perfectly. Careful planning saves time and materials. Each detail matters for a strong, useful shelf.
Focus on the space, size, and shape. Plan the layout to balance style and function. This makes the building process smooth and stress-free.
Measuring Space
Measure the area where the bookshelf will go. Use a tape measure for accuracy. Measure height, width, and depth carefully. Note any obstacles like outlets or vents. Write down all measurements clearly. Double-check to avoid mistakes later.
Choosing Dimensions
Choose bookshelf dimensions based on your space and needs. Think about how many books you want to store. Pick a height that fits the room well. Decide on shelf depth to hold larger books. Keep proportions balanced for a neat look. Consider leaving some extra space for future items.
Sketching The Layout
Draw a simple sketch of your bookshelf design. Use paper or a digital tool. Mark the overall size and shelf positions. Show where each shelf will go. Add notes about materials or special features. This helps visualize the final product. Use the sketch as a guide during building.
Cutting The Wood
Cutting the wood is the first step in building your Amaxong bookshelf. This step shapes the pieces that will form your bookshelf. Accurate cutting ensures the shelf fits together well and stays sturdy. Take your time to measure and cut carefully. Proper preparation here makes assembly easier and safer.
Marking Measurements
Start by measuring each piece of wood carefully. Use a tape measure for accuracy. Mark the lines with a pencil where you need to cut. Double-check your measurements before cutting. Clear, straight lines help guide your saw. Mark all pieces before moving to the next step.
Safe Cutting Techniques
Wear safety goggles to protect your eyes. Use clamps to hold the wood steady on your work surface. Always cut away from your body. Use a saw suited for your wood type and thickness. Keep your hands clear of the blade. Take slow, steady cuts to avoid mistakes and injuries.
Assembling The Frame
Assembling the frame is the key step in building your Amaxong bookshelf. It creates the basic structure to hold shelves and books. Take your time to make sure each part fits well. A strong frame ensures the bookshelf will last long and hold heavy books safely.
Joining The Pieces
Start by aligning the vertical and horizontal wooden pieces. Check that corners meet at right angles. Use clamps to hold pieces in place for easier joining. Make sure all pieces are flush to avoid gaps. This step sets the foundation for a solid frame.
Using Screws And Nails
Choose screws for stronger joints and nails for quick fixes. Pre-drill holes to stop the wood from splitting. Drive screws straight in to keep the frame tight. Use nails where screws are not needed. This mix keeps the frame sturdy and secure.
Ensuring Stability
Check the frame for wobbling after assembly. Tighten screws if any part feels loose. Add corner braces if extra support is needed. Place the frame on a flat surface to test balance. Stability keeps your bookshelf safe and reliable.
Adding Shelves
Adding shelves is an important step in building your Amaxong bookshelf. Shelves hold your books and decorations. Proper placement and strong support make the shelf safe and useful. This section guides you through spacing and securing shelves with clear steps.
Spacing The Shelves
Measure the height of your books before placing shelves. Leave extra space for tall books or decorations. Use a pencil to mark shelf positions on the side panels. Keep shelves evenly spaced for a neat look. Adjust spacing based on what you plan to store.
Securing The Boards
Use screws or brackets to hold shelves firmly in place. Drill pilot holes to prevent wood from splitting. Attach shelves to side panels using screws or strong brackets. Check that shelves are level before tightening screws. This ensures your bookshelf stays sturdy and lasts long.
Finishing Touches
Finishing touches give your Amaxong bookshelf a polished look. They protect the wood and improve its appearance. These steps help your bookshelf last longer and look great in any room. Focus on sanding, painting or staining, and sealing for the best results.
Sanding Surfaces
Start by sanding all wood surfaces smoothly. Use fine-grit sandpaper for a soft finish. Sand along the grain to avoid scratches. Remove all dust with a dry cloth before moving to the next step. Smooth surfaces help paint and stain stick better.
Painting Or Staining
Choose paint or stain based on your room’s style. Paint offers bright colors and covers imperfections well. Stain shows the wood’s natural beauty with rich tones. Apply evenly using a brush or cloth. Let each coat dry fully before adding another layer.
Sealing For Durability
Seal the bookshelf to protect it from damage. Use a clear wood sealer or varnish. Apply thin coats and allow drying time between each. Sealing prevents moisture, scratches, and fading. It keeps your bookshelf looking new for years.
Installation Tips
Installing your Amaxong bookshelf correctly ensures it lasts long and stays sturdy. Careful setup also keeps your space safe and neat. Follow these installation tips to place and secure your bookshelf properly.
Positioning The Bookshelf
Choose a flat, stable floor area for the bookshelf. Avoid spots near heaters or windows. Direct sunlight can fade the wood or material over time. Leave some space around the bookshelf for air flow. This helps prevent moisture buildup and damage. Place the bookshelf where it is easy to reach your books. Make sure it does not block doors or walkways.
Anchoring For Safety
Always anchor your bookshelf to the wall. This prevents it from tipping over, especially in homes with children or pets. Use strong brackets or straps designed for furniture anchoring. Find wall studs using a stud finder before drilling. Screw anchors firmly into the studs for best support. Double-check the stability after installation. A secure bookshelf protects your books and your family.
Credit: jenwoodhouse.com
Maintenance Advice
Maintaining your Amaxong bookshelf keeps it looking new and sturdy. Proper care extends its life and keeps your books safe. Small efforts every week can prevent big problems later.
Cleaning Techniques
Dust the bookshelf often with a soft cloth. Use a dry or slightly damp cloth to remove dirt. Avoid harsh chemicals that may damage the wood or finish. Clean spills immediately to stop stains. For deep cleaning, use mild soap and water, then dry quickly.
Preventing Damage
Keep the bookshelf away from direct sunlight to avoid fading. Avoid placing heavy items on thin shelves to prevent bending. Use coasters under plants or decorations to stop water rings. Check screws and joints regularly and tighten if loose. Place the bookshelf on a flat surface to keep it stable.

Credit: www.amazon.com
Frequently Asked Questions
What Materials Are Needed To Make Amaxong Bookshelf?
To build an Amaxong bookshelf, you need plywood, screws, wood glue, sandpaper, paint or stain, and brackets. A saw and drill are also essential tools for cutting and assembling.
How Long Does It Take To Build Amaxong Bookshelf?
Building an Amaxong bookshelf typically takes 4 to 6 hours. This depends on your skill level and preparation. Careful measuring and assembly help speed up the process.
Can I Customize Amaxong Bookshelf Size?
Yes, you can customize the size of an Amaxong bookshelf. Adjust the dimensions of wood panels to fit your space and storage needs. Customization ensures a perfect fit.
What Finish Options Suit Amaxong Bookshelf?
Amaxong bookshelves look great with paint, stain, or clear varnish. Choose finishes that match your room decor and protect the wood. Proper finishing extends shelf durability.
Conclusion
Making your Amaxong bookshelf is a fun and useful project. You just need some basic tools and materials. Follow the steps carefully to build a sturdy shelf. Take your time and measure twice before cutting. A handmade bookshelf adds charm to any room.
You can customize it to fit your space perfectly. Enjoy the satisfaction of creating something with your own hands. Now, your books have a new home that you built yourself. Simple, practical, and rewarding.