Are you tired of cluttered spaces and books stacked everywhere? Imagine having a bookshelf that fits perfectly in your room and adjusts to your needs.
Making a bookshelf with adjustable shelves gives you the power to organize your books, decorations, and essentials exactly how you want. In this guide, you’ll discover simple steps to build your own custom bookshelf that grows with your collection. Ready to turn your space into a neat, stylish haven?
Let’s dive in and make it happen!
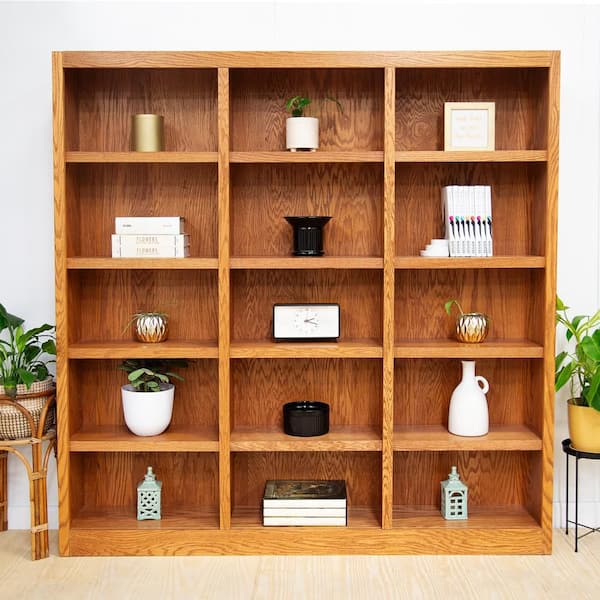
Credit: www.homedepot.com
Materials And Tools Needed
Building a bookshelf with adjustable shelves needs careful planning. The right materials and tools make the process smooth and safe. You need wood that fits your style and tools that help you work easily. Gathering all supplies before starting saves time and avoids interruptions.
Choosing The Right Wood
Select wood that is strong and easy to work with. Pine and plywood are popular choices. Pine is soft and cuts smoothly. Plywood is stable and resists warping. Choose wood with smooth surfaces to reduce sanding. Avoid wood with many knots or cracks. Measure the wood thickness to fit shelf pins.
Essential Tools List
Use basic tools for cutting and assembling the bookshelf. A saw, such as a circular or hand saw, cuts wood pieces. A drill makes holes for screws and shelf pins. Screwdrivers tighten screws securely. A level ensures shelves stay straight. Sandpaper smooths rough edges. A tape measure helps with accurate cuts. Clamps hold wood while gluing or screwing.
Additional Supplies
Besides wood and tools, get screws and shelf pins. Wood glue adds strength to joints. Shelf pins or pegs support the adjustable shelves. Use wood filler to cover holes or gaps. Finish with paint or varnish for protection and looks. Safety gear like gloves and goggles protects you during work.
Planning Your Bookshelf
Planning your bookshelf is the first step to a successful project. This stage helps you avoid mistakes and saves time. Good planning makes sure your bookshelf fits the space and meets your needs. Focus on careful measurements and clear design ideas.
Measuring The Space
Start by measuring the wall or area where the bookshelf will go. Use a tape measure for accurate results. Note the height, width, and depth available. Check for obstacles like power outlets or vents. Write down all dimensions before buying materials.
Designing Adjustable Shelves
Adjustable shelves let you change shelf height anytime. Decide how many shelves you want and their max load. Plan shelf brackets or holes for shelf pins. Choose shelf thickness based on what you will store. Keep shelf depth enough for your books or items.
Sketching Your Blueprint
Draw a simple sketch of your bookshelf on paper. Include all measurements from your space. Mark where adjustable shelves will go. Show the placement of supports and brackets. This blueprint guides you during building and helps avoid errors.
Cutting The Wood Pieces
Cutting the wood pieces is the first important step in building your adjustable bookshelf. Precise cuts ensure the shelves fit perfectly and hold weight safely. Take your time measuring and cutting each piece carefully.
Marking Measurements
Start by measuring the wood with a tape measure. Mark each length clearly using a pencil. Double-check the marks to avoid mistakes. Use a square tool to draw straight lines across the wood. Clear marks guide your saw and make cutting easier.
Safe Cutting Techniques
Wear safety glasses and gloves before cutting. Place the wood on a stable surface or sawhorse. Use a saw that fits your skill level, such as a handsaw or circular saw. Cut slowly along the marked line. Keep your fingers away from the blade. Stop if the saw feels stuck, then adjust before continuing.
Preparing Shelf Supports
Cut smaller pieces of wood for shelf supports. These pieces hold the shelves in place and allow adjustment. Measure the support length to fit inside the bookshelf frame. Cut several supports to match the number of shelves planned. Sand the edges to remove splinters for smooth assembly.
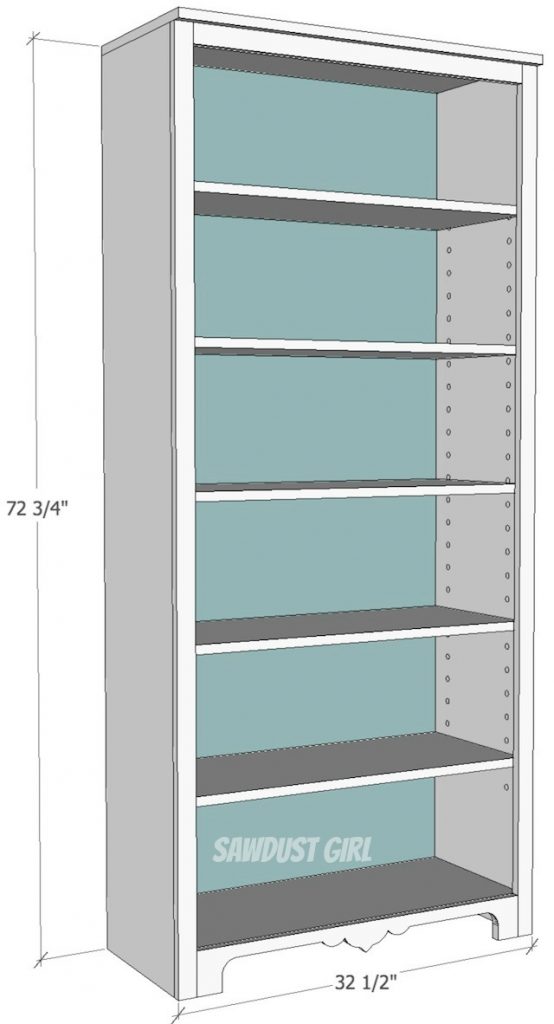
Credit: sawdustgirl.com
Assembling The Frame
Assembling the frame is the first key step in building your bookshelf with adjustable shelves. This part creates the basic structure that holds everything together. Follow each step carefully for a strong and steady frame. Use the right tools and materials to ensure a smooth build.
Joining Side Panels
Start by preparing the side panels. These panels form the vertical sides of your bookshelf. Align them properly before joining. Use wood glue along the edges for extra hold. Secure the panels with screws or nails. Check that the panels stand straight and parallel.
Attaching Top And Bottom
Next, attach the top and bottom pieces. These parts connect the side panels and add strength. Position the top piece flush with the sides. Do the same for the bottom piece. Use screws to fix them firmly in place. Make sure all corners meet at right angles.
Ensuring Stability
Stability is crucial for a safe bookshelf. Check the frame for any wobbling or gaps. Add corner braces or wooden blocks inside the corners. Tighten all screws and reinforce weak spots. Place the frame on a flat surface to test balance. A solid frame supports adjustable shelves well.
Installing Adjustable Shelves
Installing adjustable shelves lets you customize your bookshelf easily. You can change shelf height to fit books and items of different sizes. This flexibility makes your bookshelf more useful and neat. Follow these steps to install adjustable shelves correctly.
Drilling Shelf Pin Holes
Measure and mark spots for shelf pin holes on the side panels. Use a ruler or tape measure for even spacing. Drill holes with a drill bit that fits your shelf pins. Drill straight and steady to keep holes aligned. Drill holes in pairs on both sides for each shelf level.
Inserting Shelf Pins
Push the shelf pins gently into the drilled holes. Make sure pins fit snugly and hold firm. Pins should be level on both sides to support shelves well. Check that pins do not wobble or fall out easily. Proper pin placement ensures shelves stay stable and safe.
Placing And Adjusting Shelves
Set the shelves on top of the inserted pins carefully. Adjust the shelf height by moving pins up or down. Make sure shelves sit flat and do not tilt. Test shelf strength by placing light items first. Adjust as needed for perfect fit and balance.
Finishing Touches
The finishing touches turn your bookshelf into a polished piece. They protect the wood and improve its look. Taking time on these steps makes your bookshelf last longer. These simple actions create a smooth, clean, and attractive finish.
Sanding Surfaces Smooth
Sanding removes rough spots and splinters on the wood. Use fine-grit sandpaper for a soft, even surface. Sand along the wood grain to avoid scratches. Wipe dust off with a dry cloth before moving on. Smooth surfaces help paint or stain stick better.
Applying Paint Or Stain
Choose paint or stain to match your room style. Use a brush or cloth for even coverage. Apply thin coats to avoid drips and runs. Let each coat dry fully before adding another layer. Paint gives color, while stain shows the wood’s natural beauty.
Adding Protective Coating
A protective layer keeps your bookshelf safe from damage. Use clear varnish, polyurethane, or wax for protection. Apply with a clean brush in thin, even strokes. Let the coating dry well to avoid sticky spots. This step helps the bookshelf resist scratches and moisture.
Tips For Maintenance And Safety
Maintaining and using your bookshelf safely keeps it strong and lasting longer. Follow simple tips to avoid damage and accidents. Regular care protects your investment.
Regular Shelf Adjustment
Check the shelves often. Move them to balance heavy items. Tighten any loose screws or brackets. This stops shelves from sagging or falling.
Weight Distribution Advice
Place heavy books on lower shelves. Spread weight evenly across all shelves. Avoid overloading one side. This prevents tipping and keeps shelves steady.
Securing Bookshelf To Wall
Use wall anchors or brackets to fix the bookshelf. This stops it from tipping forward. Secure it especially if you have children or pets nearby.

Credit: www.youtube.com
Frequently Asked Questions
How Do I Start Making An Adjustable Bookshelf?
Begin by planning the size and design. Gather materials like wood, brackets, and screws. Cut shelves to fit your space.
What Tools Are Needed For Adjustable Shelves?
You need a saw, drill, screwdriver, measuring tape, and level. These tools help cut and assemble shelves accurately.
How To Ensure Shelves Are Stable And Secure?
Use sturdy brackets and anchors. Make sure shelves fit tightly. Check levelness during installation to avoid tilting or slipping.
Can I Customize Shelf Spacing Easily?
Yes, adjustable shelves use movable brackets or holes. This allows you to change shelf height whenever needed.
Conclusion
Building a bookshelf with adjustable shelves gives you great flexibility. You can change the shelf height anytime you need. It fits books, decorations, or anything else easily. This project does not require advanced skills or tools. Taking it step-by-step makes the process clear and simple.
Enjoy a custom bookshelf that suits your space perfectly. Try this DIY to add function and style to your room. It’s a smart way to organize and save space. Start building today and see the difference it makes.
