Are you ready to bring charm and creativity to your dollhouse? Making your own dollhouse bathroom furniture is a fun way to add personality and style to your miniature world.
Whether you want a tiny bathtub, a cozy sink, or a cute cabinet, crafting these pieces yourself lets you customize every detail exactly how you like. In this guide, you’ll discover simple steps and clever tips that make building dollhouse bathroom furniture easy and enjoyable—even if you’re new to DIY projects.
Keep reading, and you’ll soon create beautiful, realistic miniatures that impress and inspire!
Credit: craftivitydesigns.com
Materials Needed
Gathering the right materials is the first step in making dollhouse bathroom furniture. Choose items that are easy to work with and fit the miniature scale. Select tools and supplies that help create detailed, realistic pieces. Use common household items and craft supplies for best results.
Organize materials before starting. This saves time and keeps your workspace tidy. Focus on items that match the style and size of your dollhouse bathroom. Prepare a small list to track needed supplies and tools.
Basic Tools
Basic tools make crafting easier and more precise. Include scissors for cutting small pieces cleanly. A craft knife helps with detailed trimming and shaping. Use a ruler to measure tiny parts accurately. Tweezers assist in placing small pieces carefully. A small paintbrush works well for adding color and details.
Recyclable Items
Recyclable items reduce cost and add unique charm. Use small boxes or containers for cabinets and shelves. Bottle caps work well as sinks or tubs. Cardboard pieces can create walls or furniture panels. Plastic lids and straws serve as pipes or faucets. Look around your home for clean, unused items to repurpose.
Specialty Craft Supplies
Specialty supplies help add realism and durability. Polymer clay shapes tiny fixtures like soap dishes or toothbrush holders. Miniature knobs and handles improve furniture detail. Fine sandpaper smooths rough edges on wood or plastic. Acrylic paint provides color and finishes for all pieces. Strong glue bonds different materials firmly and lasts long.
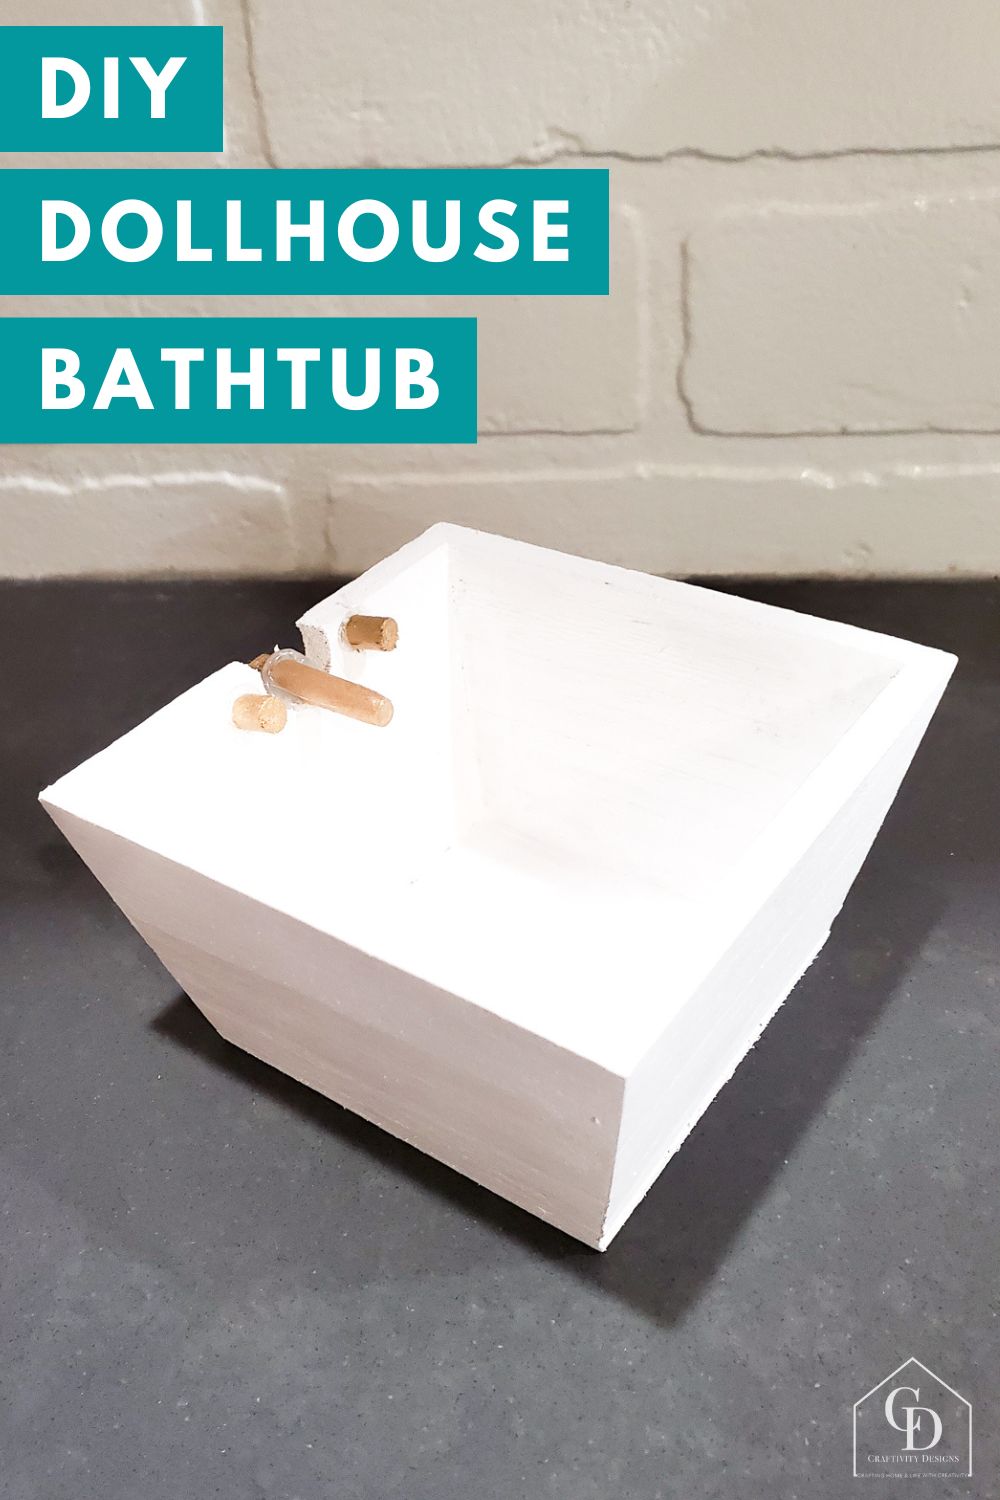
Creating The Bathtub
Creating the bathtub is an important step in making dollhouse bathroom furniture. A well-crafted tub adds charm and realism to your miniature bathroom. It can be simple or detailed, depending on your style and tools. Follow easy steps to shape, texture, and finish a beautiful tiny bathtub that fits perfectly in your dollhouse.
Shaping Techniques
Start with a small block of lightweight clay or foam. Use a craft knife to carve the tub’s basic shape. Smooth the edges carefully with fine sandpaper or your fingers. For a classic tub look, create rounded corners and a slightly curved base. You can also use a small plastic container as a mold. Press the clay into the mold to get a neat shape quickly. Keep the size proportional to your dollhouse scale.
Adding Texture And Details
Texture brings your tub to life. Use a toothpick or needle to add drain holes and faucet holes. Press gently to avoid breaking the shape. For a vintage look, carve small ridges along the rim. You may add tiny soap bars or a faucet made from wire or beads. Use a fine brush to create smooth lines or patterns. These details make the bathtub look more realistic and attractive.
Painting And Finishing
Choose a paint that matches your dollhouse style. White or pastel colors work well for a clean bathroom look. Use acrylic paint for easy application and quick drying. Apply thin layers with a small brush to avoid clumps. Let each layer dry before adding the next. Finish with a clear varnish to give a shiny, water-like effect. This also protects the paint and makes your tub last longer.
Making The Sink And Cabinet
Creating the sink and cabinet for your dollhouse bathroom adds charm and realism. These pieces bring the miniature bathroom to life. They also offer a fun crafting challenge. Follow simple steps to build a sink and cabinet that fit your dollhouse perfectly.
Building The Sink
Start by cutting a small rectangle from a thin piece of wood or sturdy cardboard. This will be the sink basin. Paint it white or a color you like. Use a small round bead or a tiny button for the faucet. Glue it to the back edge of the sink basin. Let everything dry completely before moving on.
Constructing The Cabinet
Measure the space under the sink to decide the cabinet size. Cut four small pieces of wood or thick cardboard for the cabinet sides and bottom. Assemble these pieces with glue to form a box shape. Paint the cabinet in a color that matches your bathroom style. For cabinet doors, cut two thin rectangles and attach them with tiny hinges or glue.
Attaching Fixtures
Glue the sink on top of the cabinet. Make sure it sits flat and stable. Add small knobs or buttons to the cabinet doors as handles. Use thin wire or thread to create water pipes under the sink for extra detail. Allow all parts to dry well before placing your furniture in the dollhouse bathroom.

Credit: www.amazon.com
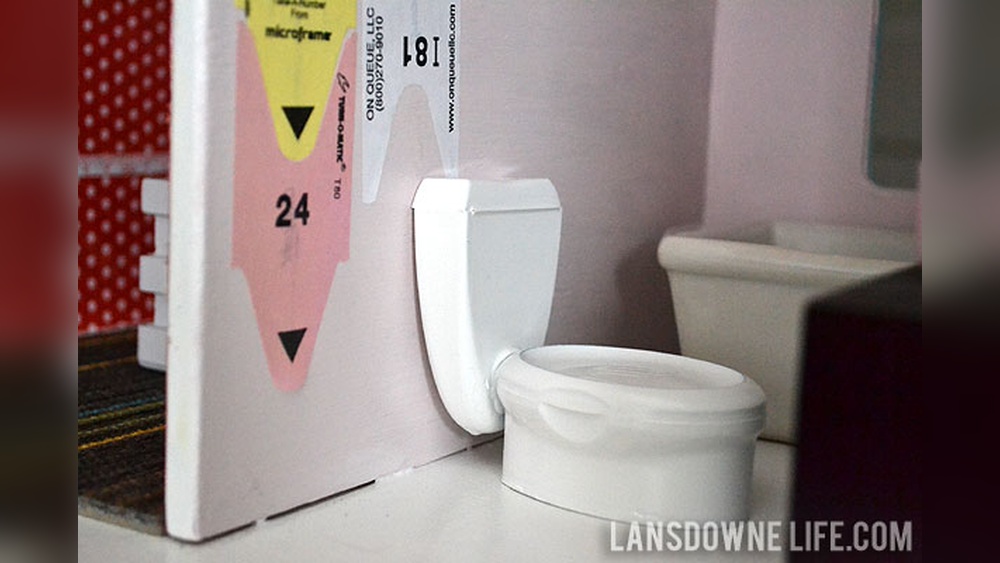
Crafting The Toilet
Crafting the toilet for your dollhouse bathroom adds charm and realism. This small project requires simple materials and a bit of patience. You can make a convincing miniature toilet that fits perfectly in your dollhouse setting. Follow these easy steps to build one from scratch.
Forming The Base
Start by shaping the toilet base. Use white polymer clay or air-dry clay for a smooth finish. Roll a small piece into an oval shape. Flatten the bottom so it sits steady. Pinch the sides gently to make the bowl shape. Let the base dry completely before moving on.
Detailing The Tank And Seat
Create the tank using a small rectangular block of clay or foam. Attach it to the back of the base with glue. For the seat, cut a thin oval from cardboard or plastic. Paint it white or cream for a clean look. Glue the seat on top of the bowl, tilting it slightly open if you want. Add tiny details like a flush handle using a thin wire or a small bead.
Painting Options
Choose paint colors that match your dollhouse style. Glossy white or soft pastels work well for a classic look. Use acrylic paint for quick drying and durability. Add shadows with light gray to show depth. Seal the paint with clear varnish for shine and protection. Let each layer dry before applying the next.
Designing Bathroom Accessories
Designing bathroom accessories for a dollhouse adds charm and realism. Small details make the miniature space inviting and complete. Choose simple materials like cardboard, wood, or clay to create each piece. Focus on scale and color to match the overall style. These tiny items bring life to your dollhouse bathroom.
Shelves And Storage
Shelves hold miniature soaps, bottles, and towels. Use thin strips of wood or sturdy cardboard for shelves. Paint them in soft colors or wood tones. Attach small hooks or knobs to hang tiny baskets or brushes. Storage boxes can be made from matchboxes or small containers. Keep shelves neat and balanced for a tidy look.
Mirrors And Lighting
Mirrors add depth and brightness to the bathroom. Cut a small piece of reflective paper or use a tiny mirror tile. Frame it with painted cardboard or thin wood strips. For lighting, use tiny LED lights or craft small lamps from beads and wires. Position lights near the mirror or ceiling. Soft light makes the space cozy and realistic.
Towels And Small Details
Mini towels add a soft touch. Cut small pieces of fabric and fold them neatly. Roll tiny towels and tie them with thin thread or ribbon. Place them on shelves or hang on hooks. Add small soap bars, toothbrushes, or a tiny bath mat. These small items create a lived-in feel and complete the bathroom look.
Adding Tiles And Flooring
Adding tiles and flooring to your dollhouse bathroom creates a realistic and charming look. This step enhances the miniature space with texture and color. Careful selection and placement of tiles bring the room to life. Let’s explore how to make the flooring perfect for your tiny bathroom.
Choosing Materials
Select materials that fit the dollhouse scale. Thin ceramic tiles, printed paper, or craft foam work well. Choose colors that match your design style. Glossy tiles add shine, while matte finishes give a soft look. Consider durability and ease of cutting too.
Cutting And Arranging Tiles
Measure the floor area before cutting tiles. Use a ruler and sharp craft knife for clean edges. Arrange tiles in patterns like grid, diagonal, or mosaic. Leave small gaps to mimic grout lines. Test the layout before gluing tiles down to avoid mistakes.
Sealing And Finishing
Apply a clear sealant to protect tiles and enhance shine. Use a small brush for even coverage and avoid pooling. Let the sealant dry completely for a smooth finish. Add tiny grout lines with paint or fine markers for realism. This step completes the authentic look of your dollhouse bathroom floor.
Assembling The Furniture
Assembling the dollhouse bathroom furniture is the step where your miniature pieces come to life. This process requires patience and attention to detail. Each part must fit perfectly for a neat, realistic look. Follow simple steps for a smooth assembly.
Dry Fitting Pieces
Start by arranging all parts without glue. Check if each piece fits well together. This step helps avoid mistakes later. Adjust edges or sand rough spots gently. Make sure drawers and doors open easily. Dry fitting saves time and reduces errors.
Gluing And Securing
Use a small amount of strong craft glue. Apply glue carefully on the joints only. Press pieces together firmly and hold for a few seconds. Use clamps or rubber bands to keep parts tight. Let the glue dry fully before moving on. Avoid too much glue to prevent mess.
Final Touches
After glue dries, check the furniture for gaps. Fill gaps with wood filler or putty. Sand smooth once the filler is dry. Paint or stain the pieces as desired. Add tiny knobs or handles for detail. This step makes your furniture look real and polished.
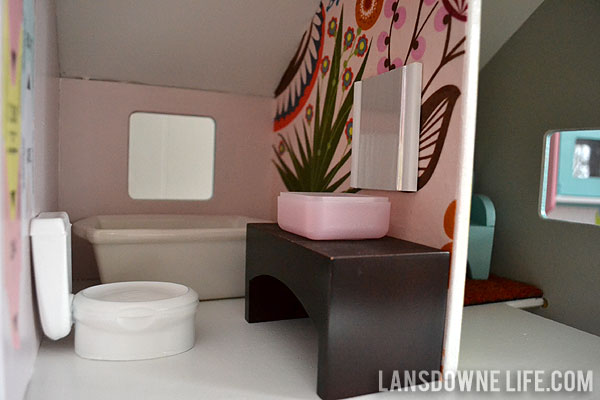
Credit: www.lansdownelife.com
Tips For Realistic Effects
Creating realistic dollhouse bathroom furniture brings your miniature scene to life. Small details make a big difference. These tips help add depth and charm.
Focus on textures, colors, and tiny accessories. Use simple tricks to mimic real bathroom elements. This guide shares practical ideas for authentic effects.
Using Everyday Items Creatively
Look around your home for small objects that mimic bathroom parts. Bottle caps can become sinks or tubs. Toothpicks work well as towel racks or handles.
Buttons can turn into knobs or soap bars. Matchsticks make excellent wooden slats for shelves. Repurpose plastic lids for mirrors or trays. Imagination turns the ordinary into the miniature.
Adding Chrome And Glass Details
Chrome and glass give bathrooms a polished look. Use aluminum foil cut into tiny shapes for faucets and fixtures. Shiny beads or sequins add sparkle as knobs or drains.
Clear plastic pieces or broken CD shards work as glass shower doors or mirrors. Paint edges with silver or white for a clean finish. These details boost realism quickly.
Creating Water Effects
Water adds life to any bathroom scene. Use clear glue or resin to simulate water in tubs or sinks. Pour it carefully and let it dry flat for a smooth surface.
Glossy varnish on painted surfaces also works well. For bubbles, small drops of white paint or tiny foam pieces create the perfect look. Water effects enhance the miniature experience.
Frequently Asked Questions
What Materials Are Best For Dollhouse Bathroom Furniture?
Wood, cardboard, clay, and plastic are ideal materials. They are easy to cut, shape, and paint. Using scrap or recyclable items can reduce costs and add charm to your miniature bathroom furniture.
How Do I Make A Miniature Bathtub For A Dollhouse?
Start with a small container or mold. Shape clay or use plastic to form the tub. Paint it white or pastel colors. Add details like faucets using tiny beads or wire.
Can I Create A Dollhouse Bathroom Sink Easily?
Yes, use small boxes or bottle caps for the basin. Attach a miniature faucet made from wire or beads. Paint and decorate for realism and durability.
How Do I Add Realistic Tiles To Dollhouse Bathroom Walls?
Use printed tile patterns on paper or thin foam sheets. Cut to size and glue onto walls. Seal with clear varnish for a glossy, water-resistant finish.
Conclusion
Creating dollhouse bathroom furniture can be fun and rewarding. Use simple materials and basic tools for best results. Take your time to measure and cut carefully. Small details make your miniature bathroom look realistic. Enjoy customizing pieces to fit your dollhouse style.
Keep practicing to improve your crafting skills. Soon, you will have a charming bathroom for your dollhouse. Happy crafting!