Are you tired of your ski coats piling up on chairs or cluttering your entryway? Imagine having a neat, stylish spot where your coats hang perfectly after every outdoor adventure.
Making your own ski coat rack is easier than you think—and it can save you time, space, and frustration. You’ll discover simple steps to create a functional rack that fits your style and keeps your gear organized. Ready to transform your space and make your ski season smoother?
Let’s get started!
Choosing Materials
Choosing the right materials is key to making a strong ski coat rack. The materials affect the rack’s look, strength, and how long it lasts. Some materials offer a classic feel, while others bring a modern touch. Think about where you will place the rack and how much weight it needs to hold. This helps pick the best materials for your project.
Wood Options For Durability
Wood is a popular choice for a ski coat rack. It is strong and lasts a long time. Hardwoods like oak, maple, and walnut are very tough. They resist scratches and dents well. Softwoods like pine are easier to work with and lighter. Wood gives a warm, natural look. You can paint or stain it to match your style. Proper sealing protects wood from moisture and wear.
Metal Elements For Style
Metal adds a sleek, modern touch to your rack. Steel and aluminum are common metals used. Steel is very strong and holds heavy coats easily. Aluminum is lighter but still sturdy. Metal hooks or frames can give a clean, industrial look. Metals also resist damage from moisture better than wood. You can find metal parts in many finishes like black, chrome, or brass.
Recycled And Upcycled Materials
Using recycled or upcycled materials helps the environment. Old wood, metal pipes, or leftover parts can make unique racks. These materials save money and reduce waste. Upcycled items often bring character and charm. Check local scrap yards or thrift stores for supplies. Clean and treat these materials to ensure they last. This choice also adds a personal touch to your rack.

Credit: www.today.pl
Tools You’ll Need
Building a ski coat rack needs some tools. These tools help you work fast and safe. You don’t need many tools, but the right ones make a big difference. Below is a list of tools you’ll use to make your project easier and better.
Basic Hand Tools
Start with simple hand tools. A hammer helps to nail parts together. Use a screwdriver to fix screws tightly. A tape measure is needed to check lengths and sizes. A pencil marks where to cut or drill. Sandpaper smooths rough edges for a clean look. These tools are easy to find and use.
Power Tools For Efficiency
Power tools speed up the work. A drill makes holes fast and precise. A saw cuts wood cleanly and quickly. An electric sander saves time on smoothing surfaces. These tools need a power source. They make your ski coat rack stronger and neat.
Safety Equipment
Safety comes first during any project. Wear safety glasses to protect your eyes. Use gloves to keep your hands safe. Ear protection helps when using loud power tools. A dust mask stops you from breathing in dust. Safety gear keeps you safe and healthy.
Design Ideas
Design ideas for a ski coat rack can make your space neat and stylish. Choose a design that fits your room size and style. Think about how many coats you need to hang. Consider the materials and colors that match your decor.
Good design helps keep your coats dry and easy to find. It also saves space and keeps your entryway clean. Here are some popular design options to consider.
Wall-mounted Racks
Wall-mounted racks save floor space. They attach directly to the wall near your door. You can use hooks or small shelves for helmets and gloves. Choose strong materials like wood or metal for durability. These racks keep coats off the ground and easy to reach.
Freestanding Coat Racks
Freestanding racks can move around your home. They do not need wall installation. This type is good for larger spaces. Many have multiple arms or hooks for many coats. Some models include a base to hold boots or bags. They offer flexibility and style in one piece.
Multi-purpose Storage Solutions
Multi-purpose racks combine coat storage with other needs. They may have shelves for shoes or cubbies for hats. Some include benches for sitting while putting on boots. These racks keep everything in one place. They help keep your entryway tidy and organized.
Step-by-step Construction
Building a ski coat rack is a simple and fun project. This step-by-step guide helps you create a sturdy rack to keep your coats organized. Follow each step carefully for the best results.
Preparing The Materials
Start by gathering all needed materials. You will need wood boards, screws, hooks, sandpaper, and wood glue. Choose wood that is strong and smooth. Measure and cut the wood to the right size. Sand the edges for a clean finish. Prepare all tools like a drill, screwdriver, and measuring tape.
Assembling The Frame
Lay out the cut wood pieces on a flat surface. Join the boards to form a rectangular frame. Use wood glue and screws to fix them tightly. Check the frame for stability before moving on. Make sure all corners are square and secure. Let the glue dry for a few hours.
Adding Hooks And Accessories
Decide where to place the hooks on the frame. Mark equal distances for a balanced look. Attach metal hooks using screws. Add small shelves or baskets if needed for extra storage. Tighten all screws firmly. Test the hooks to ensure they hold weight well.
Finishing Touches
Finishing touches give your ski coat rack a polished look. These steps protect the wood and add style. Small details make a big difference. Focus on painting, sealing, and personalizing your rack.
Painting And Staining Tips
Choose paint or stain that fits your room’s style. Use light coats for even coverage. Let each coat dry fully before applying the next. Sand lightly between coats for smoothness. Pick colors that blend well with your home decor.
Protective Coatings
Apply a clear protective coat to guard against scratches and moisture. Polyurethane or varnish works well on wood surfaces. Use a brush or spray for an even finish. Let it dry in a dust-free area. This step helps your rack last longer.
Customizing With Decorative Elements
Add hooks, knobs, or labels to personalize your rack. Use metal or wooden hooks to match your style. Attach small signs or decals for a unique touch. These elements make your rack both useful and attractive. Personalization creates a welcoming space.
Maintenance Tips
Proper care keeps your ski coat rack strong and looking good. Follow simple steps to maintain it well. Regular care prevents damage and extends its life. This section covers easy maintenance tips for your rack.
Cleaning Your Coat Rack
Dust your coat rack often with a soft cloth. Use mild soap and water for sticky spots. Avoid harsh cleaners that can damage wood or metal. Dry the rack completely to stop rust or warping. Clean hooks and shelves to keep them tidy.
Repairing Common Issues
Check the rack regularly for loose screws or nails. Tighten any loose parts with a screwdriver. Fix small cracks in wood with wood glue or filler. Replace broken hooks with new ones from hardware stores. Keep the rack sturdy to hold heavy ski coats safely.
Seasonal Storage Advice
Store the rack in a dry place during warm months. Avoid damp areas to prevent mold and rust. Cover the rack with a cloth to keep dust off. Remove hooks if storing long-term to protect them. Prepare the rack for winter use by checking all parts.
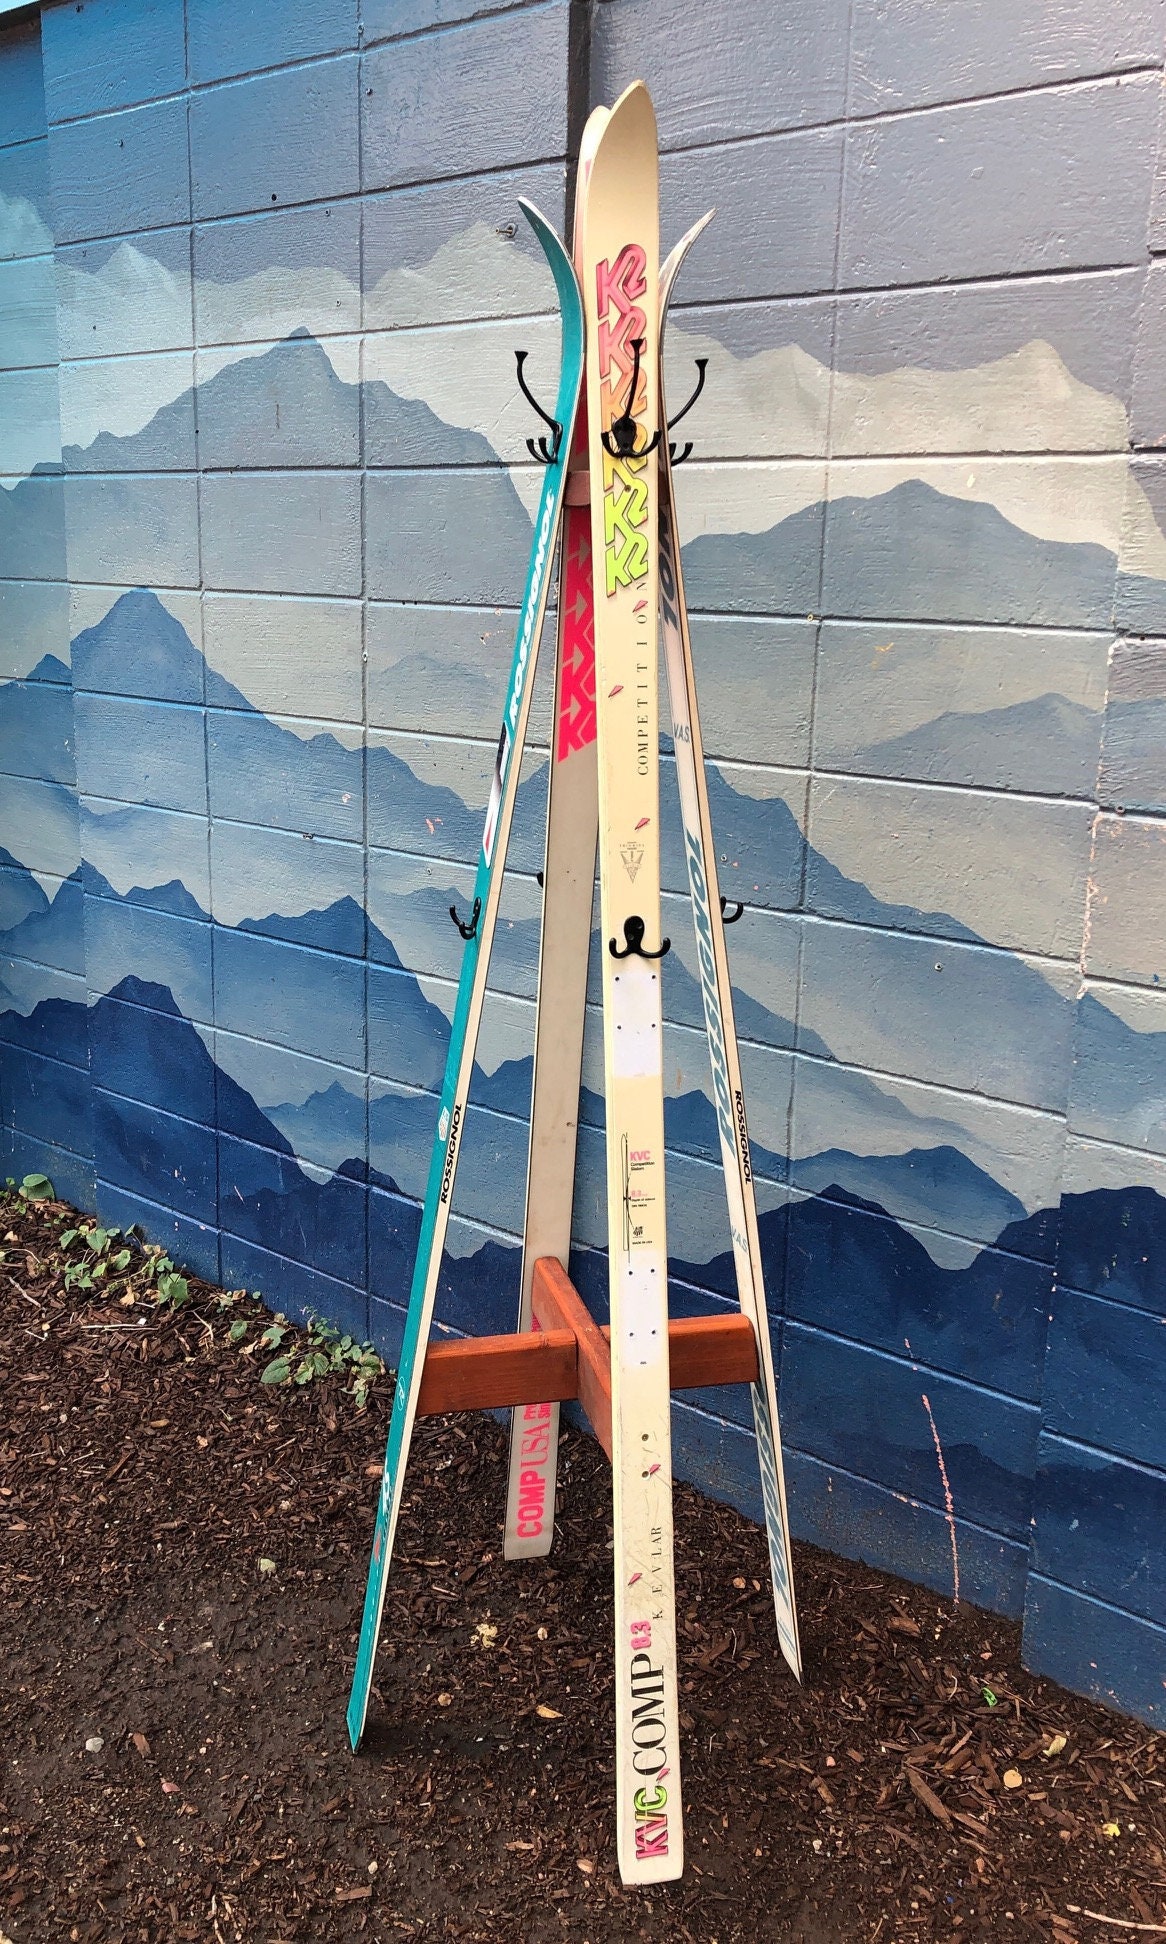
Creative Alternatives
Creative alternatives for making a ski coat rack can add charm and uniqueness to your space. These ideas use simple materials and clever designs to keep your coats organized and accessible. They fit well in homes with different styles and sizes.
Repurposing Old Furniture
Old furniture pieces can become great ski coat racks. Use an old ladder by standing it against the wall. Hang coats on the rungs for a rustic look. A wooden pallet can be mounted to the wall with hooks attached. This is a simple way to reuse and create storage. An unused chair can hold coats by attaching hooks on the back. These ideas save money and add character.
Using Natural Elements
Natural materials bring warmth and style to a ski coat rack. A sturdy tree branch can be fixed horizontally on the wall. Attach hooks to the branch to hang coats. Stones or logs can serve as stands for a free-standing rack. Bamboo poles tied together create a simple frame with hanging space. These options blend well with nature-themed rooms.
Incorporating Technology
Technology can make your ski coat rack more functional. Smart hooks with sensors can detect when a coat is hung. These hooks can send alerts if a coat is missing. LED lights can illuminate the rack, making it easier to find items. Some racks have built-in charging stations for phones or gadgets. These features add convenience to everyday use.

Credit: duluthfolkschool.com
Credit: www.etsy.com
Frequently Asked Questions
What Materials Are Needed To Make A Ski Coat Rack?
To make a ski coat rack, you need wood planks, hooks, screws, a drill, and sandpaper. Choose durable wood for strength. Hooks should be sturdy to hold heavy ski coats securely.
How Do I Mount A Ski Coat Rack On The Wall?
Locate wall studs using a stud finder. Mark drill points on the rack and wall. Use screws and a drill to secure the rack tightly to the studs for stability.
Can I Customize The Ski Coat Rack Design?
Yes, you can customize by choosing different wood types, finishes, and hook styles. Add shelves or compartments for extra storage. Personalize colors to match your room décor.
How Much Time Does It Take To Build A Ski Coat Rack?
Building a basic ski coat rack usually takes 2 to 4 hours. Time varies depending on design complexity and your DIY experience. Preparation and drying time for finishes may add extra hours.
Conclusion
Creating a ski coat rack is simple and useful. You only need a few tools and materials. This rack keeps your coats neat and easy to find. Building it yourself saves money and adds a personal touch. Try different designs to fit your space and style.
Enjoy a tidy entryway and quick access to your ski gear. Start your project today and see the difference it makes.