Looking for a simple way to organize your space and keep your coats, hats, and bags off the floor? Mounting a coat rack to your wall is the perfect solution.
It’s quick, practical, and can instantly make your entryway look neater and more inviting. But if you’re not sure how to do it right, you might worry about damaging your walls or ending up with a rack that can’t hold your stuff.
Don’t worry—you’re in the right place. This guide will walk you through every step, so you can confidently mount your coat rack and enjoy a clutter-free home. Keep reading to learn how easy it can be!

Credit: www.youtube.com
Choosing The Right Coat Rack
Choosing the right coat rack is an important step before mounting it on the wall. The right rack will fit your space and hold your coats well. It will also match your room’s style. Think about how many coats you need to hang and the space you have. This will help you pick the best coat rack for your home.
Types Of Coat Racks
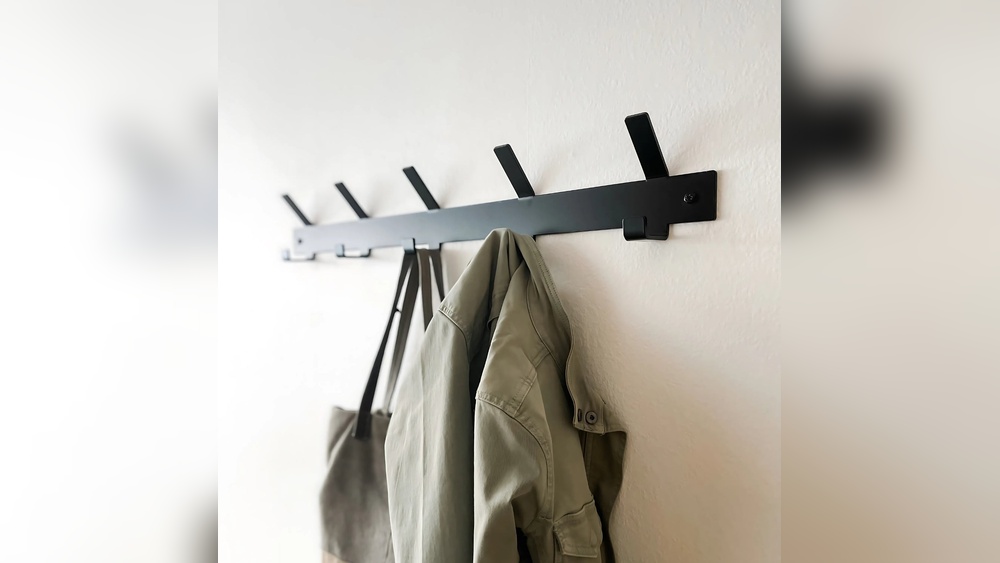
Coat racks come in many styles. Wall-mounted racks save floor space and keep coats within reach. Freestanding racks can hold more items but need floor space. Some racks have hooks only, while others include shelves or storage bins. Choose a type that suits your needs and room size.
Materials And Durability
Coat racks are made from wood, metal, or plastic. Wood looks warm and fits many decors. Metal racks are strong and last long. Plastic racks are light and often cheaper. Think about how much weight the rack must hold. A sturdy material will keep your coats safe.
Size And Capacity Considerations
Size matters when choosing a coat rack. Measure your wall space before buying. Count how many coats and items you need to hang. A rack with enough hooks avoids overcrowding. Small racks work for light use. Large racks are better for families or many guests.
Tools And Materials Needed
Mounting a coat rack on the wall requires the right tools and materials. Using proper equipment ensures a secure and neat installation. Gather all items before starting the job. This saves time and avoids frustration.
Essential Tools
You need a drill for making holes in the wall. A screwdriver helps to fasten screws tightly. A hammer might be useful for tapping in anchors. A pencil marks where to drill. A stud finder locates the wall supports. These tools make the process smooth and safe.
Wall Anchors And Screws
Wall anchors keep the coat rack stable. They prevent screws from pulling out. Choose anchors based on your wall type: drywall, plaster, or brick. Use screws that fit the coat rack holes. Screws should be long enough to hold weight. This combo ensures a strong hold.
Measuring And Leveling Tools
A tape measure checks the height and spacing. A level keeps the rack straight on the wall. Mark the spots clearly before drilling. Accurate measurements stop the rack from tilting. These tools help create a professional look.
Preparing The Wall
Preparing the wall is the first step to mount a coat rack safely. It ensures the rack holds well and looks good. Taking time to prepare avoids damage and keeps things steady. Follow clear steps for a strong and neat installation.
Selecting The Best Location
Pick a spot that is easy to reach. Near the door or hallway works best. Think about space around it for hanging coats. Avoid placing it too close to corners or furniture. The rack should be at a comfortable height for all users.
Checking Wall Material
Identify the wall type before drilling. Drywall, plaster, or concrete need different anchors. Use the right tools for your wall to prevent cracks. Knowing the material helps select the best screws and plugs. This step protects your wall from damage.
Finding Studs For Support
Studs are wooden beams behind the wall. They offer strong support for heavy items. Use a stud finder to locate them easily. Mark the stud positions lightly with a pencil. Mounting on studs prevents the rack from falling down.
Marking And Measuring
Marking and measuring are the first steps to mount a coat rack properly. They ensure the rack fits well and stays secure. Taking time here prevents mistakes and saves effort later. This section covers how to measure height and spacing, mark drill points, and use a level for accuracy.
Measuring Height And Spacing
Choose the right height for your coat rack. Usually, 5 to 6 feet from the floor works best. Measure this height on the wall with a tape measure. Next, decide how far apart the hooks should be. Space them evenly to hold coats without crowding. Mark these points lightly with a pencil.
Marking Drill Points
Use the marks to find exact drill points. These are spots where screws will hold the rack. Check the coat rack’s back for mounting holes. Match these holes to your wall marks. Mark drill points clearly but gently to avoid mistakes. This step guides your drill and secures the rack well.
Using A Level For Accuracy
Place a level on the marks to check alignment. A level shows if your marks are straight. Adjust the marks until the bubble is centered. Straight marks mean the coat rack will hang evenly. This prevents it from tilting and looking odd. Accuracy here makes the rack both strong and neat.
Drilling And Anchoring
Drilling and anchoring are key steps to mount a coat rack securely on the wall. Proper drilling helps hold screws tightly. Anchors provide extra support, especially on drywall. These steps keep your coat rack steady and safe to use.
Drilling Pilot Holes
Start by marking where the screws will go. Use a pencil for clear marks. Choose a drill bit slightly smaller than your screws. Drill pilot holes at the marked spots. This prevents the wall from cracking. It also makes screw insertion easier.
Installing Wall Anchors
Wall anchors are important for heavy loads. Push or tap the anchor into the pilot hole. Make sure it fits snugly. Anchors spread the weight across the wall. This stops screws from pulling out. Choose anchors based on the coat rack’s weight.
Tips For Different Wall Types
For drywall, use plastic anchors or toggle bolts. Concrete walls need masonry anchors and a hammer drill. Wooden walls let you screw directly into studs. Always check wall type before drilling. This ensures strong support for your coat rack.
Mounting The Coat Rack
Mounting the coat rack on the wall is a simple task that improves your room’s organization. It keeps coats, hats, and bags off the floor and easy to grab. Follow clear steps to ensure the rack is level and secure.
Aligning The Rack
Start by holding the coat rack against the wall. Use a level to check if it is straight. Mark the spots where the screws will go with a pencil. Make sure the marks match the rack’s holes.
Securing With Screws
Drill small pilot holes at the pencil marks. This makes screwing easier and avoids wall damage. Use screws that fit the rack’s holes and wall type. Screw the rack tightly to the wall for strong support.
Double-checking Stability
After screwing, gently pull the rack to test its hold. It should not wobble or move. Check that all screws are tight and secure. A stable rack will hold heavy coats safely without falling.
Finishing Touches
After mounting your coat rack, the final steps make a big difference. These finishing touches ensure the rack looks neat and stays strong. Taking time now keeps your wall and rack safe for a long time.
Cleaning The Area
Remove any dust or dirt around the coat rack. Use a soft cloth to wipe the wall and rack surface. Clean surfaces help paint or finish stick better. It also gives a fresh, tidy look to your new rack.
Adding Protective Pads
Place small pads on the rack’s back or hooks. These pads stop scratches on the wall and coat rack. They also reduce noise when hanging or removing coats. Use felt or rubber pads for best protection.
Testing Weight Capacity
Gently hang coats or bags to check strength. Start with light items, then add heavier ones slowly. Watch for any movement or looseness in the rack. A sturdy rack holds weight without bending or falling.

Credit: www.amazon.com
Common Mistakes To Avoid
Mounting a coat rack might seem simple, but many make mistakes that cause problems. Avoiding these errors saves time and keeps your rack secure. Focus on a few key points to get the job right.
Ignoring Wall Type
Not all walls hold screws the same way. Drywall needs anchors for strong support. Brick or concrete requires special drill bits and screws. Know your wall type before starting. This step prevents damage and keeps the rack stable.
Improper Measuring
Measuring wrong leads to uneven or crooked racks. Always measure twice before drilling holes. Use a level to check alignment. Correct measurement ensures your rack looks neat and works well.
Overloading The Rack
Every rack has a weight limit. Putting too many heavy items causes it to fall. Check the rack’s capacity and stick to it. Spread out the weight evenly across hooks for best support.

Credit: www.spryinterior.com
Frequently Asked Questions
How Do I Choose The Right Wall For Mounting A Coat Rack?
Select a sturdy wall made of solid wood or drywall with studs. Avoid weak or hollow surfaces to ensure secure mounting and avoid damage.
What Tools Do I Need To Mount A Coat Rack Properly?
You need a drill, level, measuring tape, screws, wall anchors, and a screwdriver for safe and accurate mounting.
How Do I Find Studs For Mounting A Coat Rack?
Use a stud finder to locate studs behind drywall. Mark their positions to anchor the coat rack securely for better support.
Can I Mount A Coat Rack On Drywall Without Studs?
Yes, use heavy-duty wall anchors designed for drywall. They provide enough support for lightweight coat racks but avoid heavy loads.
Conclusion
Mounting a coat rack to the wall is a simple way to organize space. Follow the right steps and use proper tools for safety. Choose the best spot and mark where you will drill. Secure the rack tightly to hold your coats and bags.
This small task can make your room look neat and tidy. Try it today and enjoy a clutter-free home!