Looking to give your metal bunk bed a fresh, new look? Painting it yourself can be easier than you think—and it’s a great way to add personality to your space without spending a lot.
You might wonder how to make the paint stick well or which tools to use for the best finish. This guide will walk you through every step, helping you avoid common mistakes and get a smooth, long-lasting result. By the end, your bunk bed will look brand new, and you’ll feel proud of the work you’ve done.
Ready to transform your metal bunk bed? Let’s get started!
Gathering Materials
Gathering the right materials is the first step to painting your metal bunk bed. This step helps you prepare well and get the best results. Collecting all necessary items before you start saves time and effort. It also makes the painting process smoother and more enjoyable.
Essential Tools
Start with basic tools like sandpaper and a wire brush. These help remove old paint and rust from the metal surface. You will also need a clean cloth to wipe dust and dirt. A paintbrush or spray gun works well for applying paint. Don’t forget a drop cloth to protect your floor from spills.
Choosing The Right Paint
Pick paint made specifically for metal surfaces. Look for rust-resistant and durable options. Spray paint designed for metal is easy to apply and dries fast. You can also use enamel paint for a smooth finish. Make sure the paint color matches your room’s style.
Safety Gear
Protect yourself while painting. Wear gloves to keep paint off your skin. Use a mask to avoid breathing in paint fumes. Safety goggles protect your eyes from splashes. Dress in old clothes or a painting apron to avoid stains.
Preparing The Surface
Preparing the surface is the first step to paint a metal bunk bed well. It helps the paint stick better and last longer. A clean and smooth surface also makes the bed look nice after painting. Spend time on this step to avoid problems later.
Cleaning The Bed Frame
Start by removing all dust and dirt from the bed frame. Use a cloth and warm soapy water. Wipe every part carefully. Rinse with clean water and dry with a towel. Clean metal holds paint better and stops peeling.
Removing Rust And Old Paint
Rust can ruin your paint job. Use a wire brush or scraper to remove rust spots. Take off any loose or peeling old paint too. For tough rust, apply a rust remover and follow instructions. Removing these helps paint cover the metal well.
Sanding For Smoothness
Sand the bed frame with medium-grit sandpaper. This smooths rough spots and scratches. Sanding also helps the paint stick tightly. After sanding, wipe away dust with a damp cloth. A smooth surface gives a neat, even paint finish.
Priming The Metal
Priming the metal is a key step before painting a metal bunk bed. It helps the paint stick better and stops rust from forming. Proper priming makes your paint job last longer and look smooth.
Skipping this step can cause paint to peel or chip quickly. Take time to prepare the metal surface with the right primer. This step sets the foundation for a great finish.
Selecting A Primer
Choose a primer made for metal surfaces. Look for rust-inhibiting or anti-corrosion primers. These protect the metal from moisture and rust. Oil-based primers work well on bare metal. Spray primers are good for even coverage on tricky spots. Avoid regular wall primers. They won’t stick or protect the metal properly.
Applying Primer Correctly
Clean the metal bed first. Remove dust, grease, and old paint flakes. Use sandpaper to roughen smooth areas slightly. This helps primer hold better. Apply primer in thin, even coats. Use a brush or spray can for best results. Avoid thick layers that drip or bubble. Cover all metal parts, including corners and joints. Let each coat dry before applying the next.
Drying Time
Allow the primer to dry fully before painting. Drying time depends on the primer type and room temperature. Usually, it takes 1 to 4 hours. Check the label for exact times. Touch the surface gently; it should feel dry and not sticky. Rushing to paint can cause peeling and uneven color. Wait for complete drying to ensure a smooth finish.

Credit: www.youtube.com
Painting Techniques
Painting a metal bunk bed requires specific techniques to get a smooth, long-lasting finish. Choosing the right method and applying paint carefully ensures the best results. This section explains key painting techniques that help create a clean, durable surface on metal.
Brush Vs. Spray Paint
Brush painting gives more control over the paint. It works well for small areas and detailed spots. You can easily reach corners and edges with a brush. Spray paint covers large areas quickly and evenly. It creates a smooth, factory-like finish. Spray paint requires good ventilation and protection from wind. Choose brush painting for precision and spray paint for speed and smoothness.
Applying Multiple Coats
One thick coat can drip and peel easily. Applying several thin coats creates a stronger finish. Wait about 15 to 30 minutes between coats. This helps each layer dry well and stick better. Multiple coats build color depth and protect metal from rust. Thin layers avoid runs and give a neat look. Patience pays off in the final result.
Avoiding Drips And Streaks
Drips and streaks spoil the paint job’s appearance. Use smooth, even strokes with a brush. Don’t overload the brush with paint. For spray paint, keep the nozzle moving steadily. Hold the can about 8 to 12 inches from the surface. Light, overlapping passes help avoid thick spots. Check your work from different angles to spot drips early. Fix drips by gently sanding and repainting after drying.
Finishing Touches
Finishing touches give your metal bunk bed a smooth and lasting look. This step protects the paint and keeps the bed looking new. Proper finishing also stops rust and scratches. Spend time here for a strong and neat result.
Sealing The Paint
Sealing locks the paint on the metal surface. Use a clear sealer made for metal. Apply it evenly with a brush or spray. This layer prevents paint from chipping or fading. Let the sealer dry fully before moving to the next step.
Adding Protective Layers
Add an extra coat of clear varnish or polyurethane. These layers protect against scratches and wear. Use thin, even coats for best results. Allow each coat to dry before adding the next. This builds a tough shell over the paint.
Curing Time
Allow the paint and protective layers to cure well. This means waiting for the paint to harden completely. Keep the bed in a dry, dust-free place during this time. Curing can take several days but is worth the wait. Full curing ensures the paint lasts longer and stays bright.
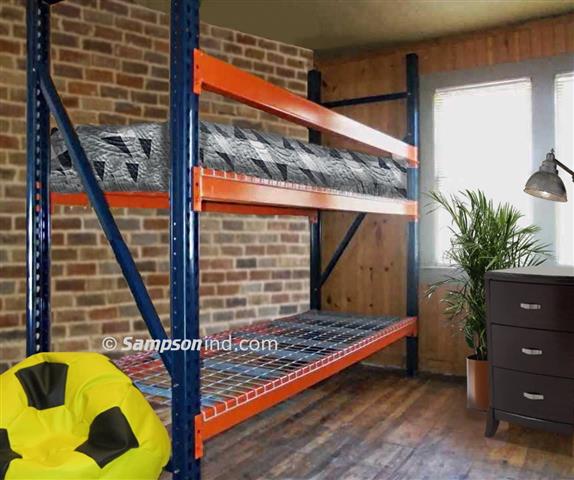
Credit: www.sampsonind.com
Maintenance Tips
Keeping a painted metal bunk bed looking fresh takes regular care. Proper maintenance protects the paint and metal from damage. Small efforts can keep your bunk bed attractive for years. Here are some simple tips for maintenance.
Cleaning Painted Metal
Use a soft cloth or sponge with mild soap and water. Avoid harsh chemicals that can damage the paint. Wipe the surface gently to remove dust and dirt. Dry the bed completely to prevent rust. Clean regularly to keep the paint bright and fresh.
Touching Up Chips And Scratches
Check the bed often for small chips or scratches. Sand the damaged area lightly with fine sandpaper. Use matching paint to cover the spots carefully. Apply thin layers and let them dry between coats. Touch-ups stop rust and keep the bed looking new.
Extending Paint Lifespan
Place the bunk bed away from direct sunlight and moisture. Use protective pads on feet to avoid scratches on the floor. Avoid dragging the bed to prevent paint peeling. Reapply a clear coat every few years for extra protection. These steps help the paint last longer and stay vibrant.

Credit: www.itallstartedwithpaint.com
Frequently Asked Questions
How Do I Prepare A Metal Bunk Bed For Painting?
Clean the bed thoroughly using soap and water. Remove rust with sandpaper or a wire brush. Wipe down with a damp cloth. Let it dry completely before painting.
What Type Of Paint Is Best For Metal Bunk Beds?
Use spray paint or enamel paint designed for metal surfaces. These paints adhere well and resist chipping, providing a smooth, durable finish.
How Many Coats Of Paint Should I Apply?
Apply 2 to 3 thin coats. Allow each coat to dry fully before applying the next. This prevents drips and ensures even coverage.
Do I Need To Use A Primer On A Metal Bunk Bed?
Yes, using a primer improves paint adhesion and prevents rust. Choose a rust-inhibiting metal primer for the best results.
Conclusion
Painting a metal bunk bed can refresh its look quickly. Follow the steps carefully for the best results. Choose the right paint and prepare the surface well. Work in a clean, dry space to avoid dust. Take your time and apply thin, even coats.
Let the paint dry fully between layers. A painted bunk bed can brighten any room. This simple project saves money and adds style. Enjoy your newly painted bed every day.