Looking at your old console table, you might see just a piece of furniture. But what if you could turn it into something fresh, stylish, and uniquely yours?
Refurbishing a console table is easier than you think, and the results can completely transform your space. Whether your table has scratches, outdated paint, or just needs a new vibe, this guide will show you simple steps to bring it back to life.
Ready to give your console table a makeover that impresses everyone? Let’s dive in and make it happen!

Credit: stencilstudios.com
Choosing The Right Console Table
Choosing the right console table is a key step in your refurbishing project. The table you select will shape your entire design process. It must suit your space and style. The material and condition also affect your work. A strong foundation helps your project succeed. Let’s explore important factors to consider.
Material And Style Options
Console tables come in many materials. Wood is classic and easy to refinish. Metal offers a modern, industrial feel. Glass tops give a light, airy look. Choose a material that fits your room’s style.
Styles vary from traditional to modern. A vintage table adds charm and character. A sleek, simple design suits minimalist rooms. Pick a style that matches your home’s decor.
Assessing Condition And Potential
Check the table’s condition closely. Look for cracks, loose joints, or water damage. These problems affect how much work is needed. A sturdy table saves time and effort.
Imagine the table’s potential after refurbishing. Can it be sanded and painted easily? Does it have unique details to highlight? Choose a piece with good bones and charm.
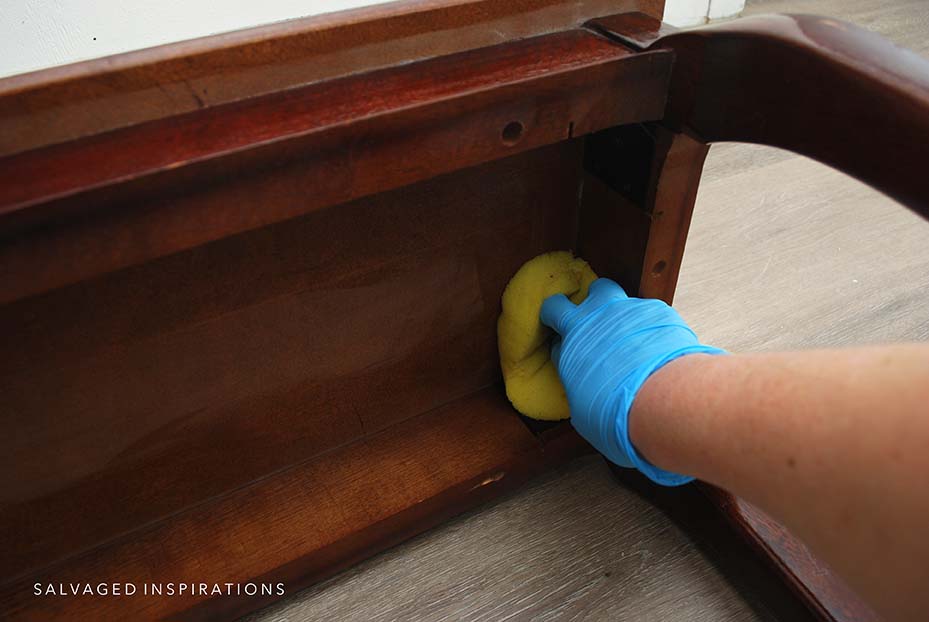
Credit: salvagedinspirations.com
Gathering Essential Tools And Materials
Refurbishing a console table starts with gathering the right tools and materials. Having everything ready makes the process smoother and faster. It also helps you avoid interruptions during your project. Knowing what to use ensures better results and a beautiful finish.
Basic Tools Needed
Start with a good sanding block or sandpaper. It helps to smooth the surface and remove old paint. A paintbrush or foam brush is necessary for applying paint or finish evenly. Use a screwdriver to take off any hardware like knobs or handles. A clean cloth or tack cloth is useful to wipe dust after sanding. A putty knife can fill holes or cracks with wood filler. Gloves protect your hands from paint and chemicals. A drop cloth keeps your workspace clean and safe.
Recommended Paints And Finishes
Choose paint made for furniture, like acrylic or latex. These paints dry quickly and last long. Chalk paint is popular for a matte, vintage look. Use a primer before painting to help the paint stick better. For protection, use a clear finish like polyurethane or wax. Polyurethane is durable and easy to clean. Wax creates a soft, natural finish but needs regular touch-ups. Pick finishes that suit your style and how you will use the table.
Preparing The Table Surface
Preparing the table surface is the first step to a successful refurbish. It sets the base for paint or stain to stick well. A clean and smooth surface improves the final look. Take time to do this carefully.
Cleaning And Sanding Techniques
Start by wiping the table with a damp cloth. Remove dust, dirt, and old grease. Use mild soap if needed. Let the surface dry completely.
Next, sand the table using medium-grit sandpaper. This removes old finish and rough spots. Sand in the direction of the wood grain. Afterward, use fine-grit sandpaper for a smooth feel.
Wipe the table again to clear away sanding dust. A clean surface helps paint or stain stick better.
Repairing Damages And Imperfections
Check for cracks, holes, or dents. Fill small holes with wood filler. Press filler into gaps, then smooth with a putty knife.
Allow the filler to dry fully. Sand the filled areas until smooth and even. For bigger cracks, use wood glue and clamps to hold parts together.
Fix loose joints by tightening screws or adding wood glue. A sturdy table lasts longer and looks better.
Applying Primer And Paint
Applying primer and paint is a key step in refurbishing a console table. It protects the wood and gives the paint a smooth surface to stick to. Proper application helps the finish last longer and look better. Take your time during this stage for the best results.
Choosing The Right Primer
Select a primer that suits your table’s material. Wood needs a wood primer to prevent stains and knots from showing. For laminate or metal surfaces, pick a primer made for those materials. A good primer blocks old colors from bleeding through. It also helps the paint stick firmly. Use a primer with low odor if you work indoors. This makes the process more comfortable.
Painting Tips For Smooth Finish
Use a clean brush or roller for even coverage. Thin coats dry faster and avoid drips. Let each coat dry fully before adding the next. Sand lightly between coats with fine sandpaper. This removes bumps and improves paint adhesion. Paint in a dust-free area to keep the surface clean. Work in the direction of the wood grain for a natural look. Patience pays off in a smooth, beautiful finish.
Adding Decorative Touches
Adding decorative touches can transform a simple console table into a stylish piece. These details bring personality and charm to your furniture. Small changes create big impacts on the overall look. Focus on easy, creative ideas to refresh your table.
Stenciling And Patterns
Stenciling adds unique designs without much skill. Choose shapes or patterns that match your room’s style. Use painter’s tape to keep edges clean. Lightly dab paint for a smooth finish. Patterns like chevrons, florals, or geometric shapes work well. Let the paint dry fully before use. This technique personalizes your table with artful touches.
Hardware Upgrades
Changing hardware updates the table’s look fast. Swap old knobs or handles for new ones. Pick materials like brass, ceramic, or wood for variety. Make sure new hardware fits existing holes. Hardware adds style and improves function. Tighten screws for a secure fit. This simple step gives your console table fresh appeal.
Sealing And Protecting The Finish
Sealing and protecting the finish is a vital step in refurbishing a console table. It keeps the surface safe from scratches, stains, and water damage. A good sealant enhances the look and extends the table’s life. Without this protection, the wood can wear out quickly and lose its charm.
Selecting The Best Sealant
Choose a sealant that fits the table’s use and style. Polyurethane is strong and water-resistant, ideal for busy areas. Wax gives a soft shine but needs reapplication often. Oil finishes soak into the wood and highlight natural grains. Pick a sealant with low odor and easy application for indoor use. Test on a small spot first to see the effect.
Application Methods For Durability
Clean the surface before applying any sealant. Use a brush or cloth depending on the product. Apply thin, even coats to avoid bubbles or drips. Let each layer dry fully before adding the next. Sand lightly between coats for a smooth finish. Finish with a final coat to lock in protection. Proper application makes the table last longer and look great.
Styling Your Refurbished Console Table
Styling your refurbished console table is the final step to make it shine in your space. This part is about placing your table smartly and decorating it with items that match your taste. A well-styled console table adds charm and character to any room. It can become a focal point or blend softly with your other furniture. Let’s explore simple ways to style your table for a fresh look.
Placement Ideas
Place your console table in entryways to welcome guests warmly. Use it behind a sofa for extra surface and style. Hallways work well for narrow tables and create interest. Under a window, it can hold plants and light. Avoid crowded spots to keep the space open and neat. Choose a spot with good lighting to highlight the table’s features.
Decor Suggestions
Decorate with a mix of items for balance and interest. Use a vase with fresh flowers or greenery for life. Add a few framed photos or art pieces for personality. Books stacked horizontally can add height and color. Use trays or bowls to keep small items tidy. Keep the style simple and avoid clutter for a clean look.

Credit: www.reddit.com
Frequently Asked Questions
How Do I Prepare A Console Table For Refurbishing?
Start by cleaning the table thoroughly to remove dust and grime. Sand the surface lightly to smooth out imperfections. Remove any old paint or finish using a stripper if needed. Make sure the table is dry before proceeding to the next steps.
What Materials Are Needed To Refurbish A Console Table?
You will need sandpaper, paint or stain, brushes, a clean cloth, wood filler, and protective finish. Optionally, use primer, painter’s tape, and new hardware for a fresh look. These materials ensure a smooth, durable, and attractive finish for your table.
How Long Does It Take To Refurbish A Console Table?
Refurbishing typically takes 1 to 3 days depending on drying times and complexity. Sanding and prepping may take a few hours. Painting or staining requires drying time between coats. Allow time for the final protective finish to cure fully.
Can I Change The Style Of My Console Table During Refurbishing?
Yes, you can update the style by changing paint color, hardware, or adding decorative details. Sanding down to bare wood allows for new stain colors. Adding stencils or decals also personalizes the table’s look creatively and effectively.
Conclusion
Refurbishing a console table brings new life to old furniture. You only need a few tools and some patience. Each step adds charm and personality to your space. Small changes create big impacts. Enjoy the process and watch your table transform.
This project suits beginners and experts alike. Give your home a fresh look without spending much. Try it today and see the difference yourself.