Are you struggling to keep your vanity top firmly in place on your cabinet? A loose or wobbly vanity top can cause damage and disrupt the look of your bathroom.
Securing it properly is easier than you think, and doing it right will save you time and money down the road. In this guide, you’ll discover simple, step-by-step tips to attach your vanity top securely and confidently. Keep reading, and you’ll have a stable, beautiful setup that lasts.
Gather Necessary Tools
Gathering the right tools is the first step to secure a vanity top to the cabinet. Having everything ready makes the task easier and faster. It also helps avoid mistakes and damage during installation.
This section explains the essential equipment needed and the safety gear to prepare. Follow these steps to work safely and efficiently.
List Essential Equipment
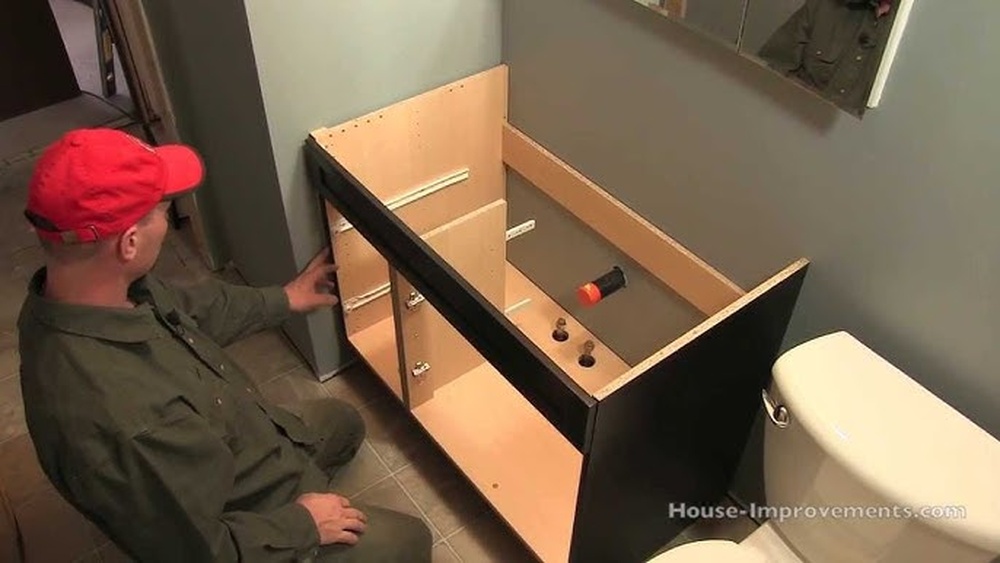
Start with a tape measure to check the size and alignment. A drill with proper drill bits is necessary for making holes. You will need screws and anchors to hold the vanity top firmly. A screwdriver or a power driver helps tighten screws with ease. Use a level to ensure the vanity top sits straight. A silicone sealant and caulking gun are useful for sealing edges to prevent water leaks. Finally, a pencil is helpful to mark drill points and measurements.
Prepare Safety Gear
Wear safety glasses to protect your eyes from dust and debris. Gloves shield your hands from sharp edges and rough materials. Use ear protection if you work with loud power tools. A dust mask keeps you safe from inhaling fine particles. Proper footwear prevents slips and protects your feet. Safety gear ensures you work without injury and stay comfortable throughout the task.
Credit: www.youtube.com
Prepare The Vanity Top
Preparing the vanity top is a key step before securing it to the cabinet. Proper preparation ensures a strong bond and a smooth finish. Take time to get everything ready for the best results.
Clean Surfaces Thoroughly
Start by cleaning the vanity top and cabinet surfaces. Remove all dust, dirt, and grease with a mild cleaner. Dry the surfaces completely before moving on. A clean surface helps adhesives stick better.
Check For Damage Or Imperfections
Look closely at the vanity top for cracks or chips. Check the cabinet edges too. Small damage can cause problems later. Fix any imperfections with filler or sandpaper. A smooth surface makes installation easier and safer.
Align Vanity Top With Cabinet
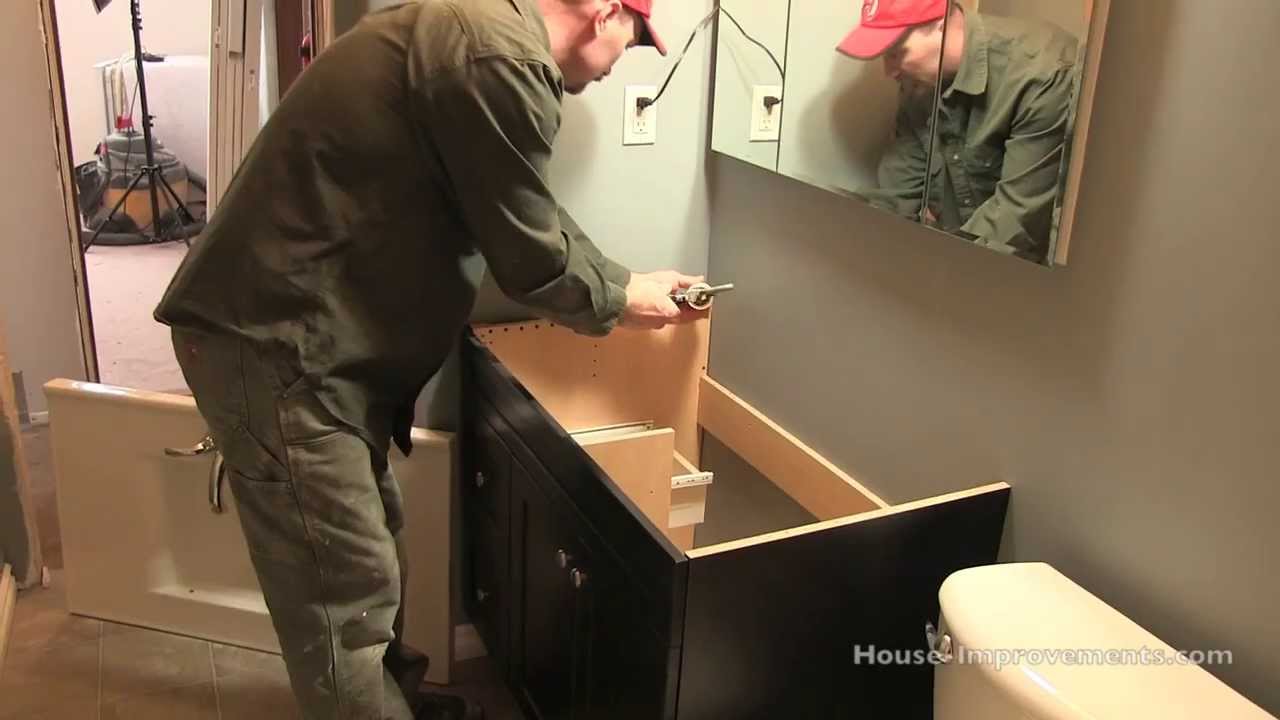
Aligning the vanity top with the cabinet is a key step in securing the vanity properly. A well-aligned vanity top not only looks good but also prevents damage and ensures stability. Take your time during this step to avoid problems later.
Positioning Tips
Start by placing the vanity top gently on the cabinet. Check that the edges of the top line up with the cabinet sides. Make small adjustments to center the top evenly. Avoid pushing too hard to prevent scratches or cracks. Use a helper if the vanity top is heavy or large.
Ensuring Level Placement
Use a level tool to check the surface of the vanity top. Place it in different spots to confirm it is flat from side to side and front to back. If the top is uneven, adjust the cabinet feet or add shims under the cabinet. A level vanity top helps water drain properly and avoids leaks. Double-check before securing the top permanently.

Credit: gharpedia.com
Apply Adhesive Properly
Applying adhesive properly is key to securing a vanity top to a cabinet. It ensures a strong bond and prevents leaks or movement. Taking time to prepare and apply adhesive correctly makes the installation last longer.
Choosing The Right Adhesive
Select an adhesive designed for bathroom use. Silicone sealants work well for water resistance and flexibility. Avoid glues that do not handle moisture or temperature changes. Check product labels for compatibility with your vanity top material.
Application Techniques
Clean the surface before applying adhesive. Remove dust, grease, and old glue for better hold. Apply a continuous bead of adhesive along the cabinet edge. Use even pressure to avoid gaps or bubbles. Place the vanity top carefully and press down firmly. Wipe off excess adhesive immediately for a neat finish.
Secure Vanity Top With Fasteners
Securing the vanity top to the cabinet is key for durability and safety. Fasteners keep the vanity top stable. They prevent movement and damage over time. Using the right fasteners and methods ensures a strong hold. This section explains the best fasteners to use and how to fasten properly.
Types Of Fasteners To Use
Screws are the most common fasteners for vanity tops. Choose corrosion-resistant screws to avoid rust. Wood screws work well for wooden cabinets. Stainless steel screws suit moist bathroom areas better. Some use brackets or clips for extra support. Adhesive strips help but do not replace screws.
Proper Fastening Methods
Start by aligning the vanity top perfectly on the cabinet. Mark screw positions under the vanity top. Drill small pilot holes to prevent wood splitting. Insert screws slowly to avoid cracking the vanity top. Tighten screws firmly but do not over-tighten. Over-tightening can cause damage or warping. Check that the vanity top is level after fastening.
Seal Edges For Protection
Sealing the edges between the vanity top and cabinet is key to prevent water damage. Water can seep into gaps and cause the cabinet to swell or rot. A tight seal keeps moisture out and extends the life of your vanity. It also gives a clean and finished look to your bathroom.
Selecting Sealants
Choose a sealant made for bathrooms and wet areas. Silicone sealants work well because they resist water and stay flexible. Clear or white sealants match most vanity tops and cabinets. Avoid sealants that dry hard and crack easily. Check the product label to confirm it is mold and mildew resistant.
Applying Sealant Neatly
Clean the edges before applying sealant. Remove dust and old sealant to help new sealant stick. Cut the sealant tube tip at an angle for better control. Use steady pressure to apply a smooth bead along the seam. Smooth the bead with a wet finger or tool for a clean finish. Allow the sealant to dry fully before using the vanity.
Final Checks And Adjustments
Final checks and adjustments are important to finish securing your vanity top. These steps ensure the top fits well and stays safe. Take your time to review every part carefully. Small details can affect the overall stability and look of your vanity.
Inspecting For Stability
Start by pressing gently on different areas of the vanity top. Check if it moves or feels loose. Look underneath to see if the top sits evenly on the cabinet. Make sure the fasteners hold tight without wobbling. Stability means the vanity top will last longer and stay secure.
Making Necessary Corrections
If you find any movement, tighten the screws or bolts more. Use a level to confirm the top is flat and straight. Adjust shims or pads under the vanity if needed. Remove any gaps between the top and cabinet edges. Finish by wiping away dust or debris that could affect the seal.
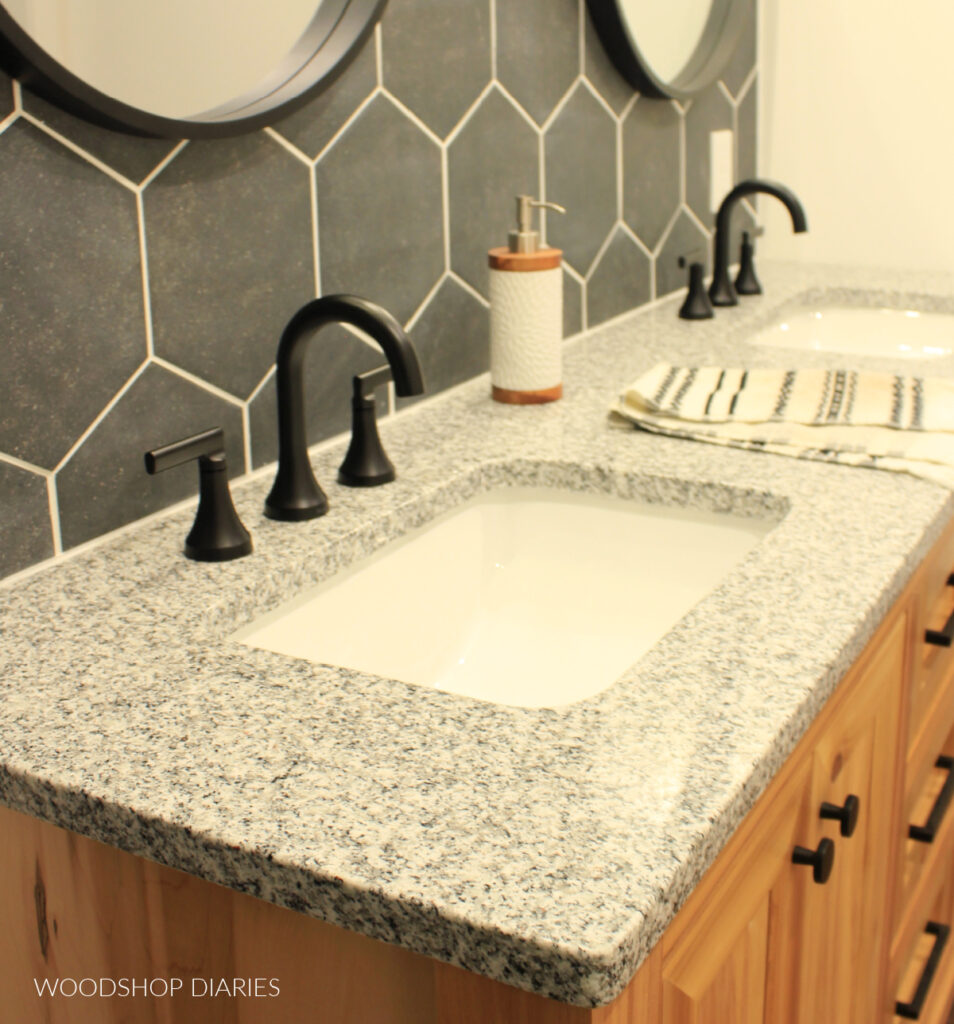
Credit: www.woodshopdiaries.com
Frequently Asked Questions
How Do You Secure A Vanity Top To A Cabinet?
To secure a vanity top, apply a bead of silicone caulk along the cabinet edges. Then, carefully place the vanity top and press firmly. Use clamps if needed. Wipe excess caulk immediately for a clean finish and let it cure fully before use.
What Tools Are Needed To Attach A Vanity Top?
Essential tools include silicone caulk, a caulking gun, clamps, a level, and a clean cloth. A screwdriver and screws may be needed for additional support. These tools help ensure a secure and level installation of the vanity top on the cabinet.
Can I Use Adhesive Instead Of Screws For Vanity Tops?
Yes, a quality silicone adhesive is often enough to secure vanity tops. It provides a strong, waterproof bond without damaging the cabinet. Screws are optional and mainly used for added stability, especially with heavier or stone vanity tops.
How Long Should Silicone Caulk Dry Before Use?
Silicone caulk typically requires 24 hours to fully cure. Avoid placing weight or using the vanity during this time. Proper curing ensures a strong, waterproof seal that secures the vanity top firmly to the cabinet.
Conclusion
Securing a vanity top to a cabinet is simple with the right steps. Start by aligning the top carefully on the cabinet. Use screws or adhesive to hold it firmly in place. Double-check for any gaps or loose spots. Tighten everything well, but do not overtighten.
A stable vanity top lasts longer and looks better. Taking your time ensures a strong and neat finish. Now your bathroom feels complete and sturdy. You can enjoy a safer and cleaner space every day.