
Are you looking to give your wood bookshelf a fresh, rich look that makes your space feel warm and inviting? Staining wood is one of the easiest ways to transform plain shelves into a stunning centerpiece.
But if you’ve never stained wood before, it might seem tricky or messy. Don’t worry—you’re about to learn simple, step-by-step tips that will help you stain your bookshelf like a pro. Keep reading, and you’ll discover how to bring out the natural beauty of the wood and protect it for years to come.
Your bookshelf makeover starts here!

Credit: www.therusticmile.com
Choosing The Right Wood
Choosing the right wood is important for a beautiful bookshelf. Wood affects how the stain looks and how strong the shelf will be. Some woods work better for staining than others. Picking the right wood makes the staining process easier and results better.
Common Wood Types For Bookshelves
Oak is strong and has a coarse grain. It takes stain well and shows a deep color. Pine is soft and has knots. It stains unevenly but is cheaper. Maple is smooth and dense. It can be hard to stain evenly. Cherry has a fine grain and darkens with time. It gives a warm look. Walnut is dark and rich in color. It needs less stain but costs more.
Wood Grain And Stain Absorption
Wood grain means the pattern of lines on wood. Open grain woods like oak soak stain fast and deep. Closed grain woods like maple absorb stain slowly and lightly. Grain affects how the color spreads on the surface. Sanding wood smooth helps stain go evenly. Testing stain on a small wood piece shows the final look.
Selecting The Perfect Stain
Choosing the right stain is key to a beautiful wood bookshelf. The stain affects the look, feel, and durability of the wood. Picking the perfect stain means understanding different types and colors. This guide helps you decide which stain fits your project best.
Oil-based Vs Water-based Stains
Oil-based stains soak deeply into wood. They bring out rich colors and highlight the grain. These stains dry slowly but last longer. They work well for hardwoods and high-use furniture.
Water-based stains dry faster and have less odor. They clean up easily with soap and water. These stains keep the wood’s natural feel and do not yellow over time. They suit softwoods and light-colored finishes.
Color Options And Finishes
Stains come in many colors, from light pine to dark walnut. Choose a shade that matches your room and style. Test the stain on a scrap piece to see the real color.
Finish options include matte, satin, and glossy. Matte looks natural and hides scratches well. Satin offers a soft shine and smooth feel. Glossy finishes are shiny and highlight wood details. Pick a finish that fits your taste and use.
Preparing The Bookshelf
Preparing the bookshelf is an important step before staining wood. Good preparation helps the stain stick better and look smooth. It also protects the wood and makes the finish last longer.
Start by cleaning and sanding the bookshelf. Then, check for any damage and fix it. These steps create a perfect surface for staining.
Cleaning And Sanding Tips
Remove dust and dirt using a soft cloth or brush. Use mild soap and water for sticky spots. Let the wood dry completely before sanding.
Sand the bookshelf with medium-grit sandpaper first. This removes old finish and smooths rough areas. Follow with fine-grit sandpaper for a soft surface.
Sand along the wood grain, never against it. This prevents scratches and helps the stain absorb evenly. Wipe away dust with a tack cloth after sanding.
Repairing Imperfections
Look closely for cracks, holes, or dents. Use wood filler to fill small holes and cracks. Apply with a putty knife and let it dry.
For larger damage, use wood glue and clamps to fix splits. Sand the repaired areas smooth once dry. This creates an even surface for staining.
Check the entire bookshelf for rough spots or loose joints. Tighten screws or nails to secure the structure. A sturdy bookshelf holds stain better and lasts longer.
Applying The Stain
Applying the stain to your wood bookshelf is an important step. It brings out the wood’s natural beauty and adds color. Doing this carefully will make your bookshelf look great and last longer.
Tools You’ll Need
- Clean cloths or rags
- Foam brushes or natural bristle brushes
- Sandpaper (120 to 220 grit)
- Gloves to protect your hands
- Stir stick for mixing stain
- Drop cloth or newspaper to protect your workspace
Step-by-step Staining Process
- Start by sanding the wood surface smoothly.
- Remove all dust with a clean cloth.
- Stir the stain well, but do not shake it.
- Apply the stain with a brush or cloth in the wood grain direction.
- Let the stain sit for a few minutes to absorb.
- Wipe off excess stain with a clean cloth.
- Allow the wood to dry fully before adding more coats.
Techniques For Even Coverage
Work in small sections to control the stain application. Always follow the wood grain for smooth results. Avoid over-applying stain, which can cause blotches. Use light, even strokes with your brush or cloth. Wipe off extra stain gently to keep color consistent. Check your work in good light to spot missed areas. Patience helps achieve a uniform finish on the bookshelf.
Sealing And Protecting
Sealing and protecting your stained wood bookshelf is key to keeping it beautiful. The sealant guards the wood from water, dirt, and wear. It also enhances the color and texture of the stain. Taking time to seal well means your bookshelf lasts longer and stays looking fresh.
Choosing A Clear Finish
Select a clear finish that fits your bookshelf’s use and look. Polyurethane is strong and good for heavy use. It gives a shiny or satin look. Water-based finishes dry fast and have less smell. Oil-based finishes add warmth and deepen the stain color. Pick one that matches your style and protection needs.
Application Tips For Durability
Apply the finish in thin, even coats. Use a clean brush or cloth to avoid streaks. Let each coat dry fully before adding the next. Lightly sand between coats for a smooth surface. Avoid thick layers; they can peel or bubble. Finish edges and corners carefully to protect all parts of the wood.

Credit: www.youtube.com
Troubleshooting Common Issues
Staining a wood bookshelf can sometimes lead to small problems. These issues can affect how the wood looks. Fixing them early keeps your bookshelf beautiful. Let’s explore ways to handle common staining problems.
Dealing With Streaks And Blotches
Streaks and blotches often happen because the wood absorbs stain unevenly. This can make some parts darker or lighter than others. To fix this, use a clean cloth to wipe off extra stain quickly. Work in small sections for better control. Sanding lightly with fine-grit sandpaper can smooth the surface. This helps the stain spread evenly next time. Always test stain on a hidden spot before applying fully.
Fixing Uneven Color
Uneven color happens if stain is not applied uniformly. It may also occur if the wood has oily spots or dirt. Clean the wood surface well before staining. Use a wood conditioner to prepare the wood. This helps the stain soak in evenly. For fixing uneven color after staining, sand the area gently. Then, apply a second coat of stain carefully. Let each coat dry completely before adding another.
Maintaining Your Stained Bookshelf
Maintaining your stained bookshelf keeps it looking fresh and beautiful for years. Proper care protects the wood and the stain from damage. Small efforts extend the life of your bookshelf and preserve its rich color.
Cleaning Tips
Dust the bookshelf regularly using a soft, dry cloth. Avoid using water or harsh chemicals that can damage the stain. Use a slightly damp cloth only if necessary, and dry immediately. For tough spots, use a mild soap solution and wipe gently. Always test cleaning products on a small hidden area first.
Touch-up Techniques
Minor scratches and stains happen over time. Use a stain marker that matches your bookshelf’s color to cover small scratches. Apply the marker carefully and let it dry completely. For deeper damage, lightly sand the area with fine-grit sandpaper. Reapply stain with a brush or cloth, and allow it to dry fully. Finish with a clear protective coat to blend repairs with the rest of the wood.
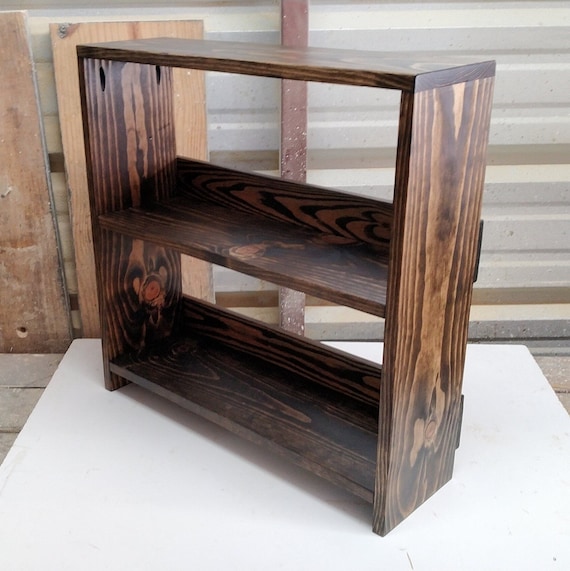
Credit: www.etsy.com
Frequently Asked Questions
How Do I Prepare Wood For Staining?
Start by sanding the wood with fine-grit sandpaper. Remove dust using a tack cloth. This ensures an even stain application and better absorption.
What Type Of Stain Works Best On Bookshelves?
Oil-based stains offer deep penetration and durability. Water-based stains dry faster and have low odor. Choose based on your project needs and ventilation.
How Long Should I Wait Before Applying A Second Coat?
Wait 4 to 6 hours for the first coat to dry. Ensure the surface feels dry and smooth before reapplying for best results.
Can I Use A Brush Or Cloth To Apply Stain?
Both are effective. Brushes reach crevices well; cloths offer better control and even coverage. Choose based on your comfort and project size.
Conclusion
Staining a wood bookshelf adds beauty and protection. Choose the right stain color to match your style. Apply the stain evenly, following the wood grain. Let the wood dry fully before adding more coats. Sand lightly between coats for a smooth finish.
Clean your brushes and workspace after staining. Enjoy your refreshed bookshelf that looks warm and natural. Small steps can make a big difference. Now, your bookshelf is ready to hold your favorite books.