Imagine having a secret spot in your home that not only stores your favorite books but also hides them in plain sight. A hidden bookshelf chest does just that—it combines clever storage with a touch of mystery.
If you’ve ever wanted to add a unique piece to your space that sparks curiosity and keeps your treasures safe, this project is for you. In this guide, you’ll discover simple steps to create your own hidden bookshelf chest, even if you’re new to DIY.
Ready to impress yourself and your guests? Let’s dive in and make something truly special.
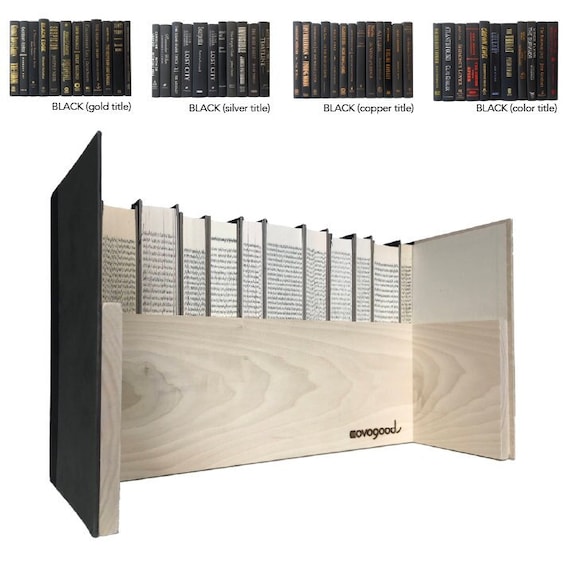
Credit: www.etsy.com
Choosing Materials
Choosing the right materials is key to building a hidden bookshelf chest. The materials affect the strength, look, and ease of assembly. Careful selection helps the project last longer and look great in any room.
Focus on three main parts: the wood, the hardware, and the tools. Each plays a special role in the final product. Pick good quality materials to make the project smooth and satisfying.
Selecting The Wood
Wood choice shapes the chest’s style and durability. Solid hardwood like oak or maple offers strength and a classic look. Pine is softer but easier to cut and less costly.
Consider the weight. Heavy wood adds stability but can be hard to move. Lighter wood makes handling easier but may need extra support. Choose wood that fits your skill and design plan.
Picking The Hardware
Hardware holds the chest parts together and allows movement. Hinges must be strong and smooth for the hidden door. Look for concealed hinges for a clean finish.
Magnetic catches help keep the door closed without visible locks. Screws and brackets should match the wood type. Choose rust-resistant hardware for long life.
Tools You’ll Need
Tools make the building process easier and more precise. A saw is essential for cutting wood pieces to size. A drill helps make holes for screws and hardware.
Screwdrivers, clamps, and measuring tape are must-haves. Sandpaper or a sander smooths rough edges. A level ensures the chest stands straight and balanced.

Credit: www.amazon.com
Designing Your Chest
Designing your hidden bookshelf chest is a key step. It shapes how your chest looks and works. Careful planning saves time and materials. Your design must fit the space and serve your needs. Let’s break down the process into simple parts.
Measuring Your Space
Start by measuring the area where the chest will go. Use a tape measure for accuracy. Check height, width, and depth carefully. Note any obstacles like baseboards or outlets. Write down all numbers clearly. Small errors can cause big problems later.
Planning The Bookshelf Layout
Think about the shelves inside the chest. Decide how many shelves you want. Consider the size of your books and items. Leave enough space between shelves for tall books. Plan for both storage and easy access. Balance style and function in your layout.
Sketching Your Blueprint
Draw a simple blueprint of your chest. Use graph paper or a drawing app. Mark all measurements and shelf positions. Include details like hinges and handles. This sketch guides your building process. Review and adjust it before starting construction.
Building The Frame
Building the frame is the first step in making your hidden bookshelf chest. This frame will hold all parts together and give the chest its shape. A strong frame ensures the chest is sturdy and lasts long. Follow these steps carefully to create a solid base for your project.
Cutting The Wood Pieces
Start by measuring the wood pieces precisely. Use a tape measure and mark the lengths clearly. Cut the wood using a saw, making sure edges are straight. Sand the cut pieces lightly to smooth rough surfaces. Accurate cuts help the pieces fit well later.
Assembling The Base
Lay out the cut wood pieces on a flat surface. Join the pieces for the base using wood glue and screws. Check that the base is square by measuring the diagonals. Tighten the screws to make the base strong. Let the glue dry before moving on.
Constructing The Outer Frame
Attach the vertical wood pieces to the base to build the sides. Use clamps to hold pieces steady while screwing them together. Add the top frame pieces to complete the box shape. Double-check all corners for right angles. This outer frame supports the shelves and door.
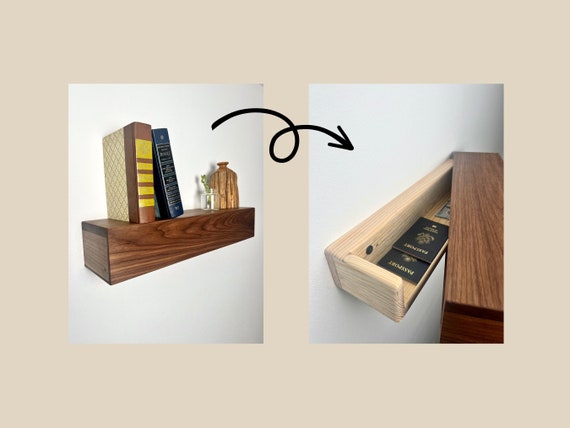
Credit: www.etsy.com
Creating The Hidden Compartment
Creating the hidden compartment is the heart of your bookshelf chest project. This part makes your furniture both useful and secret. Careful planning and simple steps help build a perfect hidden space.
Focus on making the secret door blend well with the bookshelf. The door must open easily but stay unseen. Here are key steps to create it.
Designing The Secret Door
Start by measuring the area for the hidden door. Match the door size with the bookshelf shelves. Use the same wood and finish to blend the door perfectly. Add details like books or decorations to hide seams. Think about a door handle that is easy to use but hard to notice.
Installing Hinges And Mechanisms
Choose hinges that allow smooth opening and closing. Concealed hinges work best for hidden doors. Attach hinges firmly to the door and frame. Consider soft-close mechanisms to avoid noise. Test the door several times to ensure it fits well and moves freely.
Ensuring Smooth Operation
Check the door’s movement for any sticking points. Sand rough edges or adjust hinges if needed. Make sure the door stays closed without force. Use magnetic catches or small latches for secure closing. Practice opening and closing to keep the mechanism working well.
Finishing Touches
Finishing touches are the final steps that bring your hidden bookshelf chest to life. These steps make the piece smooth, beautiful, and ready for use. Taking time on these details gives your project a polished look. Here are key finishing steps to complete your chest.
Sanding And Smoothing
Start by sanding all surfaces with fine-grit sandpaper. This removes rough spots and splinters. Sand edges and corners carefully to avoid sharpness. Use a sanding block to keep the surface even. Wipe away dust with a damp cloth before moving on. Smooth wood feels better and helps paint or stain stick well.
Painting Or Staining
Choose paint or stain that matches your room style. Paint covers the wood fully and offers many color choices. Stain shows the wood’s natural grain and adds warmth. Apply thin coats with a brush or cloth. Let each coat dry completely before adding another. A clear sealant protects the finish and makes it last longer.
Adding Decorative Elements
Decorative touches add charm and personality to your chest. Attach handles or knobs that fit the style and size. Consider decorative molding or trim for a classic look. Use stencils or decals for patterns or designs. Keep decorations simple to avoid overpowering the hidden feature. These small details make your bookshelf chest special and unique.
Tips For Maintenance
Maintaining your hidden bookshelf chest keeps it looking great and working well. Regular care helps prevent damage and extends its life. Simple steps ensure your chest stays a beautiful part of your home.
Cleaning The Surface
Dust the surface often with a soft cloth. Avoid harsh cleaners that can damage wood or paint. Use a damp cloth for sticky spots, then dry immediately. Gentle cleaning keeps the finish smooth and shiny.
Checking Hardware Regularly
Inspect hinges, handles, and locks every few weeks. Tighten screws to stop wobbling or noise. Replace any broken parts quickly to avoid bigger problems. Good hardware makes the chest safe and easy to use.
Protecting Against Wear
Keep the chest away from direct sunlight to prevent fading. Use coasters or mats under items to avoid scratches. Avoid placing heavy objects on top to protect its shape. Small actions help maintain its fresh look for years.
Frequently Asked Questions
What Materials Are Needed For A Hidden Bookshelf Chest?
You need wood panels, hinges, screws, a latch, wood glue, and paint or stain. Tools include a saw, drill, screwdriver, measuring tape, and clamps. Choose sturdy wood like pine or oak for durability and a smooth finish.
How Do I Build The Bookshelf Chest Frame?
Cut wood panels to size for the frame and shelves. Assemble using wood glue and screws for stability. Ensure the frame is square and level before attaching shelves. Sand edges for a smooth finish before painting or staining.
How To Install The Hidden Door Mechanism?
Attach hinges to one side of the bookshelf frame and the chest. Use a magnetic or latch lock to secure the door. Test the door’s movement to ensure smooth opening and closing without gaps or misalignment.
Can I Customize The Bookshelf Chest Design?
Yes, customize size, color, and shelf layout to fit your space. Add decorative molding or paint to match your room’s style. Consider LED lighting inside for a modern touch. Customization enhances both function and aesthetic appeal.
Conclusion
Building a hidden bookshelf chest can add charm to any room. It offers a smart way to save space and hide valuables. Following easy steps makes the project fun and rewarding. You can customize the design to fit your style.
This project helps improve your woodworking skills too. Try it yourself and enjoy a unique piece at home. A hidden bookshelf chest is both useful and stylish. Give it a try and see the difference!