Are you tired of flimsy bookshelves that sag under the weight of your favorite books and collectibles? Imagine having a sturdy, heavy duty bookshelf that not only holds everything securely but also adds a strong, stylish touch to your space.
Building one yourself might sound tough, but with the right steps, you can create a bookshelf that lasts for years. In this guide, you’ll discover simple, clear instructions that make the process easy and satisfying. Ready to transform your storage and showcase your items with confidence?
Let’s get started!
Choosing Materials
Choosing the right materials is key to building a strong, heavy duty bookshelf. Good materials make the shelf last longer and hold more weight. Careful selection helps avoid problems like sagging or breaking. Focus on wood, hardware, and finishing supplies to create a sturdy, attractive bookshelf.
Selecting The Right Wood
Choose wood that is strong and durable. Hardwoods like oak, maple, or birch work best. They resist dents and scratches. Avoid softwoods like pine for heavy loads. Plywood is another option. Use high-quality plywood with many layers. It stays strong and does not warp easily.
Hardware And Fasteners
Use strong screws and brackets to hold the shelf firmly. Metal brackets add extra support under each shelf. Choose screws that fit the wood thickness. Avoid nails for main joints. Screws provide better grip and hold weight better. Use washers with screws to prevent wood damage.
Finishing Supplies
Finishing protects the wood from moisture and wear. Use wood primer first to prepare the surface. Then apply paint or stain for color. Finish with a clear sealant for extra protection. This makes the bookshelf look good and last longer. Sand the wood smoothly before finishing to get the best results.
Planning Your Design
Planning your design is the first step to build a heavy duty bookshelf. It sets the foundation for a strong and durable shelf. Careful planning helps avoid mistakes and wasted materials. It also ensures the bookshelf fits your space and needs perfectly.
Determining Shelf Dimensions
Start by measuring the space where the bookshelf will go. Note the height, width, and depth available. Decide how many shelves you want. Think about the size of books or items you will store. Make shelves tall enough to hold large books. Choose a width that fits your room and looks balanced.
Weight Capacity Considerations
Heavy duty shelves need to support a lot of weight. Estimate how much weight the shelves will hold. Consider heavy books, boxes, or decorations. Use strong materials like hardwood or metal brackets. Plan shelf thickness and support to handle the load. Add extra support for very heavy items to prevent sagging or breaking.
Sketching The Blueprint
Draw a simple blueprint of your bookshelf design. Include all measurements and shelf placement. Mark where supports and fasteners will go. A clear sketch helps you visualize the project. It guides you during cutting and assembly. Make adjustments on paper before starting the build.
Tools You Need
Building a heavy duty bookshelf requires the right tools. These tools help you cut wood, join parts, and stay safe. Using proper tools makes the project easier and the shelf stronger. Below are the essential tools you need.
Cutting Tools
Cutting tools shape the wood pieces for your bookshelf. A handsaw or circular saw works well for straight cuts. A jigsaw helps with curved or detailed cuts. Use a measuring tape and pencil to mark cuts clearly. Sharp blades make clean cuts and reduce effort.
Assembly Tools
Assembly tools join the wood parts securely. A drill with screwdriver bits speeds up the process. Use wood screws or bolts for strong joints. A hammer helps with nails or small adjustments. Clamps hold pieces together while you fasten them.
Safety Equipment
Safety equipment protects you during the project. Wear safety glasses to shield your eyes from dust and debris. Use ear protection if power tools make loud noise. Gloves protect your hands from splinters and sharp edges. A dust mask stops you from breathing sawdust.
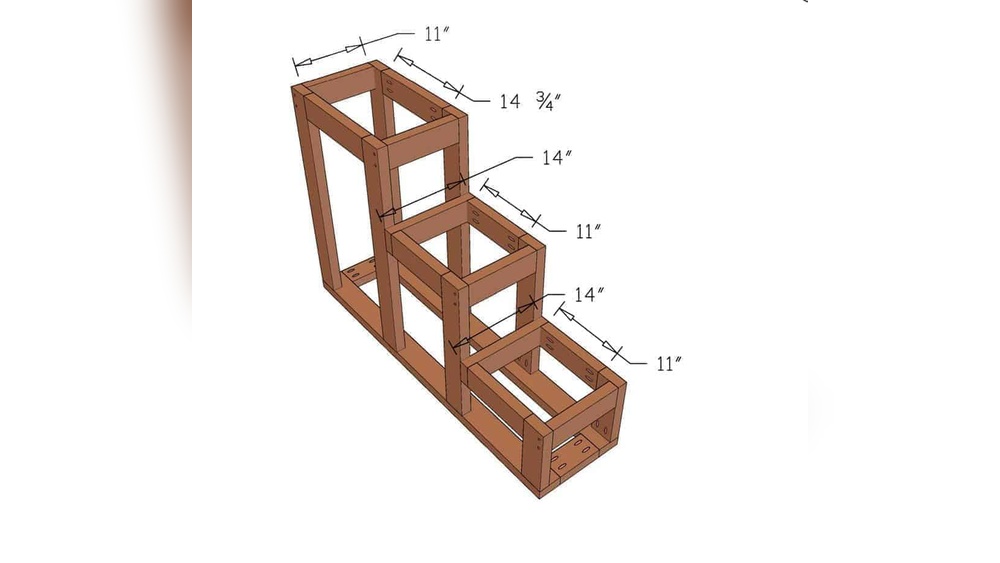
Credit: www.rockler.com
Cutting And Preparing Wood
Cutting and preparing wood is a key step in building a heavy duty bookshelf. It sets the foundation for strong shelves that hold weight well. Careful preparation helps avoid mistakes and saves time later. This stage requires focus and accuracy.
Measuring And Marking
Start by measuring your wood pieces carefully. Use a tape measure for exact lengths and widths. Mark the spots clearly with a pencil. Double-check your marks before cutting. Precise measuring ensures all parts fit perfectly.
Making Precise Cuts
Use a saw suited for your wood type. Follow the pencil marks closely while cutting. Keep the saw steady to avoid rough edges. Make slow, controlled cuts for better accuracy. Clean cuts make assembly easier and stronger.
Sanding And Smoothing
Sand each cut edge with fine-grit sandpaper. Smooth surfaces prevent splinters and improve finish quality. Sand in the direction of the wood grain. Check for rough spots and keep sanding until smooth. Well-prepared wood looks better and lasts longer.
Assembling The Frame
Assembling the frame is the key step to build a strong bookshelf. It creates the basic shape and holds all parts together. The frame must be sturdy to support heavy books. Follow clear steps to make it stable and long-lasting. Pay close attention to measurements and fitting parts well.
Building The Side Panels
Start by cutting the wood for side panels. Use thick boards for better strength. Attach vertical and horizontal pieces to form rectangles. Make sure corners are square and edges align perfectly. Use wood glue and screws to secure the joints tightly. These panels will carry most of the shelf’s weight.
Joining The Shelves
Cut the shelves to fit between side panels. Position each shelf evenly along the height. Use wood glue on contact points for strong bonds. Fasten shelves with screws through the side panels. Check the shelves are level and flush with edges. Solid shelves prevent sagging under heavy books.
Reinforcing Joints
Reinforce all joints with metal brackets or corner braces. Attach braces inside corners for extra support. Use long screws for firm grip into wood. Add wooden dowels or pocket holes for hidden strength. Reinforcing stops wobbling and keeps the frame square. This ensures the bookshelf stays sturdy over time.
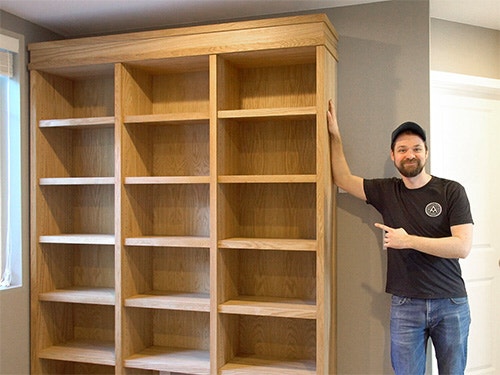
Credit: gooddiyplans.com
Adding Support Features
Finishing touches make your heavy duty bookshelf look complete and last longer. These steps protect the wood and bring out its beauty. Spend time on this part to get the best result. A good finish also helps the shelf resist wear and tear.
Applying Stain Or Paint
Choose a stain or paint that suits your room style. Stain shows the wood grain and gives a natural look. Paint covers the grain and adds color. Use a brush or cloth to apply. Work in thin, even coats for a smooth finish. Let each coat dry well before the next one.
Sealing For Protection
Seal the surface to protect it from moisture and scratches. Use a clear polyurethane or varnish. Apply with a clean brush in long strokes. Two or three coats give strong protection. Sand lightly between coats to keep the finish smooth.
Final Inspection
Check all surfaces for smoothness and even finish. Look for missed spots or rough areas. Fix any flaws with light sanding or another coat. Ensure the shelf is dry and sturdy. Your heavy duty bookshelf is now ready to use.
Finishing Touches
Maintaining a heavy duty bookshelf keeps it strong and lasting longer. Simple care steps protect your investment and ensure safety. Regular checks help catch small problems before they grow. Follow these easy maintenance tips to keep your bookshelf in top shape.
Regular Cleaning
Dust and dirt can weaken the shelf over time. Use a soft cloth to wipe all surfaces weekly. Avoid using water or harsh cleaners that damage wood or metal. Clean corners and joints carefully to remove hidden dust. Keeping the shelf clean helps it hold weight better.
Checking For Wear
Look for cracks, loose screws, or bending shelves often. Inspect all joints and fasteners to ensure they stay tight. Pay attention to shelves that sag or lean. Early detection of wear prevents accidents and costly repairs. Check the bookshelf every month for signs of damage.
Repairing Damages
Tighten loose screws or bolts immediately to restore stability. Replace broken parts quickly to avoid further harm. Use wood glue for small cracks or splits in wooden shelves. Sand and repaint scratched surfaces to protect from moisture. Simple repairs extend the life of your bookshelf.

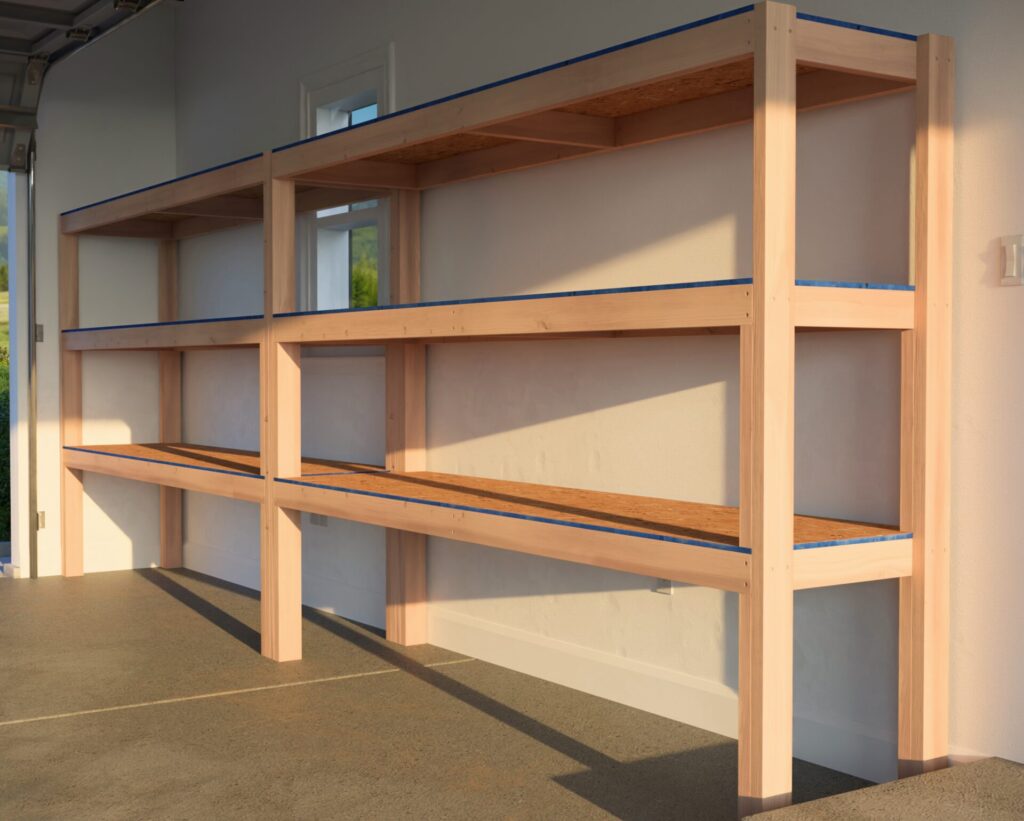
Credit: www.homedepot.com
Frequently Asked Questions
What Materials Are Best For A Heavy Duty Bookshelf?
Use solid hardwood like oak or maple for strength. Plywood with a thick veneer is also durable. Avoid softwoods as they may warp or crack under weight.
How Do I Ensure Stability In A Heavy Duty Bookshelf?
Secure shelves with strong brackets and screws. Anchor the bookshelf to the wall to prevent tipping. Use thicker shelves to support heavier loads safely.
What Tools Are Needed To Build A Heavy Duty Bookshelf?
You’ll need a saw, drill, measuring tape, level, screws, and brackets. Sandpaper and wood glue improve finish and strength. Having clamps helps keep pieces steady during assembly.
How Thick Should Shelves Be For Heavy Loads?
Shelves should be at least 1 inch thick for heavy books. Thicker shelves prevent sagging over time. Using support brackets under shelves adds extra stability.
Conclusion
Building a heavy duty bookshelf takes careful planning and strong materials. Follow each step to ensure stability and safety. Choose quality wood and sturdy screws for lasting support. Measure twice, cut once, and assemble with care. This shelf will hold your books without bending or breaking.
Enjoy organizing your space with confidence and style. A solid bookshelf makes any room look neat and tidy. Keep your favorite books close and easy to find. Simple tools and patience lead to great results. Your effort will pay off with a durable, useful shelf.